
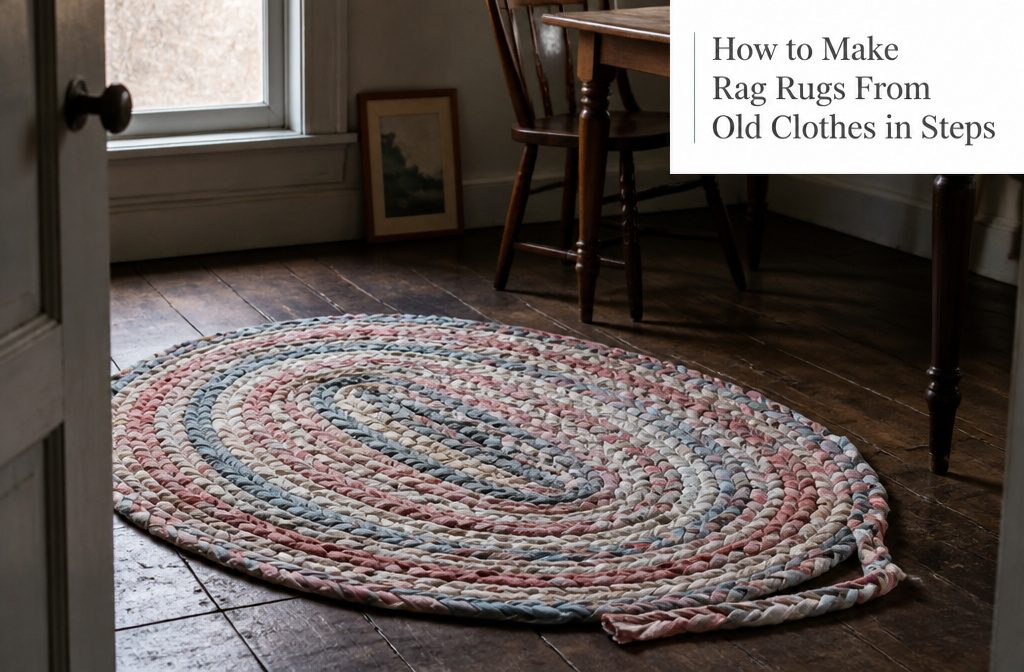
A braided rag rug from old T-shirts takes about 10 shirts and reaches roughly 2×3 feet once you coil and stitch the braid together.
The rug will buckle into a bowl if you keep the braid too tight as you work. Stretchy jersey lets you coil and attach as you braid; woven cotton needs to be braided first, then sewn flat afterward.
1. Choose Your Fabric and Gather Tools
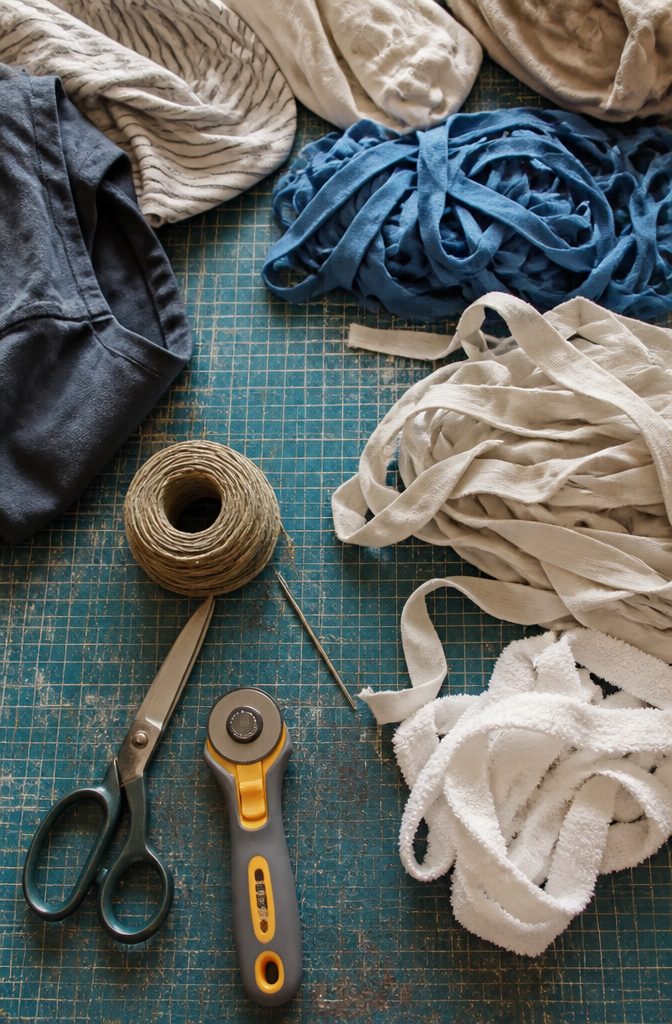
The material you choose decides how the strips behave while you braid and how tightly the finished rug holds its shape. T-shirts work well because jersey stretches slightly, which makes the braid more forgiving and easier to coil without buckling.
Woven cotton sheets stay flatter and give you sharper definition between rows, but they do not stretch, so you need to keep the tension even as you braid.
Towels add bulk and a heavier feel, though they are harder to work through a needle.
For a small rug, gather around 10 T-shirts. Two full or queen sheets will give you approximately 2×3 feet; add another sheet or two and you can reach four feet.
How many strips you actually get depends on the width you cut and how tightly you braid, but those estimates hold for most builds.
You need scissors or a rotary cutter to make the strips, a tapestry needle for stitching the coils together, and string to tie off the braid if you are using a method that calls for it.
Warp string works, though any strong yarn or twine will hold. The rotary cutter speeds up the cutting if you are working through sheets, but scissors slide through cotton just as cleanly.
2. Cut Strips 1 to 3 Inches Wide
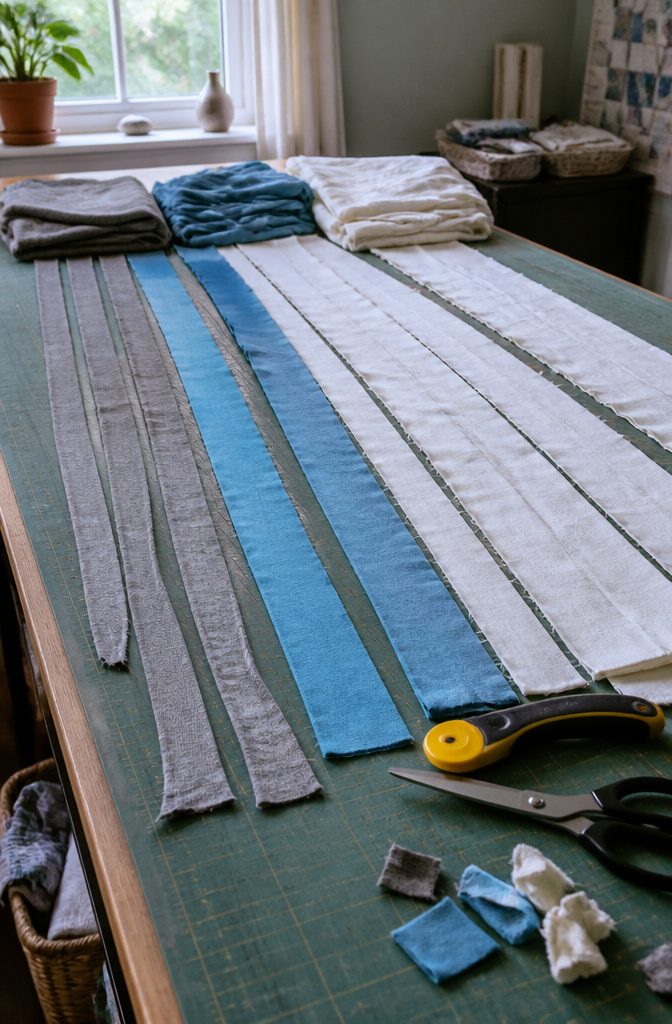
Width changes by weight.
T-shirt jersey is thinner and holds a tighter weave, so strips about an inch wide work well and let you control the braid without bulk. Sheets and other woven cotton are thicker, and I’d go 2–3 inches for those.
The thicker the fabric, the faster very wide strips become hard to manage as you braid and coil. Some sources split the difference at 1.5 inches across materials, which lands in the middle and keeps things moving.
T-shirt fabric cuts cleanly with a rotary cutter, faster than scissors and easier to hold straight across multiple layers.
Sheets can be torn once you make a starting nick with scissors, or you can cut partway and let someone pull the strip the rest of the way.
Tearing is faster but leaves a rougher edge; it doesn’t matter much once the braid is sewn down.
Consistent width matters less than you’d think. A little variation disappears in the finished rug.
3. Start a Three-Strand Braid
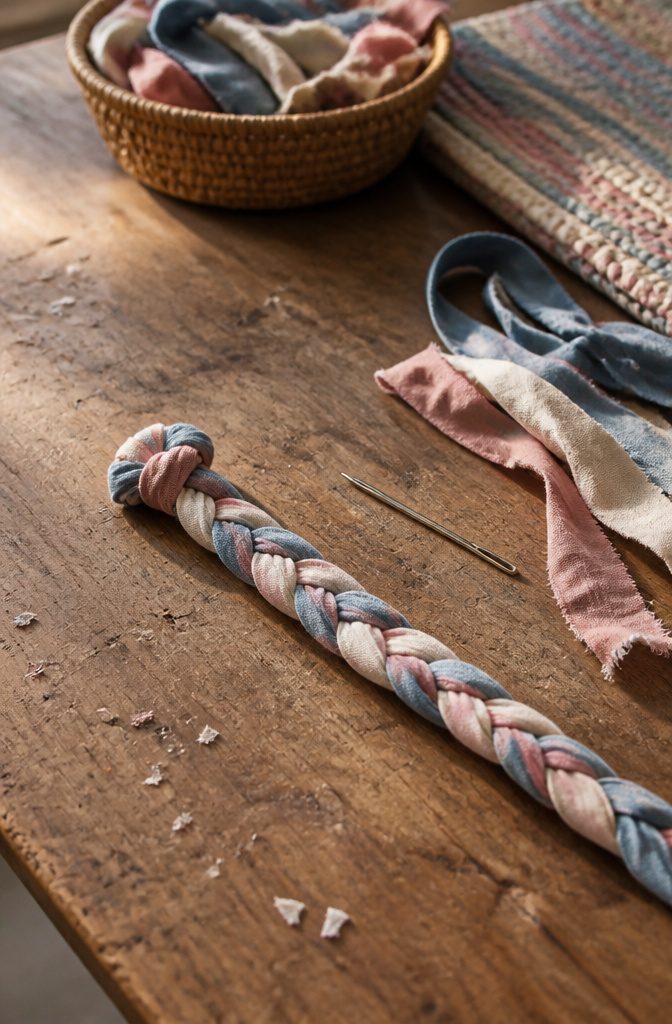
Join three fabric strips at the top by knotting them tightly together, or sew the ends if you want something flatter.
A knot is faster and holds just fine for most rugs; stitching by hand or machine keeps the join low-profile if the center will sit where people see it up close.
Either way, you want to lock the strips so the braid stays together when you pull on it.
Once the ends are secured, start braiding using the basic three-strand technique you would use for hair. Keep the tension even as you work so the braid comes out uniform in width and flat rather than twisted.
Some tutorials describe braiding four strips instead of three, which gives a wider, flatter braid that builds a rug faster, though the weave is a little less familiar if you have never done it before.
Three strands are easier to control and feel more intuitive.
4. Braid and Form the Center
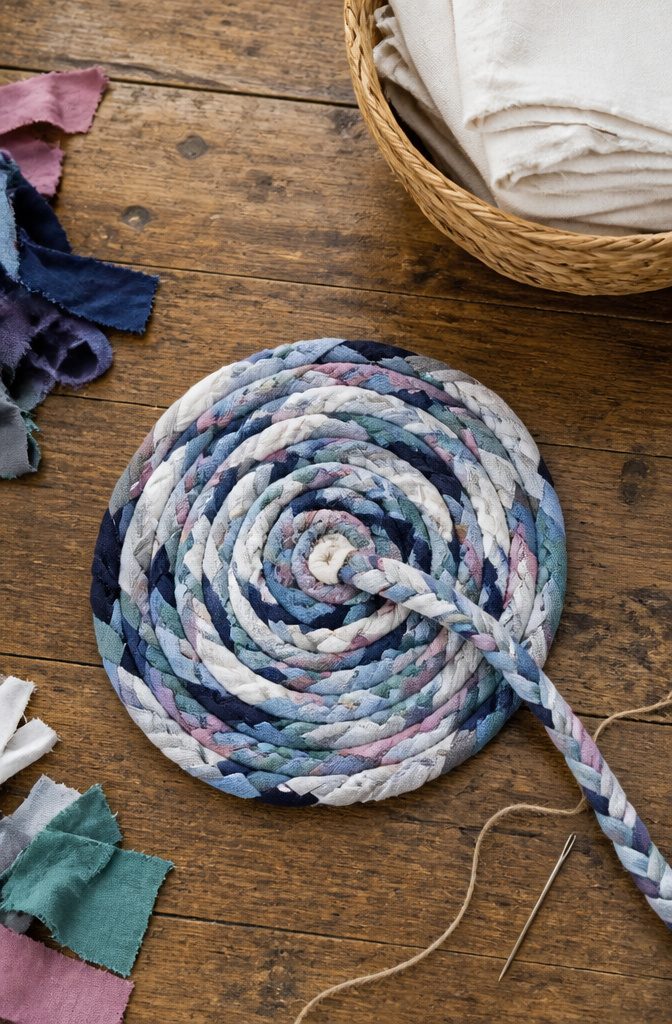
Once the braid reaches about 4 inches, you can start forming the center of the rug. Lay the braid flat and curve it so all three strands begin moving up alongside what you’ve already made.
The strand nearest the center passes under and through one of the loops in the existing braid, locking the new row to the old. Keep braiding, and each time that inside strand comes around, loop it through again.
Two ways to approach this part.
If you’re working with stretchy T-shirt fabric, coiling and attaching as you braid keeps everything tight and produces a really clean spiral. The fabric stretches just enough to let you thread it through without wrestling.
Non-stretchy flannel or woven cotton works better if you make a long braid first and then coil and sew it into shape later with a tapestry needle and string, weaving through the inner loops to hold the rows together.
Either method demands that the rug stay flat as it grows. Pull too tight and it puckers into a basket.
Leave too much slack and wrinkles set in that won’t press out. Check after every few rounds that it lays flat on the floor without lifting at the edges.
5. Join New Strips With a Slit and Loop
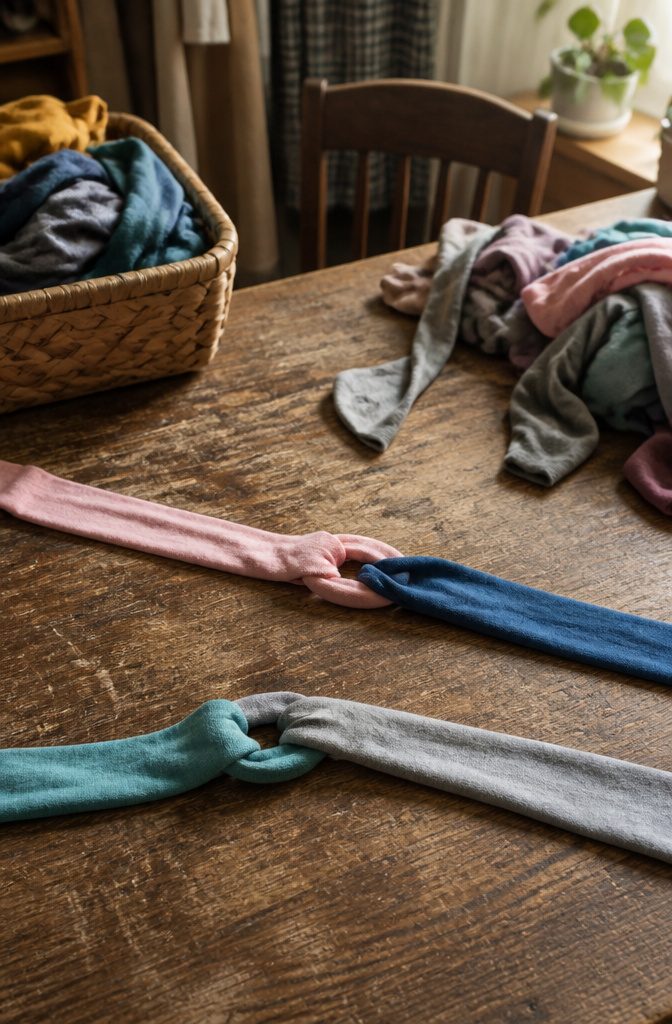
When a fabric strip runs short, the cleanest join is slit and loop.
Fold the end of the finishing strip in half lengthwise, cut a small slit partway through the fold, then do the same with one end of the new strip.
Push the far end of the new strip through the slit in the old one, then back through its own slit, and pull all the way through.
The loop cinches tight and holds without sewing or glue. This works best with thinner or stretchy fabrics; heavier weaves can make the join stiff.
Another option is to overlap the two strips where one ends and the next begins, wrapping one around the other so the braid itself holds them together.
I prefer this for a long braid that will be coiled and sewn later, since the overlap disappears into the stitching.
If all three strands look like they will run out at the same point, cut one or two shorter before you start so the joins land at different spots.
Stacking three thick joins in one place makes the braid bulky and the coil uneven. Keep the join itself loose to reduce bunching as the rug builds.
6. Finish and Flatten the Edge
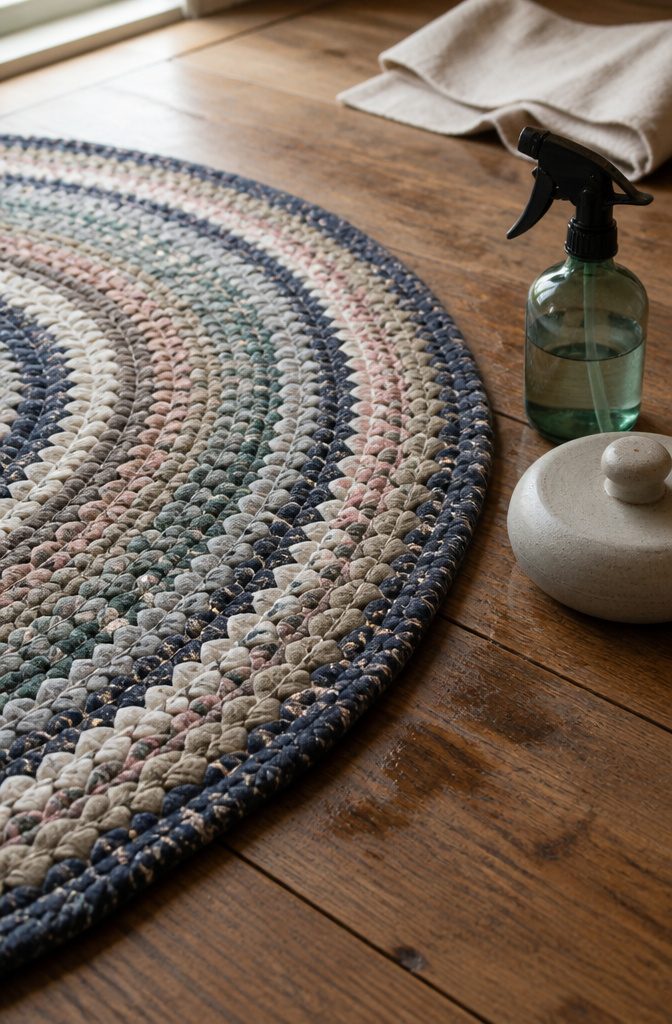
When the braid runs out of room, taper the final three strips to points so they all end at the same length.
Sew that tapered section together, then tuck the finished end against the edge of the rug and stitch it down so it disappears into the coil. The taper keeps the last join from looking blunt or lumpy.
If you would rather skip the sewing, tie a knot at the end instead. Either method stops the braid from unraveling once you set the rug down.
The rug will probably bunch as you near the finish.
Mist the surface with water from a spray bottle and press it flat with your hands. If it keeps curling, set something heavy on top while the fabric dries.
Keeping your joins loose the whole way through helps too, since tight connections pull the rug into a bowl shape. Once it dries flat it tends to stay that way.
Other Ways to Build a Rag Rug
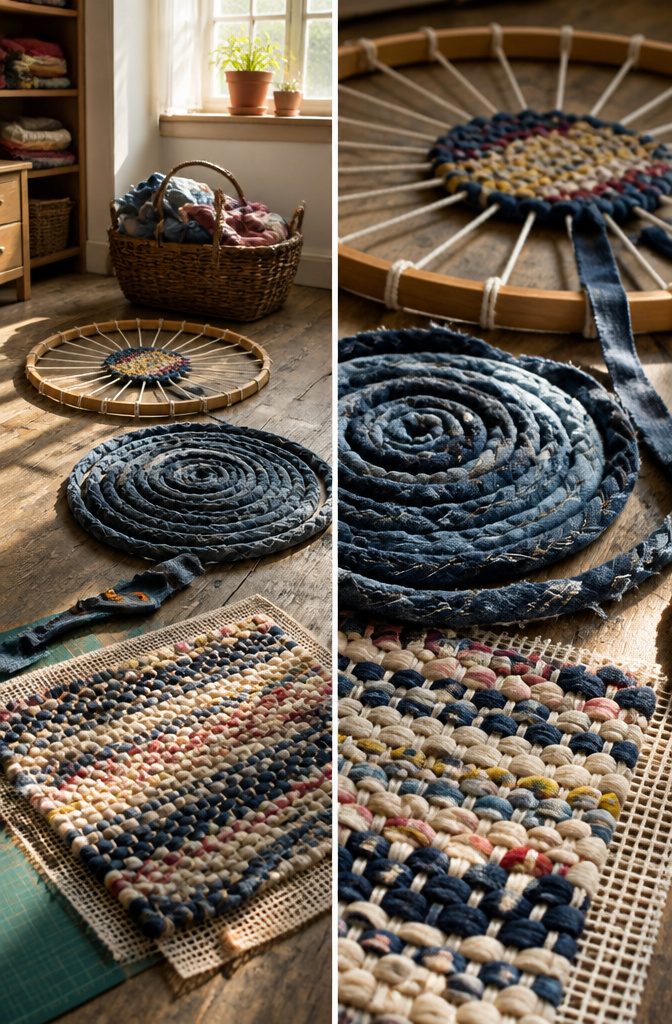
If the braided approach doesn’t suit the fabric you have or you want a different texture, three other complete methods show up regularly.
- Woven T-shirt rug on a hula hoop loom: Choose your colors, cut T-shirts into continuous yarn strips, set up a hula hoop with strings radiating from the center like spokes, then weave the T-shirt yarn over and under the spokes in a spiral. When you reach the size you want, finish by tying off the ends and trimming.
- Denim rug wrapped and woven around rope: Cut denim into 2-meter strips, wrap the fabric tightly around one end of a rope, coil the rope into a flat spiral, then weave the denim yarn through the coil below while wrapping it around the new rope three or four times between passes. Join new rope with duct tape when you run out.
- Canvas weaving: Thread fabric strips through the holes in packaging wrap or rug canvas, tie them off on the back, trim the ends, and stitch multiple pieces together if the canvas is too small for the rug you want.
Crochet, traditional loom weaving, and knotted construction also work, though each carries its own learning curve.
Why Stretchy Fabric Braids Differently Than Woven Cloth
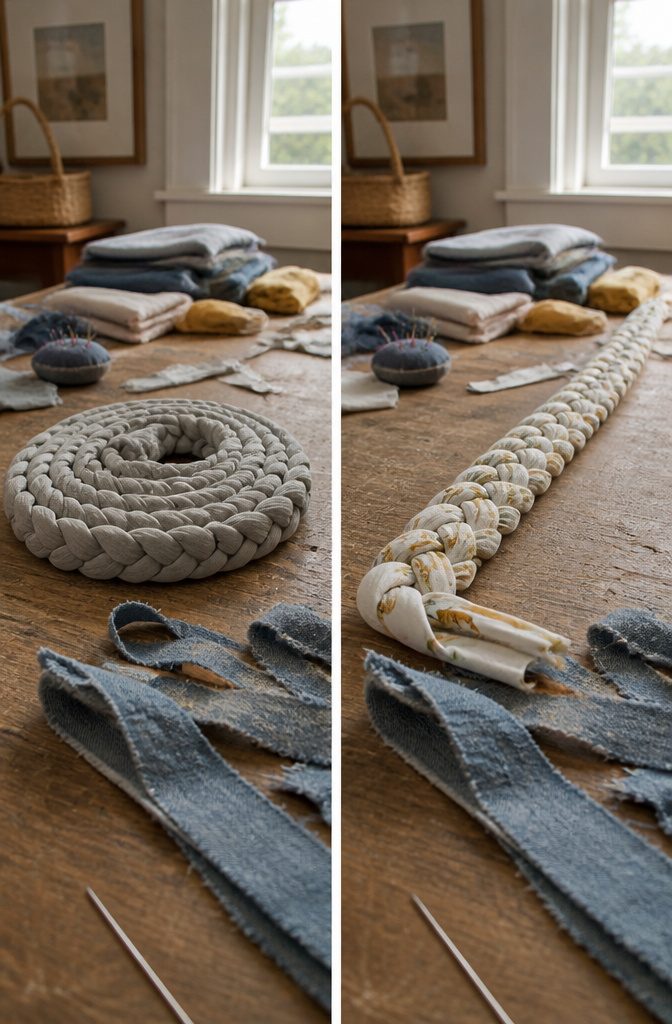
Fabric type decides the method before you start. Stretchy T-shirt material holds together as you braid and coil at the same time, because it has enough give to wrap neatly without bunching.
Non-stretchy flannel or woven cotton sheets work better braided first in a long rope, then coiled and sewn later when the whole thing is manageable.
Fraying matters more than you expect. T-shirts and other knit jerseys do not fray at all, which is why they handle so cleanly in a continuous coil.
Denim frays on every cut edge, and stretch denim frays less than rigid denim but still needs attention. If you mix fabrics with different tensions, braiding first gives you control over the whole thing before it turns into a tangle.
Stiffness changes how the fabric moves through your hands. Softer worn denim weaves and wraps more easily than thick raw denim, which fights the curve and makes the braid lumpy.
Cotton sheets that do not fray sit somewhere in the middle: soft enough to handle, stable enough to hold a braid without stretching out of shape.
Keep the Rug Flat or It Will Wrinkle
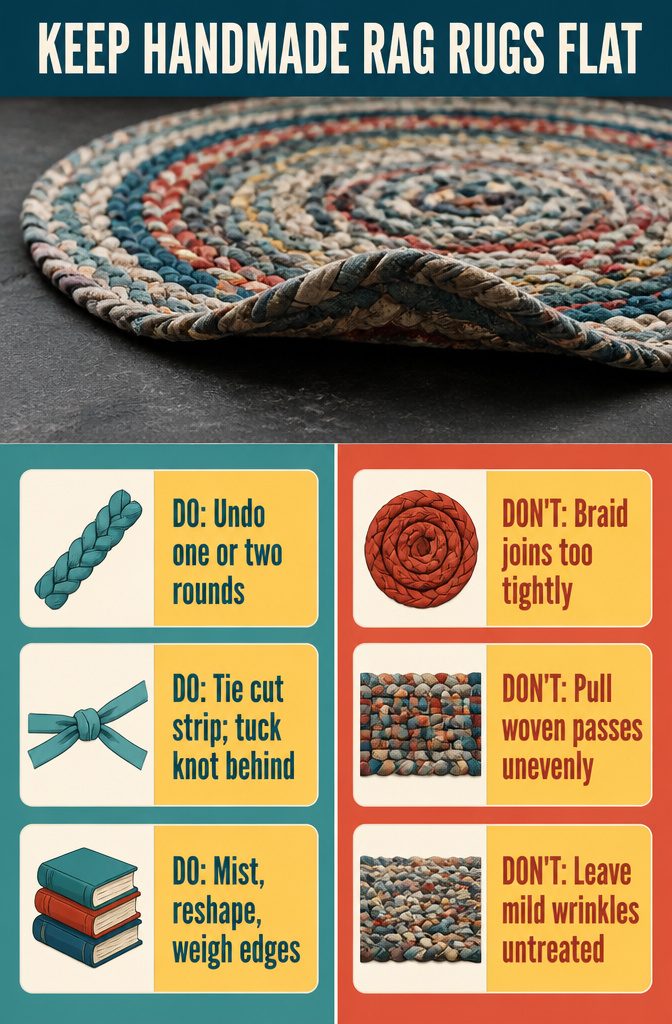
The biggest problem with a braided rug shows up after you finish: it buckles into a basket shape instead of lying flat.
If the braid was kept too tight during assembly, the edges pull inward and the whole piece turns into a shallow bowl.
The same wrinkle happens with woven rugs when tension gets uneven. You pull one pass too tight, the fabric puckers, and suddenly one section bulges while the rest sits flat.
If you catch it early, pull out one or two rounds of braid or weaving, tie off the strip where you cut it, and tuck the knot to the back.
The rug forgives mistakes that way. For milder wrinkles, mist the surface with water and push it back into shape by hand.
Set a few heavy books on the edges while it dries. Keeping your joins loose from the start prevents most of the trouble.
Backing and Care
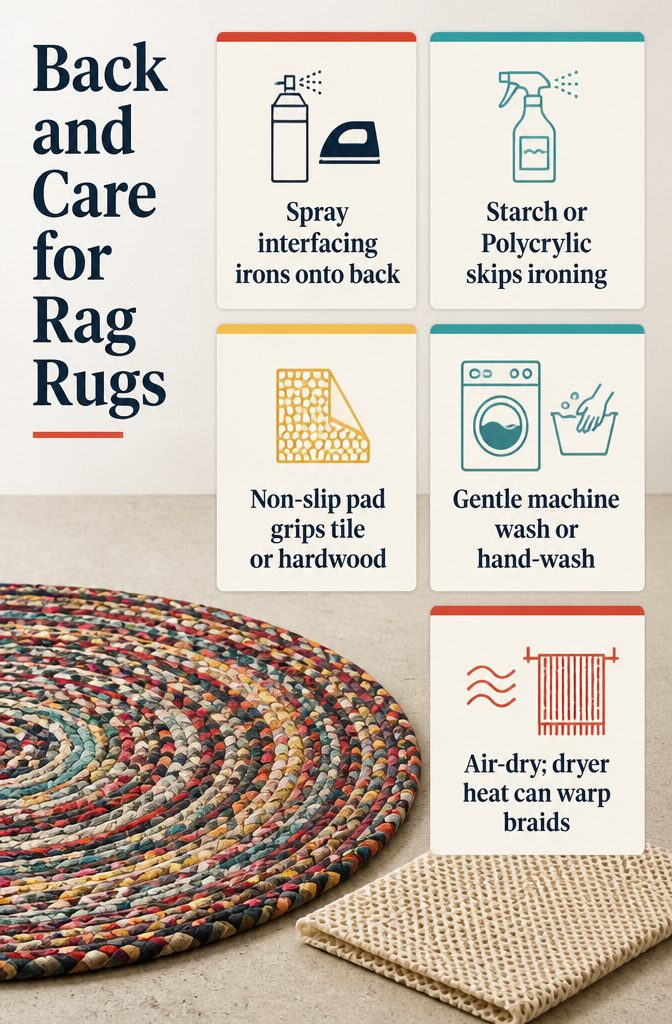
Once you’ve coiled and stitched the final edge, the rug will stay flatter if you give it a little help. Spray fusible interfacing ironed onto the back locks the coil in place and stops the braids from shifting underfoot.
Starch or Polycrylic spray work the same way if you don’t want to iron. All three finish the back so it looks intentional instead of raw.
A non-slip rug pad underneath solves the sliding problem without adding weight to the rug itself. The pad grips hardwood or tile better than fabric alone, and you can pull it up when you need to clean.
Hand-wash or machine-wash on a gentle cycle, then hang the rug in a spot with good airflow to dry.
Tossing it in the dryer can tighten the braids unevenly and warp the shape you worked to flatten. The air-dry step takes longer but keeps the rug looking the way you built it.
Frequently Asked Questions
How can a beginner make a rag rug?
Cut fabric strips 1–3 inches wide, braid three strips together while keeping tension even, then coil the braid flat and stitch each new row to the one below it.
T-shirt jersey is the easiest fabric to start with because it stretches slightly and doesn’t fray. The whole process takes no special skill, just patience to keep the coil flat as it grows.
What is the best fabric to use for rag rugs?
T-shirts work best for beginners because jersey stretches slightly and makes braiding and coiling easier without buckling.
Woven cotton sheets give sharper definition between rows but require more attention to tension since they don’t stretch. Both materials handle cleanly and don’t fray, which keeps the edges from unraveling as you work.
How much fabric do I need to make a rag rug?
For a small rug, gather around 10 T-shirts. Two full or queen sheets will give you approximately 2×3 feet, and adding another sheet or two will get you to 4 feet.
The exact count depends on how wide you cut the strips and how tightly you braid, but those estimates hold for most builds.
Why won’t my rag rug lay flat?
If the braid was kept too tight during assembly, the edges pull inward and the whole piece turns into a shallow bowl.
Mist the surface with water and press it flat by hand, then set something heavy on top while it dries.
For stubborn buckling, pull out one or two rounds of braid, tie off the strip where you cut it, and tuck the knot to the back.
How do you clean a rag rug?
Hand-wash or machine-wash on a gentle cycle, then hang the rug in a spot with good airflow to dry.
Tossing it in the dryer can tighten the braids unevenly and warp the shape. Air-drying takes longer but keeps the rug looking the way you built it.
What type of denim should I use to make a rag rug?
Flared and boot-cut jeans yield more fabric yarn than skinny jeans.
Softer worn denim is easier to weave and wrap than thick stiff denim, though both types will fray at the cut edges. Stretch denim frays less than rigid denim but still needs attention as you work.






