
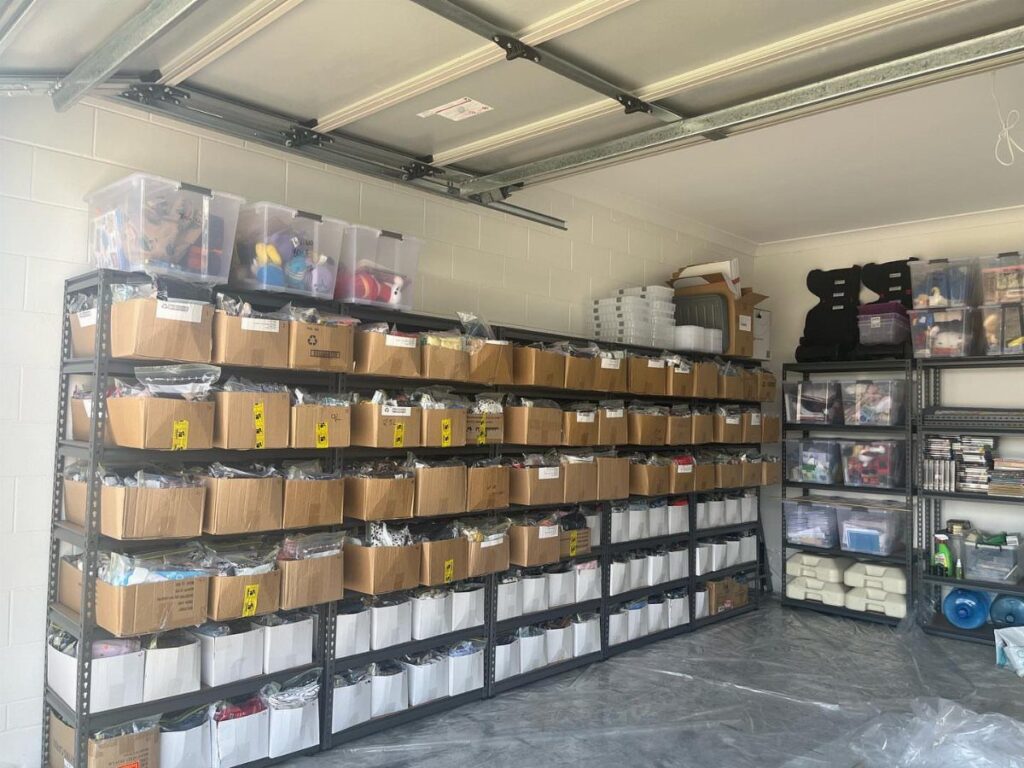
Wall-mounted racks, overhead ceiling storage and dedicated zones for tools, sports gear and lawn equipment let a two-car garage hold years of accumulation without blocking the bay or burying what you need under what you don’t.
1. Keep Items Off Floor
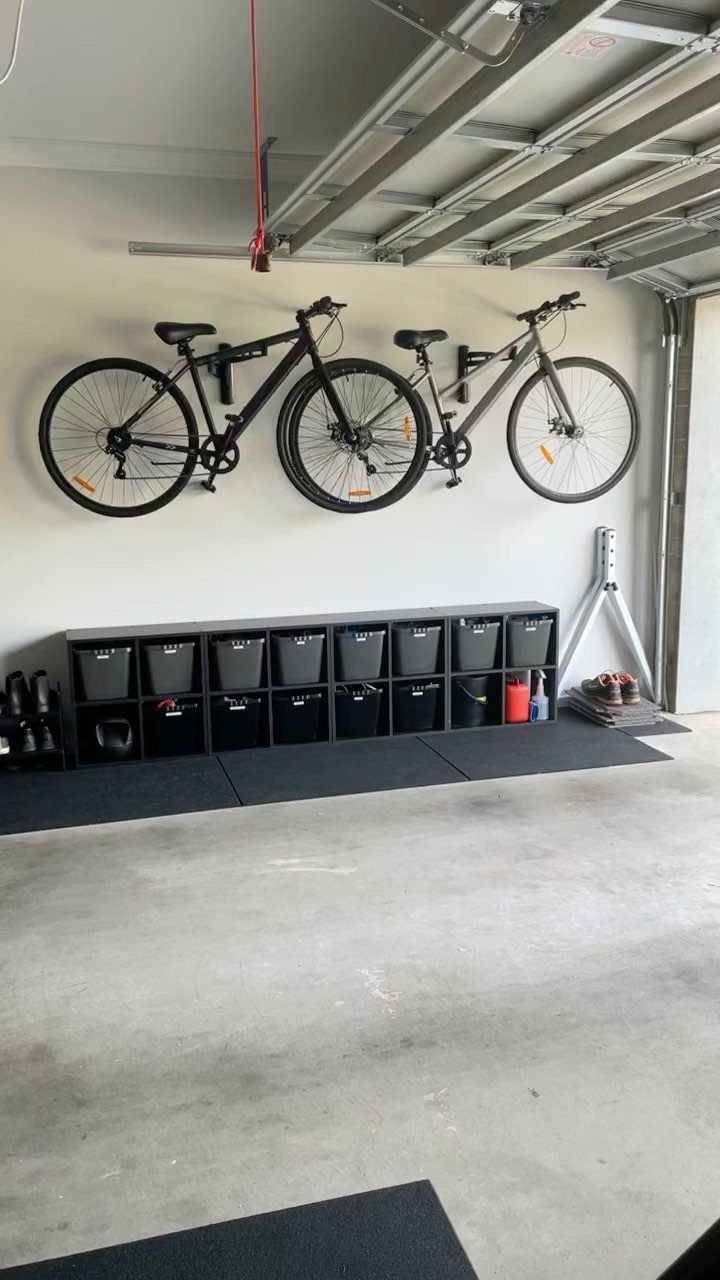
Wall-mounted hooks, vertical shelving and closed cabinets lift gear off the garage floor so you can park a car and walk through without stepping over piles.
A clear floor also makes sweeping faster and stops small items from getting kicked under the car or into corners.
Start with wall studs and anchor anything that holds weight.
Group similar items together: sports gear on one wall, tools on another. If you’re working with limited wall space, a freestanding metal shelf unit along one side holds bins and boxes without drilling.
According to a recent This Old House survey of 1,000 homeowners, cluttered garages aren’t just unsightly—they’re dangerous. The survey found that 39% of homeowners have tripped over items in their garage, while 27% have hit objects when opening vehicle doors.
2. Overhead Shelves
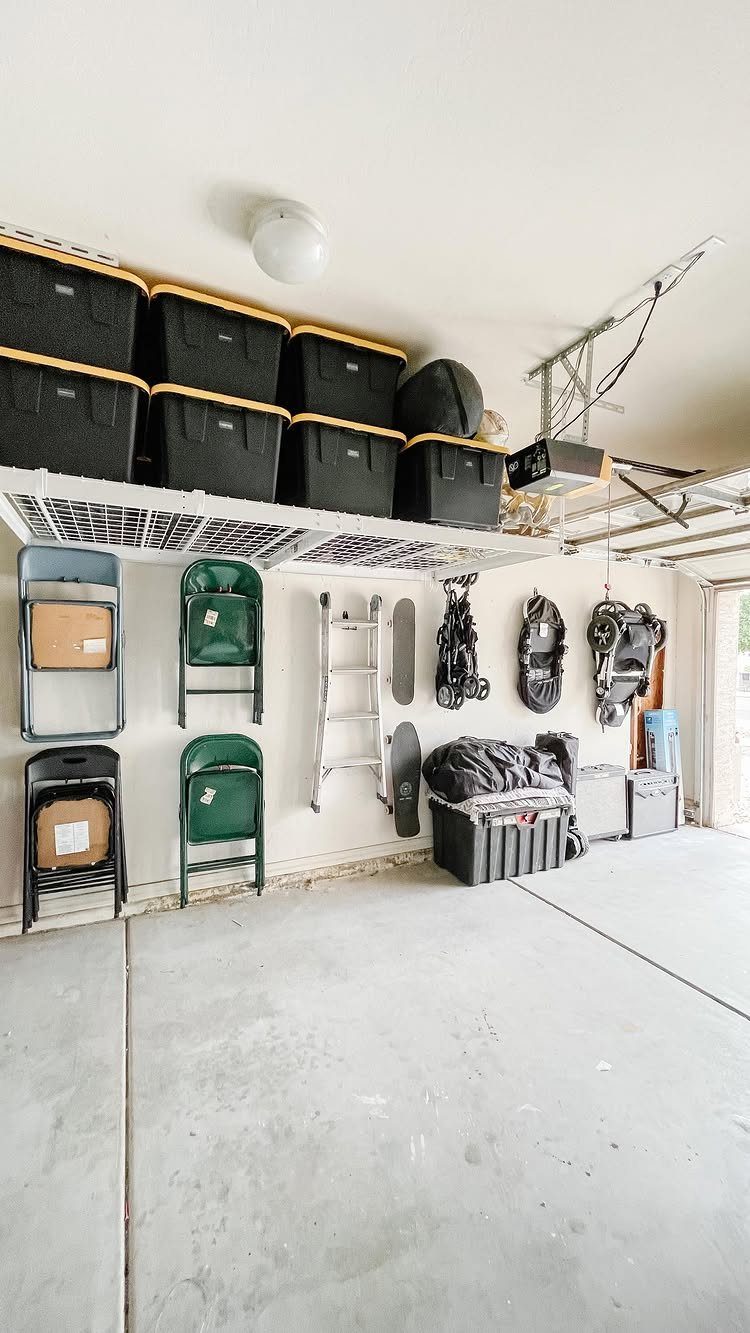
Ceiling-mounted racks installed above the hood of a parked car hold bins of seasonal decorations, camping gear or anything you don’t reach for weekly.
This pulls storage out of the way and leaves wall space open for tools and equipment you use more often.
Check the ceiling joists before you mount the rack, and keep the total load under the bracket rating.
Store lightweight items only: heavy boxes sag over time and can drop. If your garage has a low ceiling or an opener that takes up overhead space, skip this and mount shelving higher on the walls instead.
3. Pegboard Storage
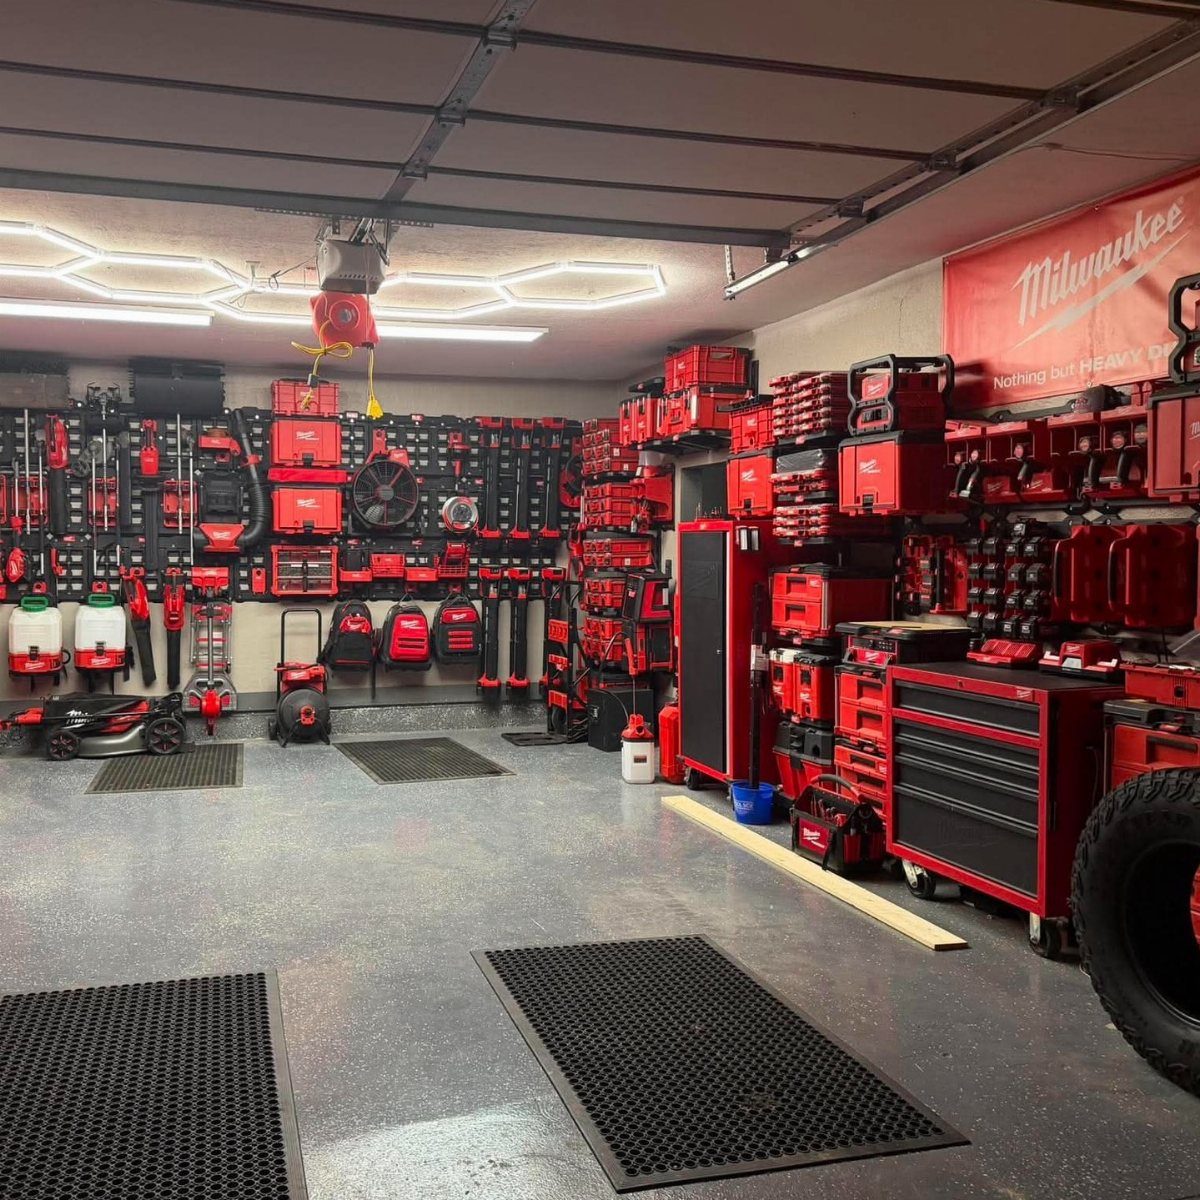
A pegboard mounted to the wall turns hand tools, pliers, screwdrivers and tape measures into a visible, organized row. Hooks slide into holes and rearrange without tools, so the layout changes as your collection grows.
Install pegboard over a frame of 1×2 furring strips to give the hooks room to lock in. Space the frame on center so it lines up with wall studs, then screw through the board and strips into the studs.
Paint the board to match the garage or leave it natural. This works best for tools you use weekly and want to grab without opening a drawer.
4. Build a Workbench
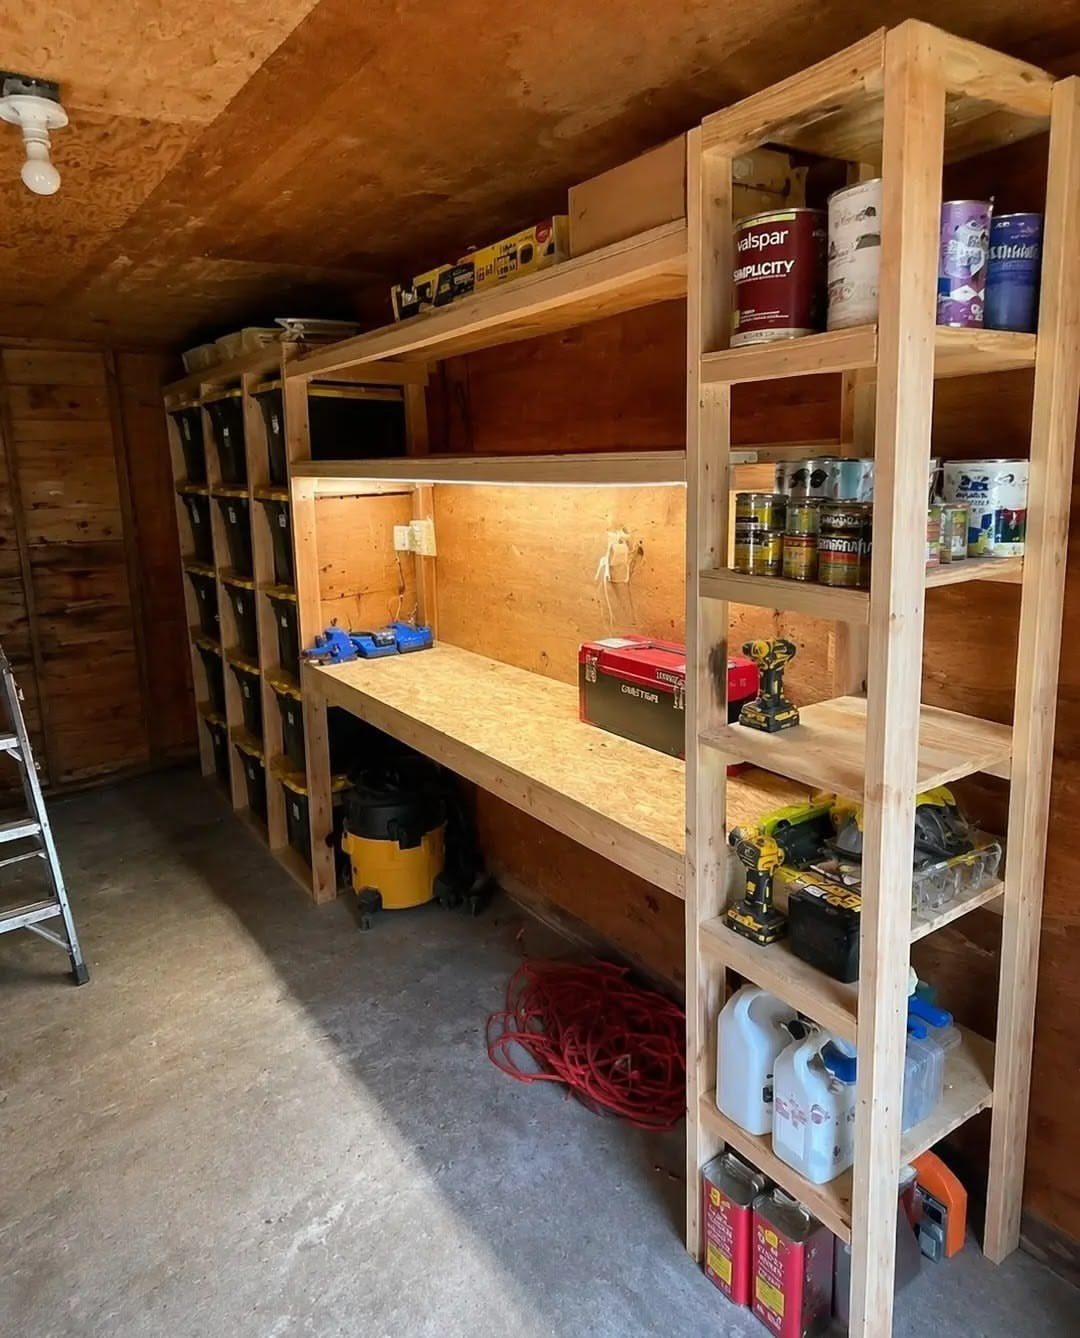
A solid workbench anchored to the garage wall gives you a surface to spread out tools, clamp wood and set down a project without clearing the kitchen table. Open shelves underneath hold power tools, paint and bins within reach.
Build the frame from 2x4s and top it with plywood or a single sheet of MDF. A length that fits most garage bays leaves room to work on both sides.
Anchor the back legs to wall studs and level the bench before you screw down the top. Seal the wood if you’ll be using solvents or stains on the surface.
5. Retractable Cord Reels
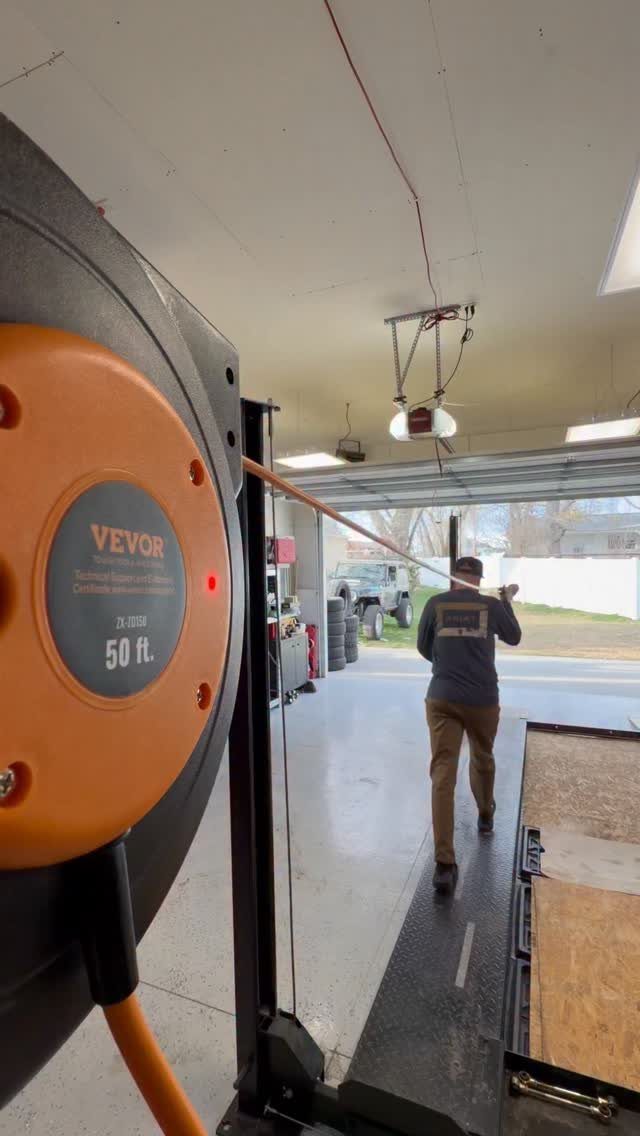
A spring-loaded cord reel mounted to the ceiling or high on the wall pulls an extension cord down when you need it and retracts it when you’re done.
The cord stays off the floor, doesn’t tangle in a bin, and you don’t have to coil it by hand after every use.
Mount the reel within reach of an outlet and position it so the cord extends to the farthest corner of the garage.
Most reels lock at any length you pull. If you use air tools, a separate reel for the air hose keeps both systems ready and out of the way.
6. Gardening Station
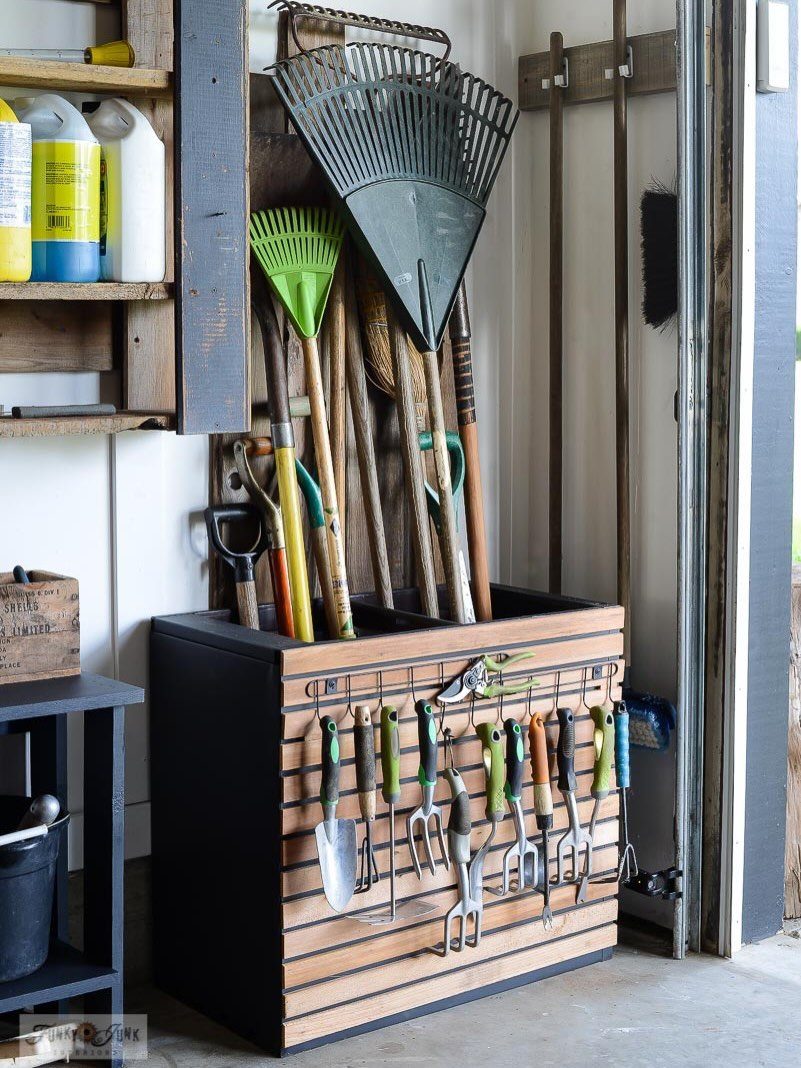
A wall section dedicated to shovels, rakes, hoses and hand trowels keeps gardening tools separated from car supplies and easy to find when you’re heading outside.
Hang long-handled tools on hooks and store smaller items in a bin or basket mounted at waist height.
Use heavy-duty hooks screwed into studs for anything with a wooden handle. A pegboard section or slatwall panel above the bin holds pruners, gloves and packets of seeds.
If you work with potting soil or fertilizer, add a low shelf or repurposed crate to hold bags upright and off the floor where moisture collects.
7. Tote Storage Rack
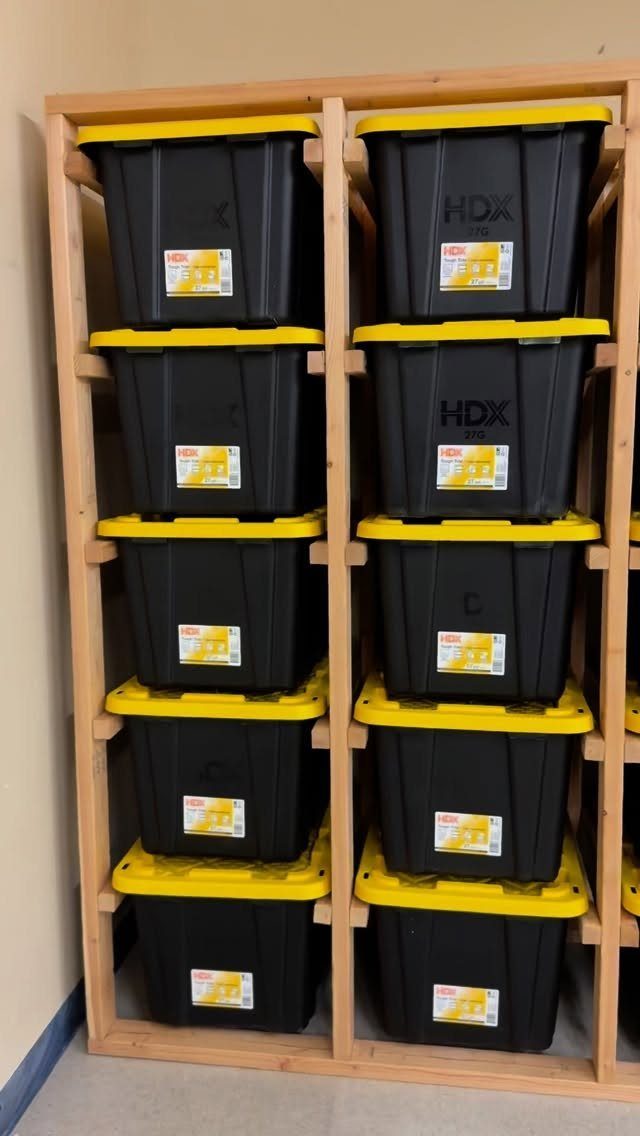
A custom wooden rack built to fit and stack plastic storage bins turns vertical wall space into high-capacity storage.
The bins slide in and out without taking the whole stack apart, and you control the shelf height to fit the totes you already own.
This works when you have tall garage walls and floor space taken up by a car.
Build the frame from 2x4s with horizontal supports spaced to the height of your bins plus an inch of clearance, then anchor the back to wall studs.
Paint or stain the wood to match your garage finish or make the rack a focal point.
8. PVC Drill Holders
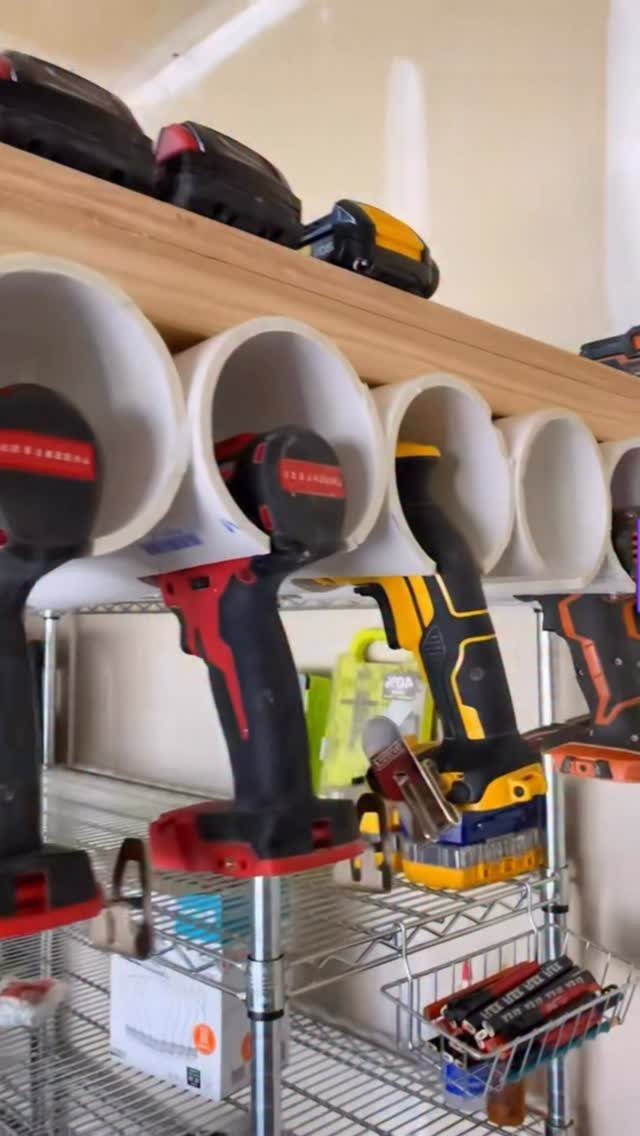
Cut sections of PVC pipe and mount them under a shelf to hold drills and impact drivers upside down by their battery packs.
Measure the height of your tallest drill from battery base to tip, add an inch, and cut the PVC to that length. Secure each pipe under the shelf with 2 hose clamps or mounting brackets.
Space them so the drills don’t knock into each other when you pull one out. This keeps cordless tools off the bench and frees up drawer space for bits and accessories.
9. Rolling Car Detailing Cart
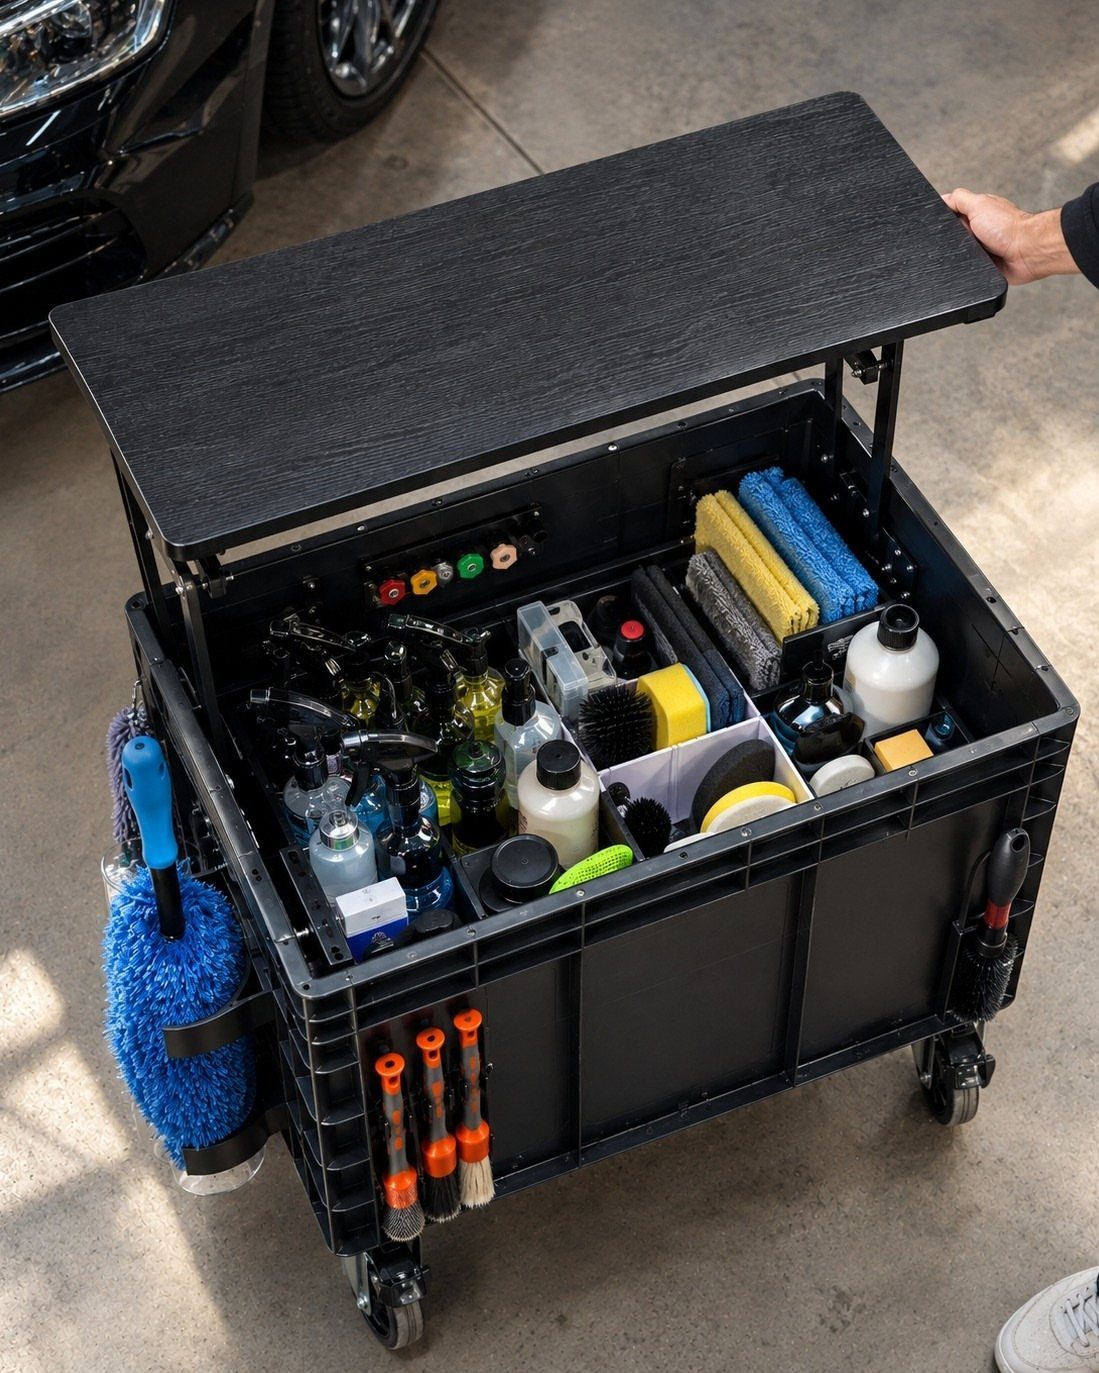
A rolling utility cart stocked with brushes, sprays, microfiber towels and detailing supplies parks next to the car and moves to whichever side you’re working on.
Everything stays in one place, and you don’t walk back and forth to a shelf every time you need a different product.
Look for a cart with at least 2 tiers and a lid or top tray that keeps smaller items from sliding around.
Group supplies by task: washing on one level, interior cleaning on another, wax and polish together. The cart rolls into a corner or against the wall when you’re done, and the car still fits in the bay.
10. Labeled Hardware Bins
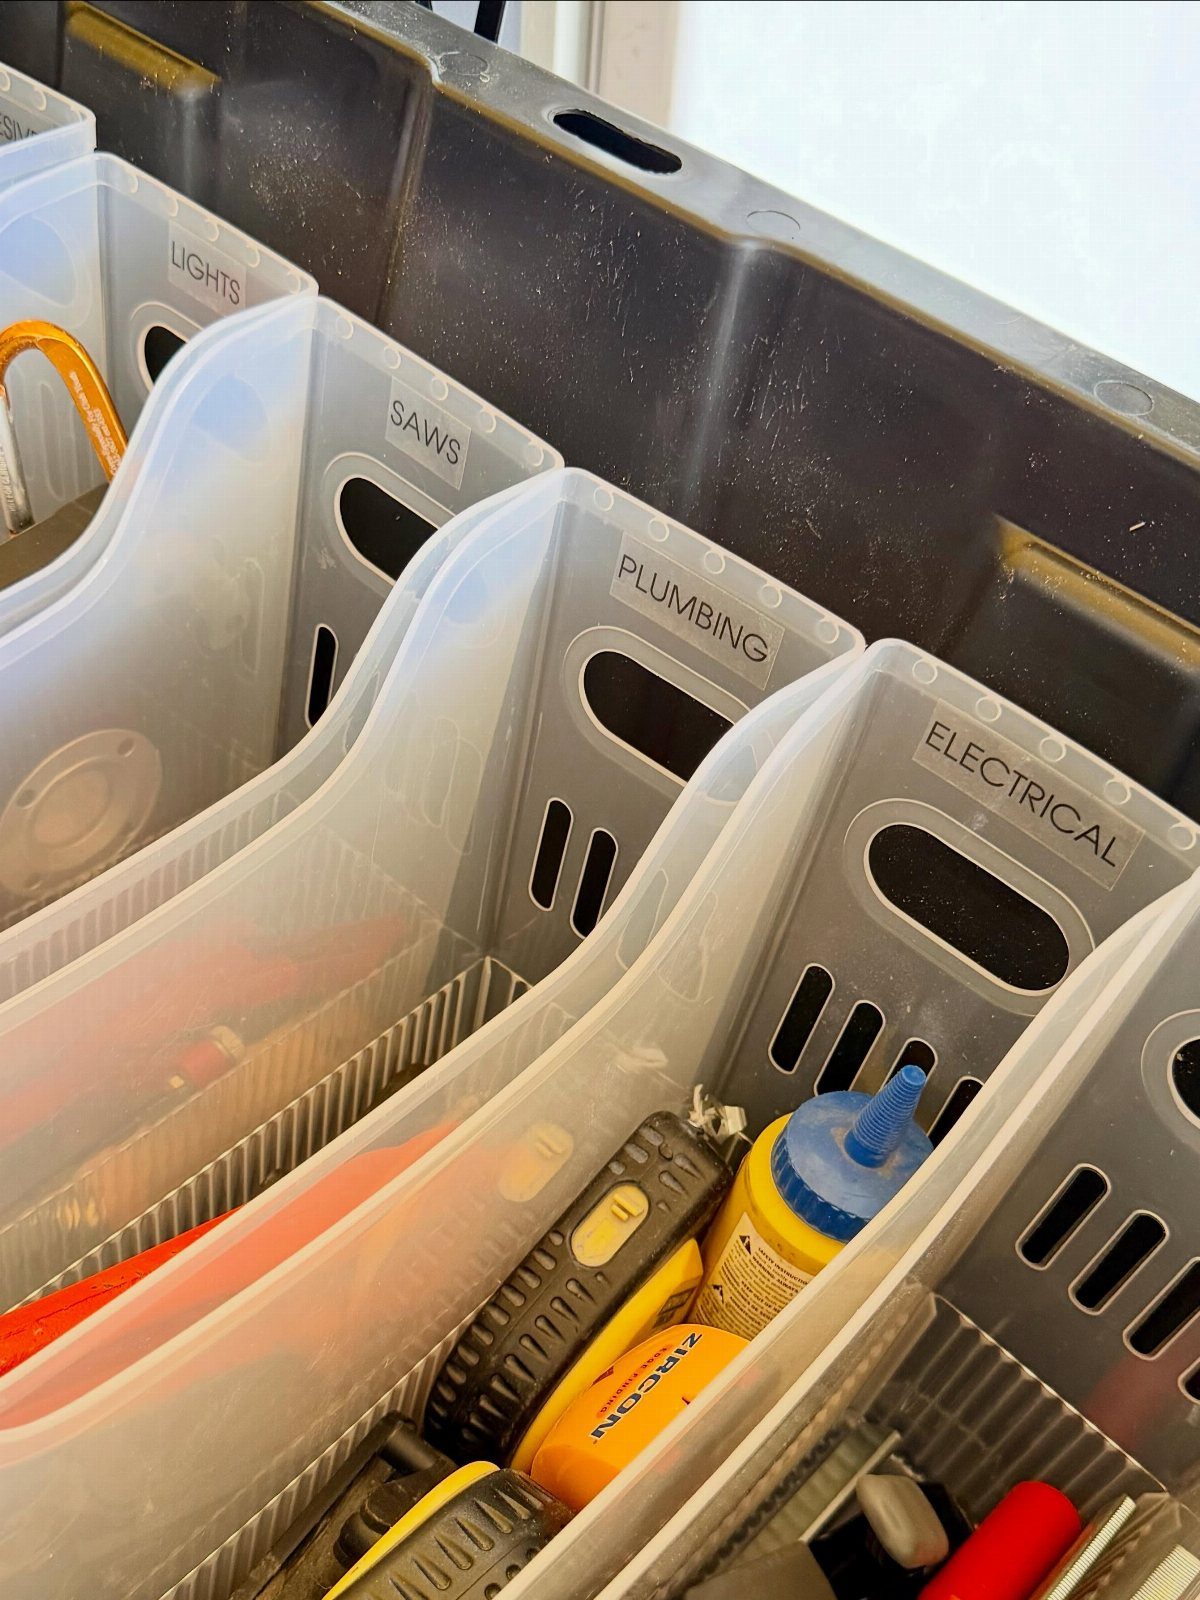
Clear plastic bins sorted by trade and labeled in bold letters sit inside a larger tote and keep small hardware, fittings and hand tools visible and separated.
You can pull one bin out to carry into the house or find what you need without digging through a single mixed drawer.
Use a label maker or permanent marker on adhesive tape.
The outer tote keeps the bins together and stacks on a shelf or under a workbench. This setup works when you have a rotating set of small tools and parts that move between the garage and other rooms.
11. Lined Tool Drawer Organization
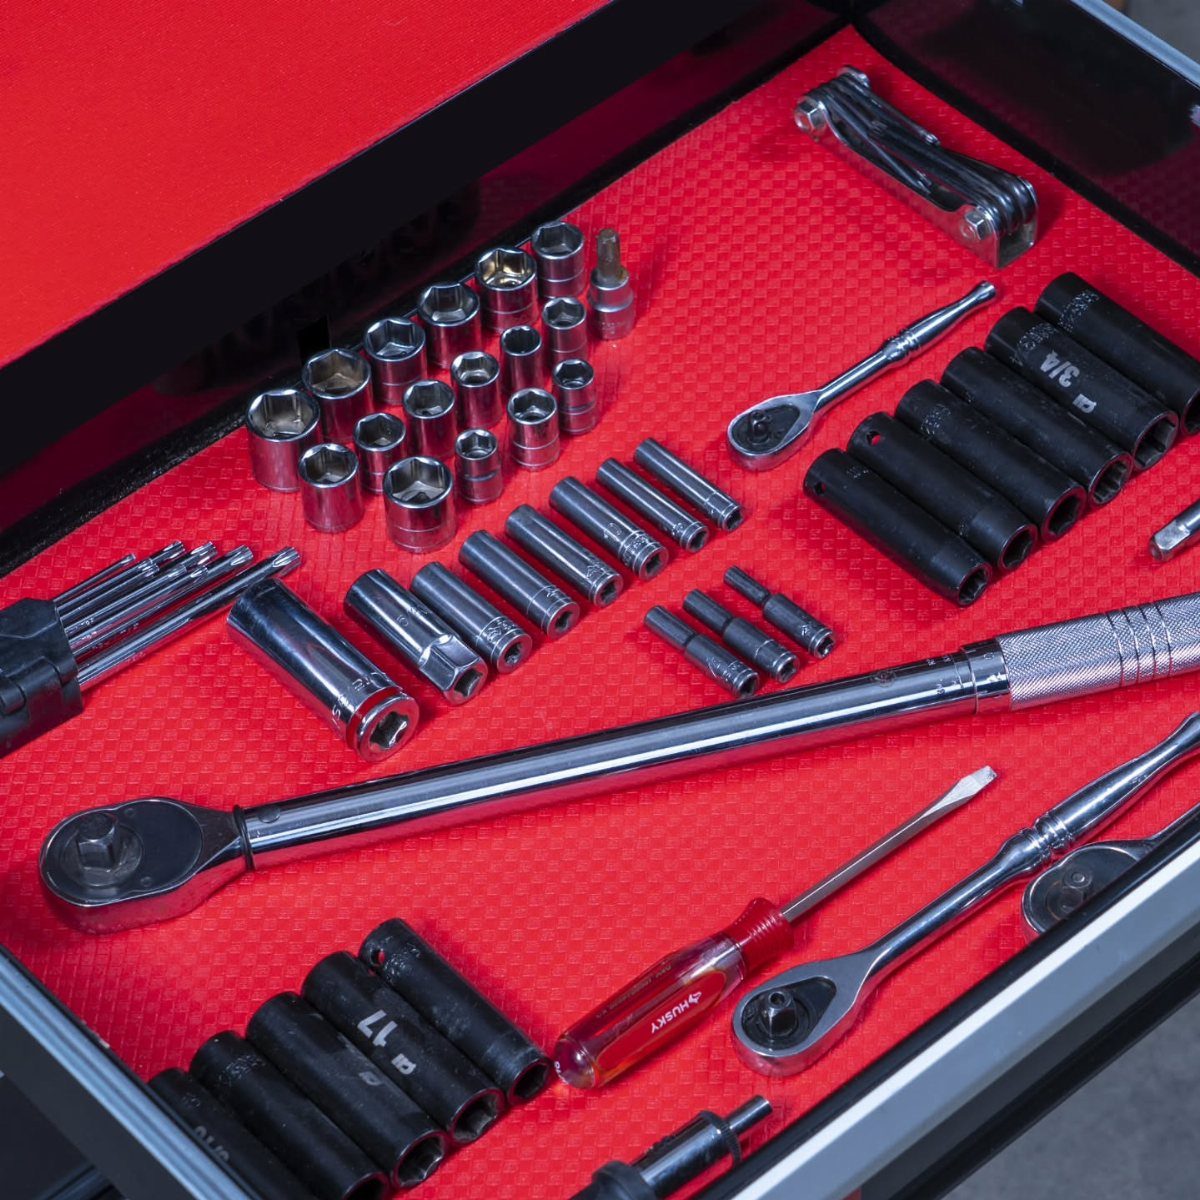
A textured rubber or foam drawer liner grips sockets, wrenches and ratchets in place and keeps them from sliding around when you open and close the drawer.
Tools stay where you set them, and you can see the full layout at a glance.
Measure the drawer, cut the liner to fit, and arrange tools by size or type. The liner flexes slightly so tools press into it and hold position without additional dividers.
This works best in shallow drawers where tools sit in a single layer. For deeper drawers, stack a second liner on top or add foam organizer trays that nest with the liner underneath.
12. Slatwall Shoe Rack

Wire shelves hook directly into slatwall channels and hold sneakers, work boots and athletic shoes off the garage floor without taking up a closet.
Each shelf tilts slightly forward so shoes sit stable, and you can adjust the height or move shelves as your storage needs change.
Mount slatwall panels to wall studs first, then clip wire shelves into the channels at whatever spacing fits your shoes.
Space shelves closer for sneakers, wider for boots. This frees up indoor closet space and keeps muddy or dusty shoes out of the house while still easy to grab on the way out.
13. Wall-Mounted Spray Bottle Rack
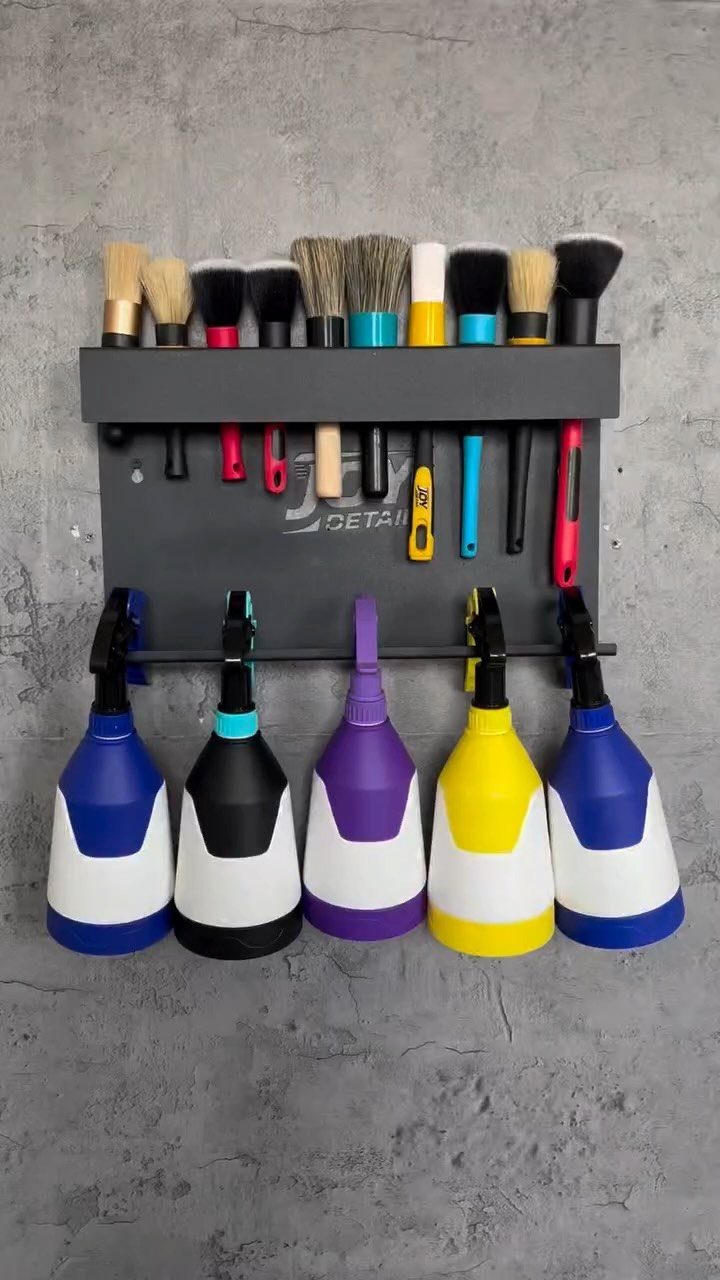
A metal rack screwed to the wall holds detailing brushes in a top tray and hangs spray bottles by their trigger guards below.
The bottles stay visible and grouped, right where you can grab them without opening a cabinet or sorting through a bin.
Mount the rack near the detailing cart or workbench where you mix and pour products.
Most racks hold 4 to 6 bottles and take up less than a foot of wall space. This frees up shelf room for bigger containers and keeps the sprays you reach for most often at eye level.
14. Sports Equipment Cubby Locker
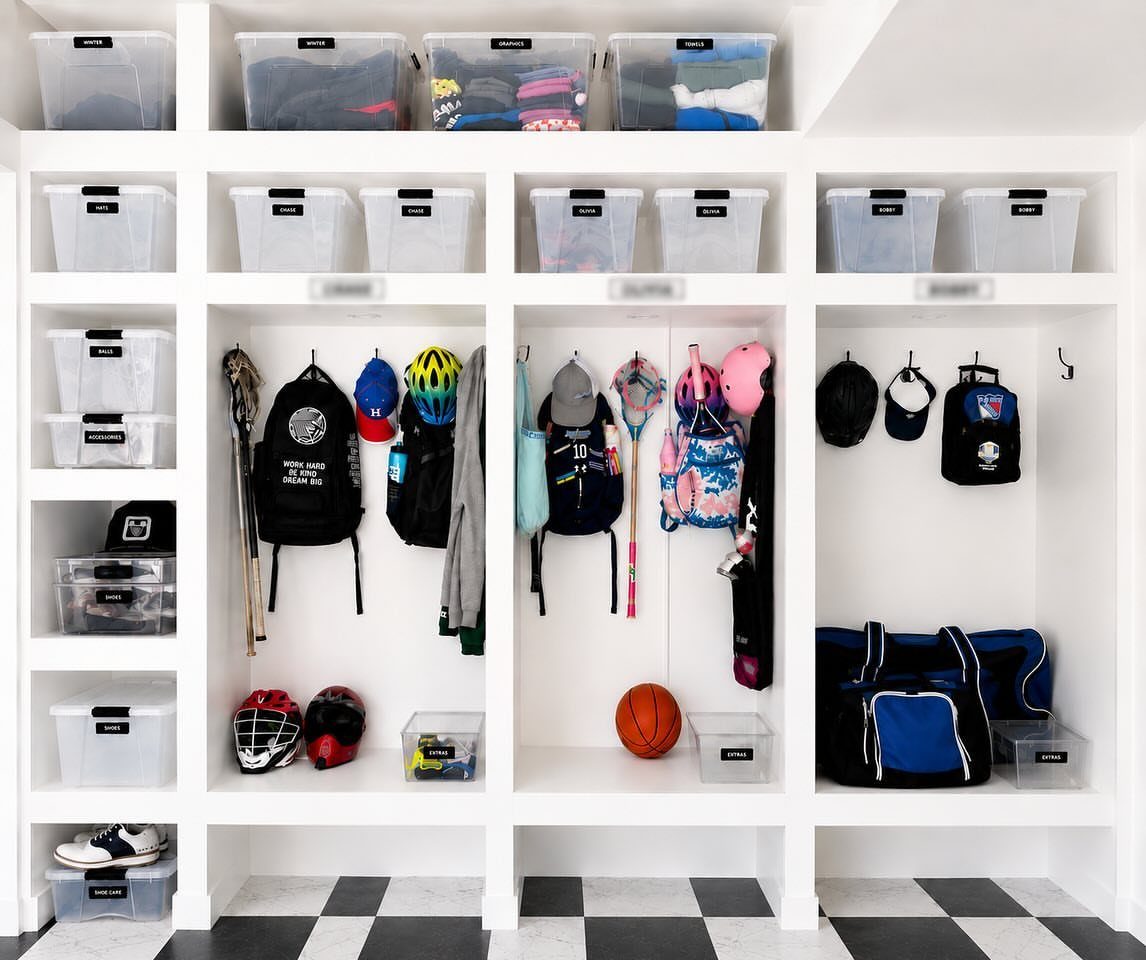
Built-in cubbies divide one wall into sections for each family member’s gear, with open bins on upper shelves and floor space below for basketballs, soccer cleats and helmets.
Labels on the bins make it faster to put things back, and everyone knows where their equipment lives.
Frame the cubbies with 2x4s and finish the front edges with trim. Size each section to fit the tallest item that goes inside, and leave the bottom open so shoes and balls don’t pile up in a single corner.
If built-ins aren’t an option, a freestanding cubby unit anchored to the wall does the same job and moves if you do.
15. Pallet Garden Tool Rack
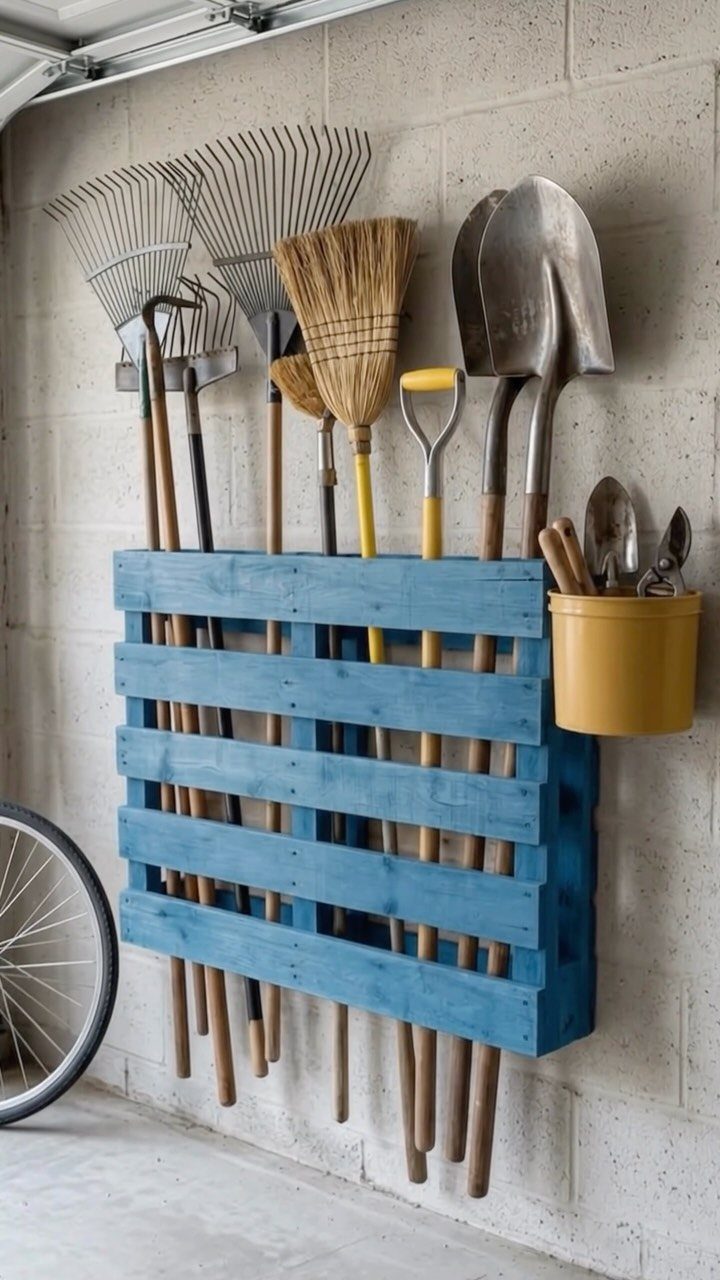
A shipping pallet screwed flat to the wall turns vertical slats into slots that hold rake and shovel handles upright. A bucket hooks to the side for smaller hand tools or coiled hoses.
Mount the pallet to wall studs with lag bolts through the top and bottom rails.
Space tools so the handles slide in and out without catching on each other. This works when you have a small tool collection and want a simple rack you can build in under an hour.
16. Wall-Mounted Lumber Rack
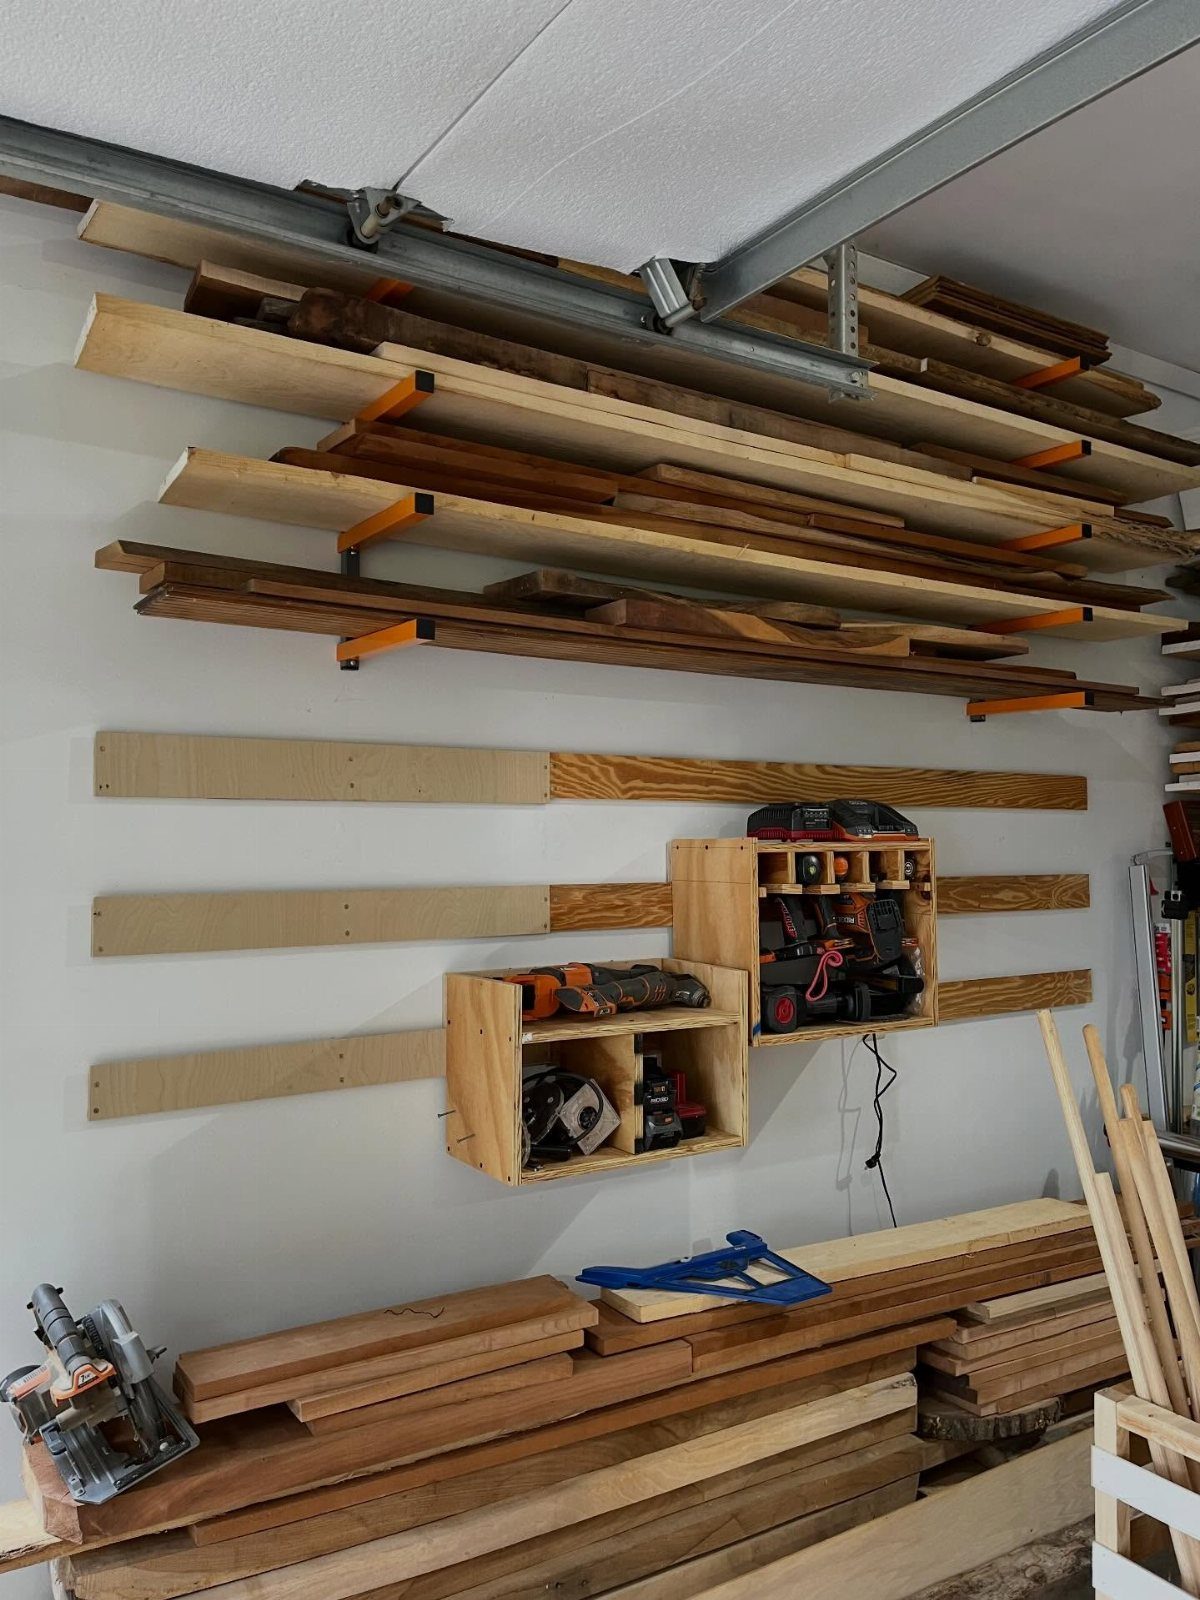
Horizontal brackets bolted to wall studs hold 2x4s, plywood sheets and leftover trim flat against the garage wall and off the workbench. Stack boards by length and width so you can pull one out without moving the whole pile.
Use heavy-duty steel or wood brackets rated for the combined weight of your lumber. Mount the brackets high enough that a car door clears underneath, and keep spacing consistent so the weight distributes evenly along the wall.
This keeps long material out of the way and stops warping that happens when boards lean in a corner for months.
17. Motorcycle Gear Wall Mount
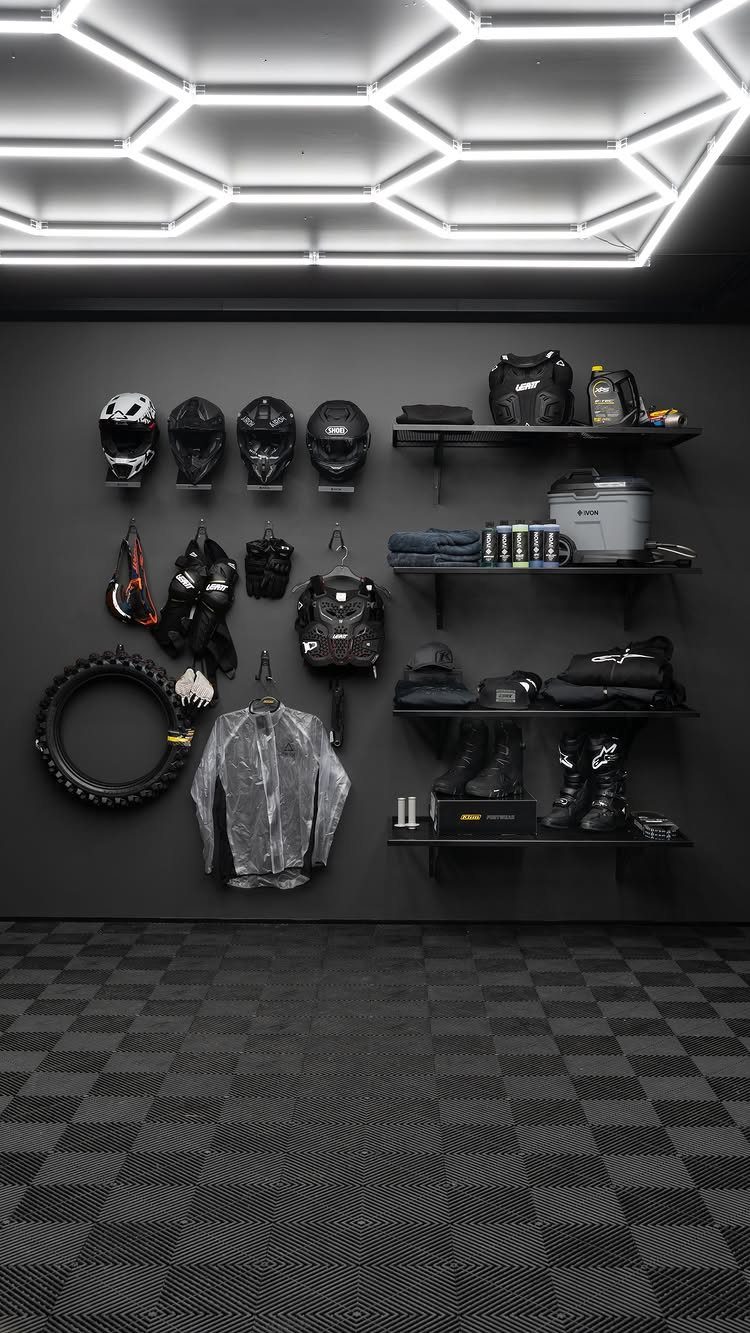
Helmets hang on individual hooks, jackets drape over a wall-mounted bar, and boots sit on a low shelf or in a cubby below.
A tire holder bolted to the wall keeps a spare off the floor and within reach when you need it.
Group everything on one section of wall so you can grab gear on the way out. Use heavy-duty hooks for helmets and a coat bar rated for the weight of leather jackets and padded gear.
If you store gloves or smaller accessories, add a shelf or basket at shoulder height between the hooks and the floor storage.
Frequently Asked Questions
What’s the best way to organize your garage?
Start by clearing out items you don’t use, then group what’s left by type and assign each category a dedicated spot on the wall or shelf.
Clear the floor by mounting gear on hooks, shelves and ceiling racks so the car fits and you’re not sidestepping clutter every time you walk through.
Clear bins and labels make it faster to find what you need and put it back when you’re done.
What are some good storage ideas?
Wall-mounted pegboard holds hand tools in a visible row, ceiling racks keep seasonal bins out of the way, and a workbench with open shelves underneath gives you a surface to work and storage within reach.
PVC pipe sections mounted under a shelf hold cordless drills upside down by their battery packs, and clear labeled bins sorted by task sit inside a larger tote so small hardware stays separated and easy to find.
Is it cheaper to buy or build garage shelves?
Building your own shelves costs $100 to $500 in materials depending on size and can be finished in a day, while buying pre-made units runs higher and limits you to standard dimensions.
Building your own lets you match the depth and spacing to the bins you’re storing instead of forcing odd-sized loads into fixed retail slots.
Should you store clothing in the garage?
Clothing should stay inside the house, not in the garage. Soft items like clothes and bedding can attract animals looking for a place to nest, even when stored in bins.
Can you store canned food in a garage?
Heat and cold cycles shorten the life of canned goods by breaking down flavor and texture faster than stable pantry conditions would.
Summer heat can push internal temperatures high enough to spoil what’s inside, and a hard freeze changes texture permanently even once the can thaws.






