
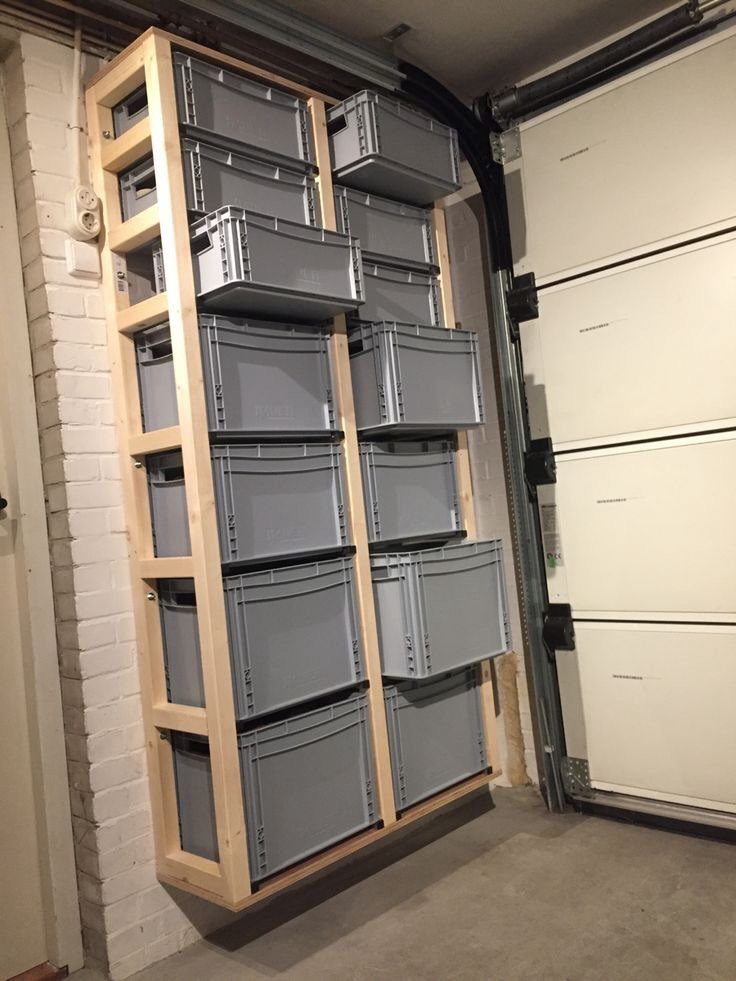
Shelving and ceiling racks sit at one end of this list; labeled bins and pegboard at the other.
The single thing that narrows it down is your basement’s moisture level, since a damp, unfinished space rules out materials that can’t survive humidity.
Ceiling racks bolt into joists and hold camping gear or holiday bins above head height, leaving the floor clear for a workbench or a vehicle.
1. Shelving and Cabinets
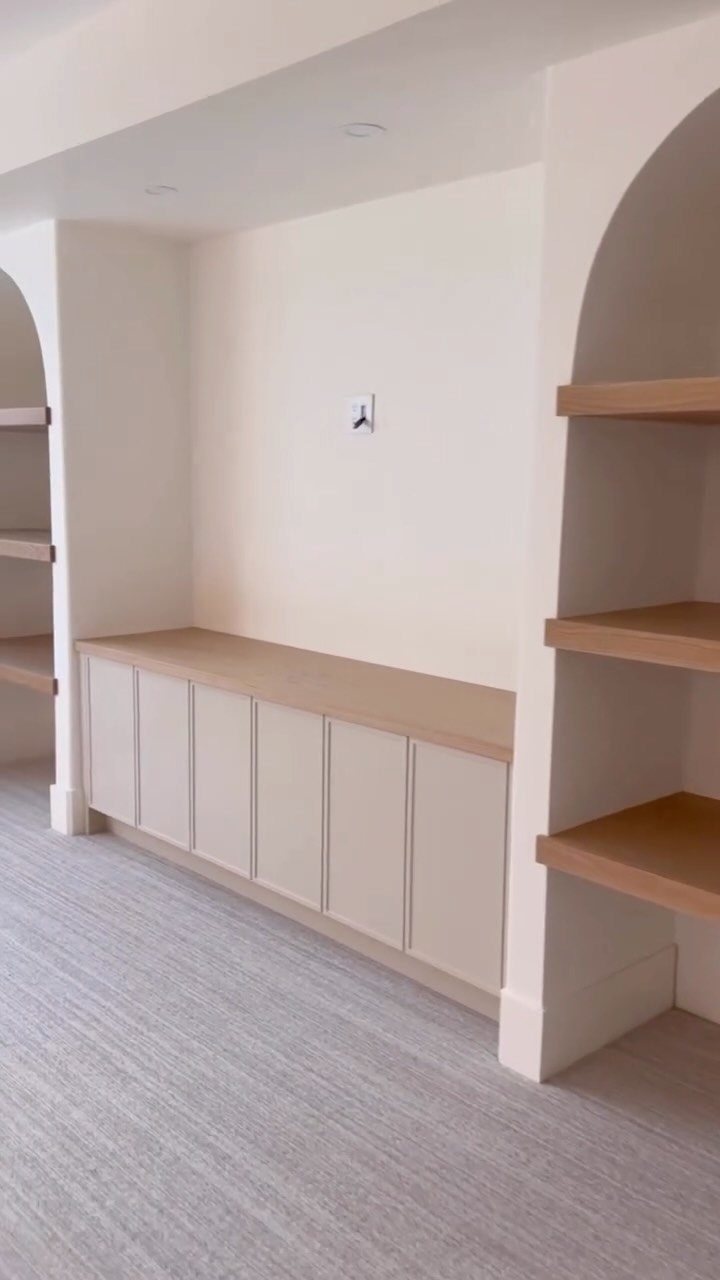
Cabinets and shelving let you stack belongings vertically instead of spreading them across the floor. The arched alcoves here hold open shelves for bins and boxes you reach for often, while the lower cabinets hide clutter behind doors.
Cabinets work best when you want a cleaner look and can afford the extra cost.
Open shelves are faster to access and cheaper to install, but everything stays visible. I’d run cabinets along one wall for seasonal items and add a few open shelves opposite for things I grab weekly.
2. Covered Shelving
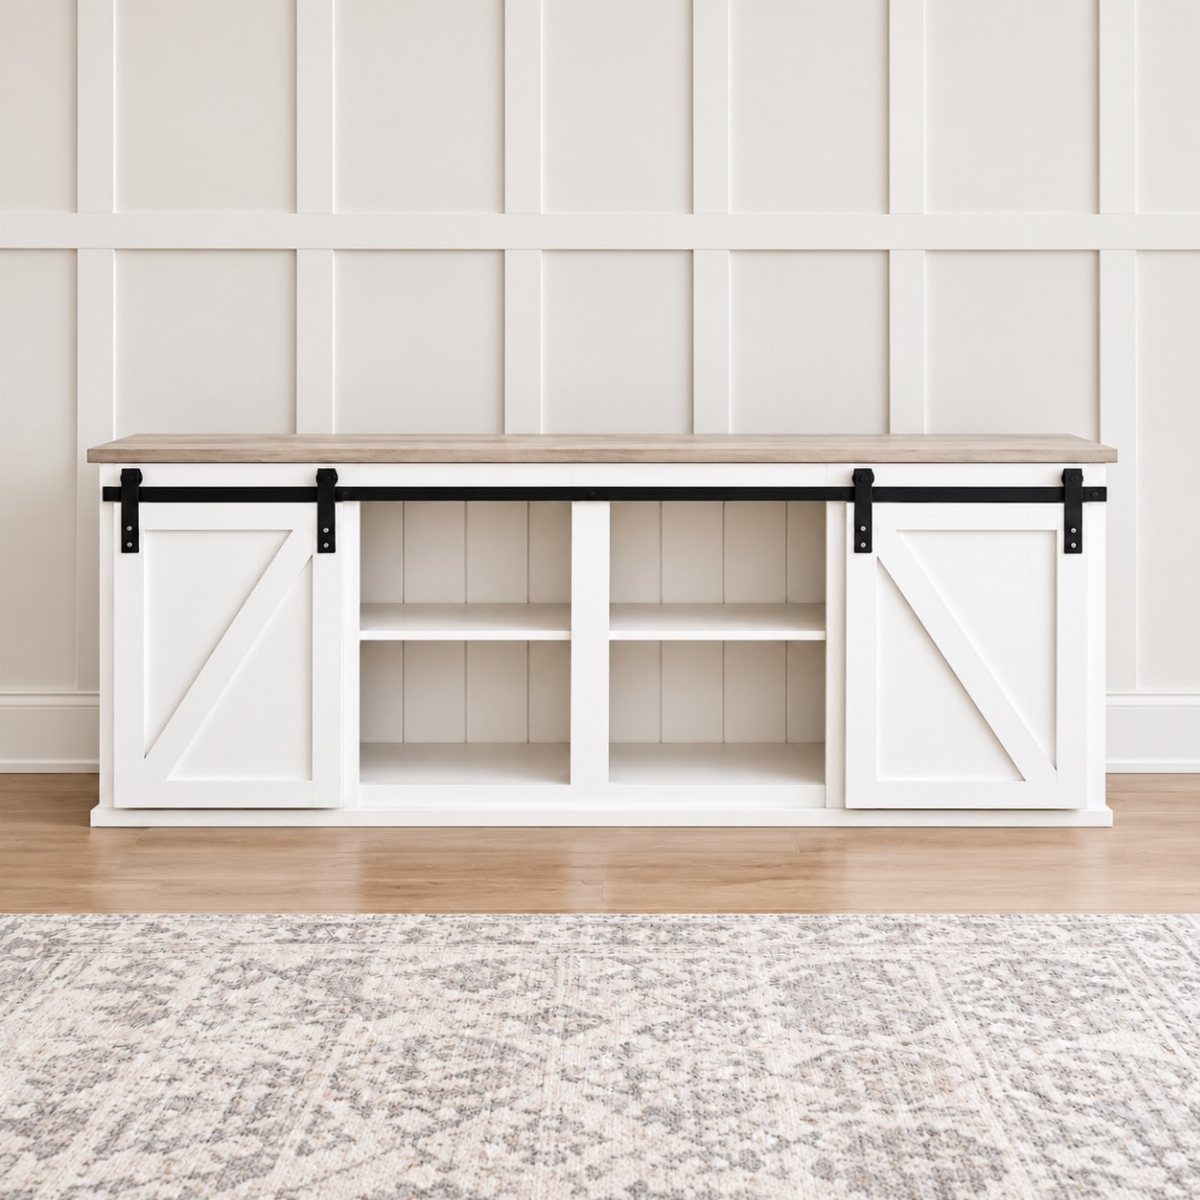
Sliding doors or curtains turn functional shelving into furniture. You get the capacity of open shelves without the visual mess, and the console sits flush against the wall like a built-in.
Barn doors slide on a track, so they need wall clearance on one side for the door to rest open.
Curtains take up less room and cost less to add, but they don’t hold their shape as well. The light wood top here gives you a surface for keys or a lamp, which open shelving alone doesn’t offer.
3. Industrial-chic Shelves
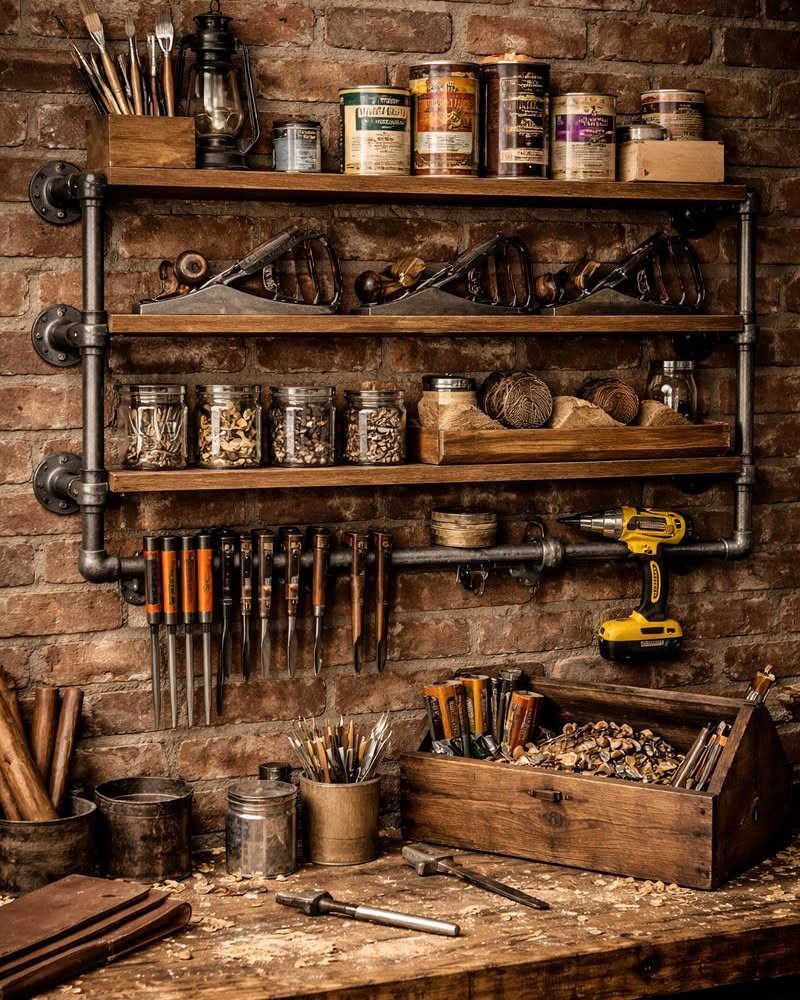
Plumbing pipe and wood planks build shelving that holds weight and looks deliberate. The black iron stands out against brick, and each shelf holds tools, jars, or anything heavy enough to justify the industrial look.
You’ll need flanges to anchor the pipes to the wall and floor, plus elbow joints to set the shelf depth.
The wood can be stained or left raw. This setup costs more than bracket shelves but looks like a choice, not a temporary fix, which matters if the basement stays visible.
4. Wall-mounted Shelves and Pegboards
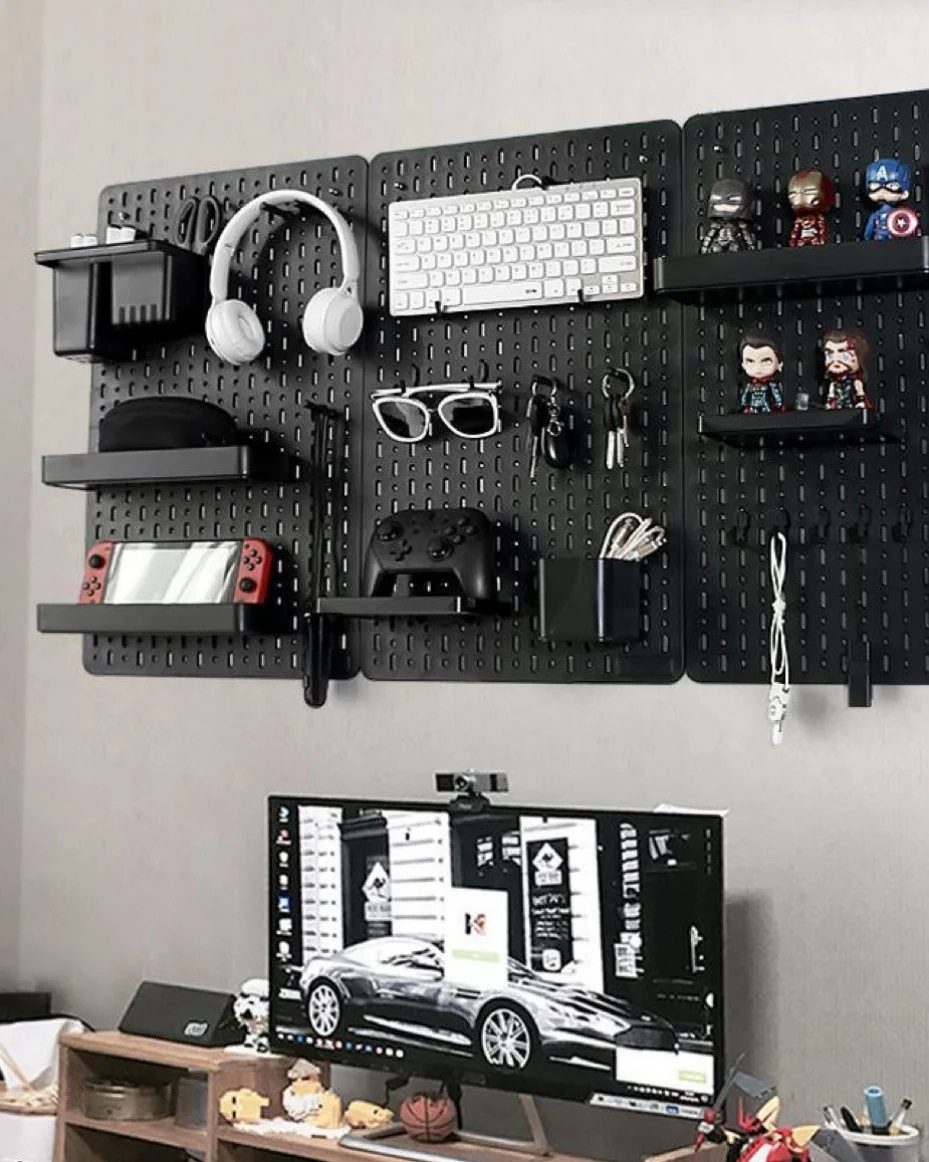
Pegboards hold small items at eye level and keep them off surfaces. Hooks and small shelves slot into the holes, so you can rearrange the layout as your storage needs shift.
Mount the pegboard with spacers behind it so the hooks have room to lock in.
Black pegboard on a grey wall disappears when it’s not loaded, which keeps a gaming setup or workshop looking clean. This works best for lightweight items you use often: controllers, hand tools, charging cables, or collectibles that belong within reach.
5. Clear Storage Bins
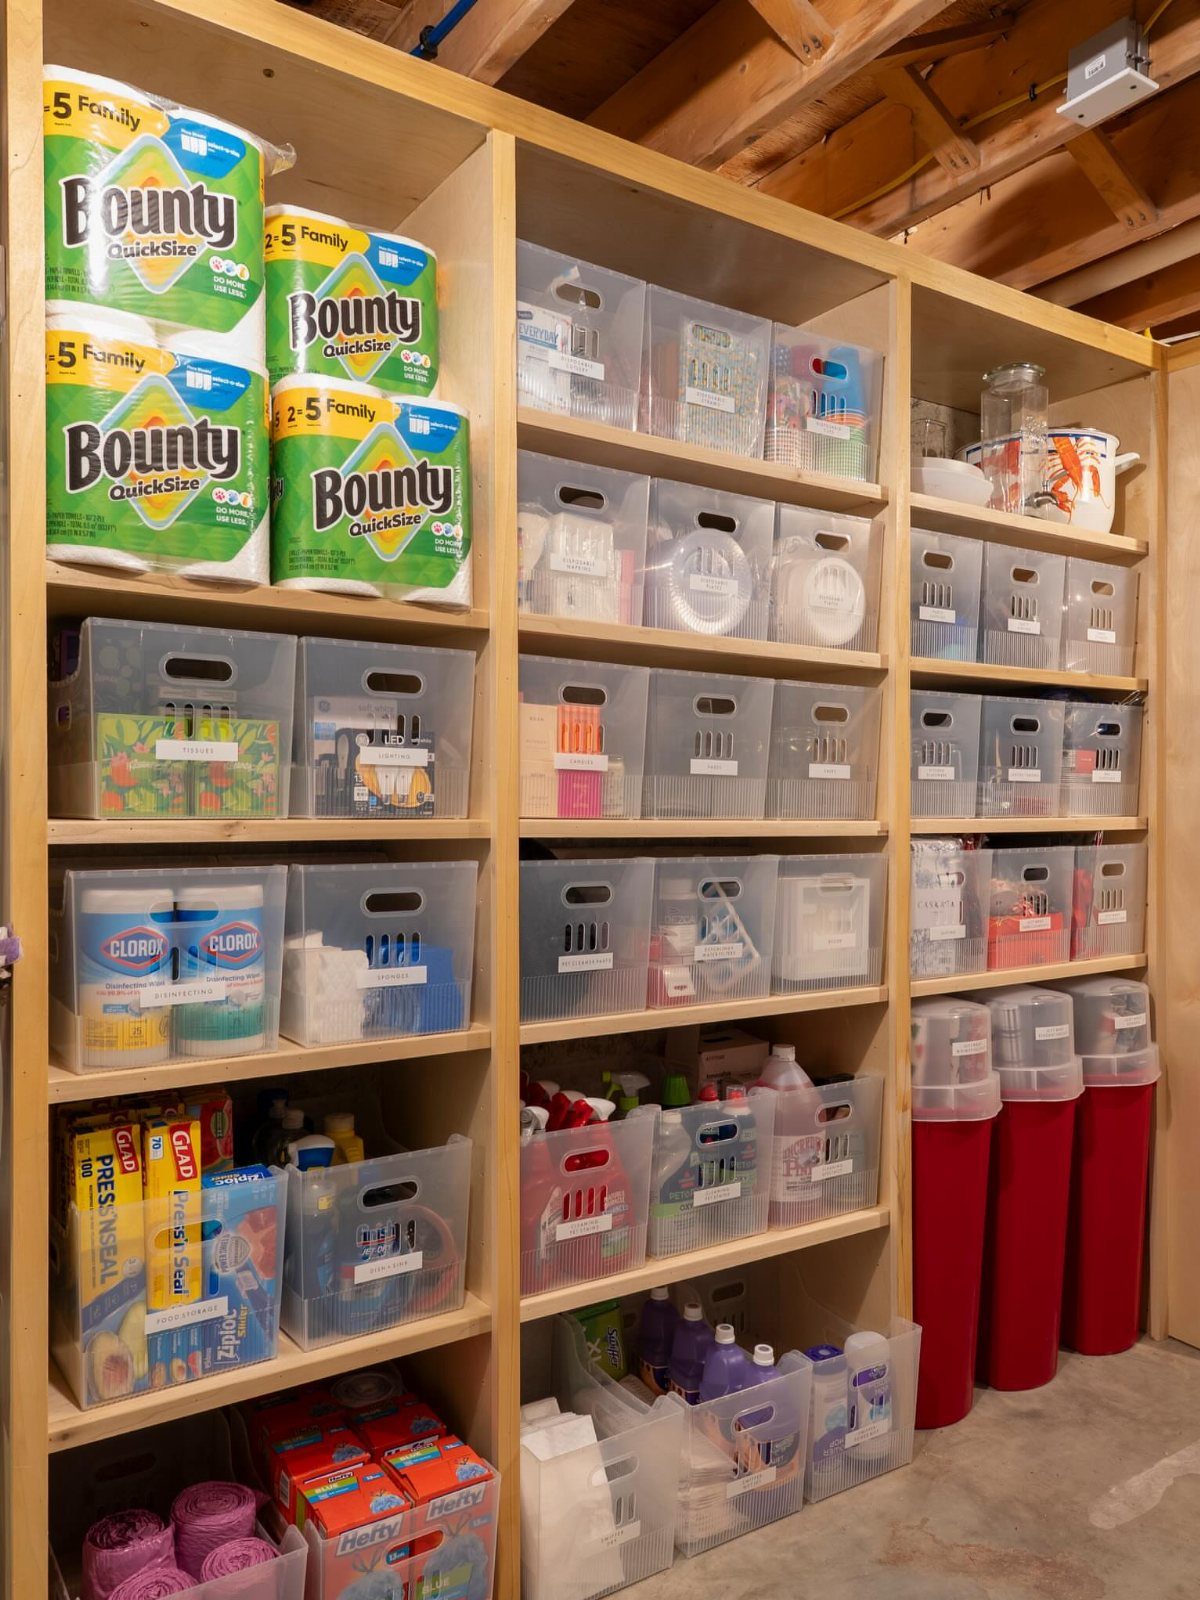
Clear bins let you see what’s inside without pulling them off the shelf. Lids keep dust and moisture out, which matters in a basement that isn’t climate controlled.
Stack bins of the same size so they sit stable and use the full height of the shelving.
I label the ends facing out, even with clear bins, because you can’t always tell paper towels from napkins through plastic at a glance.
This setup works for bulk household supplies, craft materials, or anything you buy in quantity and store long term.
6. Labeled Bins for Holiday Decorations
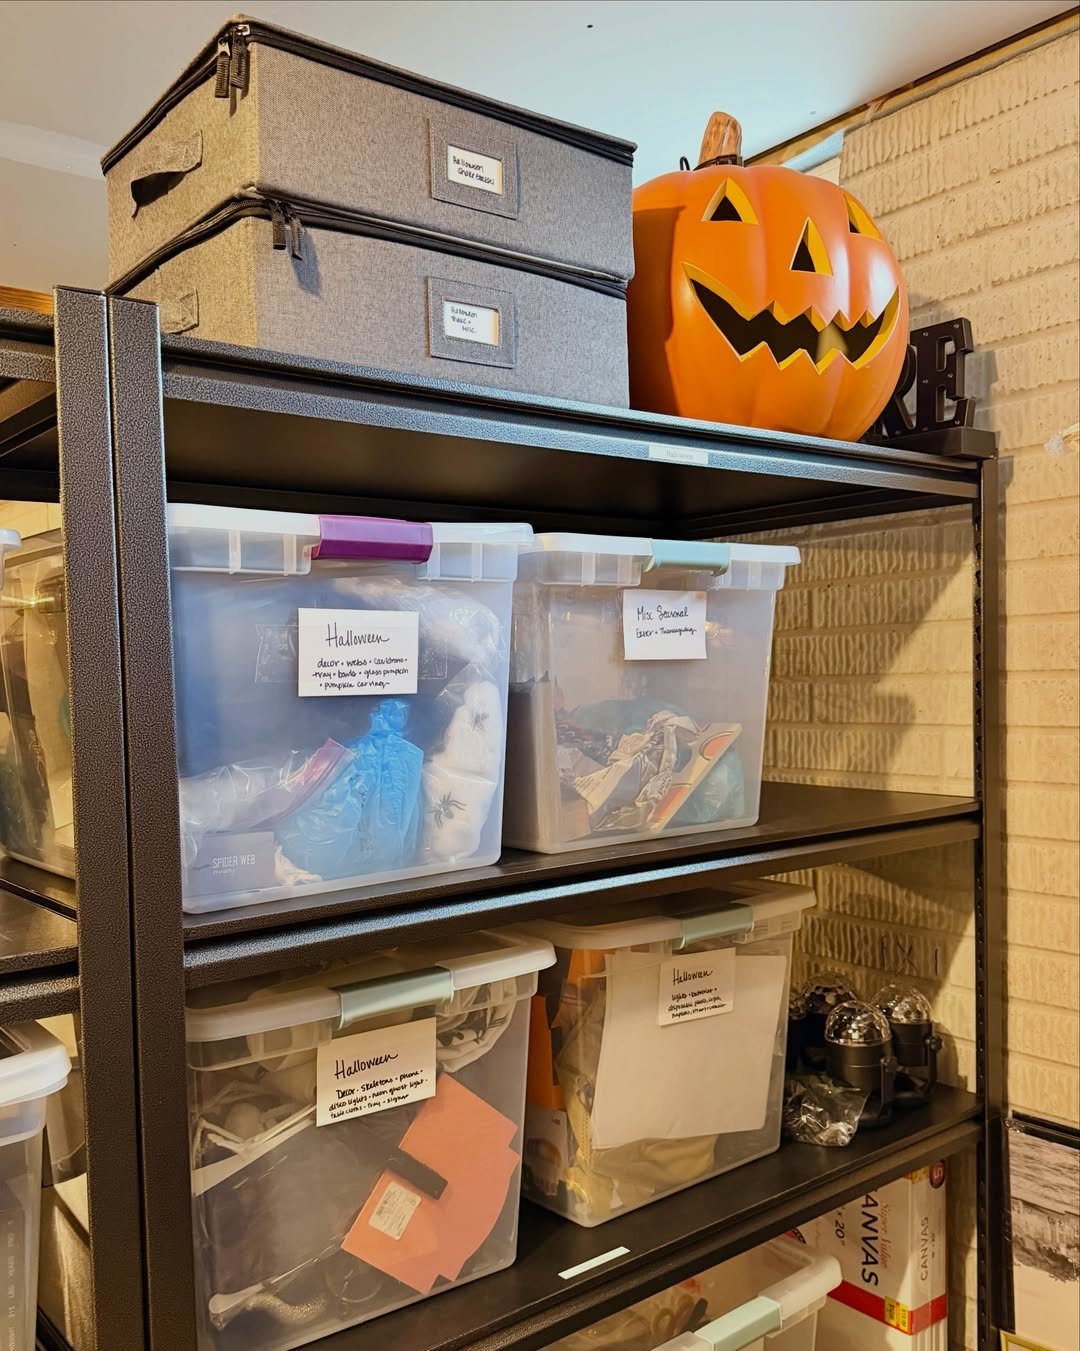
Group decorations by holiday and label each bin so you don’t have to dig through 3 containers to find the right string of lights.
Seasonal items go in and out of storage on a fixed schedule, and labeled bins let you find what you need without sorting through every box.
Plastic bins with lids protect decorations from moisture better than cardboard boxes.
I use fabric bins for lightweight items like garlands, since they’re easier to pull off a high shelf without tipping. Stack bins by season, with the next holiday’s container at the front, and the system runs itself.
7. Steel Pipe Coat Rack
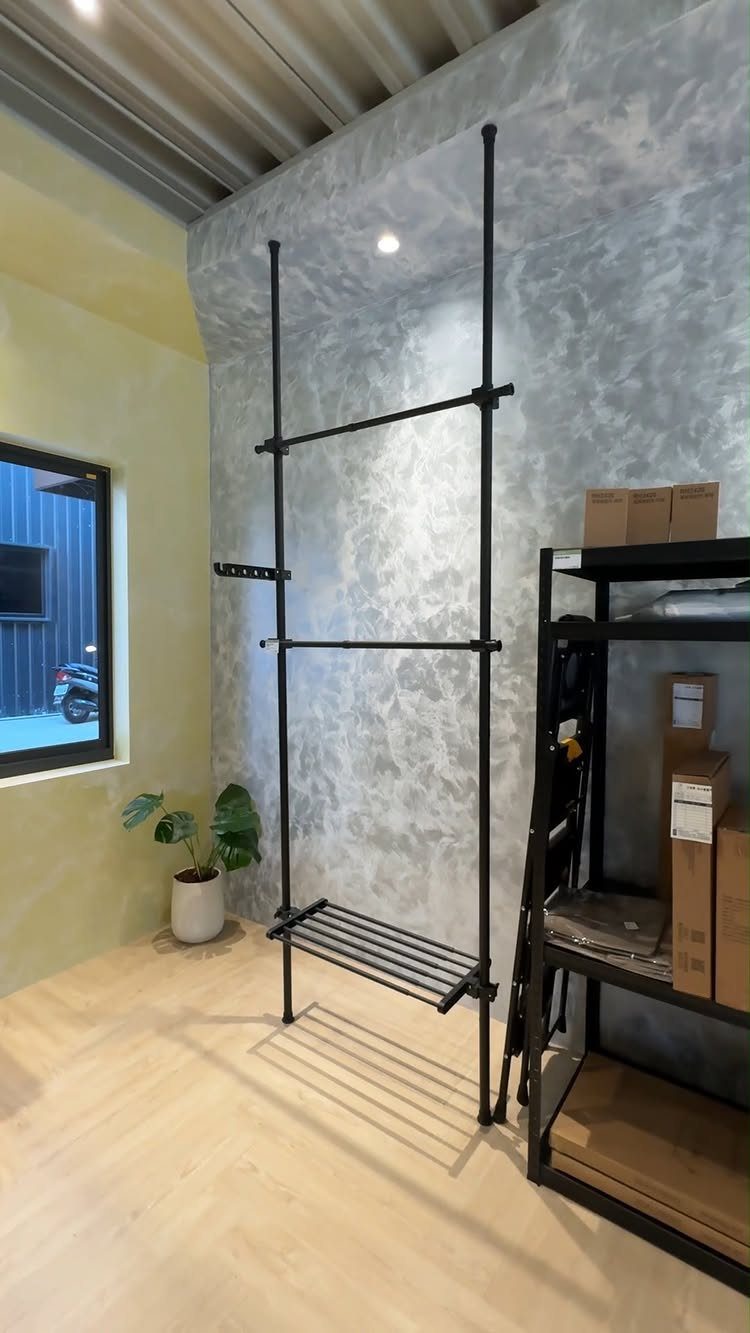
Steel pipe and flanges build a coat rack that doesn’t tip when you hang winter jackets on it. The pipe runs vertically against the wall, with shorter horizontal sections jutting out to hold hooks or act as hanging bars themselves.
A bottom shelf keeps shoes or bags off the floor, and the whole unit bolts into studs so the weight stays anchored.
This setup takes up less floor space than a freestanding rack and holds more coats per foot of wall. If your basement doubles as a mudroom entry, the industrial look fits better than plastic hooks.
8. Stackable Storage Systems
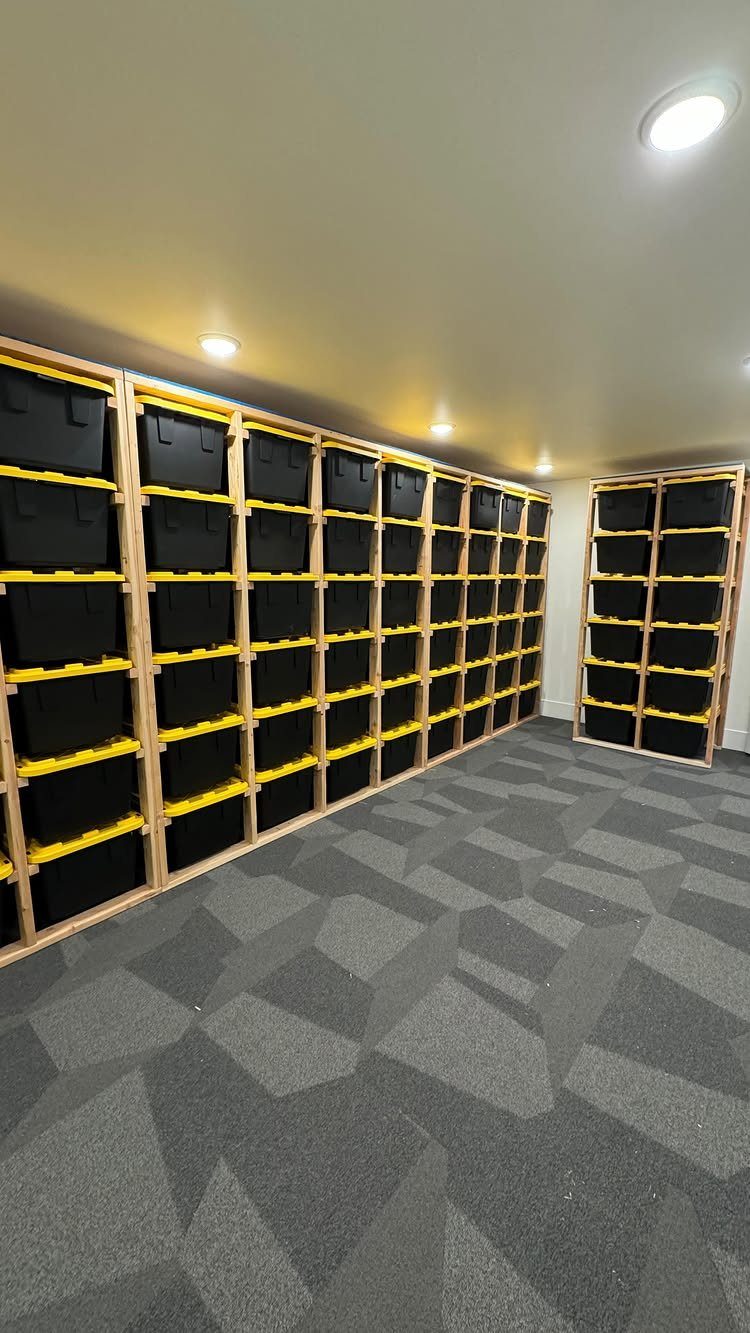
Matching bins and shelving units lock into one system so every container fits without gaps or wasted height.
The yellow and black bins here slide in and out like drawers, and the shelves size to the bin dimensions instead of the other way around.
Stackable systems let you add another unit when storage needs grow, and the uniform look keeps a visible wall from reading as clutter.
I’d use this for tools, hardware, or craft supplies where you need to see and grab one bin fast.
The modular setup costs more upfront than loose bins on generic shelves, but you skip the tetris game every time you rearrange.
9. Under-stairs Storage
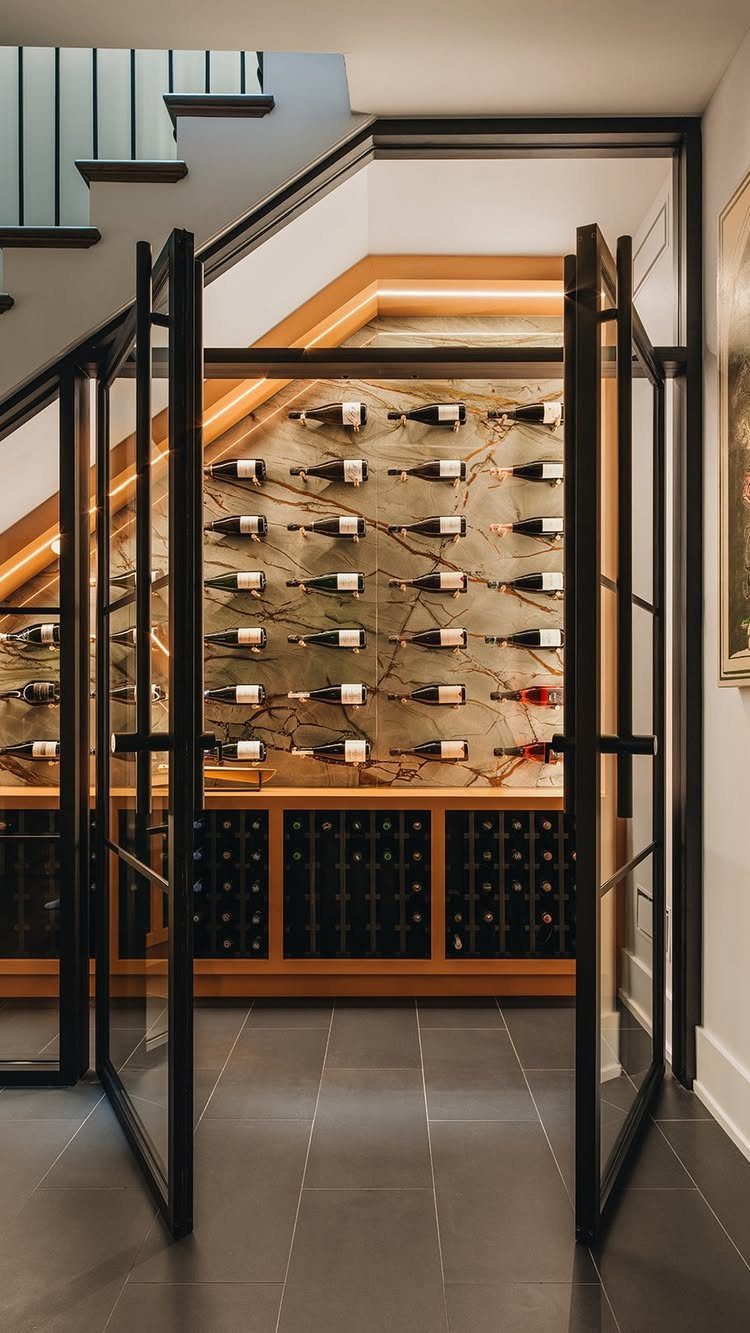
The triangular void under a staircase usually traps dead space, but a built-in turns it into storage that fits nowhere else.
Glass doors and interior lighting here make it a wine cellar, though the same framing works for pantry shelves, a coat closet, or seasonal bins.
Measure the ceiling height at intervals as you move toward the wall, since the slope limits what you can stack.
I’d hinge the door at the tall end so it swings clear when open, and add a light inside if the space runs deeper than arm’s reach.
10. Ceiling Storage Racks
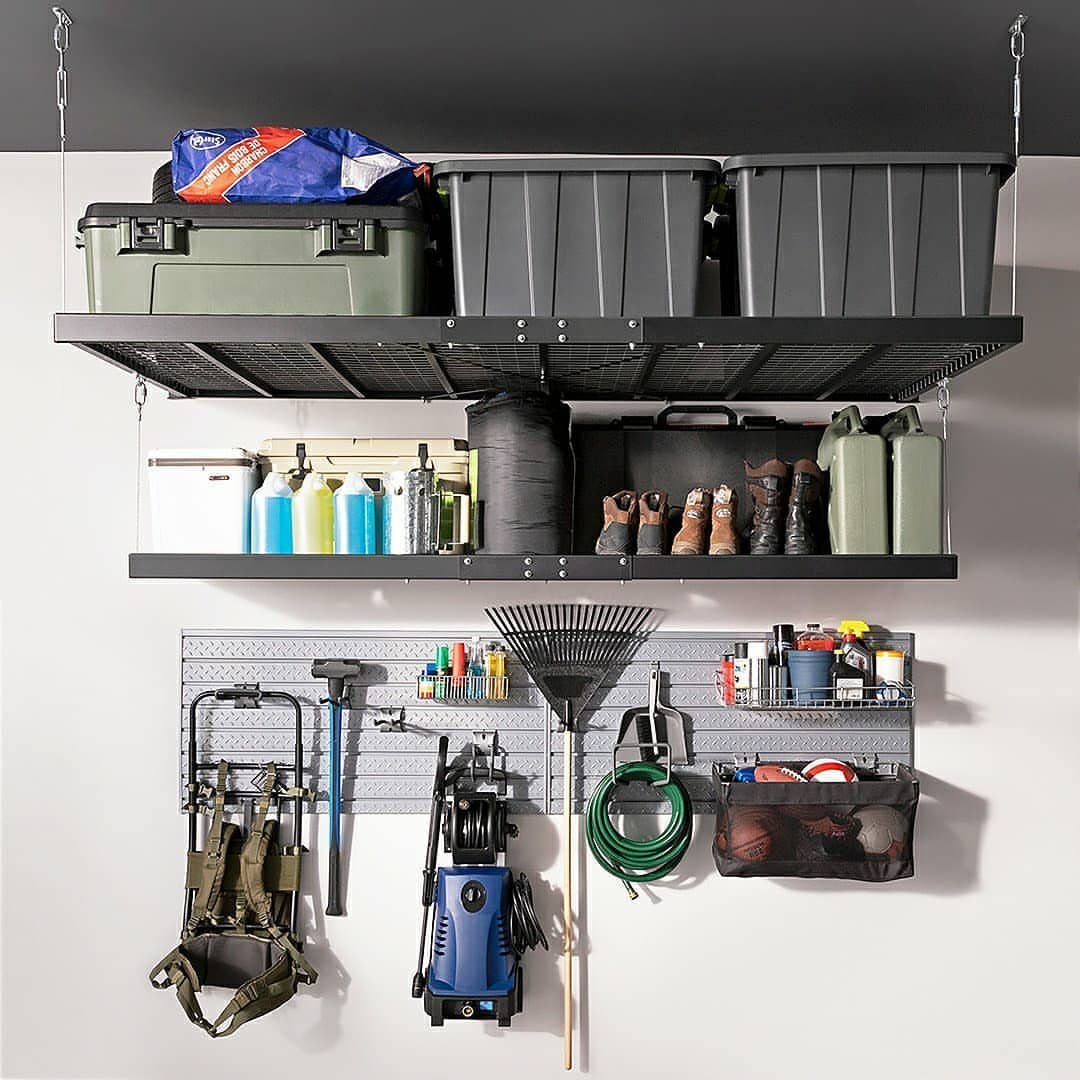
Overhead racks bolt into ceiling joists and hold bins, camping gear, or anything you won’t touch for months. The black metal frames here suspend above head height, so floor and wall space stay open for daily use.
Check joist spacing and load limits before you install, since drywall anchors won’t hold. I’d put holiday decorations or off-season sports equipment up here, not things I need often enough to drag out a ladder.
The ceiling usually offers more square footage than one wall, and using it leaves room below for a workbench or vehicle.
Assess Moisture and Basement Conditions
Check your basement for damp spots, cracks and ventilation before you bring in bins or shelving.
A finished, climate-controlled space can hold anything an upstairs closet can. An unfinished basement sits partly underground, so humidity runs higher and moisture can creep in through walls or floors.
If the air feels damp or you smell mildew, find where the water enters and fix it there.
A dehumidifier pulls moisture out of the air and stops it from settling into cardboard, fabric, or wood. A dehumidifier stops moisture damage at the source, which matters more than any bin you can buy.
Skip cardboard boxes for anything that can warp or grow mold: photos, documents, or anything you can’t replace. If the basement has flooded before, treat the floor as temporary dry ground and keep everything you care about off it.
When organizing your unfinished basement, remember to protect your belongings. Sealed containers are the best basement storage solutions to protect against dust, humidity, flooding and pests.
Plan Zones and Access
A basement often holds tools, holiday decor, bulk supplies, and sports gear all at once.
Zones keep those categories from mixing. Group items you use together, and give each group its own area with shelving or a marked section of floor.
Put things you reach for weekly at waist height, close to the stairs.
Seasonal items and keepsakes go higher or deeper, since you won’t touch them until the calendar turns. Leave a clear path between zones so you can move through the space without shifting boxes.
When every category has a fixed spot, putting things back takes no thought.
Maintain an Organized Basement
Once a year, pull a few bins off the shelf and check whether you still need what’s inside.
Reassess what you have stored each year and get rid of anything you no longer need, and the basement stays manageable instead of backing up on you.
Keep labels facing out and replace any that peel or fade.
Sweep the floor and wipe down shelves so you catch a leak or a pest problem before it spreads. Check the walls and floor for condensation, water stains, or new cracks, and fix moisture problems the day you find them.
Seasonal check-ins catch small problems before they spread.
If you swap out holiday bins in January, that’s a natural time to inspect the shelf and the wall behind it. Consistent labeling and a quick sweep every few months keep the system running without a full reorganization.






