
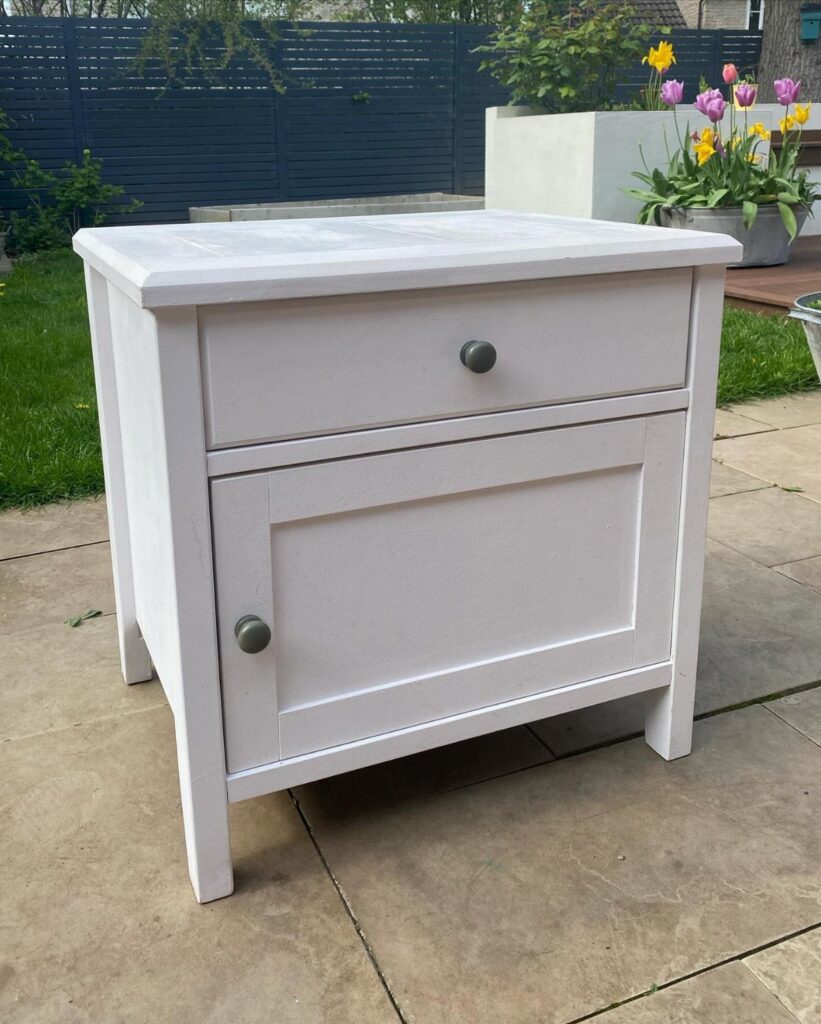
The span here runs from a simple drawer swap with mismatched hardware to a hinged lift-top charging compartment with a routed well and a USB hub inside.
Mattress height is what sets the target: most of these plans land in the 24–27 inch range, so knowing your bed’s finished height before picking a design saves a rebuild.
Pine plywood and construction lumber keep most of these builds inside a real weekend budget, though red oak and fine-thread pocket screws are the right call if you want the piece to hold up longer.
1. Floating Nightstand
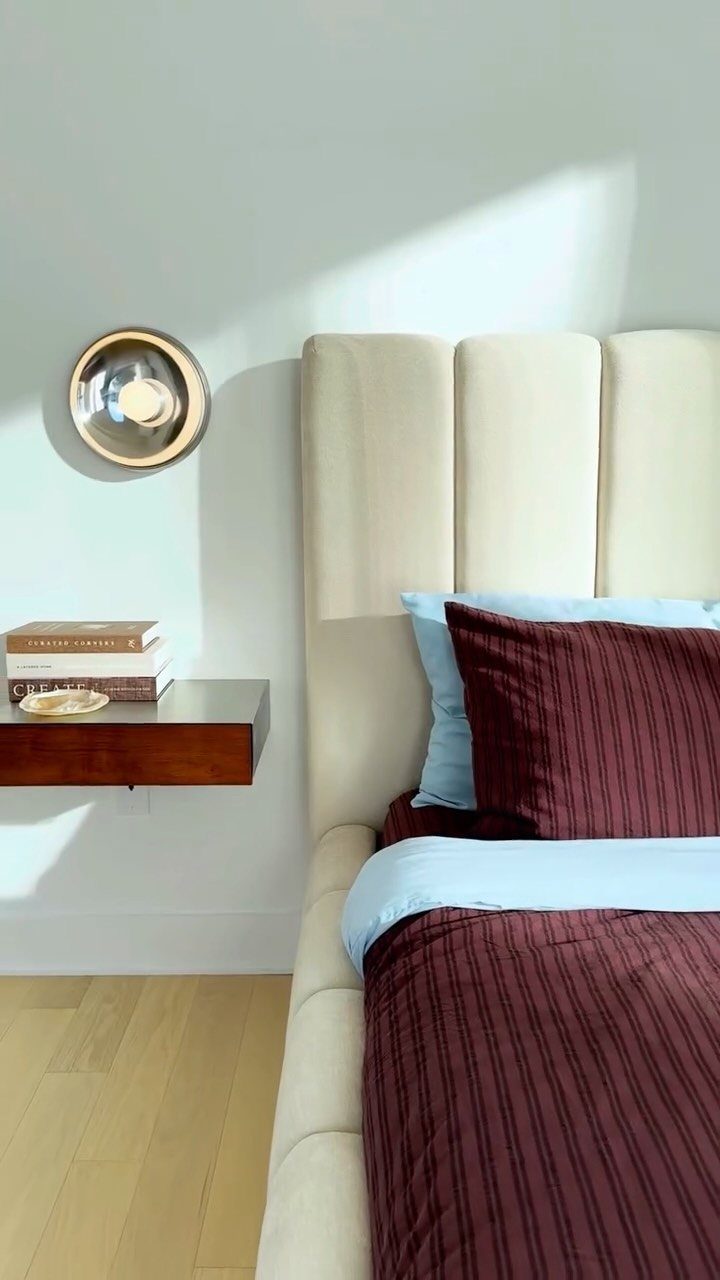
A wall-mounted nightstand frees up floor space and keeps the look light. Attach it to studs with heavy-duty brackets rated for the weight you’ll put on top.
The open surface holds a lamp and a book or two. Without legs, sweeping underneath is easier, and the room feels less crowded.
If you rent, check with your landlord before drilling into the wall. Some brackets leave smaller holes than others.
2. Bedside Table with Drawer Pulls
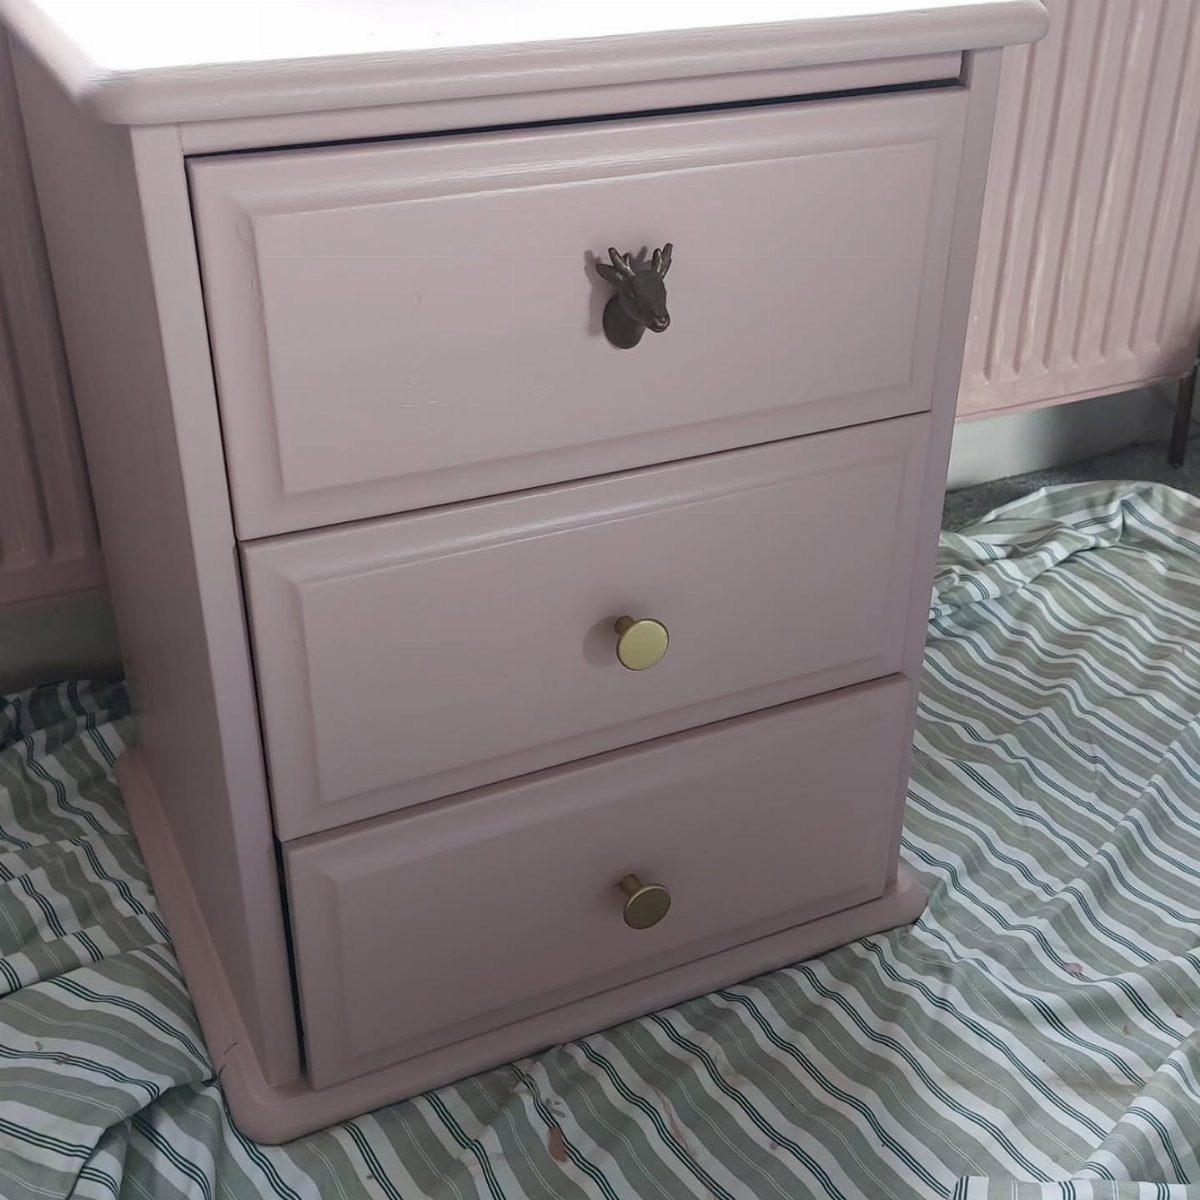
Mismatched drawer pulls turn a plain bedside table into something with more personality. Pick 3 different knobs or pulls in finishes that share one color or metal tone so they feel connected without matching exactly.
Swap the original hardware by unscrewing the old pulls and measuring the hole spacing before you buy new ones. If the new pull covers the old holes, no drilling required.
A mix of brass, ceramic, and cast metal keeps it interesting without looking random.
3. Modern Drawer Nightstand
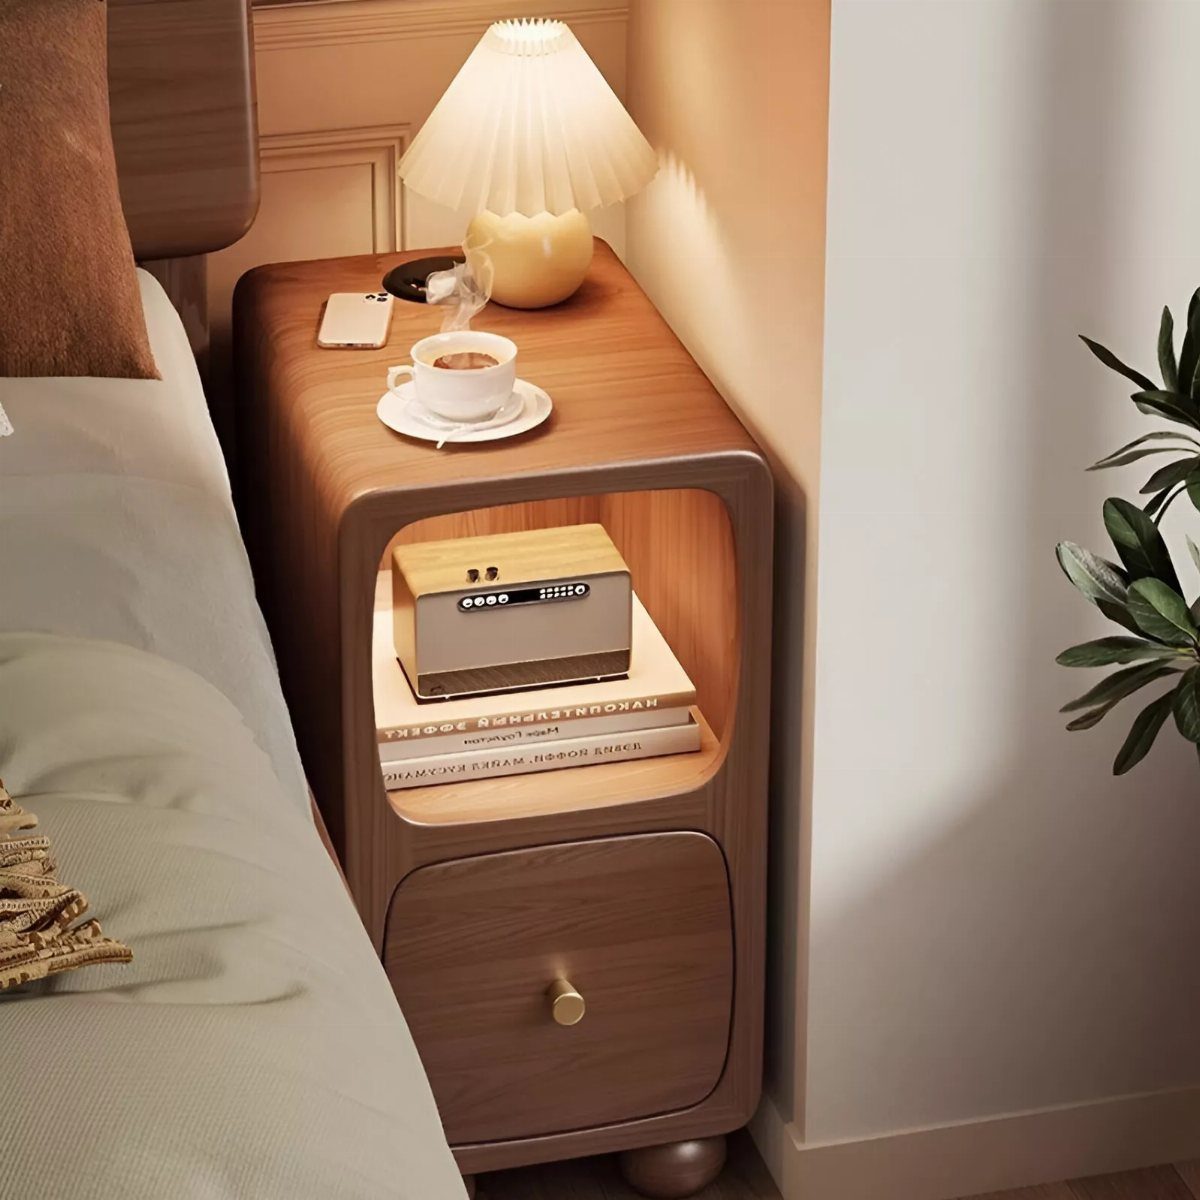
A nightstand with both a drawer and an open shelf below gives you storage for what you want hidden and quick access to what you reach for often.
The drawer holds chargers, reading glasses, or whatever you don’t want on display. The shelf below fits a few books, a radio, or a basket for extra storage.
Build one with 3/4-inch plywood or pine, cut to size, with a simple drawer box on slides. Round over the edges with a 1/2-inch roundover bit if you want the softer profile.
4. Charging Station Nightstand
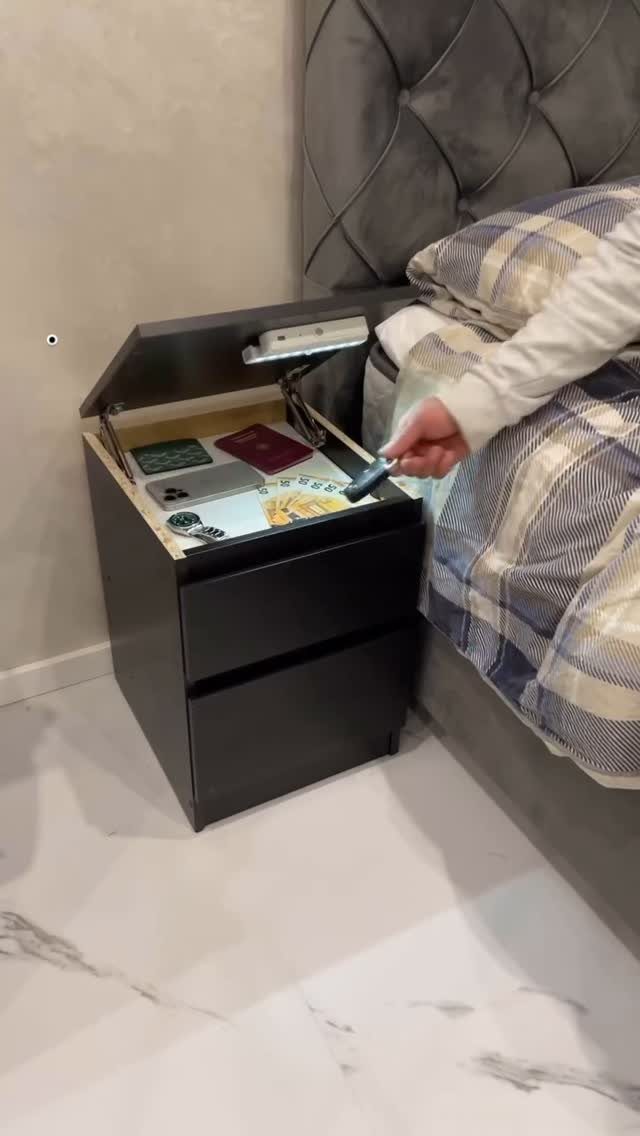
A nightstand with a lift-top charging compartment hides your phone, tablet, and cables while they charge overnight. The top flips open to reveal a recessed tray with a power strip or USB hub inside, so cords stay out of sight.
Cut a hinged lid into the top panel and rout out a shallow well underneath for the charging station. Drill a hole in the back for the power cord to exit.
This works best if you already charge your devices at night and want them off the surface but still within reach.
5. Suitcase Nightstand
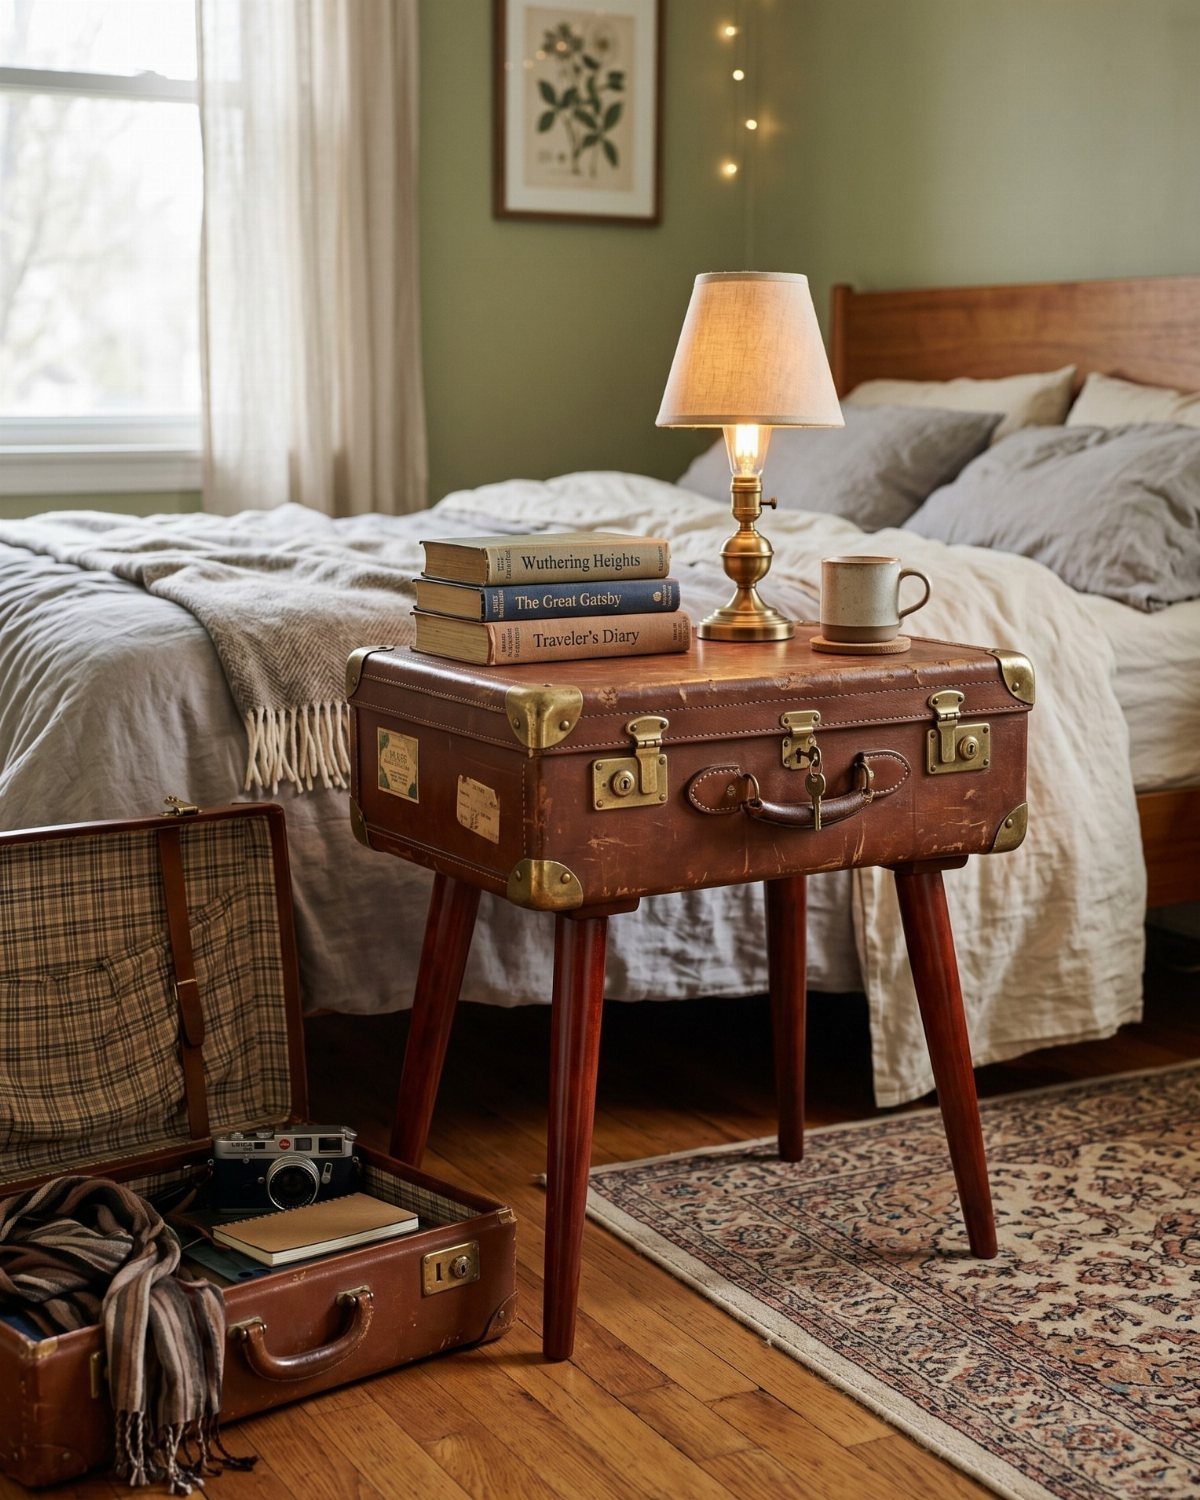
An old suitcase on legs makes a nightstand with built-in storage.
Attach hairpin legs or tapered wooden legs to the bottom with screws or metal brackets. The suitcase opens from the top, so I use it for off-season clothes, extra blankets, or anything I don’t need daily.
Choose a suitcase with a flat top so a lamp sits level. Reinforce the corners with metal brackets if the case feels flimsy.
Vintage leather suitcases hold up better than cardboard, and they develop character as they age.
6. Simple White Nightstand
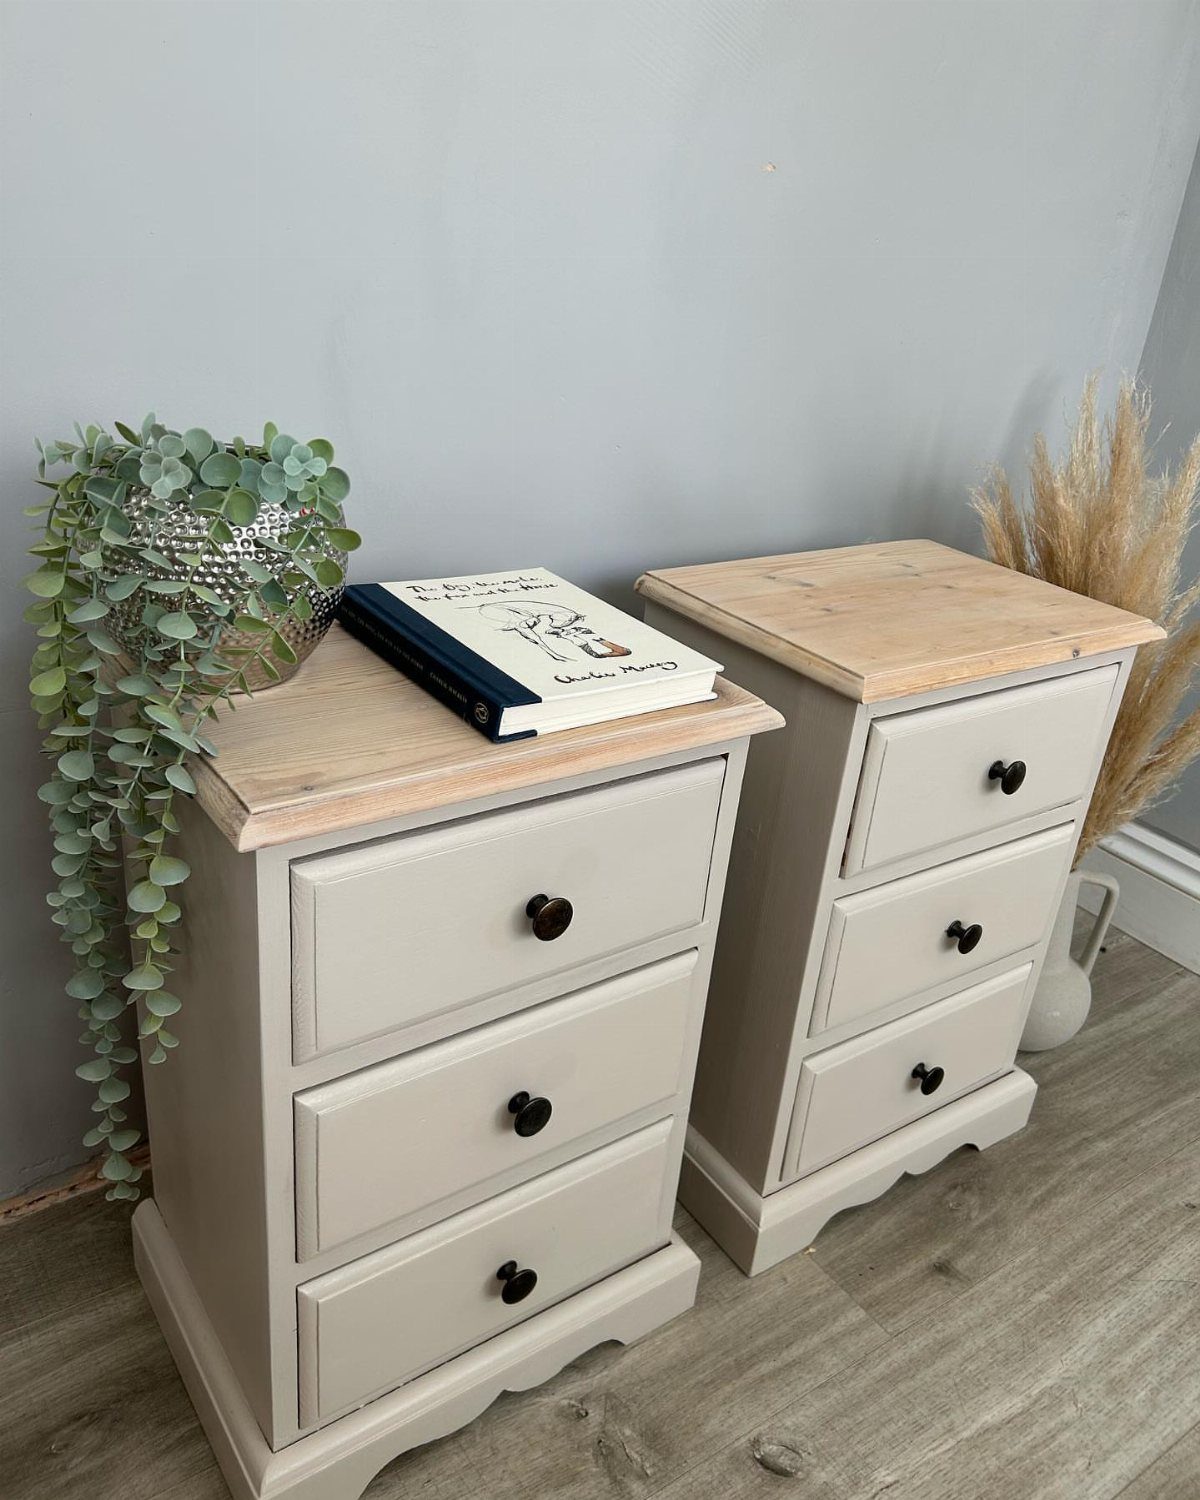
A simple two-tone nightstand with a drawer and open shelf below works in almost any bedroom. Paint the frame a soft grey or white, leave the top natural wood, and add black knobs for contrast.
Sand and prime the frame, then apply 2 coats of paint. Seal the wood top with polyurethane or wax so it resists water rings from cups or glasses.
The open shelf holds a few books or a small basket, and the drawer keeps smaller items out of sight.
7. Ballard-Inspired Nightstands
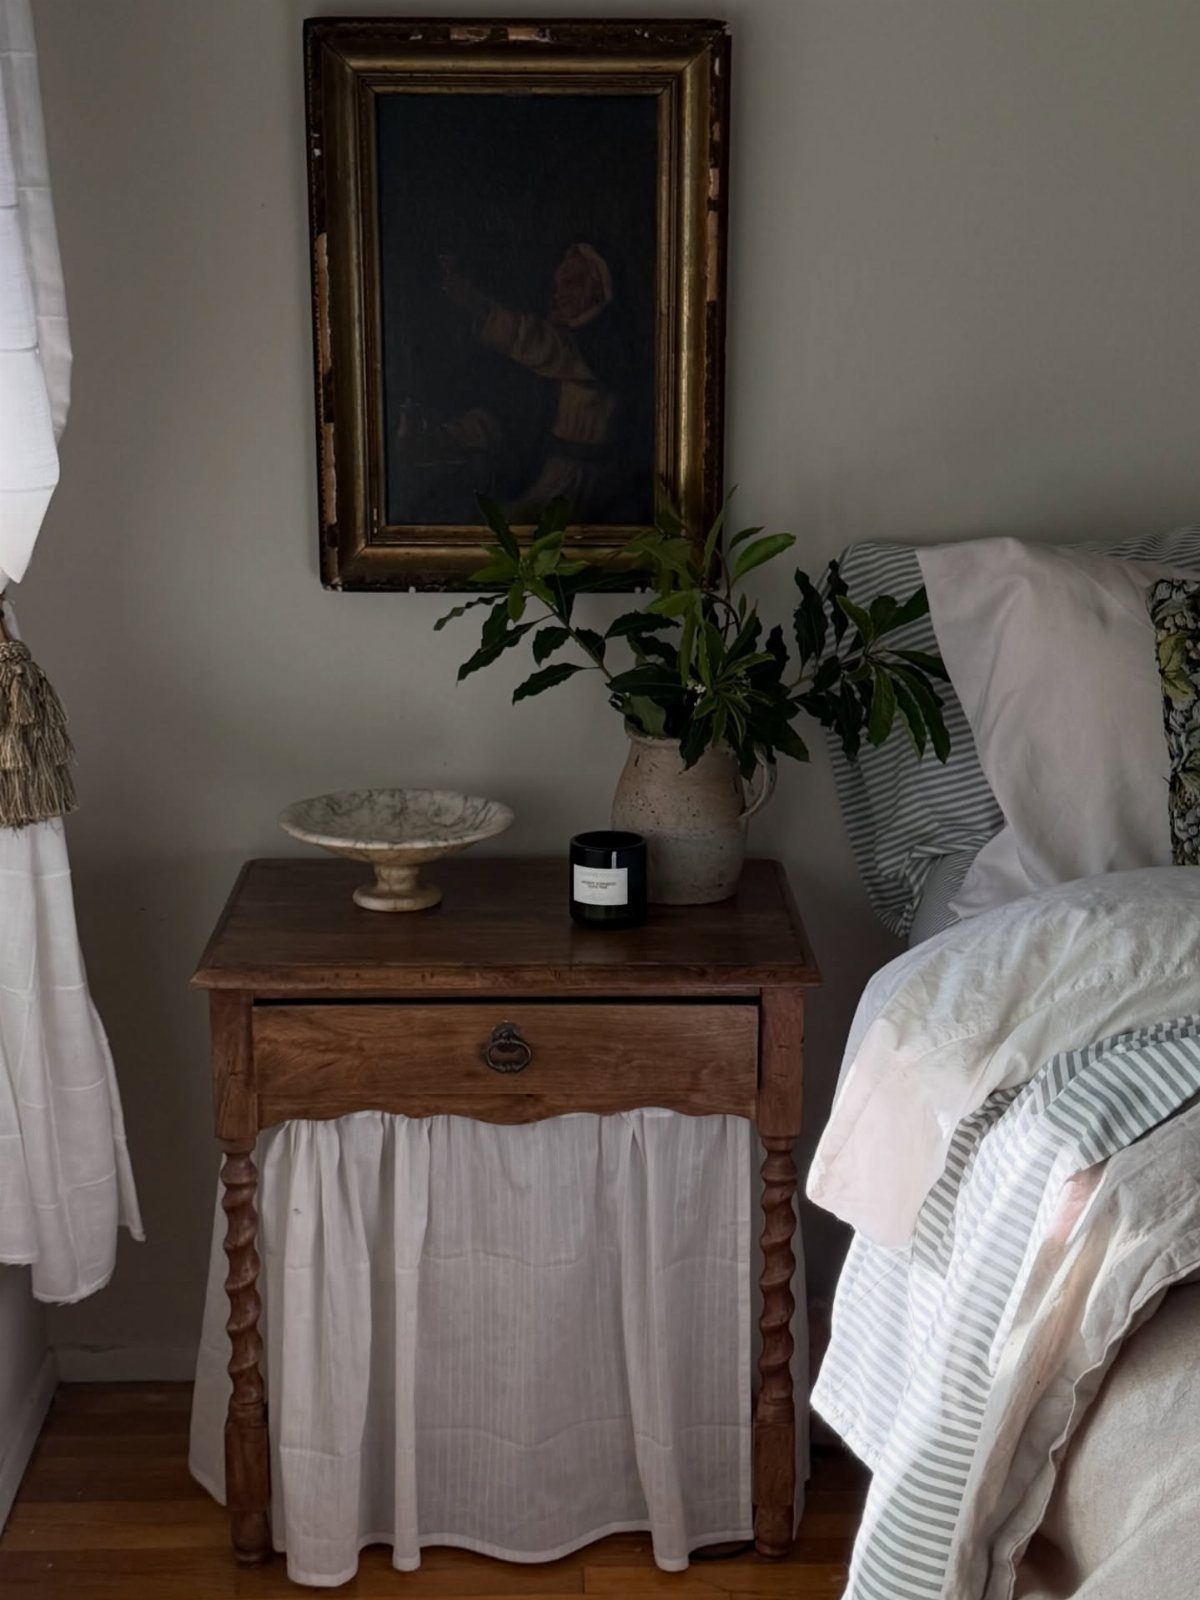
A wooden nightstand with a fabric skirt hides storage underneath while keeping the top surface clean for a lamp and a few decorative pieces.
The drawer keeps small things in reach, and the skirted base hides storage bins or anything else you’d rather not look at.
Attach the fabric to the underside of the tabletop with a staple gun or hook-and-loop tape if you want to swap it out later. Measure the perimeter and add a few inches for gathering or pleats.
White linen or cotton gives a soft, collected look that works in traditional or cottage-style bedrooms.
8. Fluted Two-Door Cabinet
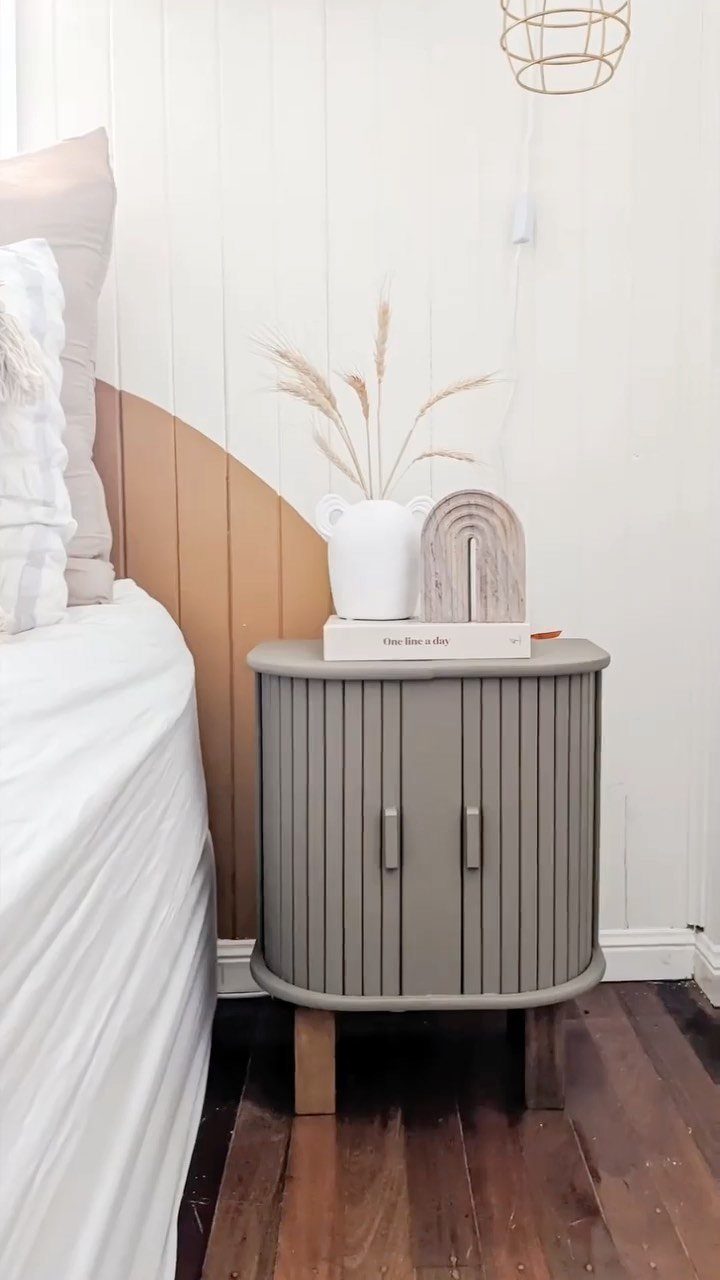
Vertical fluting on cabinet doors adds texture without pattern, and paired with tapered wood legs, it keeps the piece from feeling heavy.
The two-door cabinet offers more enclosed storage than a single-drawer nightstand, so it works well if you need to tuck away more than just a phone and a book.
Look for unfinished cabinets with flush doors if you’re adding your own fluted panels.
Cut fluted molding to fit the door face, then paint the whole piece one color so the doors read as part of the design, not an add-on.
9. Repurposed Metal Locker
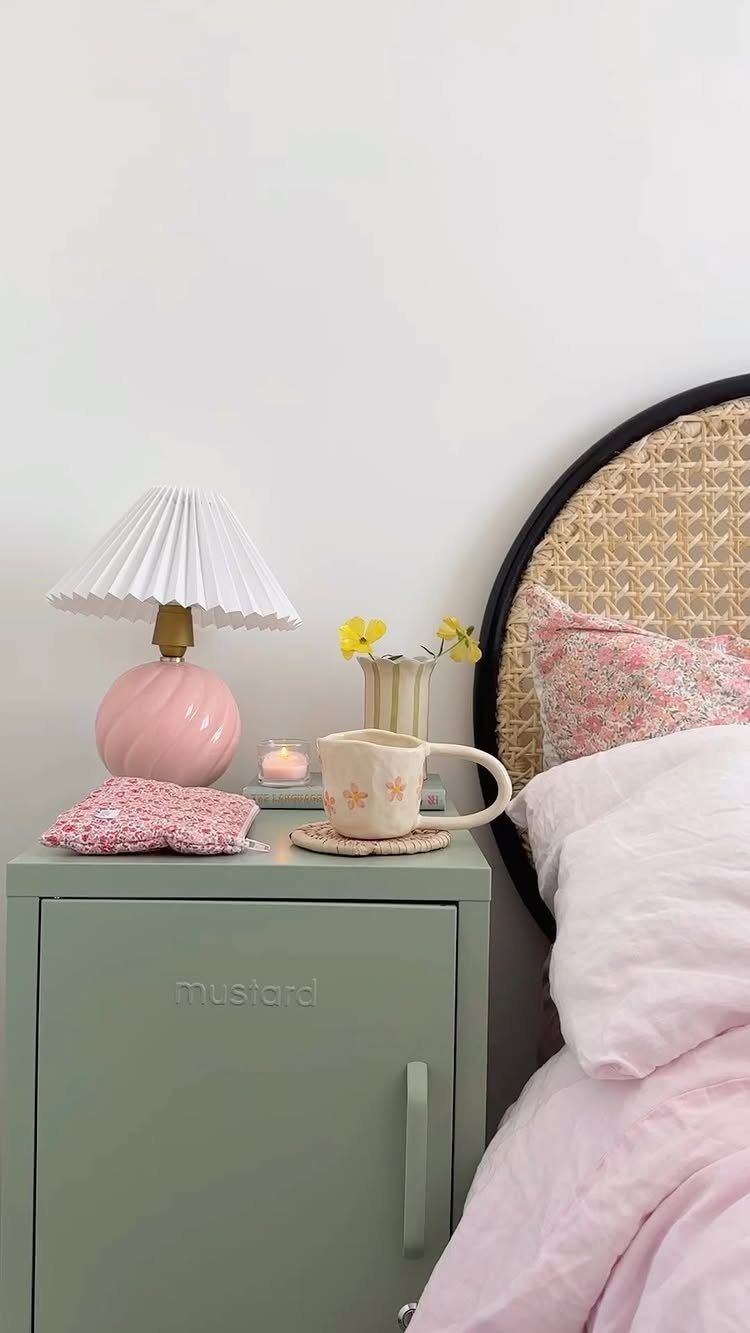
A metal locker painted in a soft color gives you enclosed storage with a latch and fits narrow spaces where a full nightstand won’t. The locker door swings open, so everything inside stays out of sight.
Mini lockers sold for mudrooms or kids’ rooms work as bedside tables if you have the width for one. Sand off any rust, prime with a metal primer, then paint in 2 coats.
The lamp and flowers soften the industrial look, and the color you pick does more to set the mood than the locker style itself.
10. C-Shaped Wooden Table
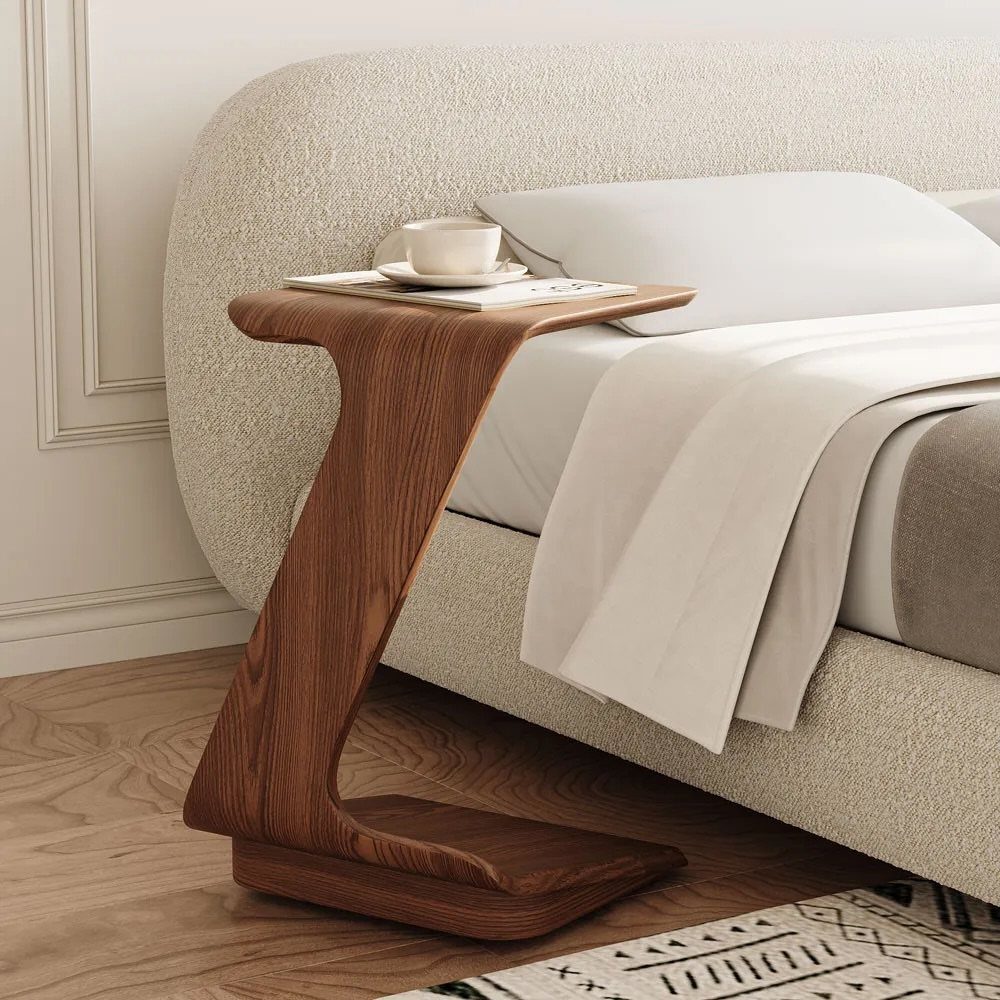
The C-shape slides under the mattress edge so the tabletop sits right next to you without taking up floor space in front of the bed.
The curved profile is cut from a single piece of plywood, bent laminate, or solid wood.
If you’re building one, cut the curve with a jigsaw and sand the edges smooth. A slot or tray routed into the top keeps a cup or phone from sliding off.
This works best in small bedrooms where a standard nightstand would block a walkway.
11. Scalloped Painted Nightstand
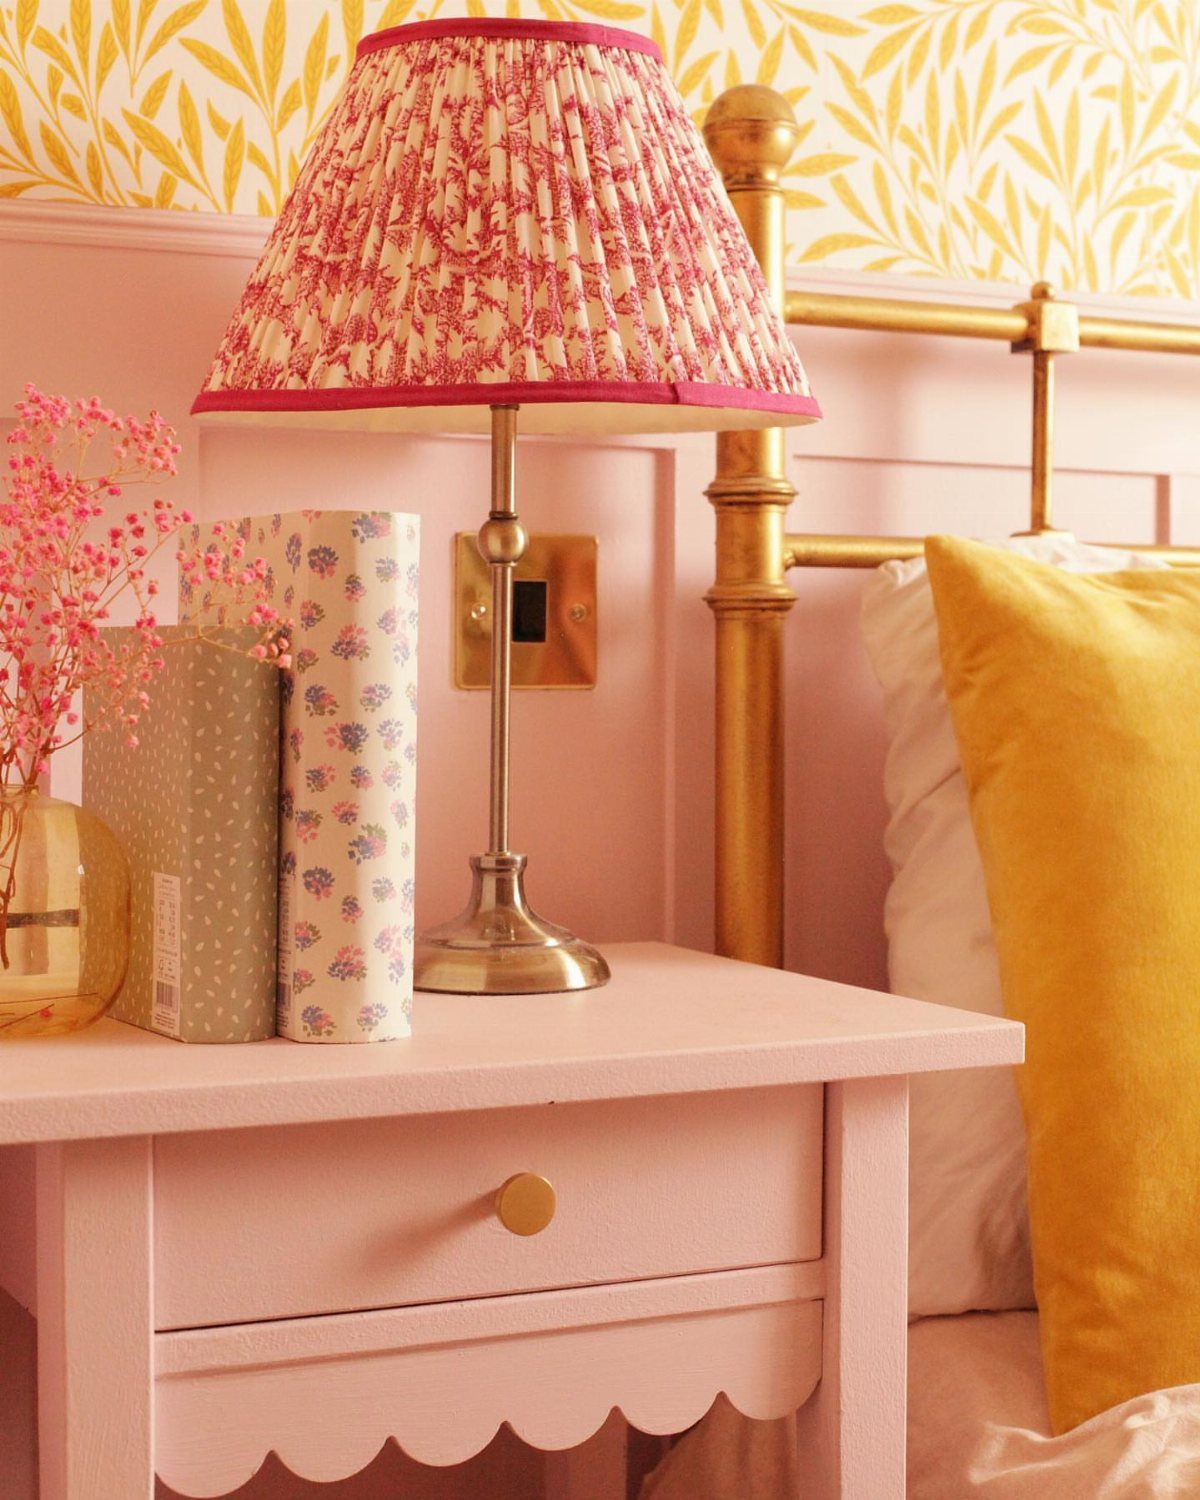
Scalloped trim along the bottom edge gives a plain nightstand a finished, furniture-like detail. Cut the scallops with a jigsaw from a separate apron board, then attach it flush with the base before painting.
Sand the edges smooth after cutting so the curves feel intentional, not rough. One coat of color over the whole piece makes the scallops look structural instead of stuck on.
The soft pink finish and the single gold knob keep it light without leaning too sweet.
12. Bold Yellow Accent Table
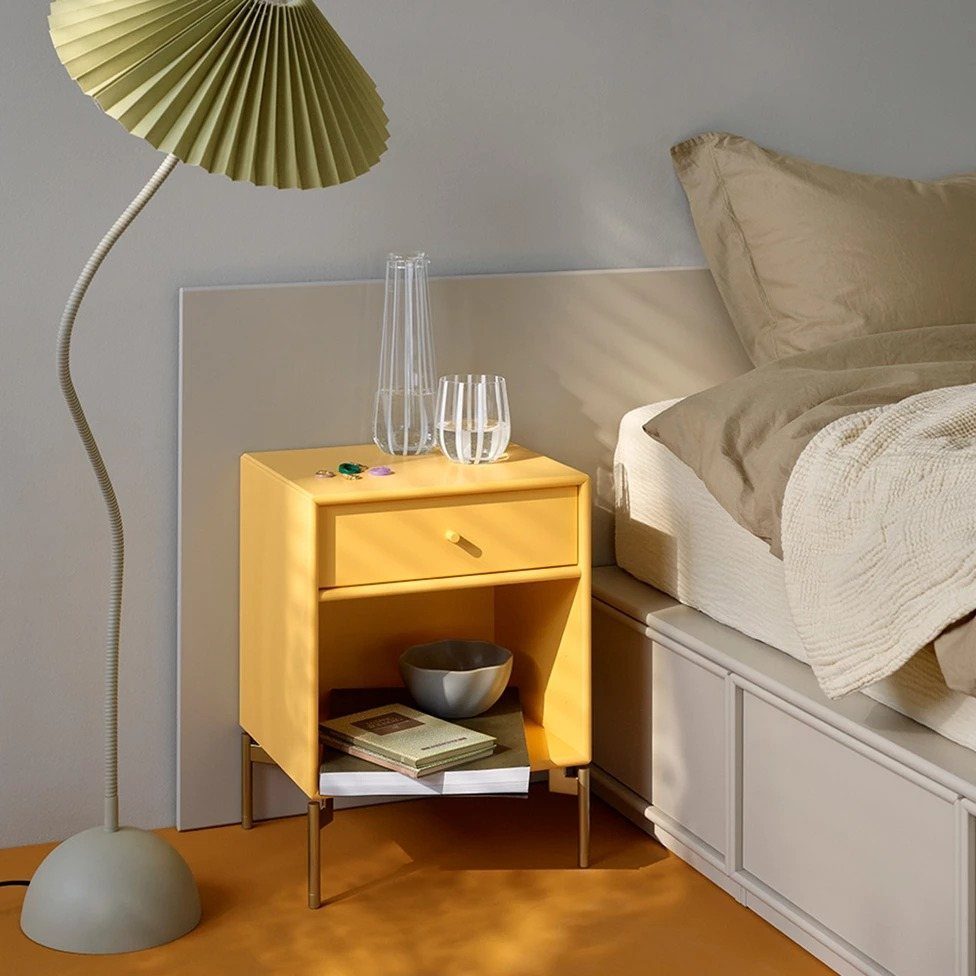
A bright yellow nightstand stands out in a neutral bedroom and doesn’t require any complicated build. The single drawer and open shelf below give you both hidden and visible storage in a simple frame.
A warmer yellow with a bit of ochre in it ages better than a pure lemon tone.
The color does most of the work here, so the design itself stays straightforward.
13. Marble Top Side Table
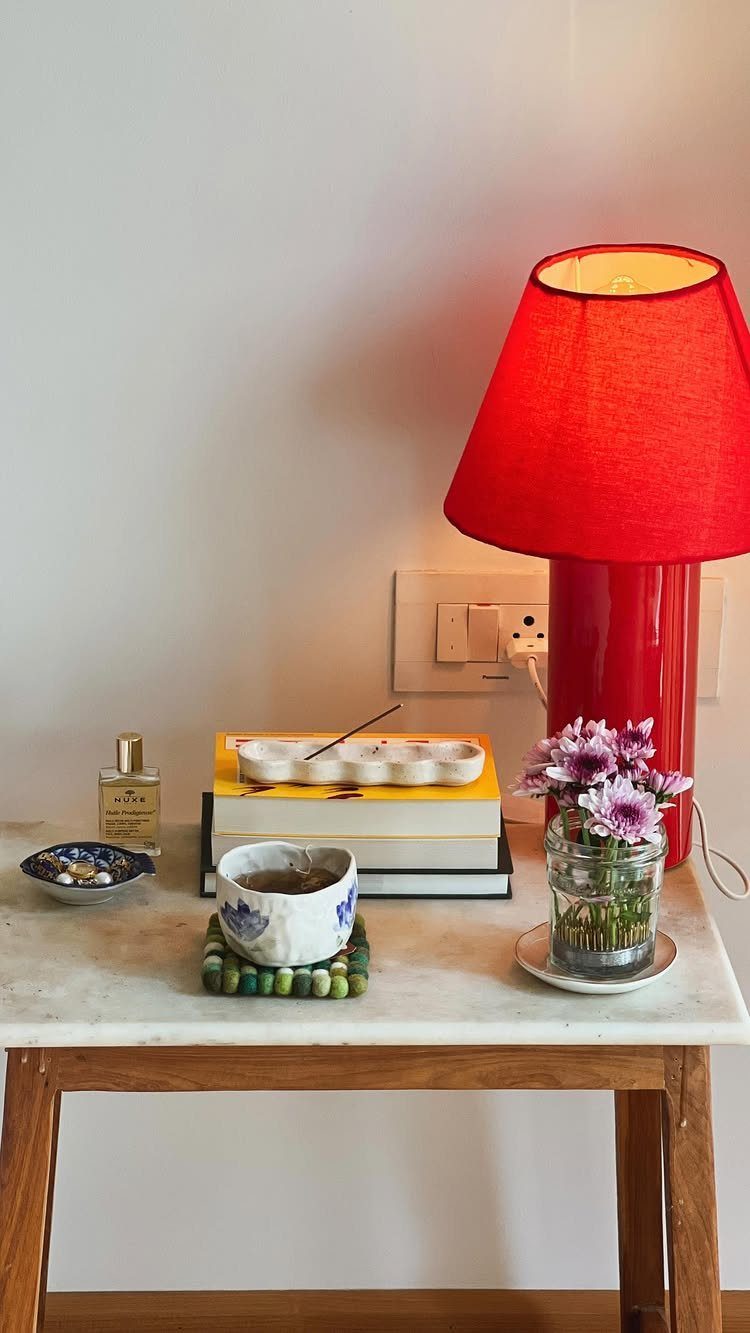
A marble top on a simple wood frame adds weight and polish to a basic nightstand without changing the structure underneath. The stone surface resists water rings better than wood, and the veining gives you pattern without adding color.
Buy a remnant slab cut to size, or use marble tile with finished edges. Attach it to the wood base with construction adhesive and let it cure overnight before putting anything heavy on top.
The contrast between the warm wood and the cool white stone keeps the piece from reading too casual.
14. Open Cubby Shelf Table
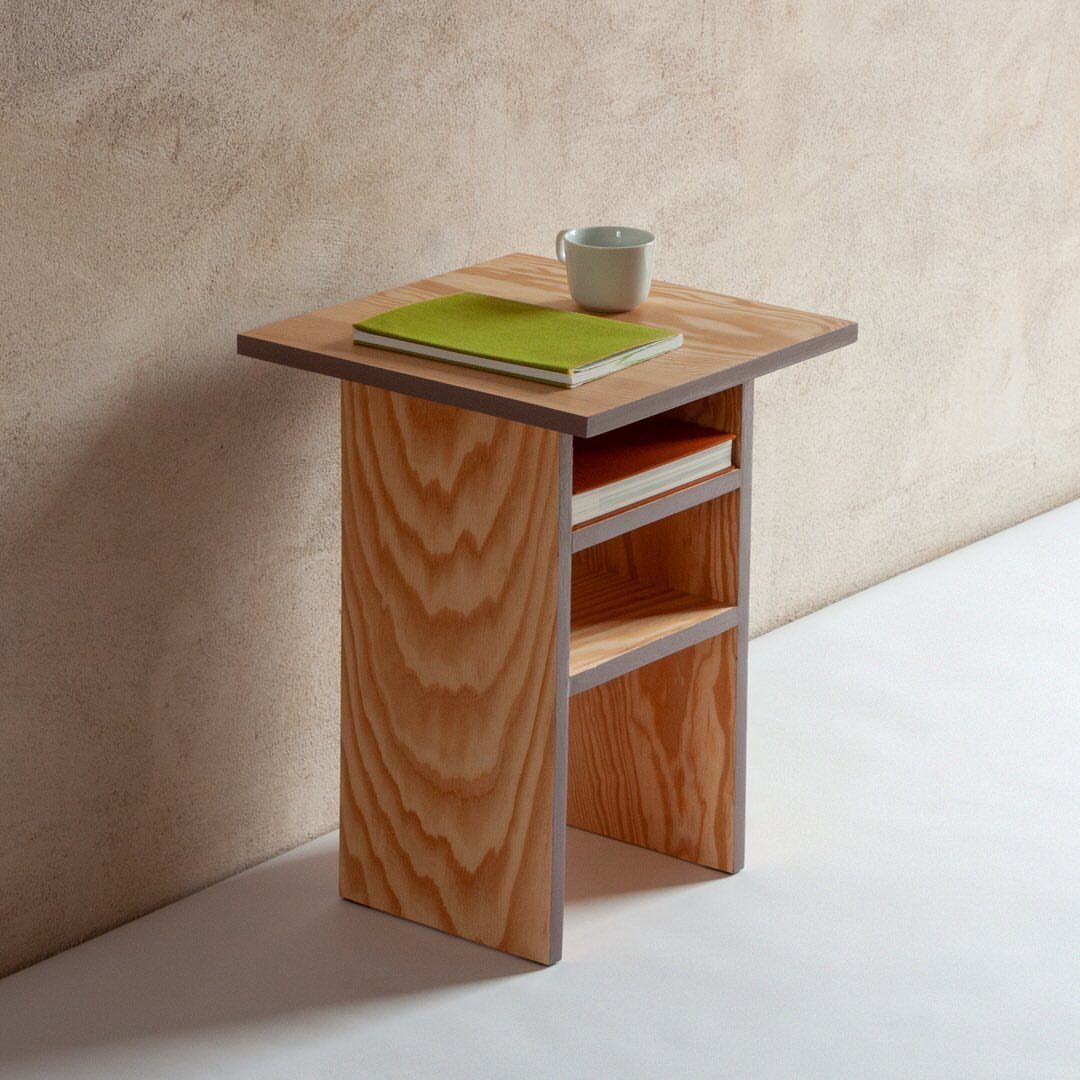
One open cubby cut into a solid block keeps everything you reach for at night in one spot without drawers or doors.
The single shelf holds a book, a notebook, or a small basket, and the top surface stays clear for a lamp or a cup.
Cut the piece from plywood with a jigsaw or table saw, then sand the edges smooth. A light wood finish or clear oil brings out the grain without darkening it.
This works best if you keep only a few things on your nightstand and prefer the look of one clean rectangle.
15. Curved Wood Nightstand
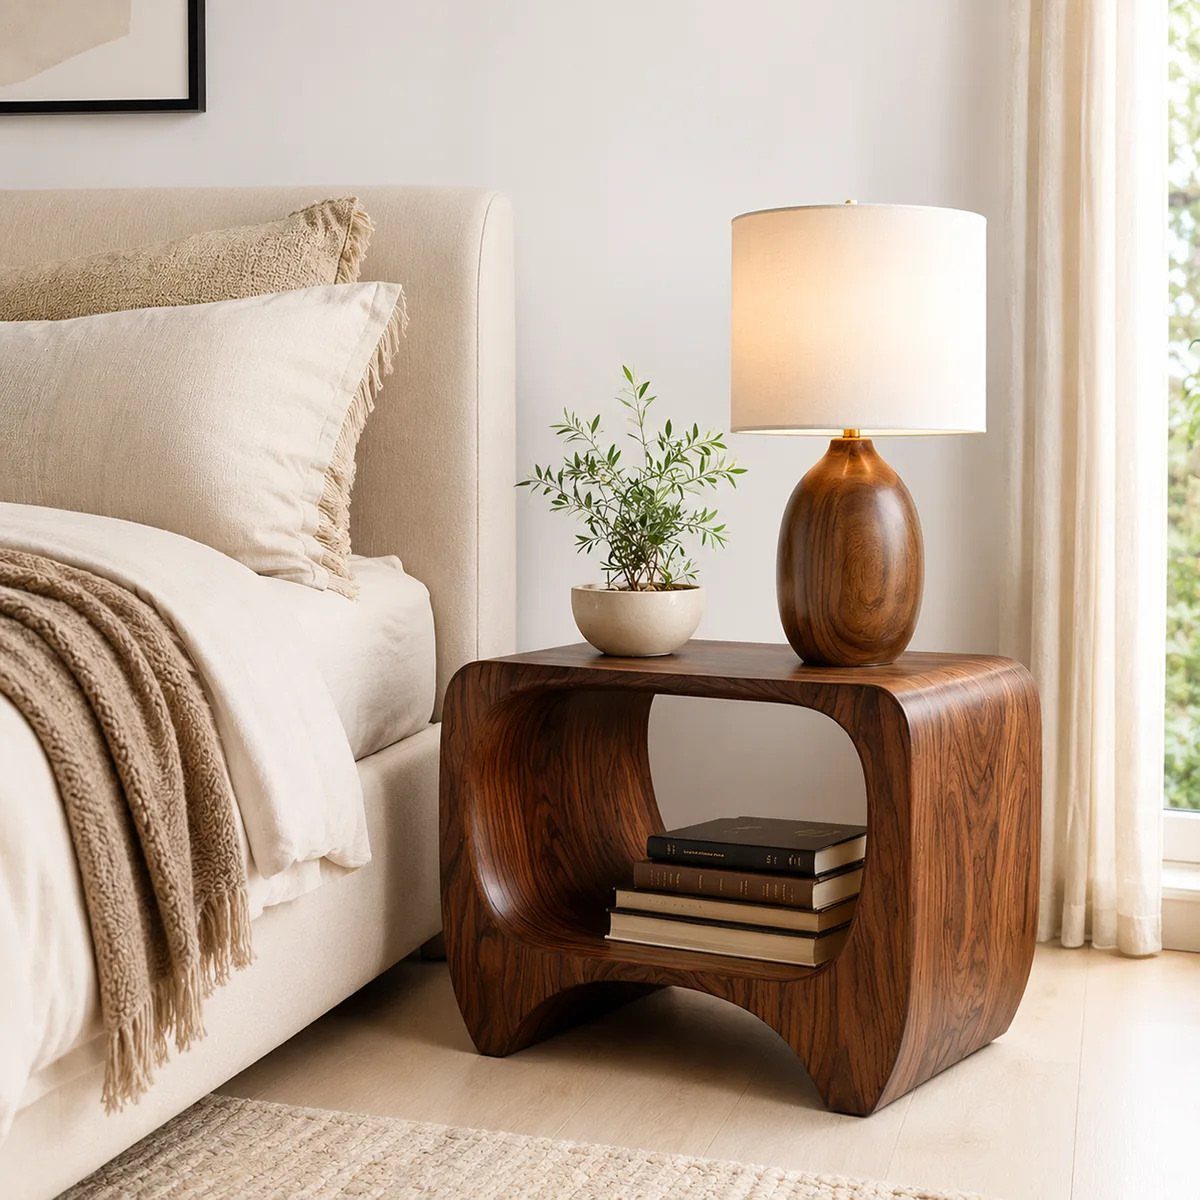
Curved edges soften the profile of a wood nightstand and make it easier to move around in a tight bedroom.
The open cubby below holds a small stack of books or a plant, and the rounded front panel keeps the piece from looking boxy.
Steam-bend thin wood strips or laminate layers around a form to get the curve, then glue and clamp until dry.
The dark stain gives it a heavier, more traditional feel than lighter finishes.
16. Carved Accent Nightstand
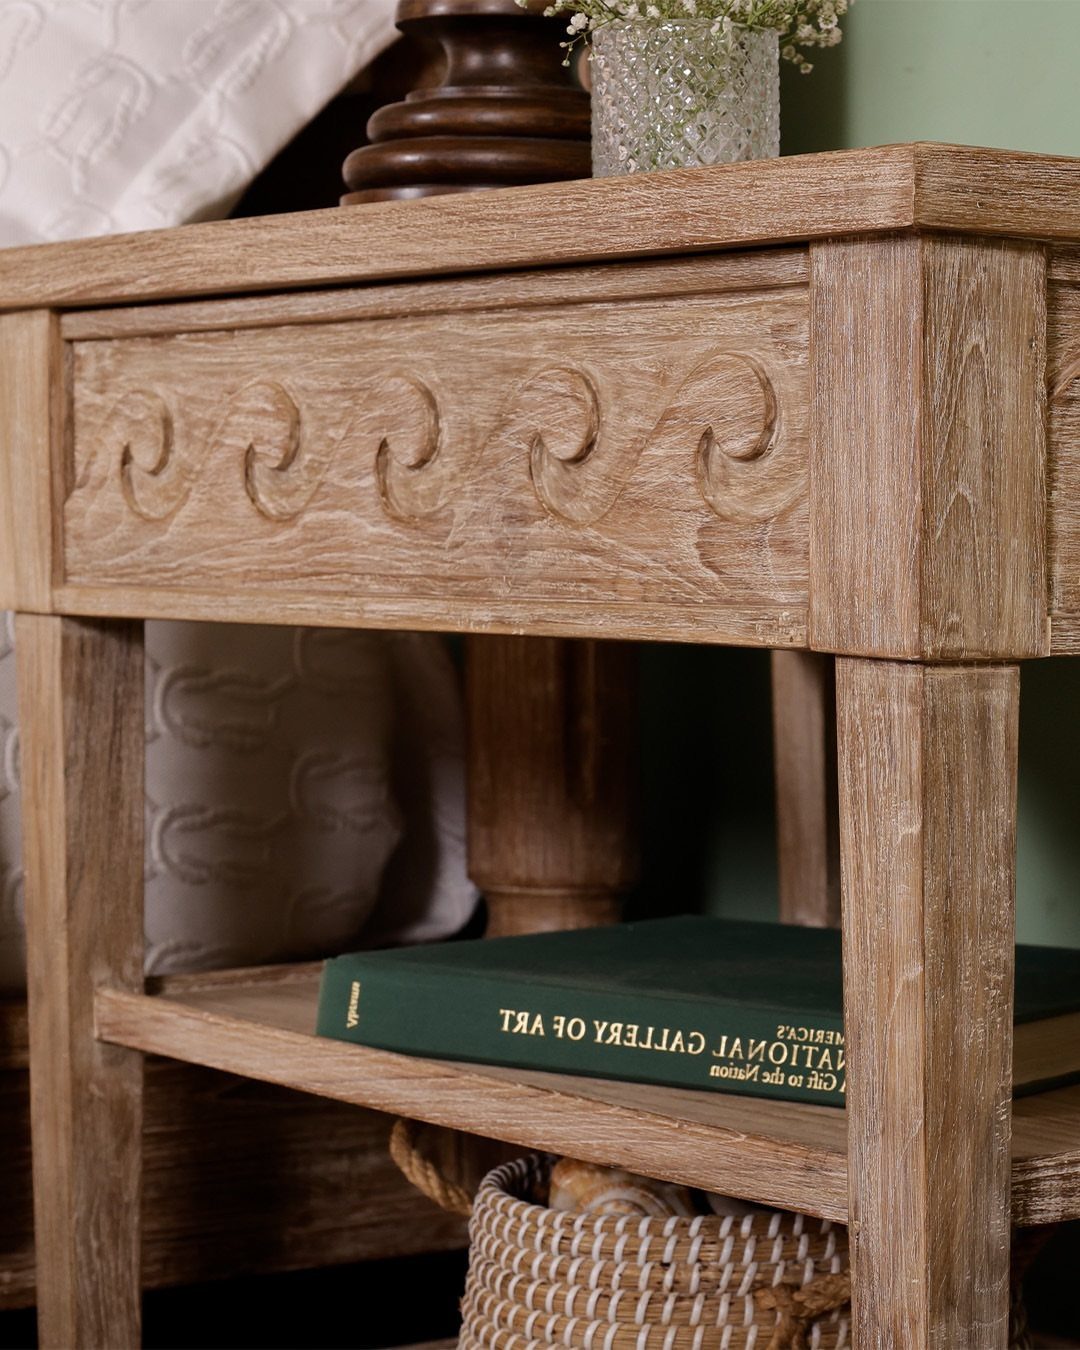
Carved detail on the front panel adds texture to a plain nightstand without changing its footprint. The panel sits above an open lower shelf that holds baskets or books, and the carving catches light in a way flat surfaces don’t.
Look for pre-carved wood panels sold for cabinet doors or wall trim, then cut to fit and attach with wood glue and finishing nails. Sand the edges flush with the frame before staining or sealing.
A light wood tone keeps the carving visible without making it the loudest thing in the room.
17. Turned Leg Bedside Tables
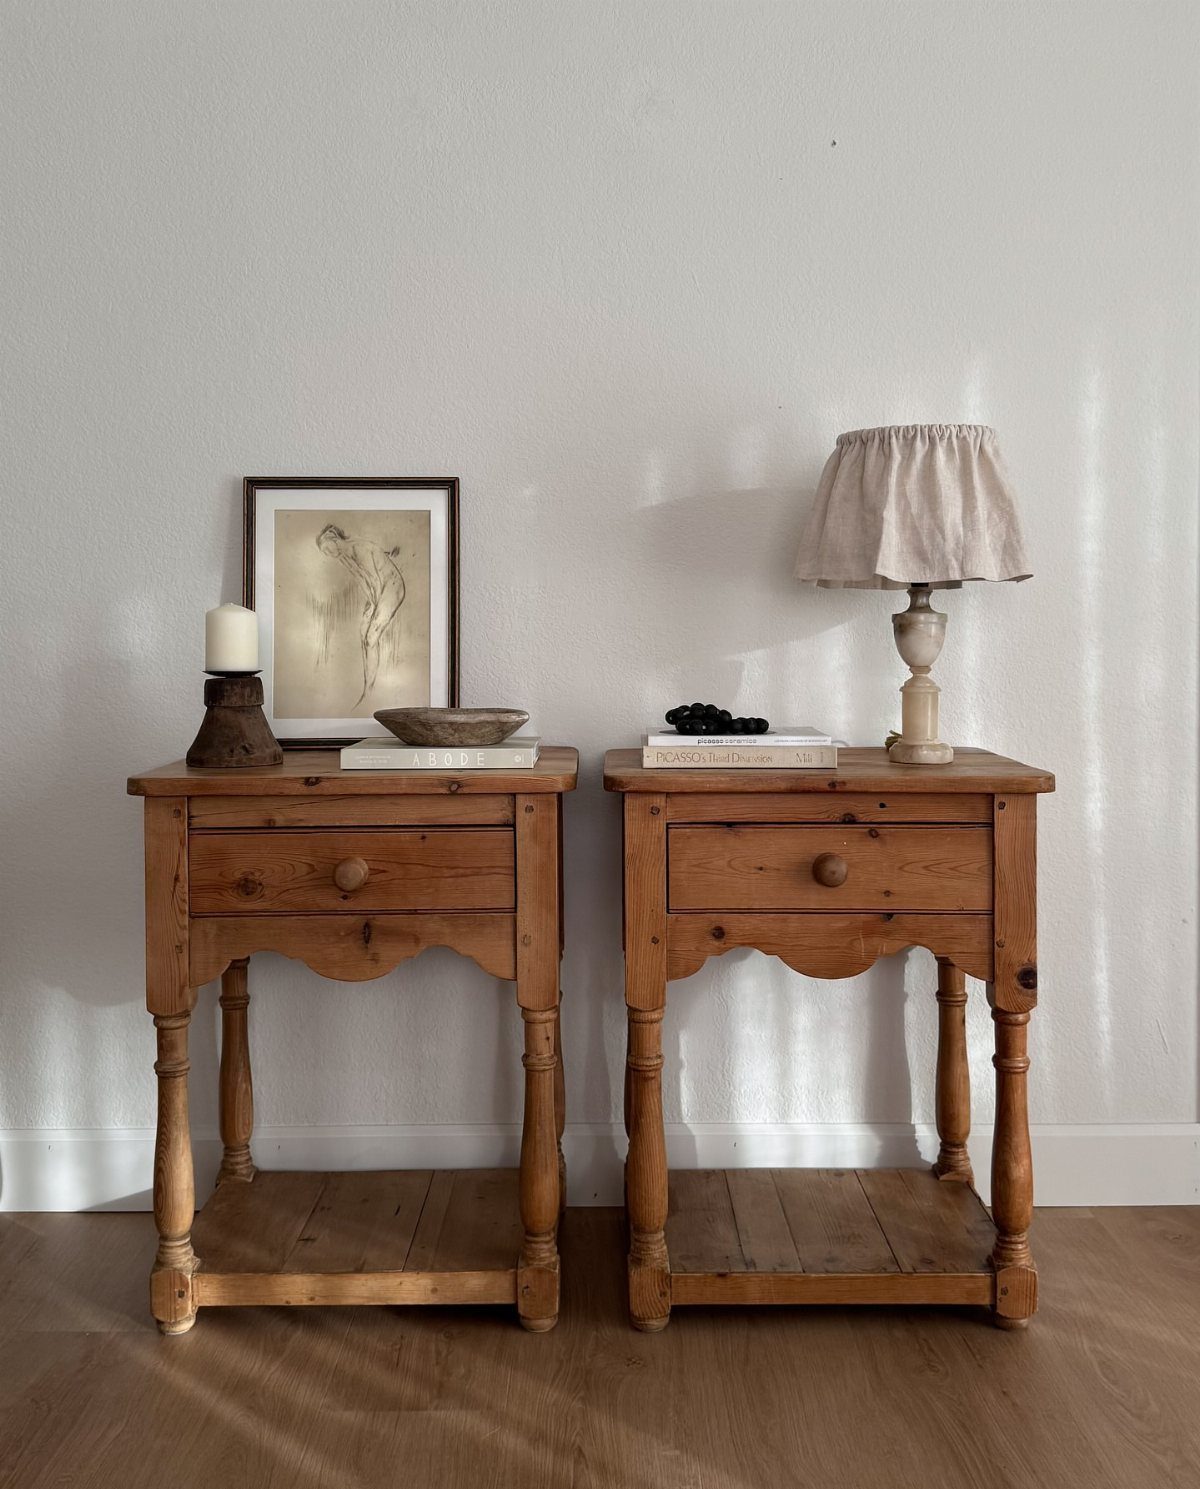
Turned legs give a pair of nightstands a more finished look than straight legs, and the single drawer in each keeps small items out of sight. The tapered profile makes the piece feel lighter than a solid box.
Buy unfinished nightstands with turned legs, or add pre-turned legs to a simple drawer box.
Matching nightstands work best when the room has space on both sides of the bed and you want symmetry.
Choosing Wood and Joinery
Pine plywood and construction lumber (pine, spruce, or fir) are the budget-friendly path for most of these builds.
Red oak and oak plywood are a step up in durability and look, but they cost more and work the joint differently: pocket-hole screws into hardwood like oak need fine-thread screws, while softwood and plywood call for coarse-thread.
Get that backwards and the joint won’t pull tight.
Dowels with glue are a clean alternative to pocket screws for frame joints if you want to skip the jig.
On lumber grade: even within the same species, boards vary.
A knot marks where a branch once grew from the trunk, and wood there is structurally weaker than the surrounding grain, so a knot in a table leg can compromise stability.
Spending a little more to pick straighter, cleaner boards is worth it on structural pieces.
Tools and Safe Cutting
The core tool list for most of these builds is a drill, a pocket-hole jig, a chop saw, and a table saw. A jigsaw or scroll saw comes in for curved cuts, and a tapering jig handles angled legs.
Ripping 2x4s lengthwise on a table saw is where extra attention matters: blade height and kickback are real risks on that cut.
If that feels like too much, 2×2 lumber gives you the same finished dimension without the rip cut. 2×2 boards are more likely to be twisted or bowed, so check each one before buying.
An orbital sander and a drawer-slide jig round out the kit but are optional depending on the design.
Measure and Fit the Build
Before cutting anything, review the full plan and list every cut you’ll need. Checking measurements on paper catches mistakes that cost nothing to fix; catching them in wood costs you the board.
Adjusting leg and support lengths changes the overall size, so use those dimensions as a starting point and fit them to your space.
Standard nightstand height generally tracks mattress height, and most plans put the finished piece somewhere in that 24–27 inch range.
Keeping assemblies square as you go matters most at this stage: a frame that’s even slightly out of square will show in the finished piece.






