
The single decision in this list is floor space and situation: a C-table slides under a sofa arm where no standard table fits, a dog crate version earns its footprint twice, and a floating slatted shelf skips furniture entirely.
Style range runs from a fluted cylinder to a resin river with fish figures and pebbles suspended mid-table, and from a hairpin-leg live-edge round to marquetry inlay with concentric ovals cut from contrasting veneers.
What narrows 26 options to one is the specific gap, surface, or storage problem in your room.
1. DIY Narrow End Tables
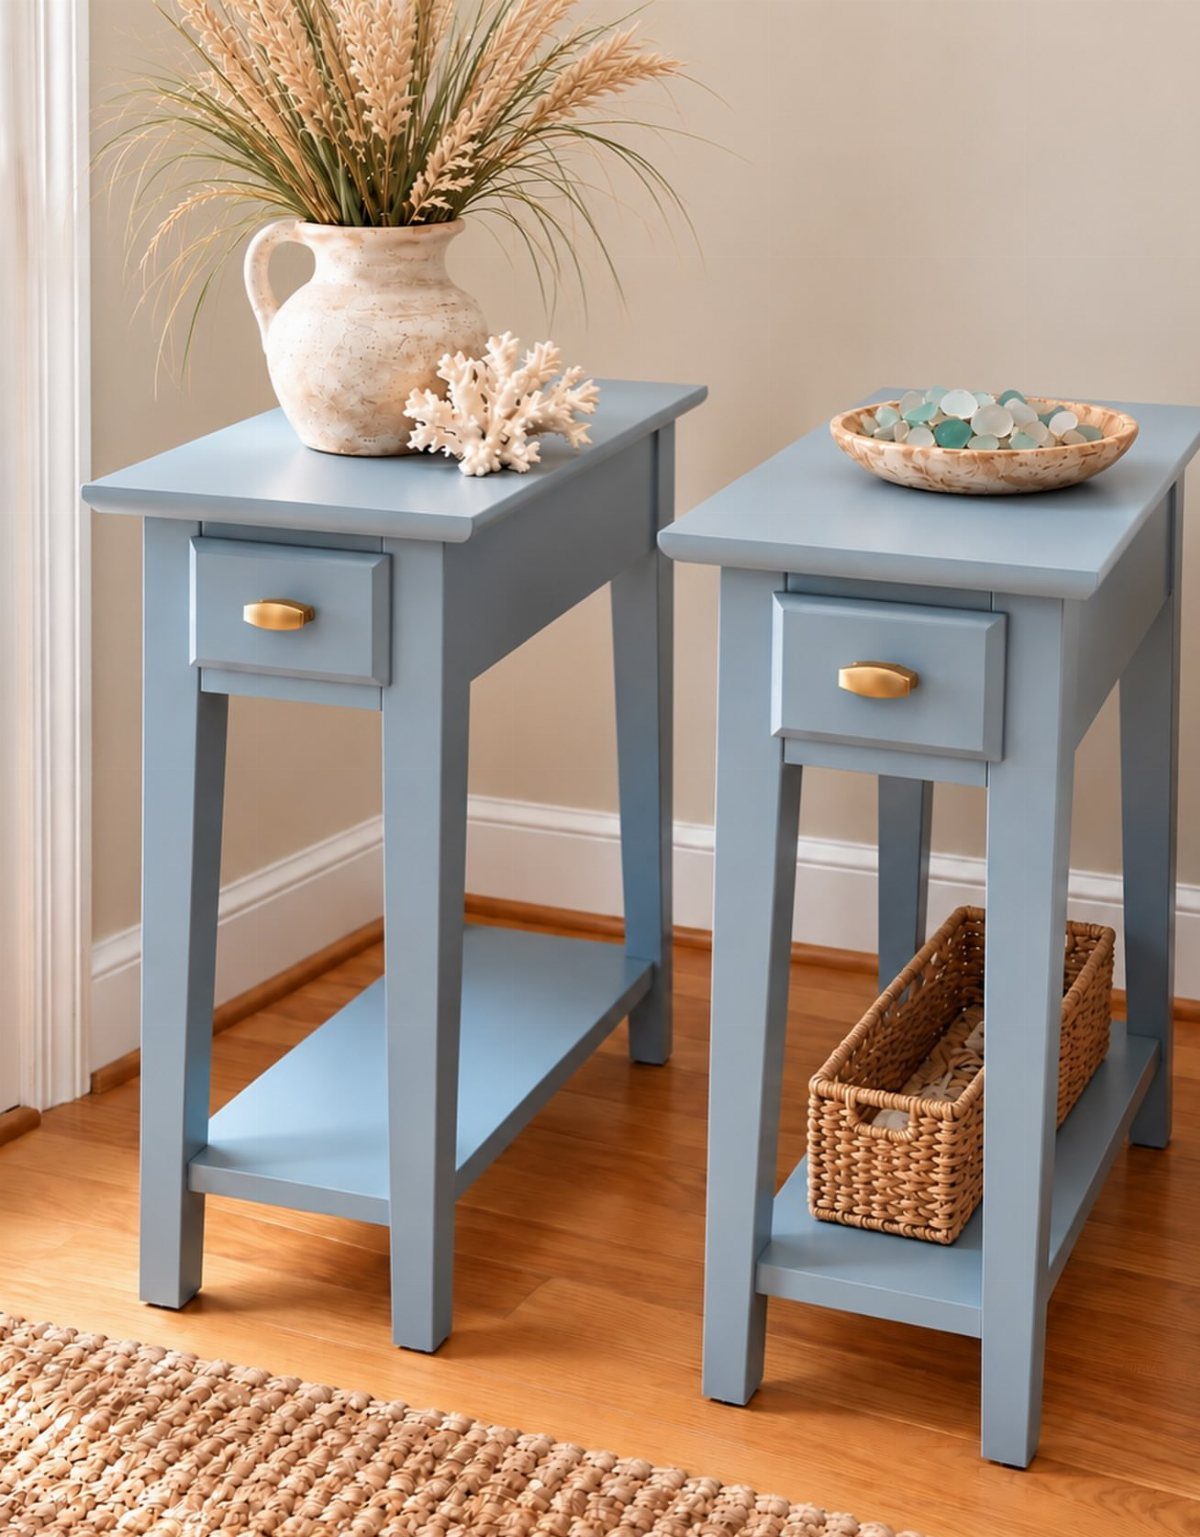
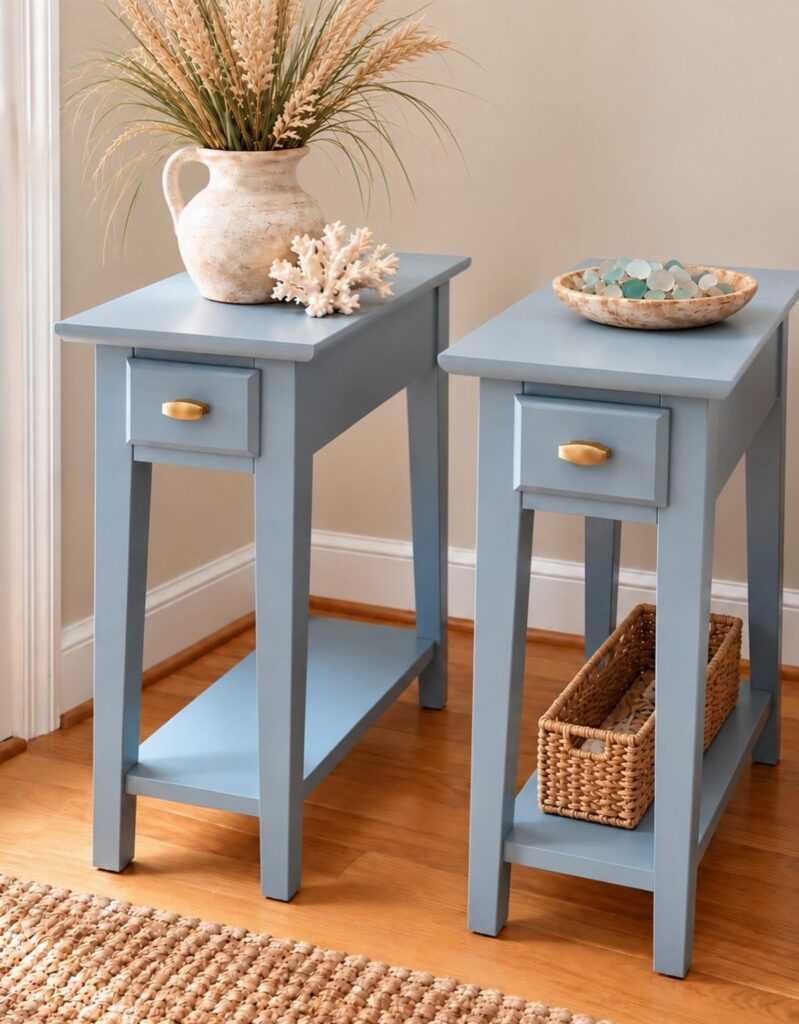
Slim builds like this solve a specific problem: the narrow gap beside a bed or the strip of floor next to a chair where a standard end table simply won’t fit.
The drawer is what makes this more than a shelf on legs. Small items disappear inside it, and the surface stays clear.
Light blue paint reads as cottage or coastal, but the silhouette is simple enough to repaint for almost any room. A satin or semi-gloss finish holds up better on painted furniture than flat does.
2. Modern Bedside Table with Arches
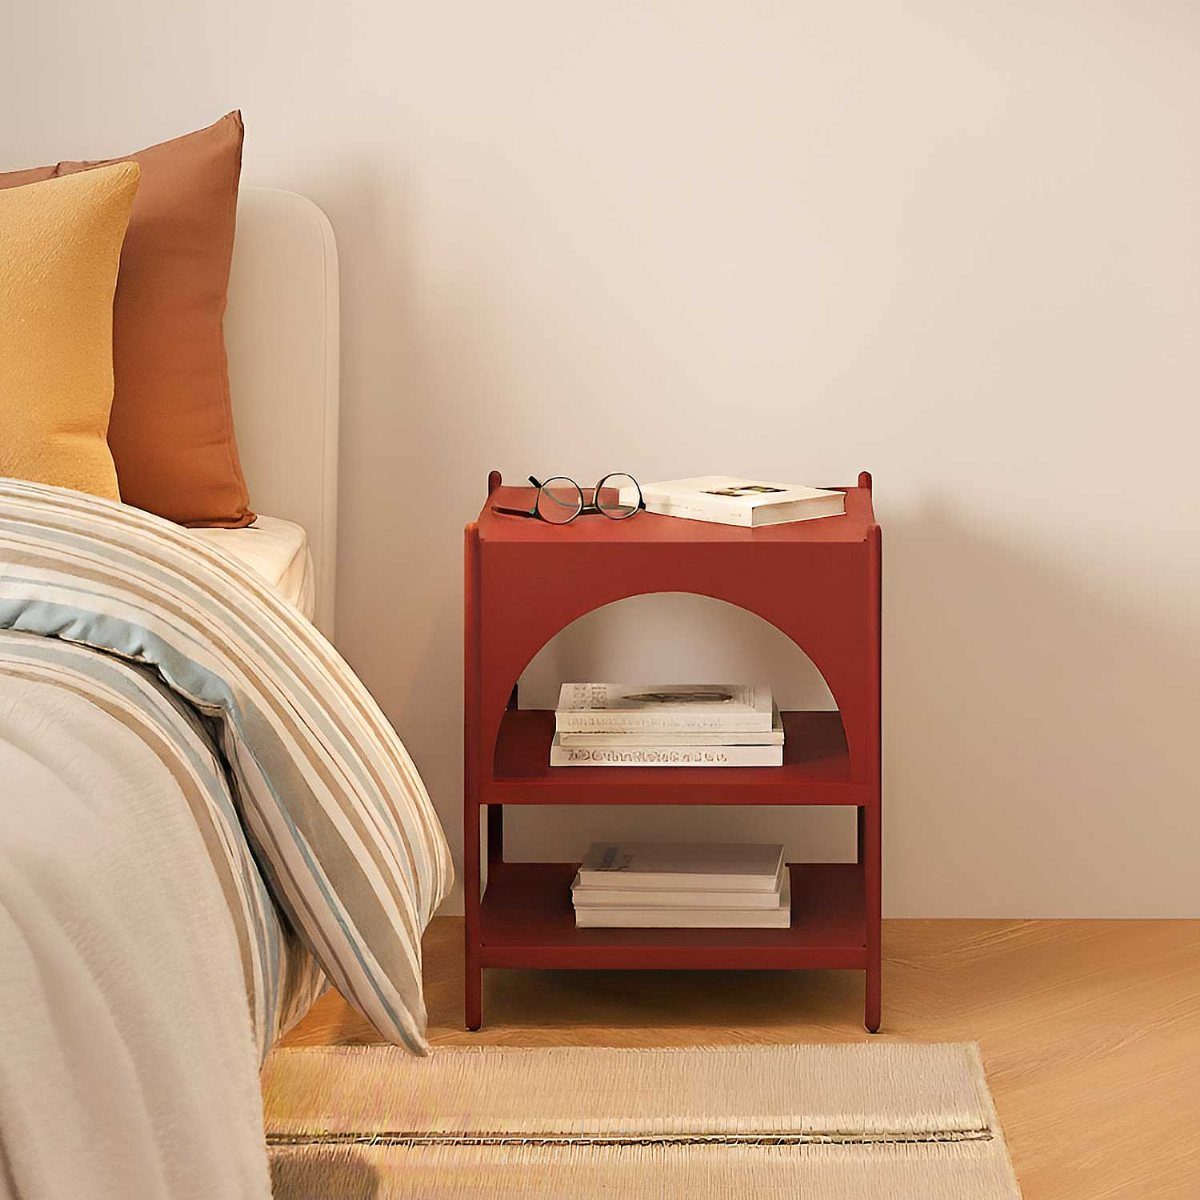
An arched opening on a nightstand is doing 2 things at once: it gives you enclosed shelf space and it brings a sculptural detail to a piece that would otherwise be just a box.
This one works in red because the arch keeps it from reading as heavy. Painted furniture in a saturated color tends to land better when the form has some visual relief, and an arch provides that.
Build-wise, the arch cutout is the only step that separates this from a basic carcass build.
A jigsaw with a template handles it cleanly. The shelf height inside can be set wherever books stack best for you.
3. DIY Round Side Table
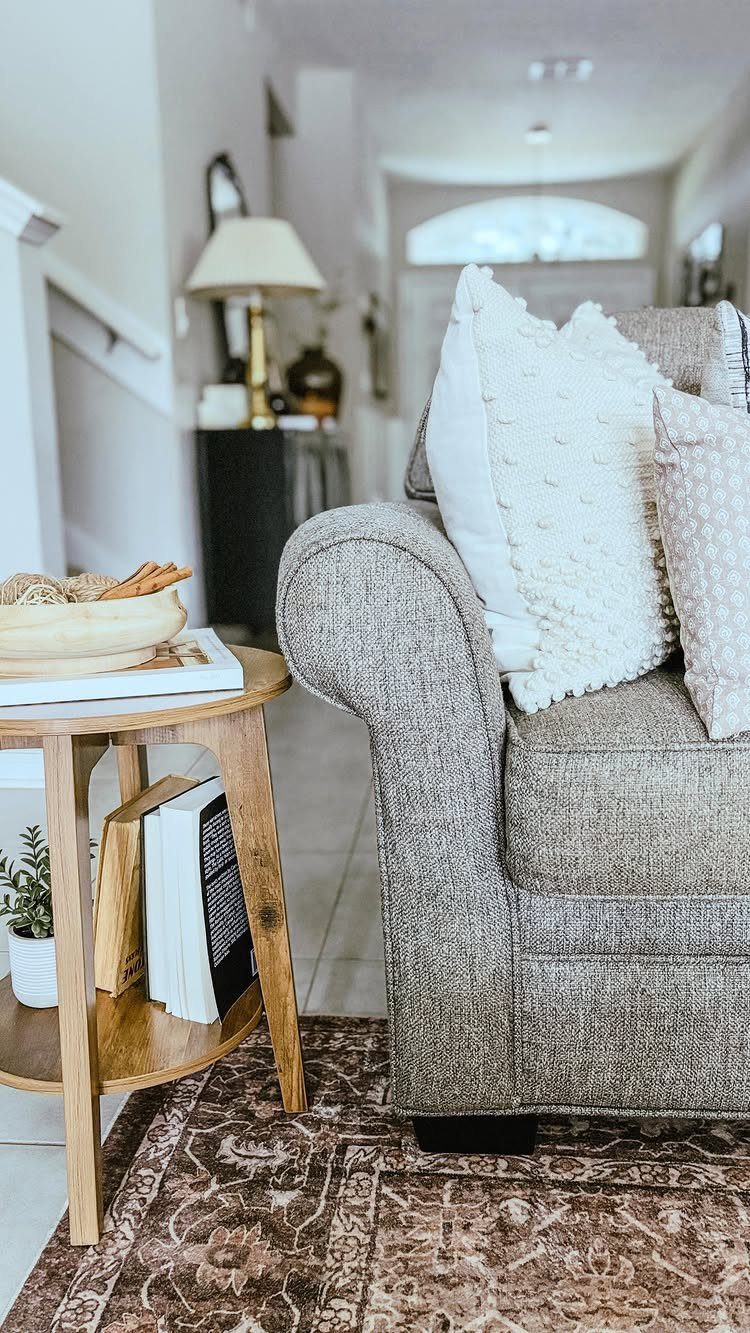
Round tables are genuinely harder to build than rectangular ones, which is part of why they tend to look more considered in a room.
For the tabletop, a router and a circle-cutting jig give you a clean edge in one pass. Getting the leg angles consistent is the part that takes patience, especially if you’re building this as a first project.
4. DIY C Table for Sofa
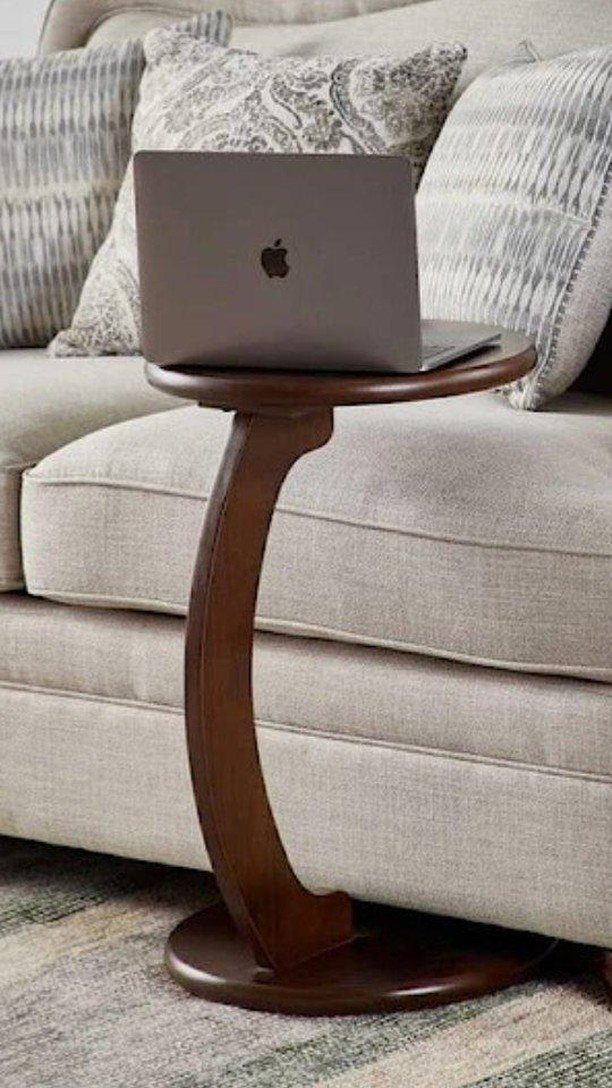
A C-table solves the problem that regular end tables never quite do: it slides under the arm of a couch so the surface ends up exactly where you want it, above your lap, without anything blocking your feet.
The base needs to clear the sofa frame, so measure before you cut. Most sofa arms sit well off the floor; the vertical post needs to clear that height with room to spare.
Hardwood or quality plywood both hold up fine for this. Softwood dents under a laptop or a full mug faster than you’d expect.
5. Live Edge Resin River Table
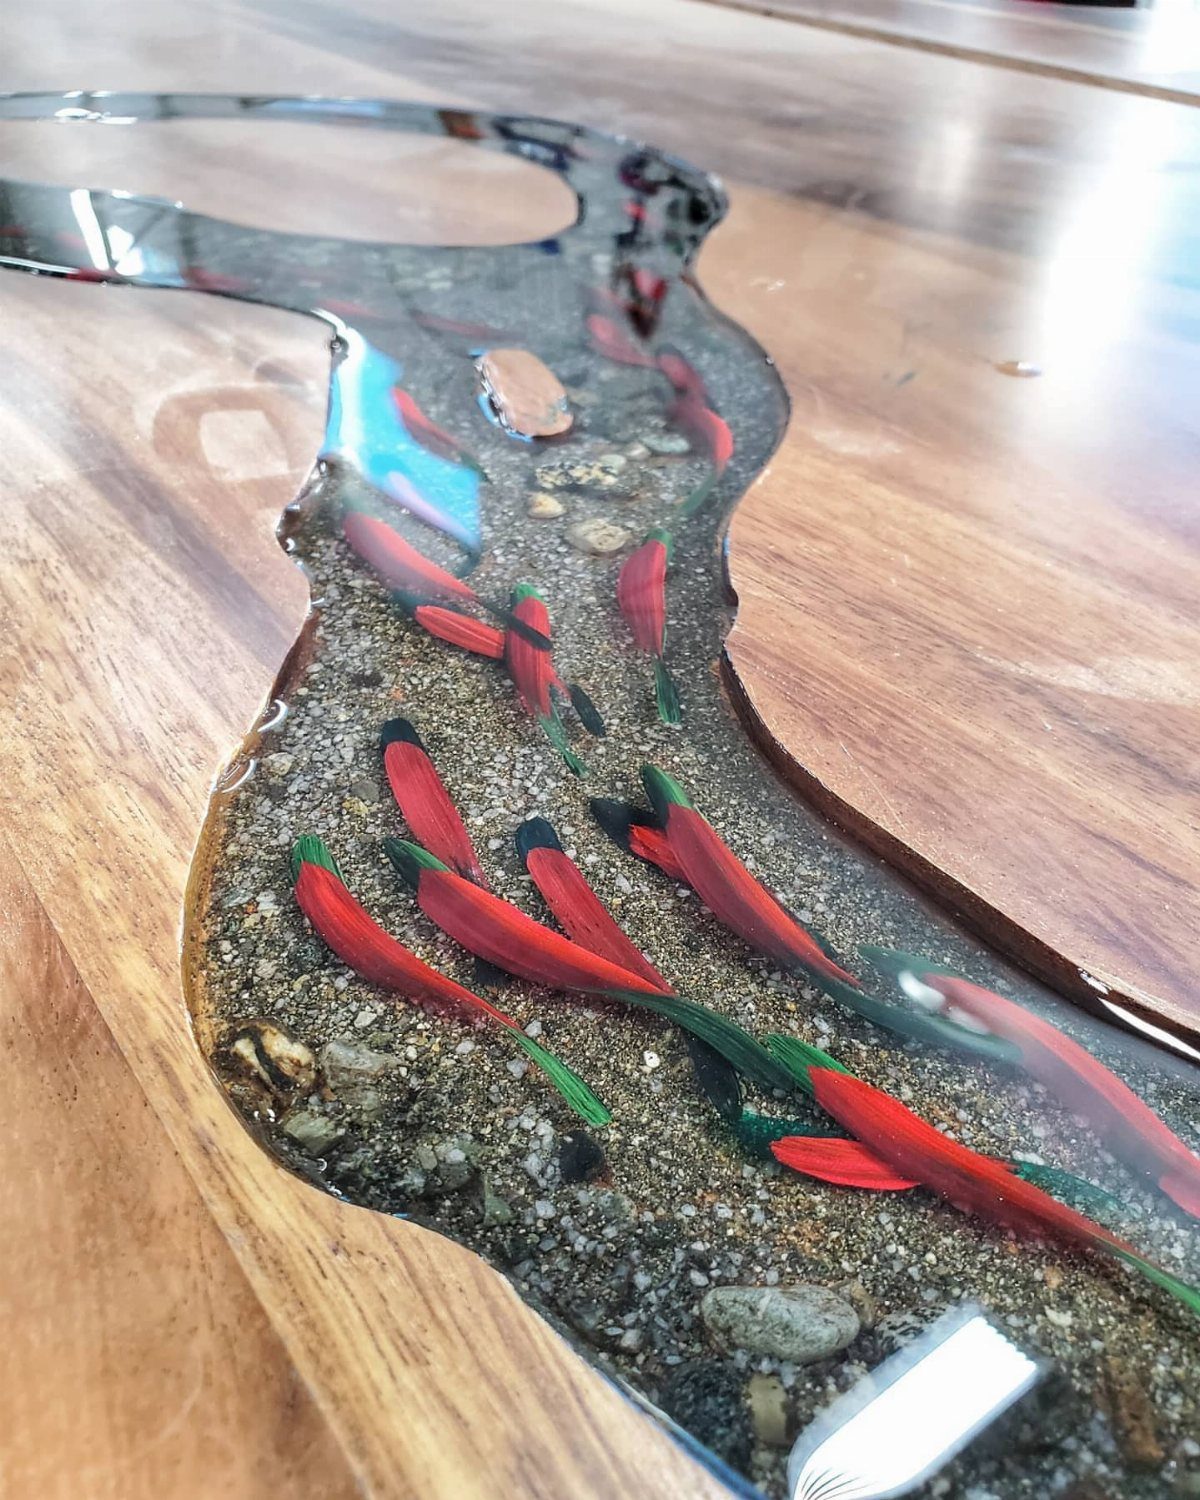
The resin river is the whole idea here: a channel cut or formed between two live edge slabs, filled with clear epoxy, and left to cure flat.
Pigment, objects, or both go into the pour before it sets. The fish figures and pebbles in this one are suspended mid-table, visible from above at any angle.
Epoxy pours for a piece this size typically run 2–3 sessions to avoid heat buildup from a thick single pour.
The curing and sanding stages take longer than the woodworking does. This is not a beginner weekend project, but the result is genuinely one-of-a-kind.
6. Dog Crate End Table
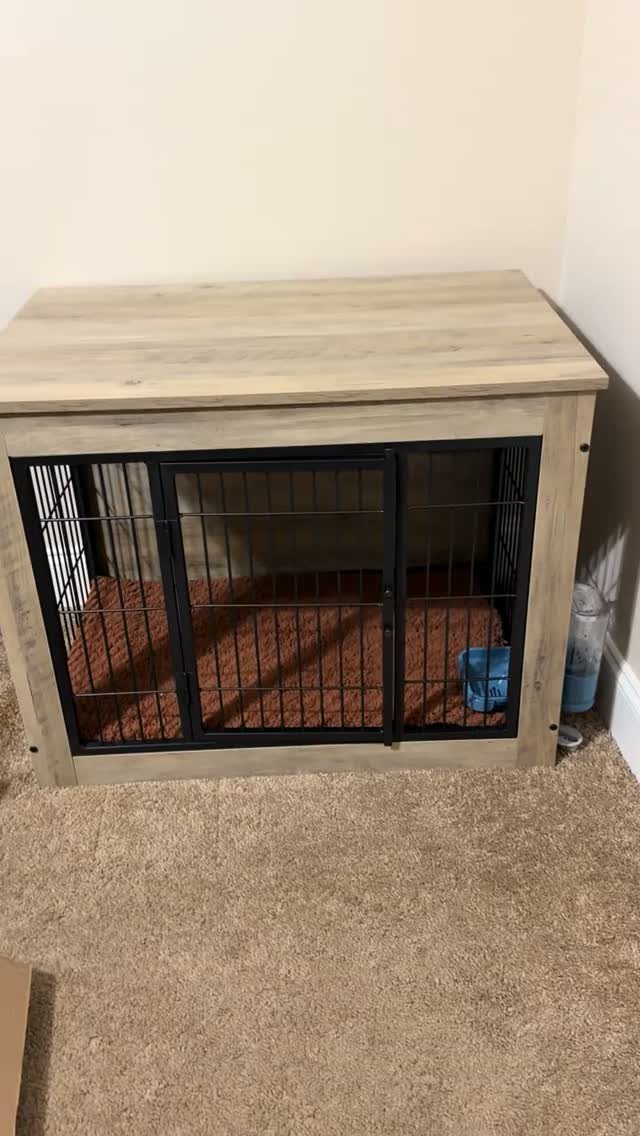
If you have a dog that crates at night, this is the only end table on this list that actually earns its floor space twice.
The crate opening faces out from the table base, so the dog has a defined space and you have a functional surface and a piece of furniture that doesn’t read as a wire cage in the middle of the room.
Sizing is the part to get right before you build anything.
Measure your dog’s crate first, then design the table around those dimensions rather than the other way around. The black metal panel framing in this version keeps it from looking makeshift.
7. Mid Century Walnut Table
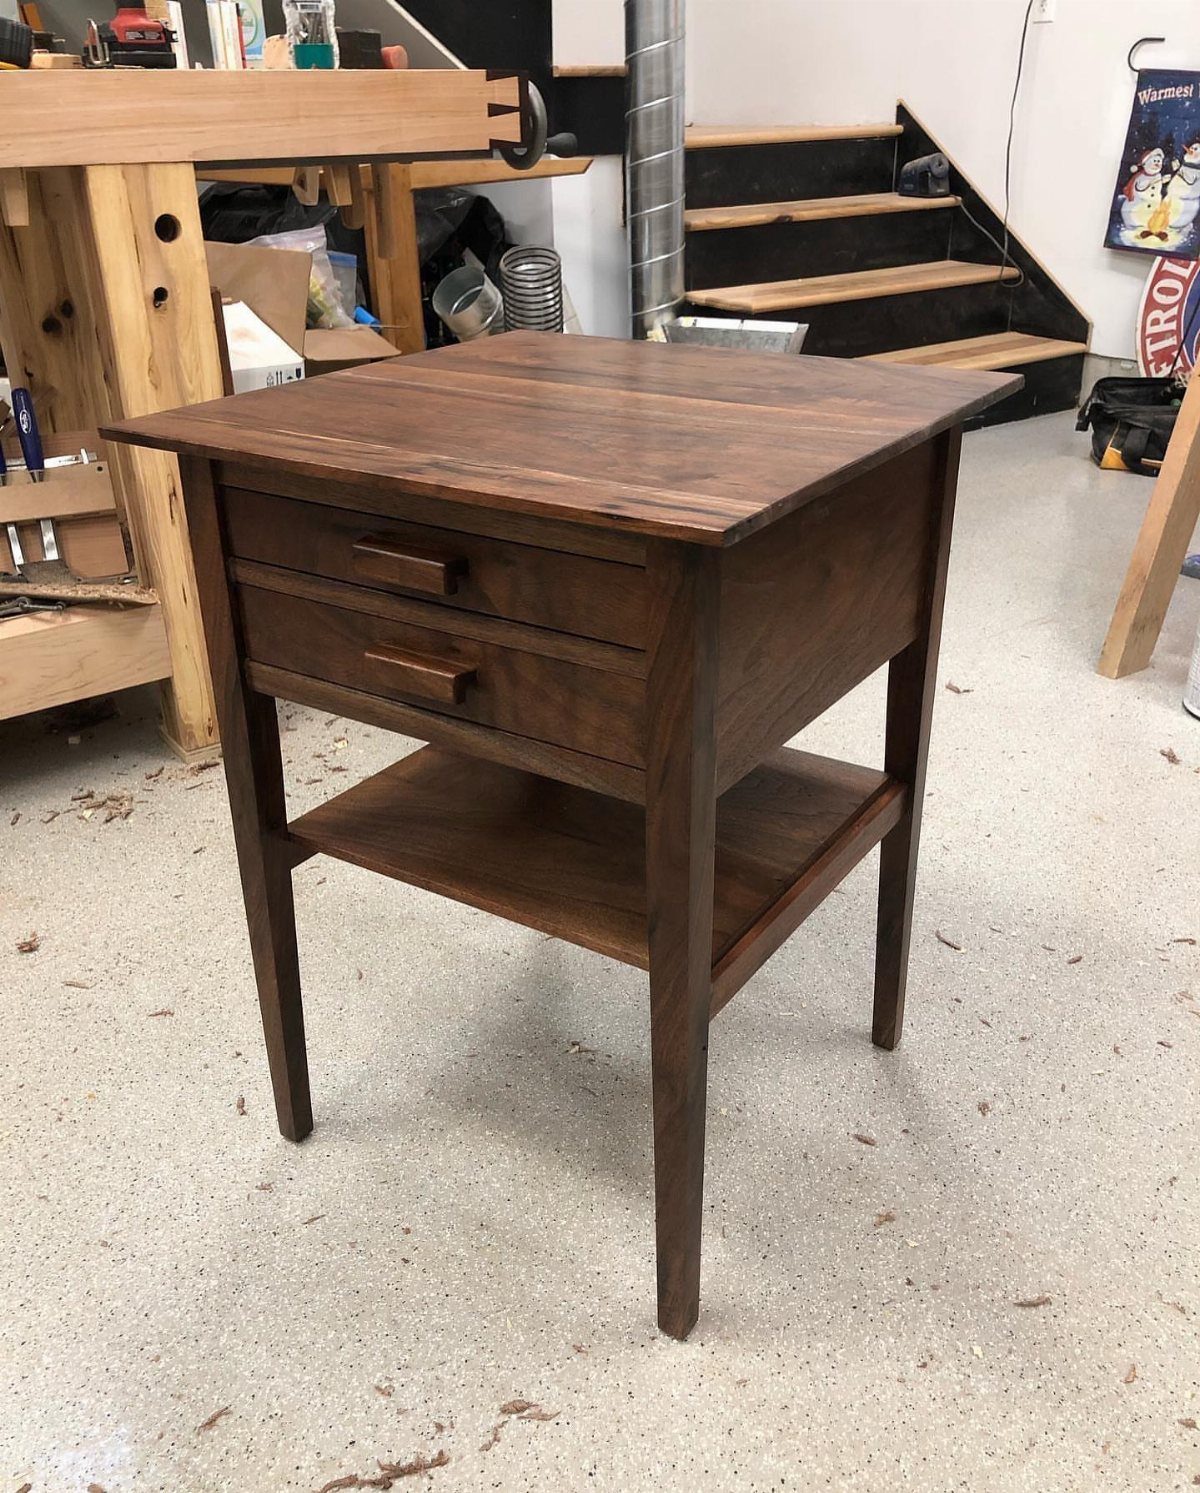
Walnut’s natural color range does most of the design work here. The chocolate tones with their warm grain patterns give the piece a richness that painted furniture simply can’t replicate, which is why midcentury builds lean on it so heavily.
2 drawers plus a lower shelf is a practical storage combination for a bedside table: charging cables and books disappear without the table looking overloaded.
Walnut is not cheap lumber. For a smaller piece like this, buying a project panel or a single wide board is more economical than building up from thinner strips.
8. Walnut and Maple Side Table
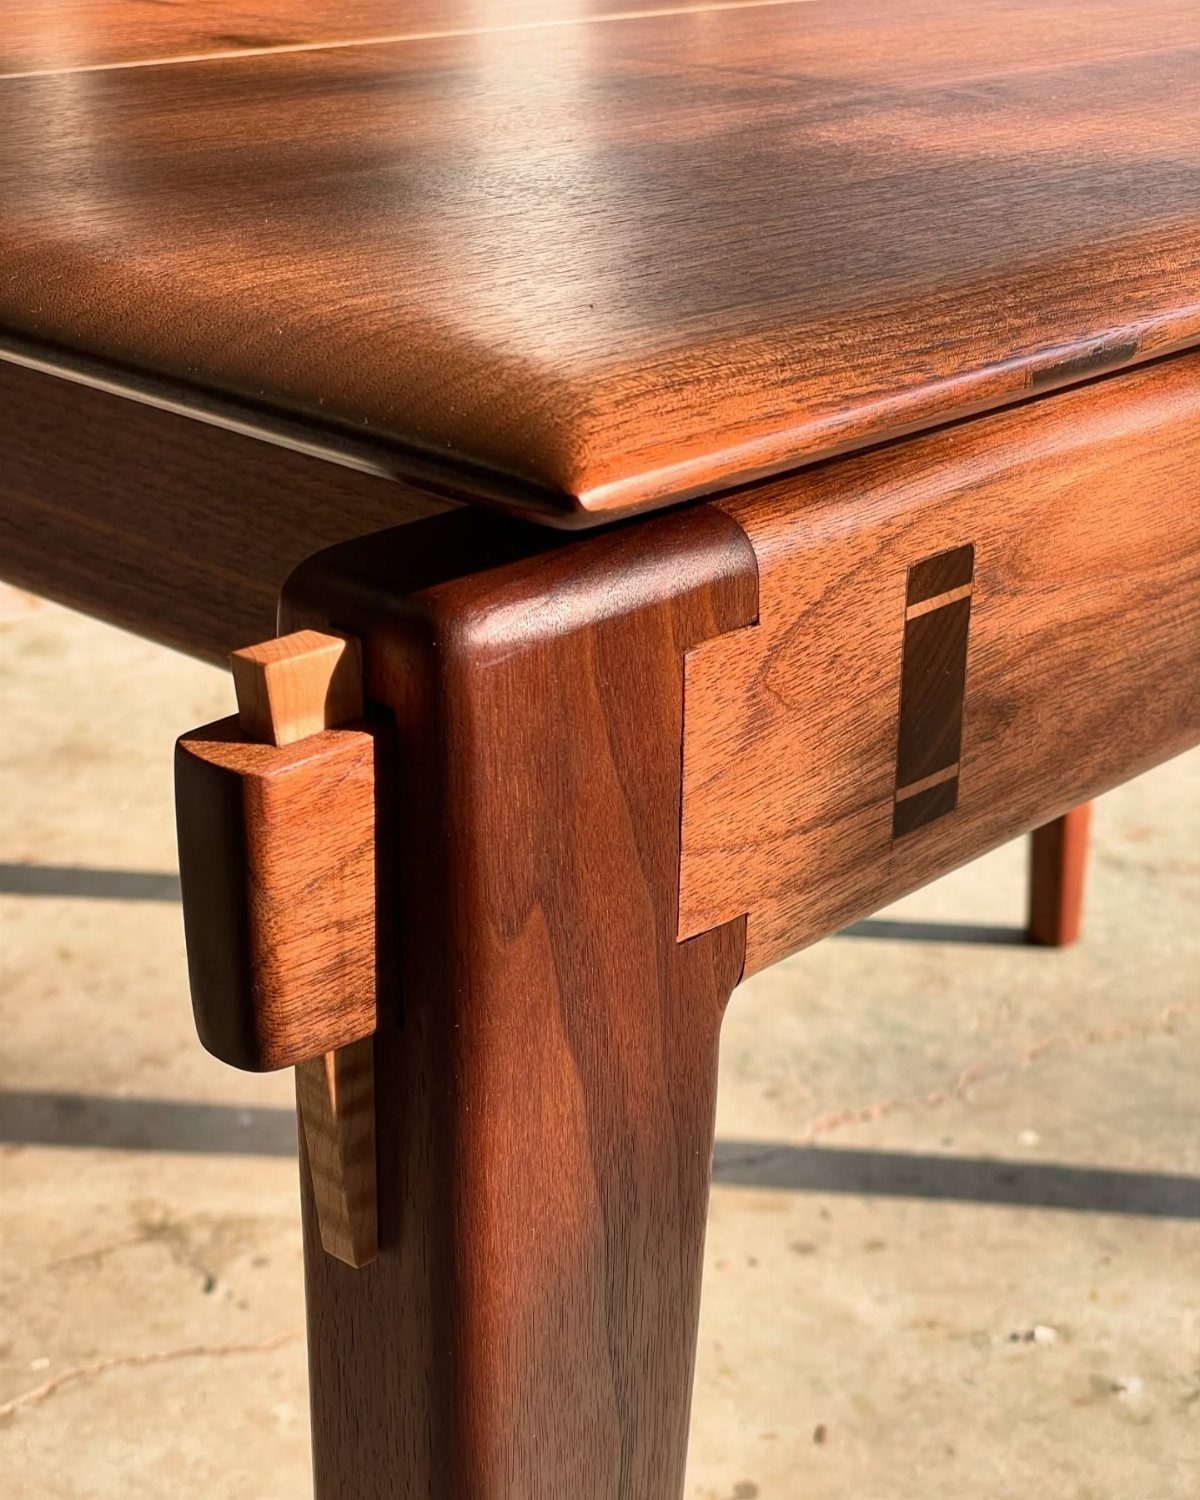
The maple wedge joint running across that walnut corner isn’t just structural. It’s the whole visual concept: 2 species with opposing grain and a natural color difference of roughly 3 shades, brought together at a single point that’s impossible to miss.
Butterfly joints and bow-tie inlays work on the same idea, but a full wedge running edge to edge reads bolder than either.
Finishing is where this can go wrong.
Walnut and maple absorb stain at different rates, so anything beyond clear oil or a simple topcoat risks making one wood look off. Clear finish lets the contrast stay honest.
9. Live Edge Hairpin Table
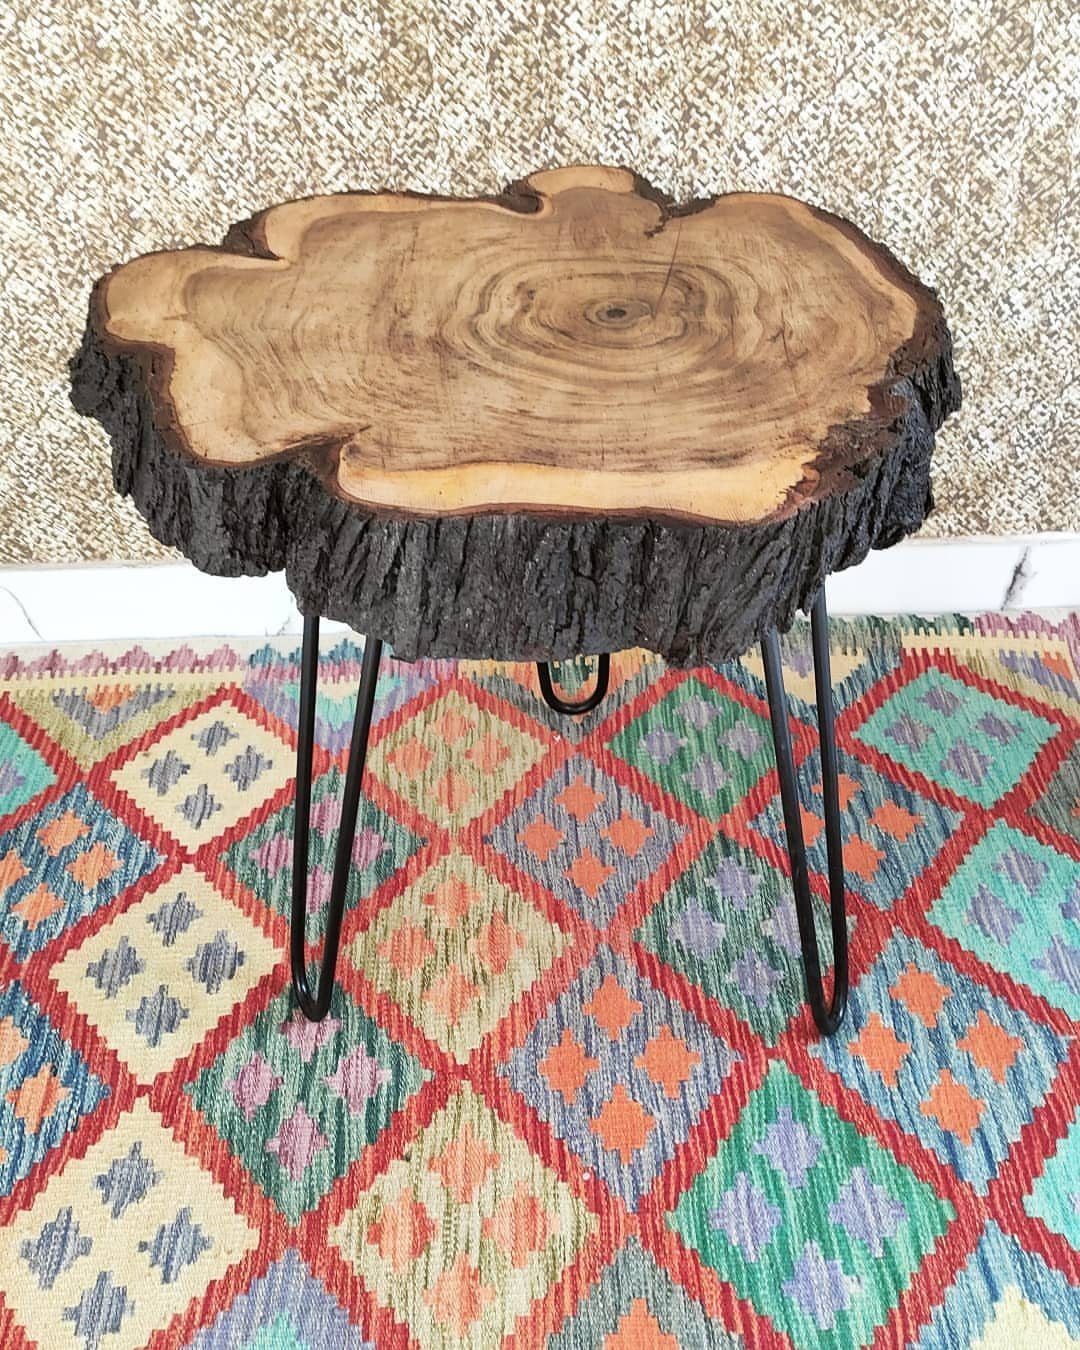
Hairpin legs are the fastest path to a finished live-edge piece: source a natural wood round, attach 3 pre-made legs from underneath, and the table is done.
The bark edge is the detail worth protecting. A few coats of thin CA glue or clear epoxy along the bark line keeps it from flaking over time, especially on a thinner slab.
Leg height is the only real decision. Hairpin legs sized for a side table beside a sofa or chair usually put the surface at a usable height.
10. Farmhouse X Base End Table
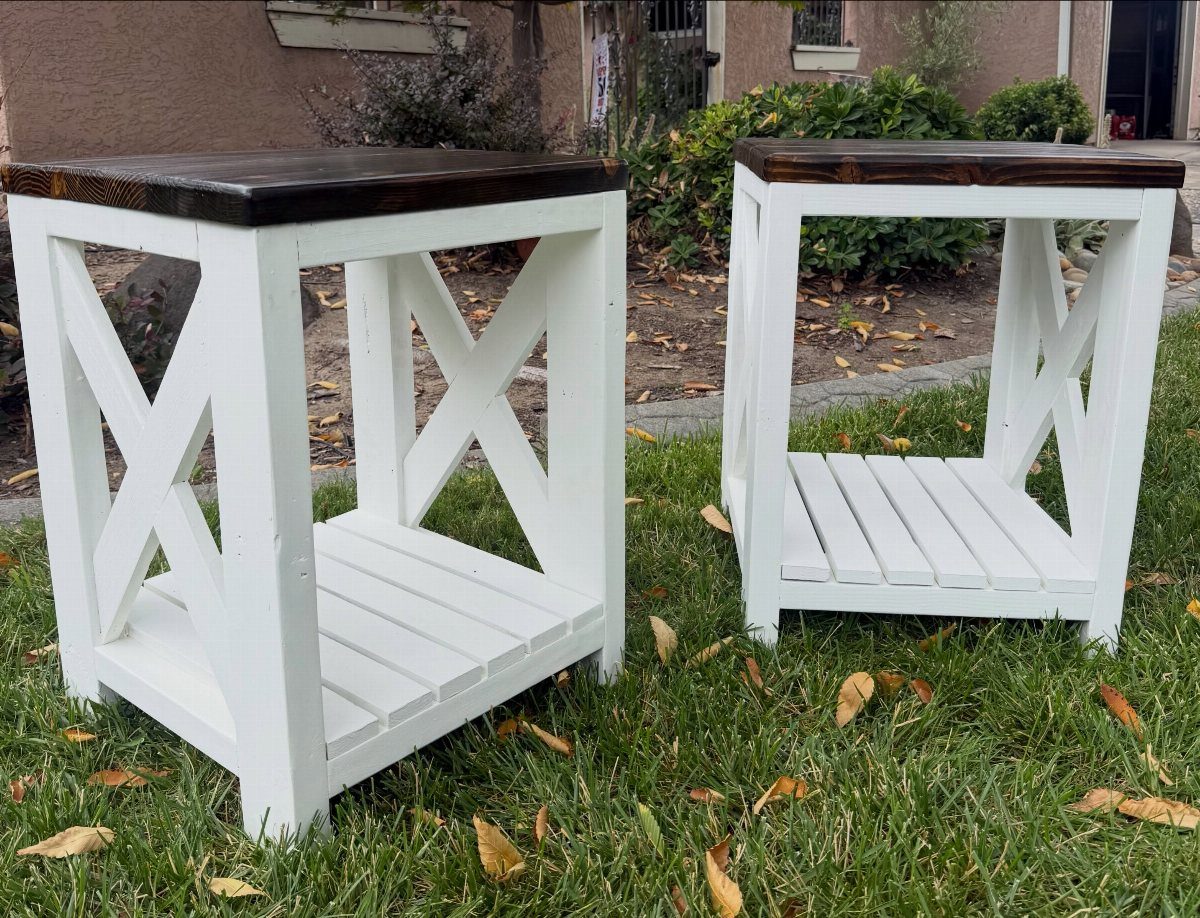
X-base framing is a classic farmhouse detail partly because it reads as sturdy and partly because it breaks up what would otherwise be a solid panel side, making the table feel lighter than it is.
The contrast draws the eye to the wood grain on the top surface.
A lower shelf on a design like this adds storage without complicating the build much. It also gives the X bracing a visual anchor at the bottom.
11. Decorative Tile Inlay Side Table
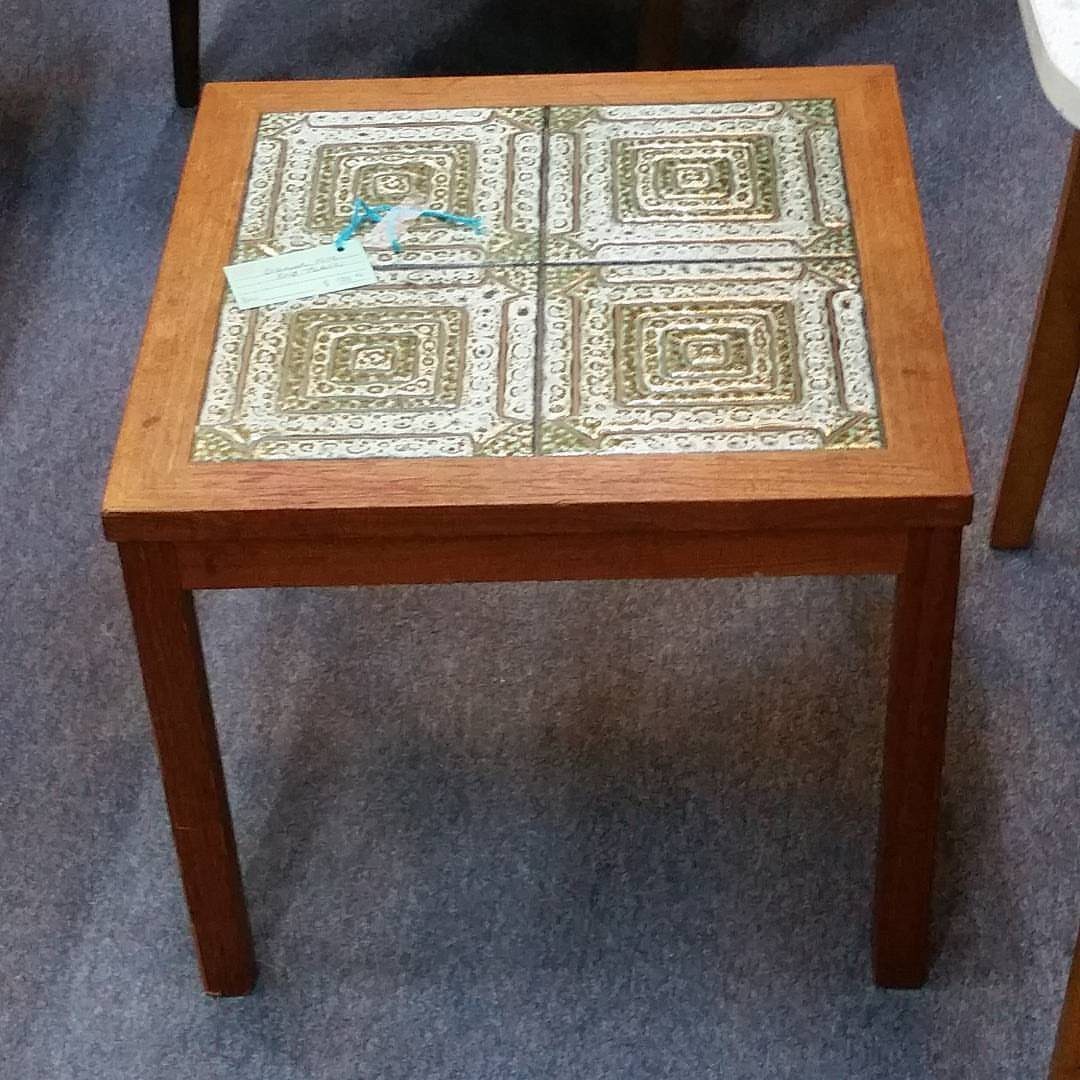
Tiling a tabletop is one of the lower-cost ways to get a genuinely decorative surface. Patterned ceramic tiles at most home improvement stores are inexpensive enough that covering a small end table top completely stays well within a tight budget.
The key step is recessing the tile area so the tile surface sits flush with the surrounding wood frame. Without that reveal, the edges catch everything and the grout lines become a dirt trap.
Sanded grout in a neutral tone keeps the tile pattern as the focal point. Matching grout to the background color of the tile is usually the safest call.
12. Wood Top Geometric Metal Table
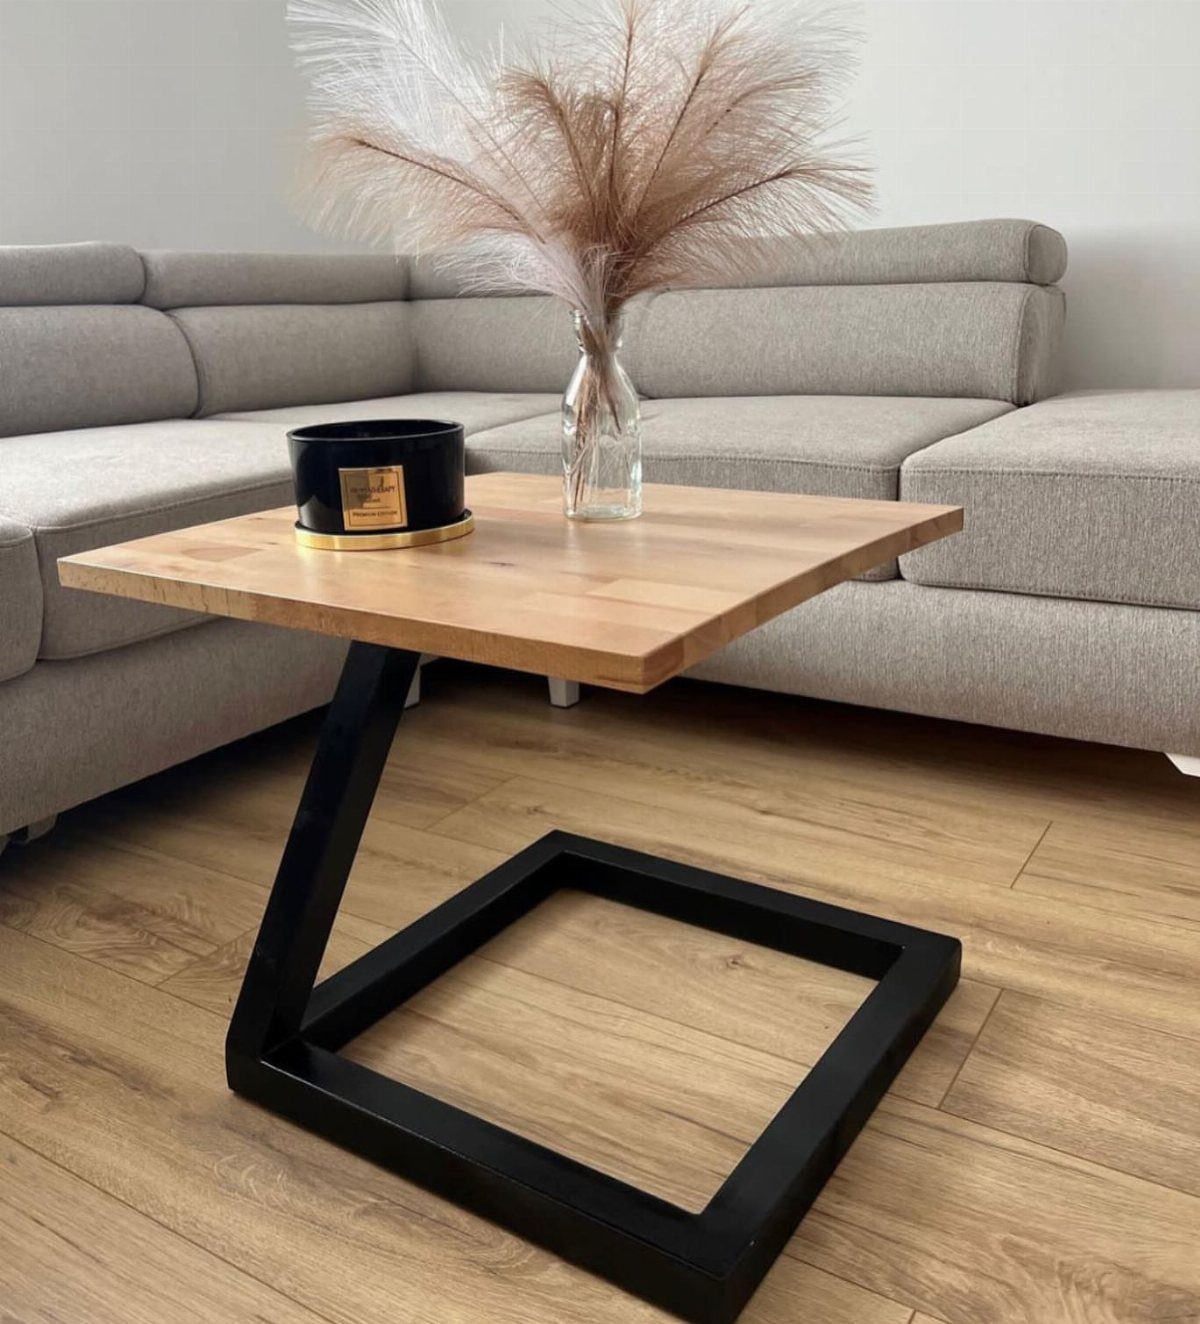
The geometric metal base is doing the decorative work here; the wood top is intentionally plain, and that balance is exactly right. A figured or heavily grained top would compete with the angular base rather than complement it.
For a base like this, welded steel is the typical material. Sourcing one from an Etsy metalworker or a local fabricator skips the fabrication work entirely and costs less than most people expect for a table-scale piece.
Light wood against black metal is a pairing that reads consistently well in a living room, which is probably why it shows up so often.
13. Slab Leg Minimalist End Table
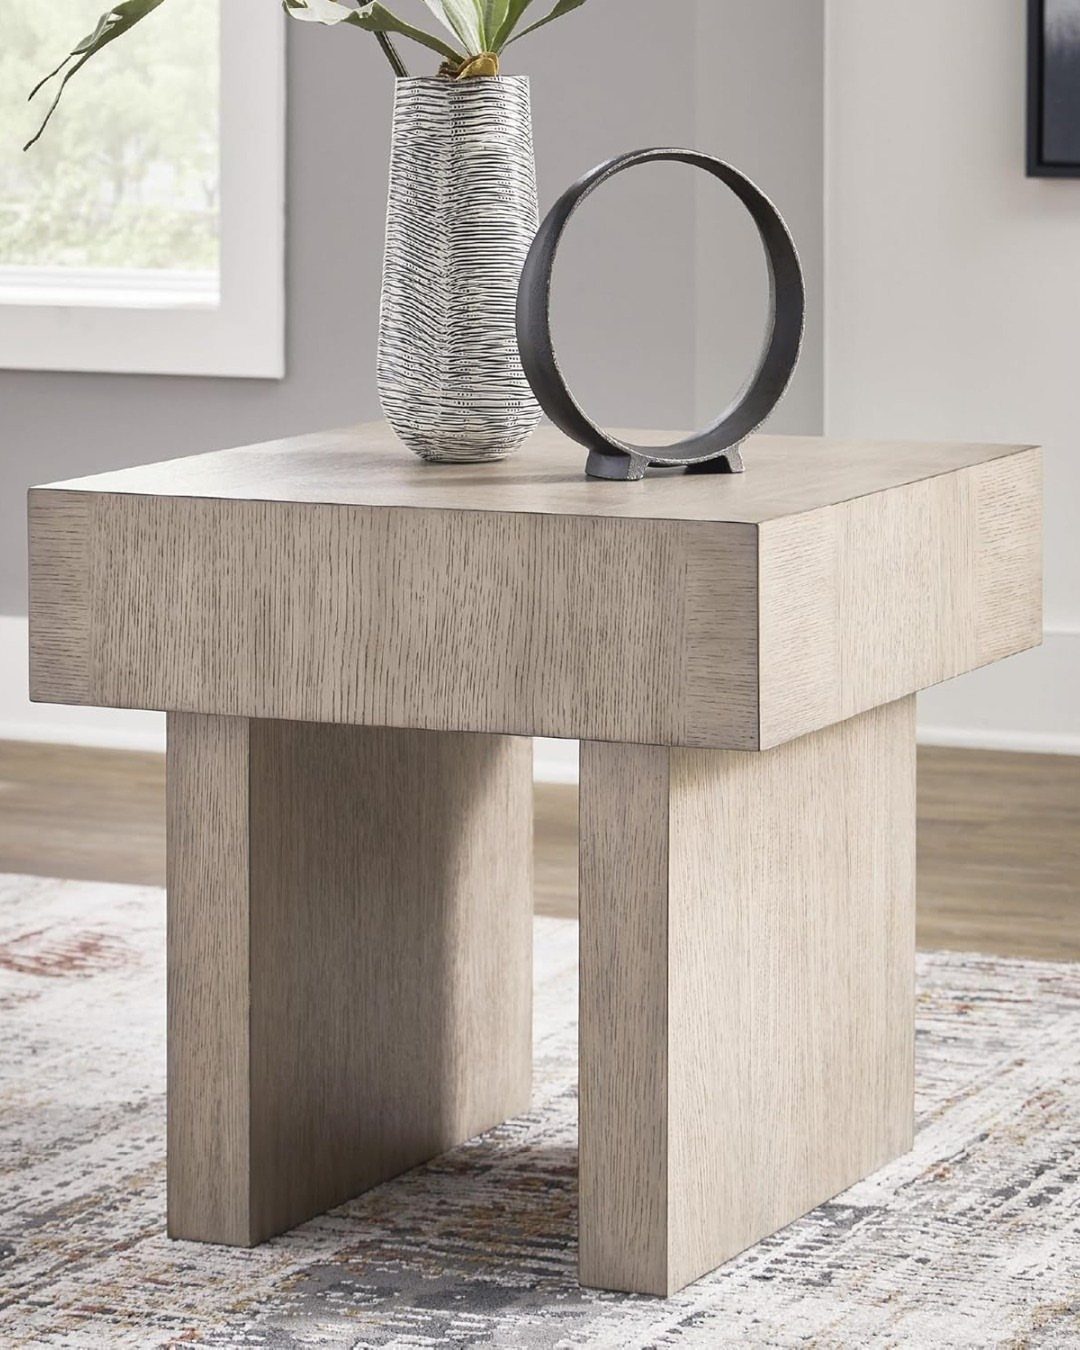
Wide slab legs are what separate this build from a standard four-leg table: the legs read as part of the form rather than hardware holding it up.
A thick top on legs this wide needs solid stock or a good hardwood plywood to keep the proportions honest. Thinner material makes the slab legs look bulky instead of intentional.
The simplicity is the whole appeal.
No drawer, no shelf, no joinery beyond straight cuts. A miter saw, a drill, and a sander will build the entire piece.
14. Tall Single Drawer End Table
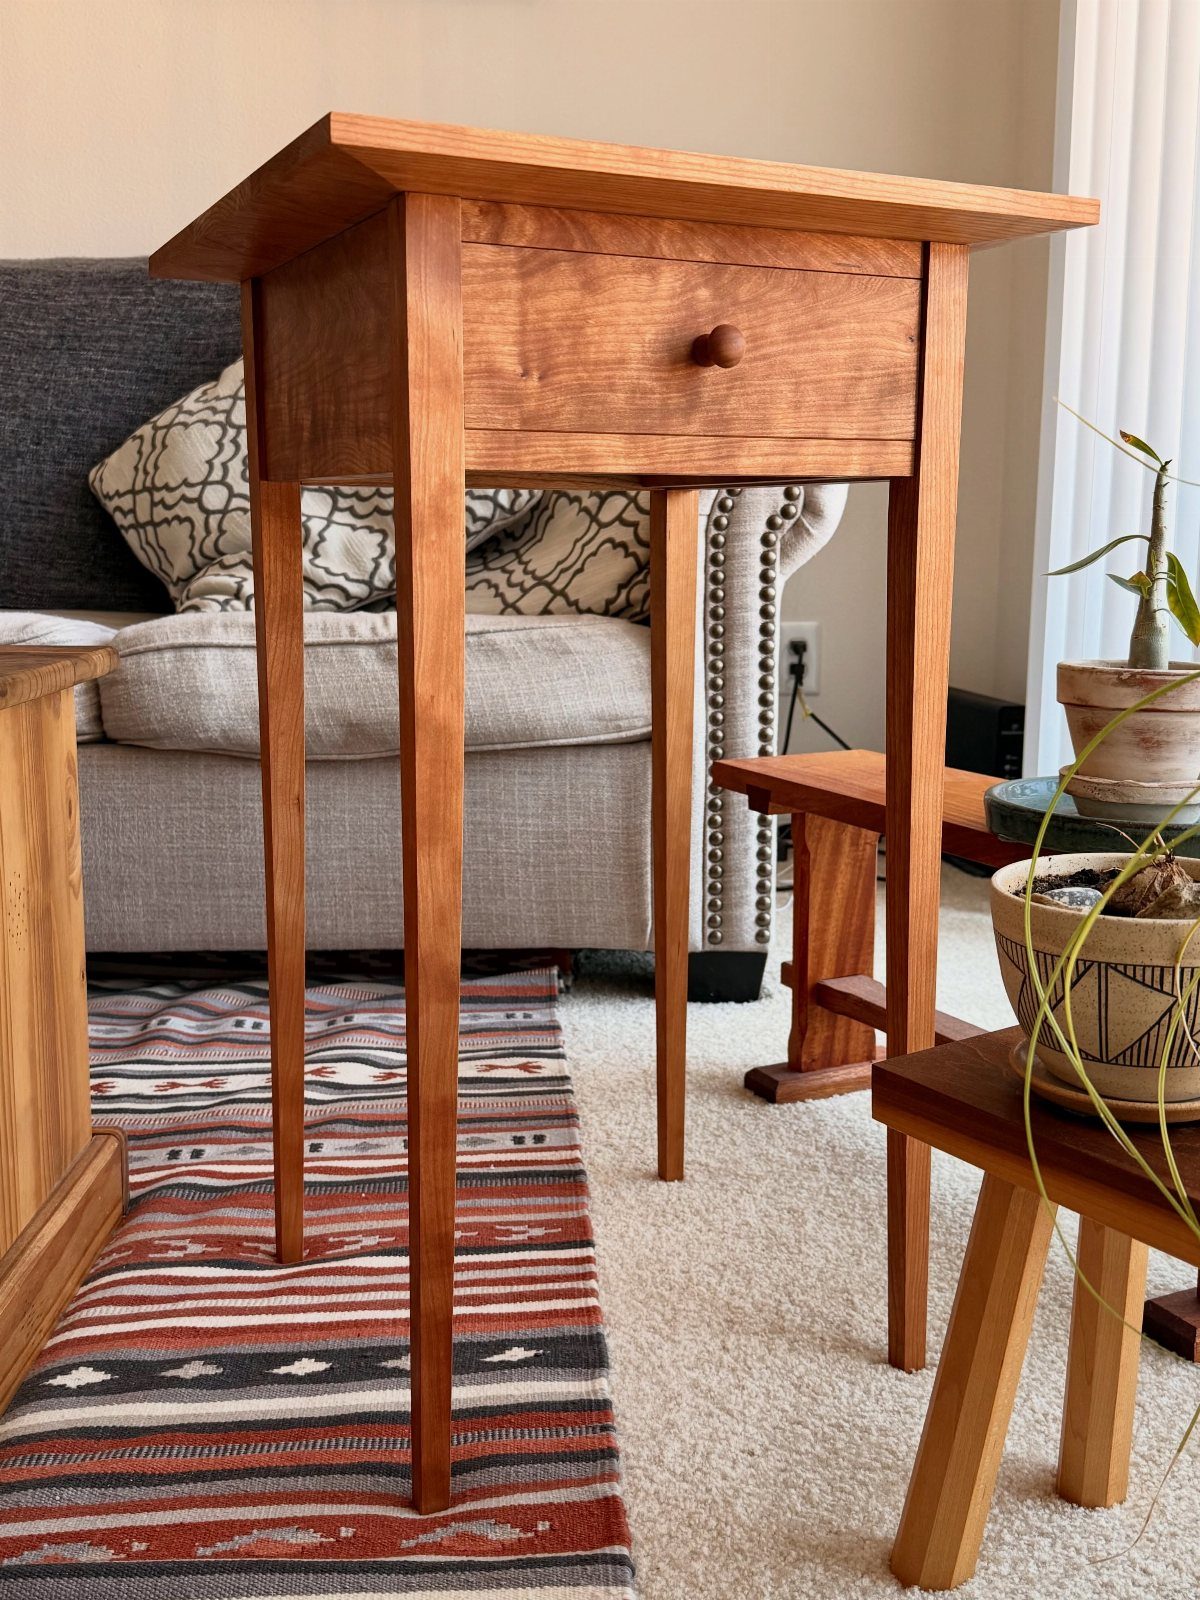
Tall and narrow is the silhouette that fits where a standard end table crowds the space: beside a tight sofa arm or flanking a small bed where floor space is already spoken for.
Tapered legs are cut with a tapering jig on a table saw, or a sander and a steady hand if that’s what you have.
The taper only needs to start an inch or so below the top and run to the floor.
A single drawer at standing height puts remotes and charging cables out of sight. For a bedside table I’d skip a knob and use a routed pull instead, cleaner and one less hardware buy.
15. Curved Wood End Table
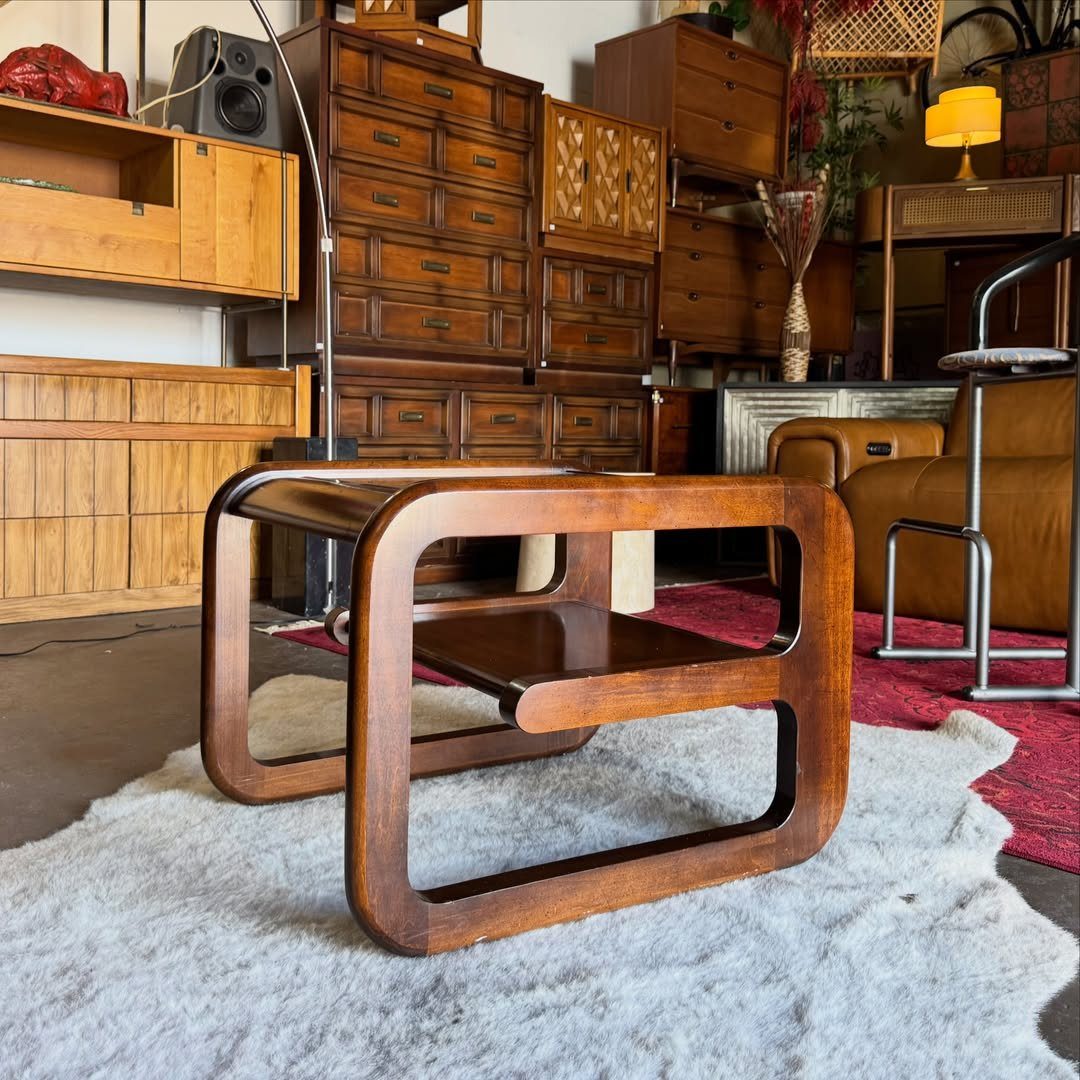
Softly curved sides change how a dark wood table reads in a room: the shape breaks up the heaviness that a solid dark box would otherwise bring.
Curves in solid wood mean either band sawing the profile from a thick blank or steam-bending thin stock around a form.
The band saw approach is more realistic for a home shop, and the sawn edge sands smooth enough to look intentional.
The lower shelf gives the curved sides something to connect to. Without it, the curves read as a decorative detail rather than a structural one.
16. DIY Fluted End Table
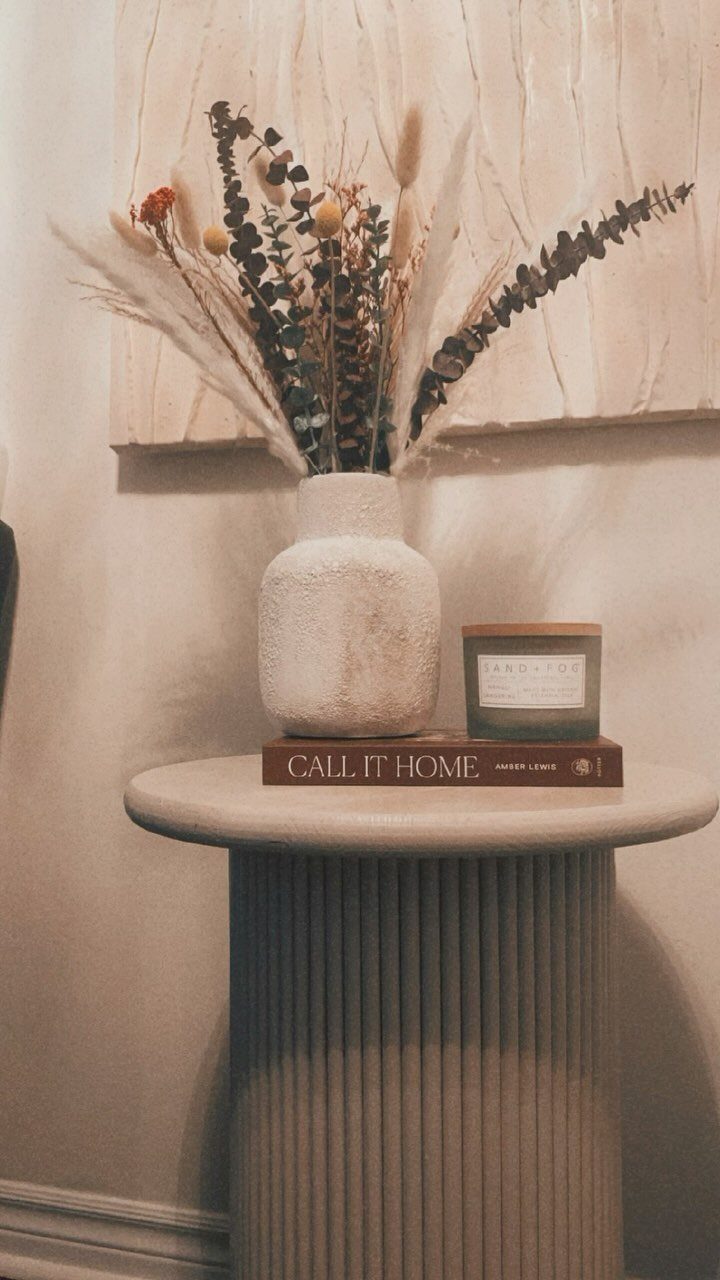
Vertical fluting on a cylindrical form is the detail that makes this read as furniture rather than a basic round column. The ridges catch light and shadow in a way that a smooth surface never does.
The simplest path to a fluted cylinder is reeding tooling on a router table, run along staves glued around a circular core.
For a version at this scale, a turned column from a hardwood supplier skips the roundwork entirely and lets you focus on the fluting.
Beige paint over the flutes softens the geometry. The texture carries enough visual interest that the color can stay quiet.
17. Open Shelf Side Table
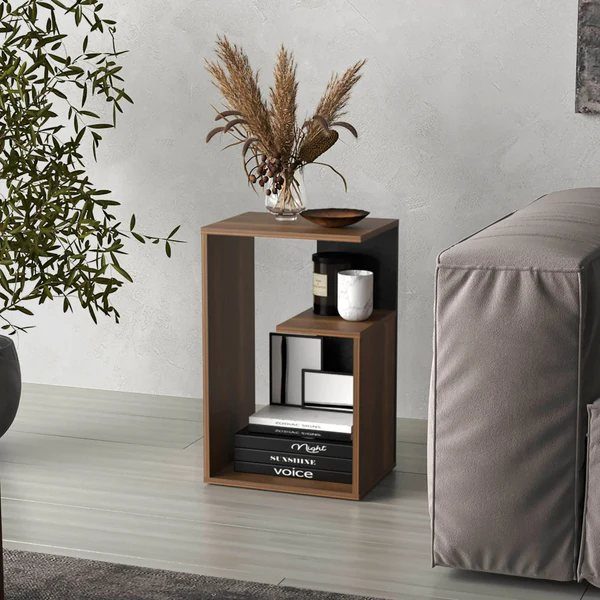
Open shelving on an end table earns its keep in a living room: books and candles stay within reach from the sofa without a door or drawer in the way.
A 2-shelf build like this is a straightforward carcass with the front left open. The joinery is basic: shelf supports or dados hold the middle shelf, and the top sits on the sides.
18. Live Edge Magazine Rack Table
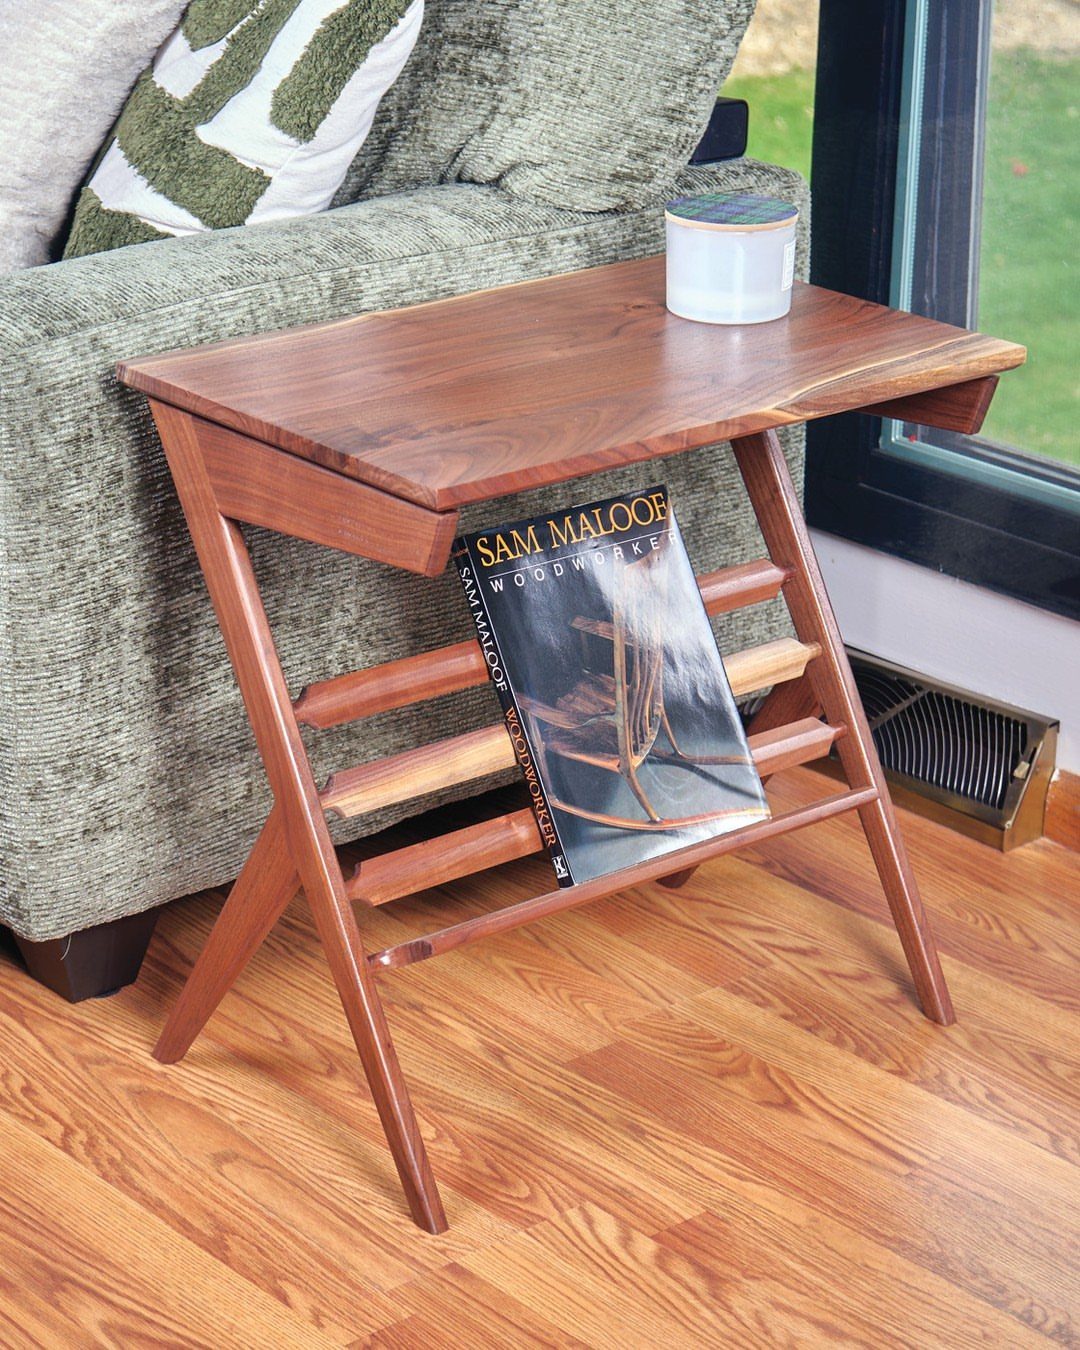
A live edge slab on top plus a slanted magazine rack below is a combination that gives you a surface and storage without the build getting complicated.
The live edge top is the easy part: source a slab, flatten it, finish it.
The rack is a simple frame of thin boards set at an angle off one side, wide enough for a few books or magazines to lean.
Angling the rack keeps the spines visible and readable, which matters if the table sits beside a reading chair. A vertical rack hides the covers and turns into a harder-to-use slot.
19. Floating Slatted Bedside Shelf
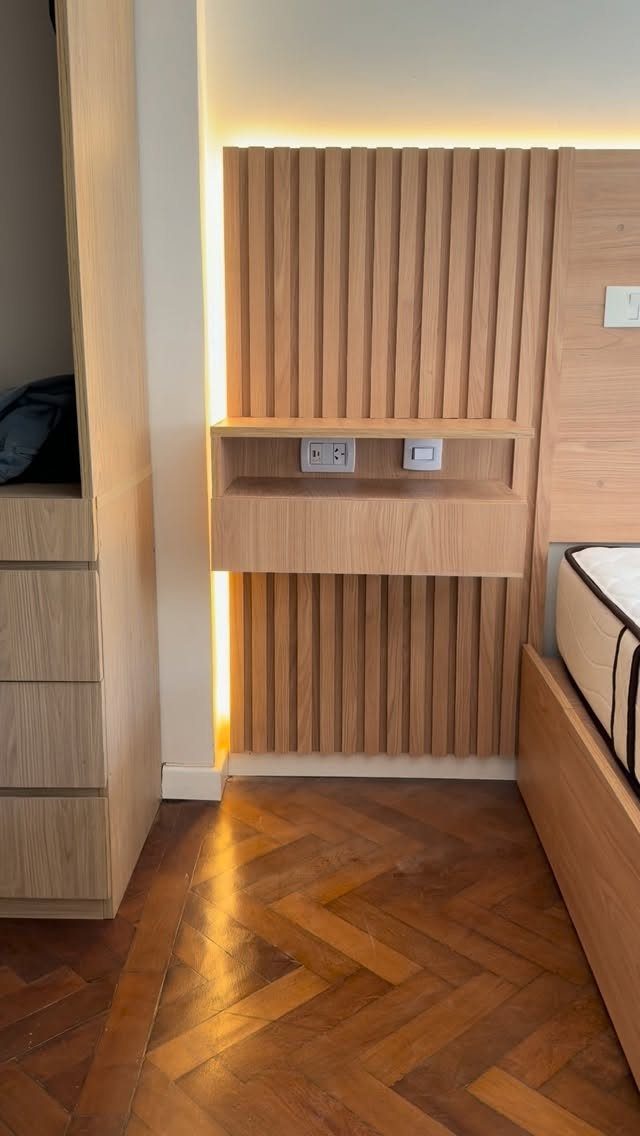
Mounting a bedside shelf directly onto a slatted accent wall skips the nightstand entirely and frees up floor space beside the bed.
The shelf and wall read as one piece here because both use the same vertical slat profile.
Matching the shelf material and finish to the wall panels is what makes that work; a contrasting shelf on a slatted wall just looks like a shelf bolted onto a wall.
For mounting, locate studs behind the slats before attaching any hardware. A floating shelf bracket rated for the load you plan to put on it, anchored into the framing rather than the slats alone, is the right call.
20. Two-Tone Painted Wood Table
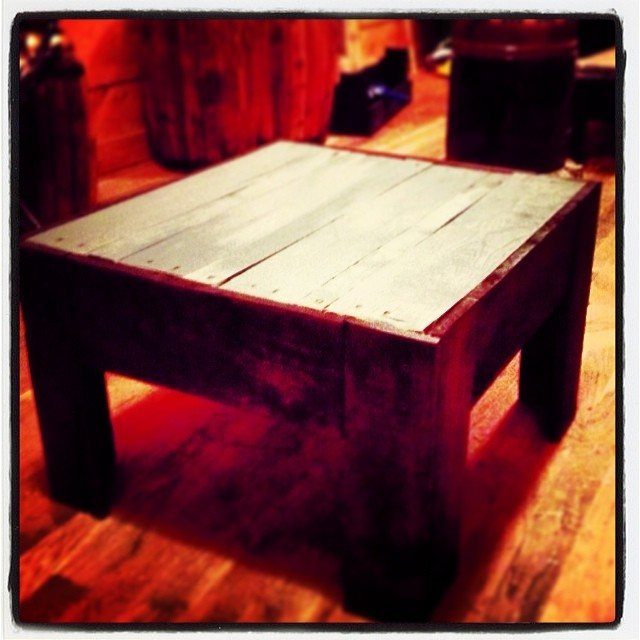
Two tones on one piece of furniture is simpler to pull off than most people expect: paint the base and legs one color, finish the top in another, and the contrast does the design work.
Light top with dark legs reads well because the eye lands on the top surface first, which makes the contrast feel intentional rather than accidental. Reversing it, dark top with lighter legs, tends to feel heavier.
For a rustic plank top like this one, a matte or satin finish holds the weathered texture better than gloss.
The dark base can take the same sheen or go flat; matching the finish level across both tones keeps it from looking accidental.
21. Round Geometric Base Table
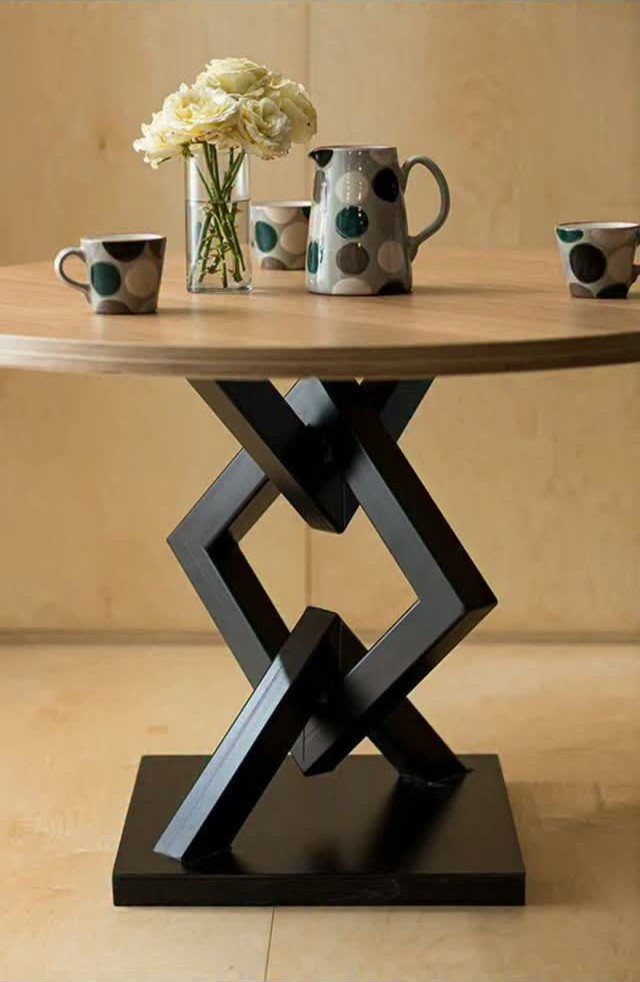
The interlocking geometric base carries all the visual weight here: the round top is intentionally plain so the base structure gets the attention it deserves.
Bases like this are typically cut from flat stock on a CNC or by hand with a jigsaw, then slotted together without fasteners. The interlocking geometry is self-supporting once assembled, which makes it easier to build than it looks.
Light-toned wood against a black base is a combination this scale handles well; a darker top would close up the contrast and flatten the visual effect.
22. Rustic Trunk Style End Table
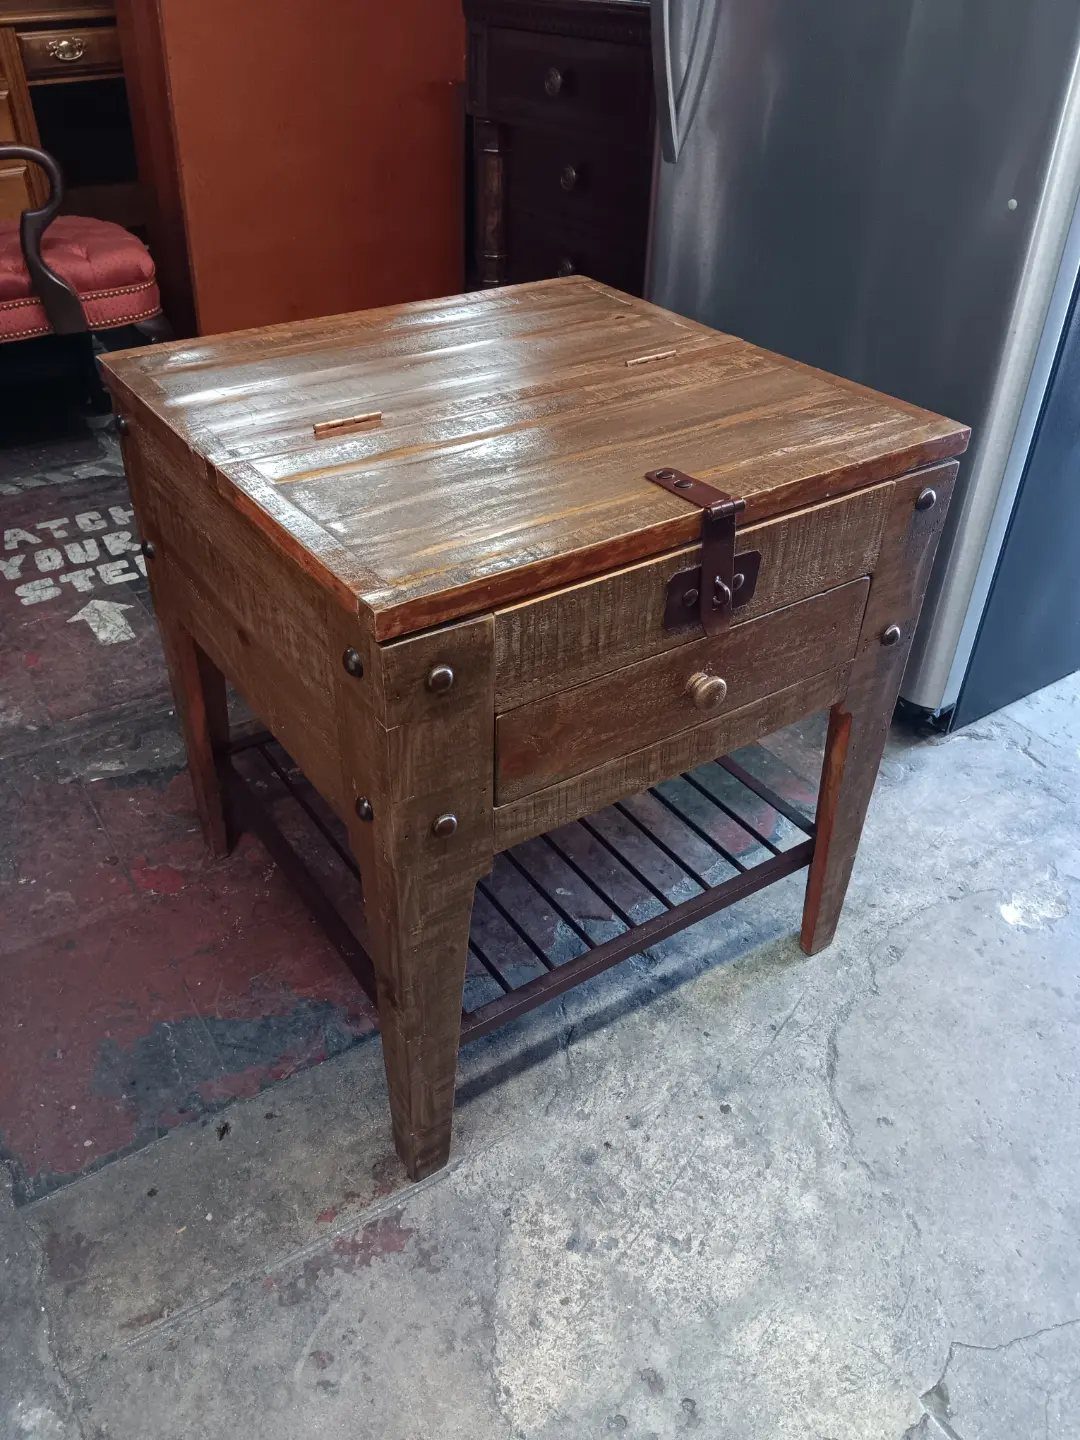
A hinged lift-top lid turns an end table into light storage, and adding a drawer below that means 2 separate compartments in a piece that reads as furniture rather than a storage box.
The slatted lower shelf keeps the visual weight from getting too solid. On a table built with this much surface detail, leaving the bottom shelf open is the right call.
Weathered or reclaimed-look boards suit this style better than freshly milled lumber. If you’re building it, a grey or dark walnut stain on pine gets close to that worn finish without hunting for salvage material.
23. Twisted Wood Pedestal Table

A spiral-carved pedestal is sculpture first, table second, and that ordering matters for where it belongs in a room.
The twist is cut from a single post, either on a lathe with a spiral attachment or by hand with a chisel along a marked helix.
Hand-carved versions read rougher, which suits a natural or organic room. Lathe-turned versions are cleaner and sit better in a more refined space.
Top diameter on a pedestal this narrow needs to stay modest. A top that overhangs too far makes the piece feel top-heavy and unstable; staying close to the diameter of the widest point of the spiral keeps it proportional.
24. Wood Marquetry Inlay Table
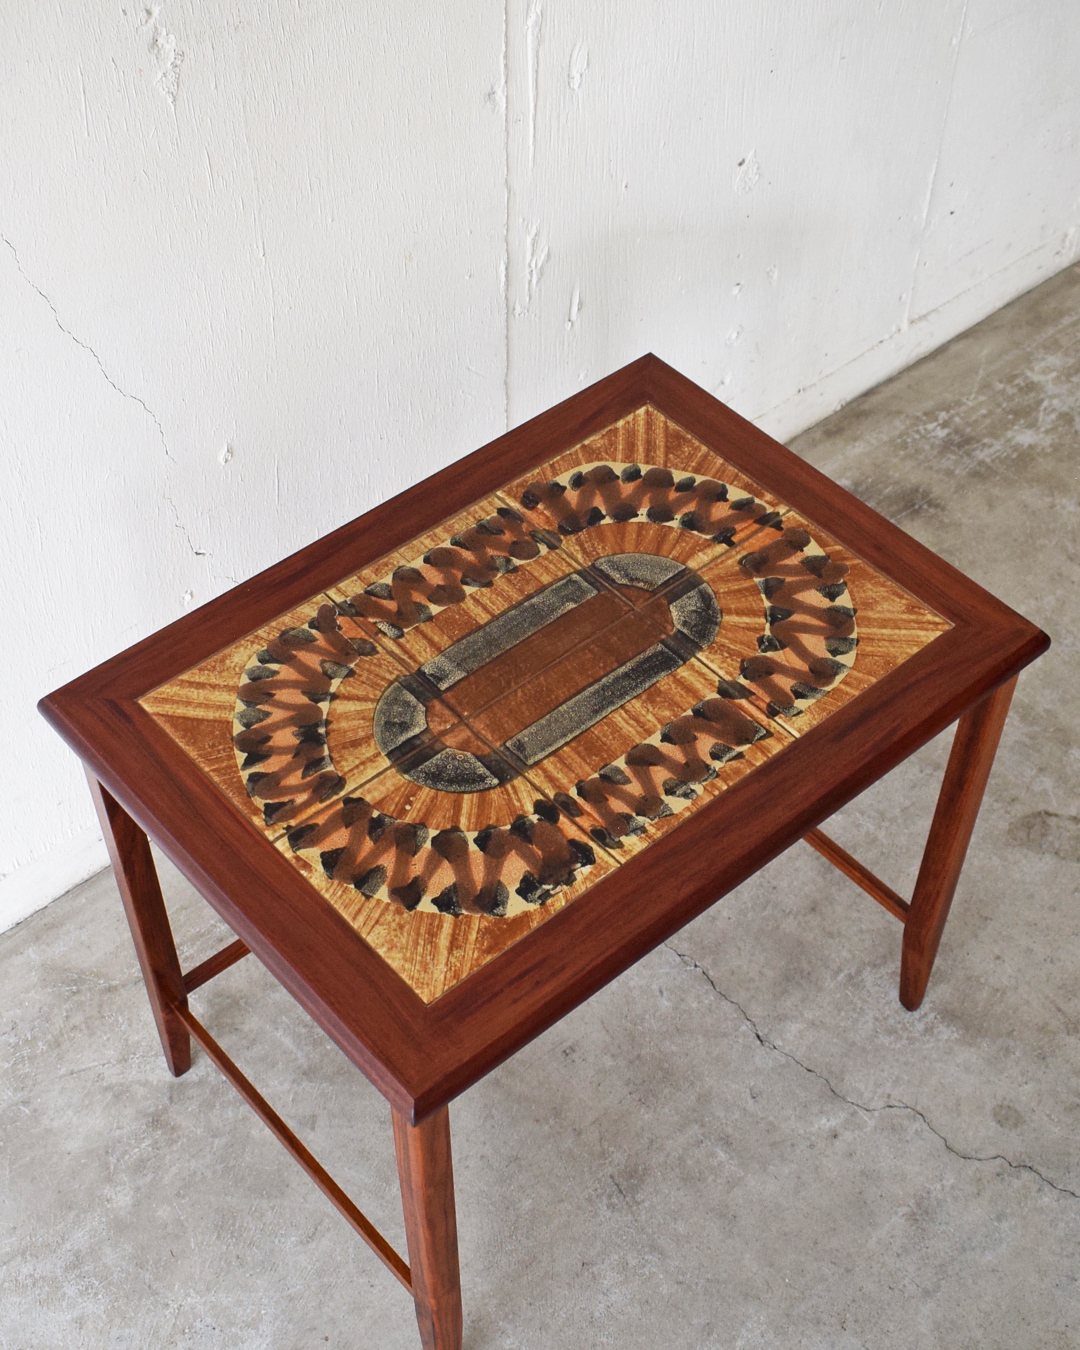
Marquetry inlay is woodworking at its most patient: thin veneers of contrasting species cut and fitted together to form a pattern, then glued flat into a recessed field on the tabletop.
The concentric oval pattern here builds outward from a center point, so precision in the first ring matters most.
Any gap or misalignment at the center reads across every subsequent layer. A sharp marking knife and a stable straightedge are more important to the result than any power tool.
Tapered legs keep the base from competing with a top this detailed. The simpler the base, the more the inlay holds.
25. Round Three-Drawer End Table
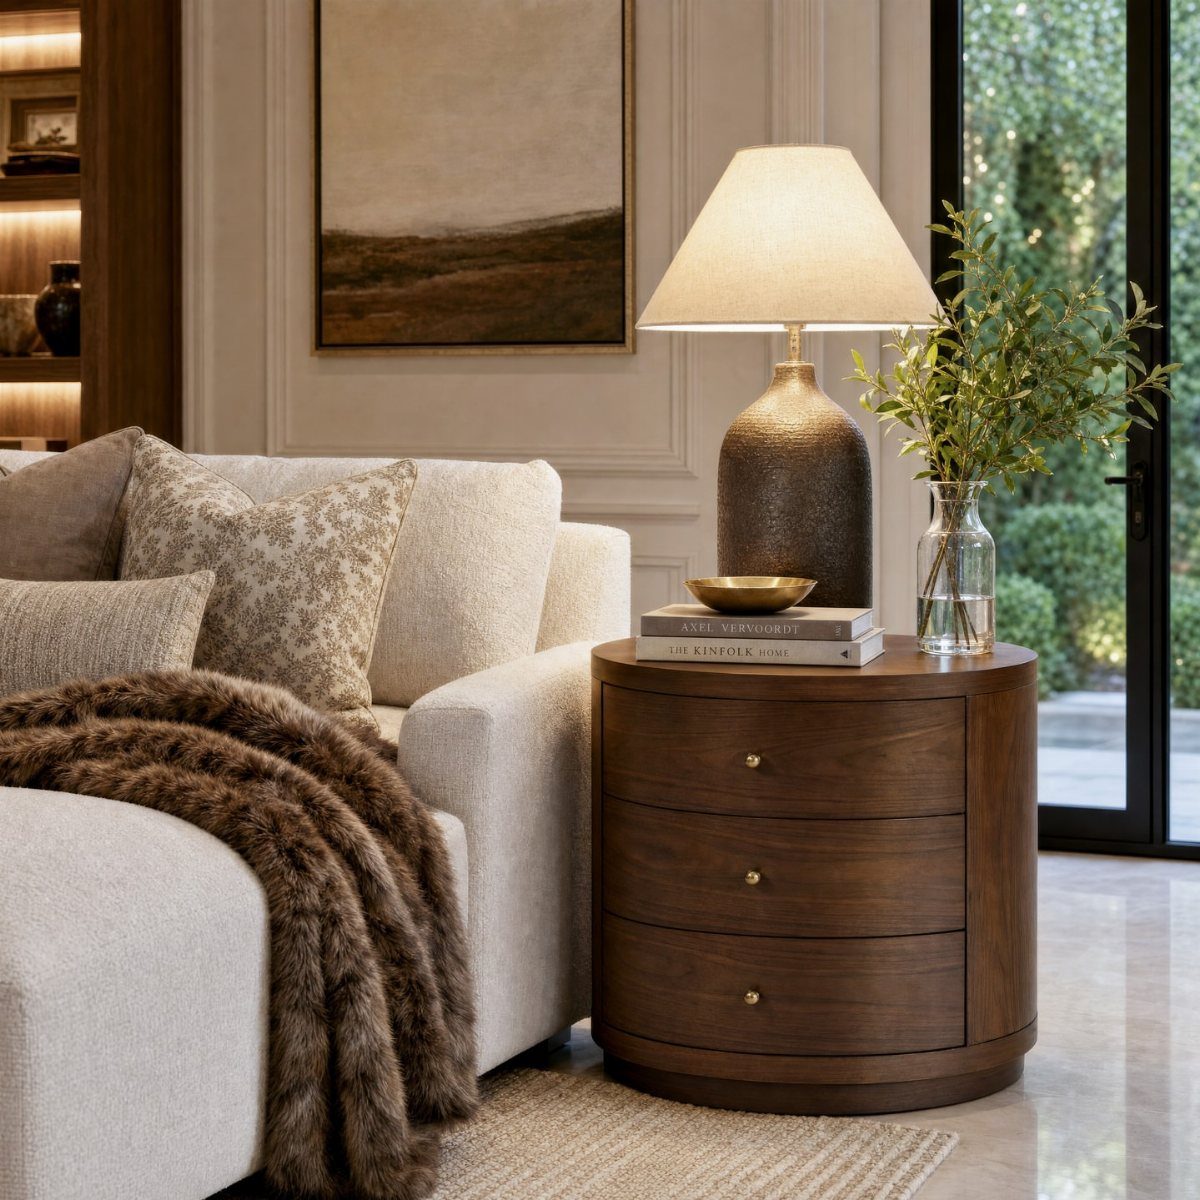
A round side table with three stacked pull-out drawers keeps clutter out of sight while holding a single column silhouette beside a sofa.
Curved drawer fronts are the step that slows the build. Cutting 3 openings into a solid cylinder is precise router work against a template, and bending thin fronts to match the radius needs a form.
A middle path: turn a post round on a lathe, route the slots, then make each front from flexible veneer.
Brass knobs on dark brown wood reads warm and quiet. 3 drawers hold remotes and chargers, more storage than most round end tables manage.
26. Round Marble Nesting Tables
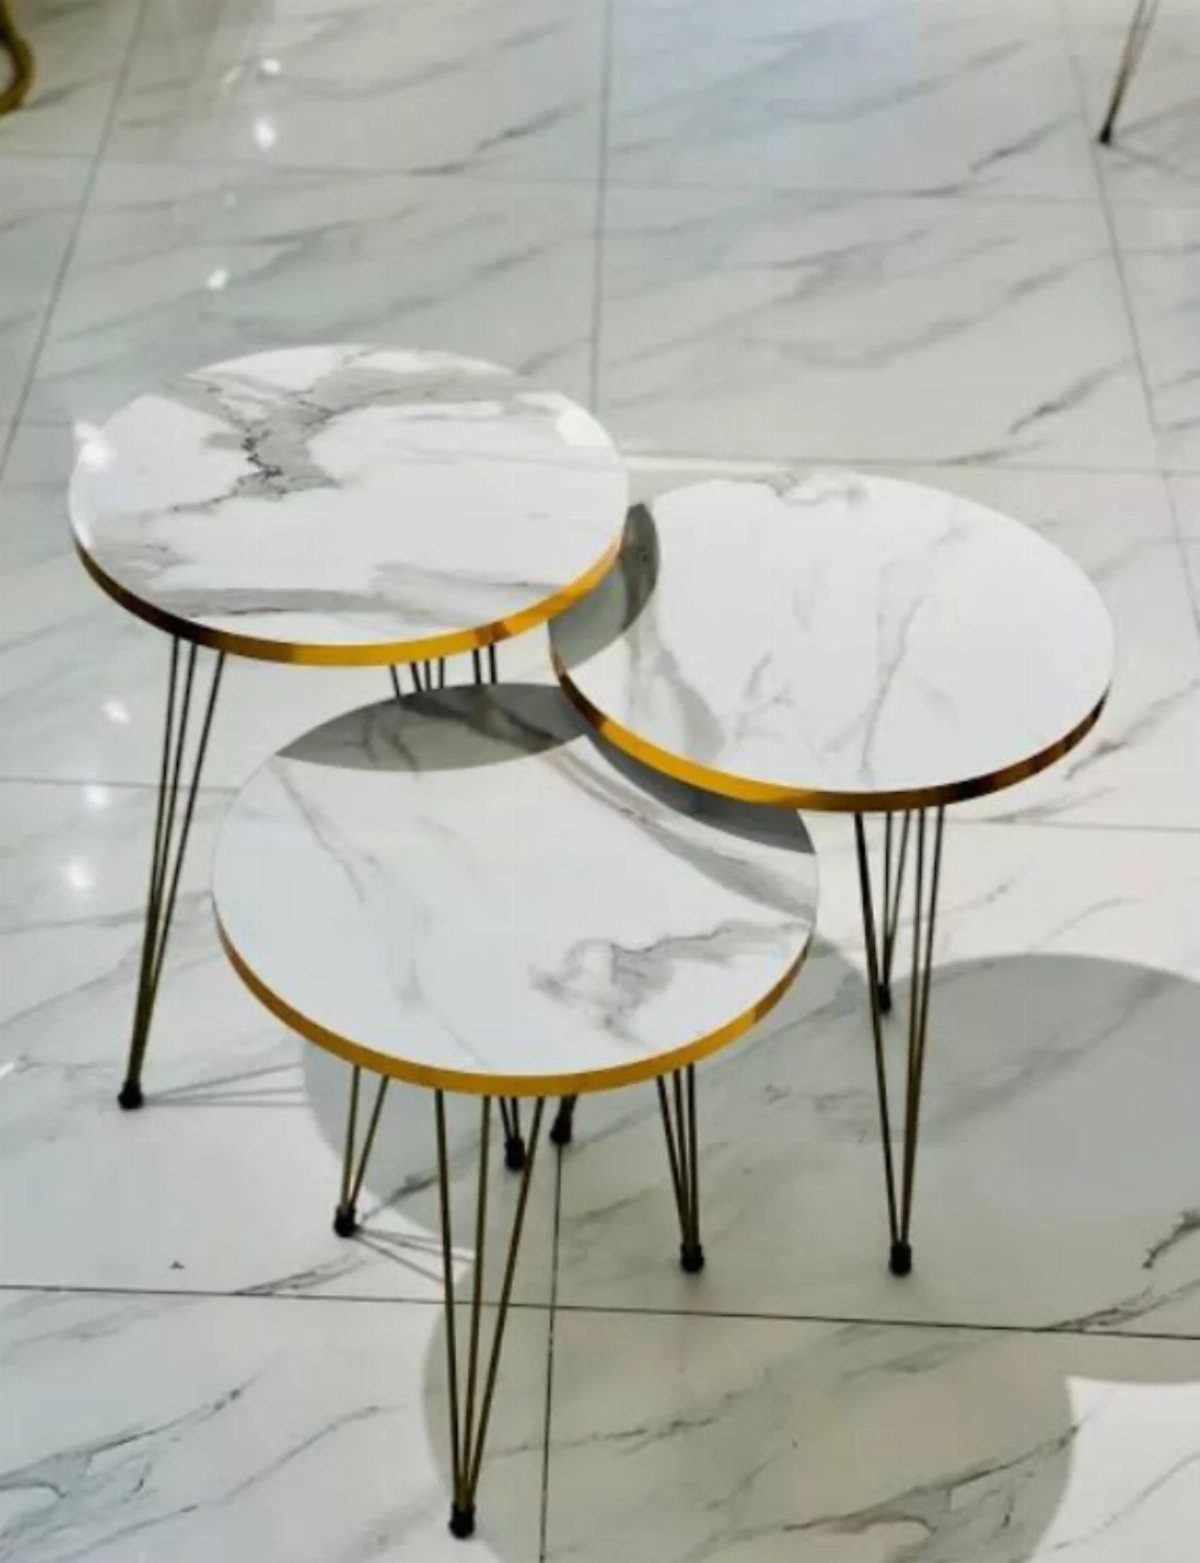
3 round tables that nest under one another solve the problem of needing surface only sometimes: pull out extras for guests, tuck them back when the room clears.
Faux marble here is printed melamine or marble-patterned ceramic.
Melamine is the lighter, cheaper pick and fine for a side table; ceramic resists heat and a wet glass better. Gold banding reads finished when it is
Adapting Dimensions and Materials
Lengthening the legs on a shelf-table raises the surface height; trimming the cut lengths on a Pottery Barn-inspired design shrinks the footprint. Color and stain are just as adjustable as the dimensions.
The one discipline that matters when modifying any plan is checking every measurement again after you change one.
Dimensions in a plan are interdependent, and adjusting a single piece without running through the others is how a build ends up with parts that don’t line up.
Preparing and Finishing Wood
Sand with the grain before any stain goes on, then pull the dust with a vacuum and a damp lint-free cloth. Skipping that step means the stain picks up sanding residue unevenly before it ever touches the wood fiber.
Wood conditioner cuts down on blotchiness on porous or soft woods, but the base of the conditioner has to match the base of the stain.
Water-based conditioner under oil-based stain, or the reverse, breaks the adhesion. Minwax makes both formulations; the label tells you which stain type each one works with.
Fill nail or screw holes after staining, not before.
Wood filler takes stain differently than the surrounding wood, so staining over filled holes almost always leaves visible dark or light spots. A color-matched filler applied after the stain blends in far better.
Finish with a clear topcoat. Polycrylic in matte is a solid choice for painted or lightly stained pieces; polyurethane holds up better on surfaces that will see regular use.






