
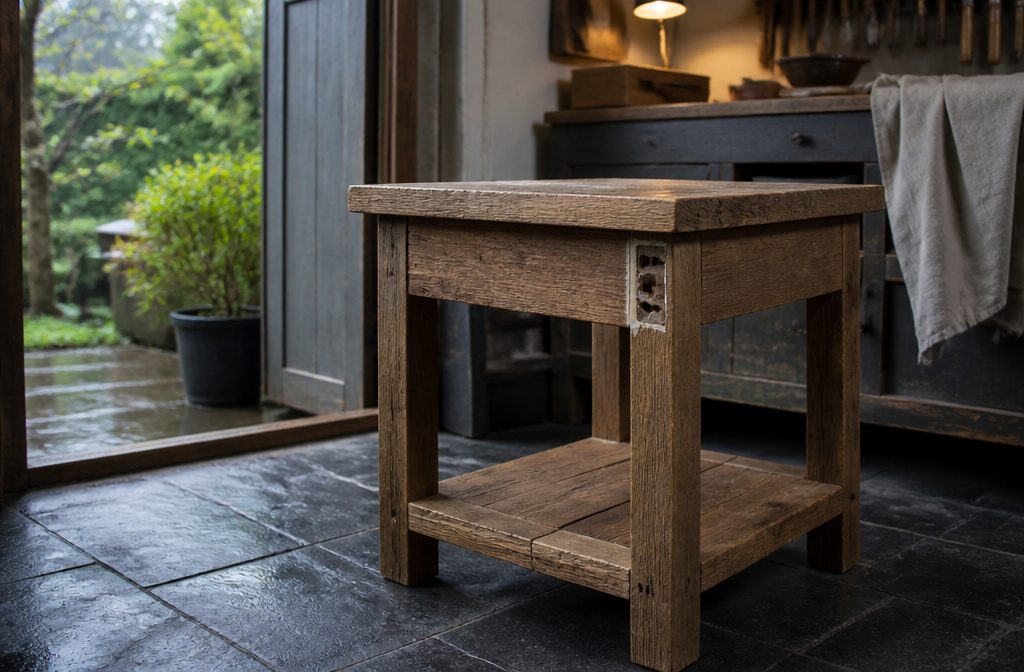
A rustic end table built from dimensional lumber or reclaimed boards costs between $30 and $80 in materials and takes a weekend to finish if you already own a drill, saw, and clamps.
Most builders rush the joinery and end up with a frame that racks sideways under load. Pocket holes drilled at the correct angle and backed with wood glue hold the apron flush to the leg tops without visible hardware.
1. Plan the Size and Prepare Your Materials
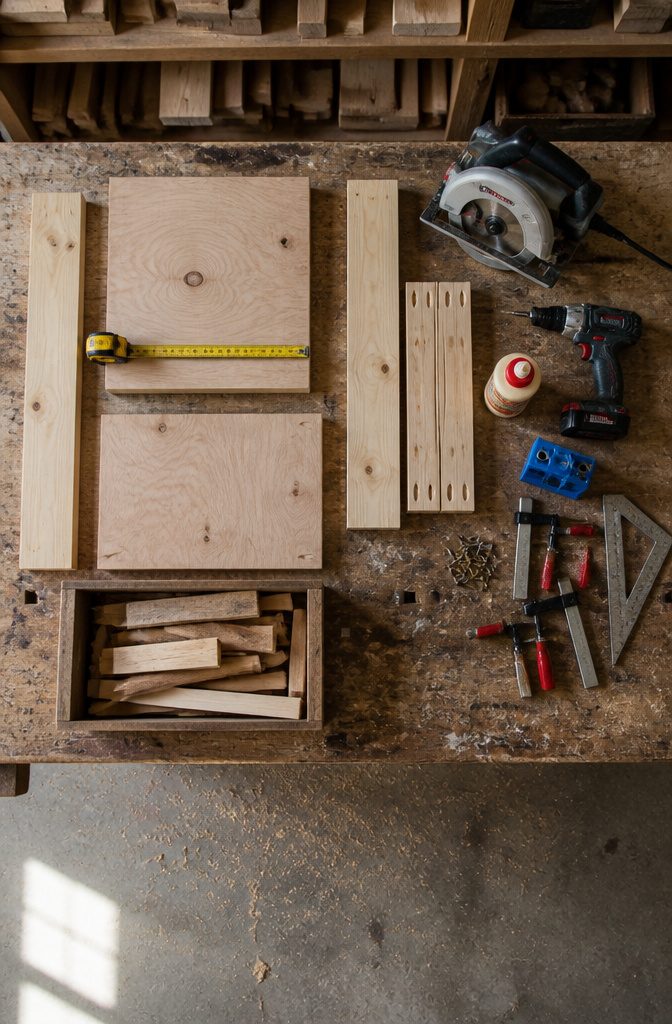
The first step is figuring out how tall, how wide, and how deep you want the finished piece to stand.
One common size is 13 inches by 19 inches, standing about 21 inches tall, but dimensions flex to fit your space and the boards you already have.
If you want a larger footprint for lamps or books, stretch the apron lengths and adjust the leg spacing to match.
Once you settle on size, mark your plywood or dimensional lumber for the sides, top, vertical support, and any shelves before you cut.
Measure twice and account for the offset between a circular saw blade and its base plate, typically around an inch and a quarter, so your final dimensions land exactly where you marked.
Material choices vary widely across plans: some call for reclaimed decking, others for dimensional lumber like two-by-fours and cedar fence pickets, and still others for maple plywood.
Gather fasteners, a drill, a saw, wood glue, clamps, a pocket-hole jig if you have one, and whatever finish you plan to use. Check your scrap pile first since most pieces are short lengths.
2. Cut and Prepare the Parts
Cut and Prepare the Parts
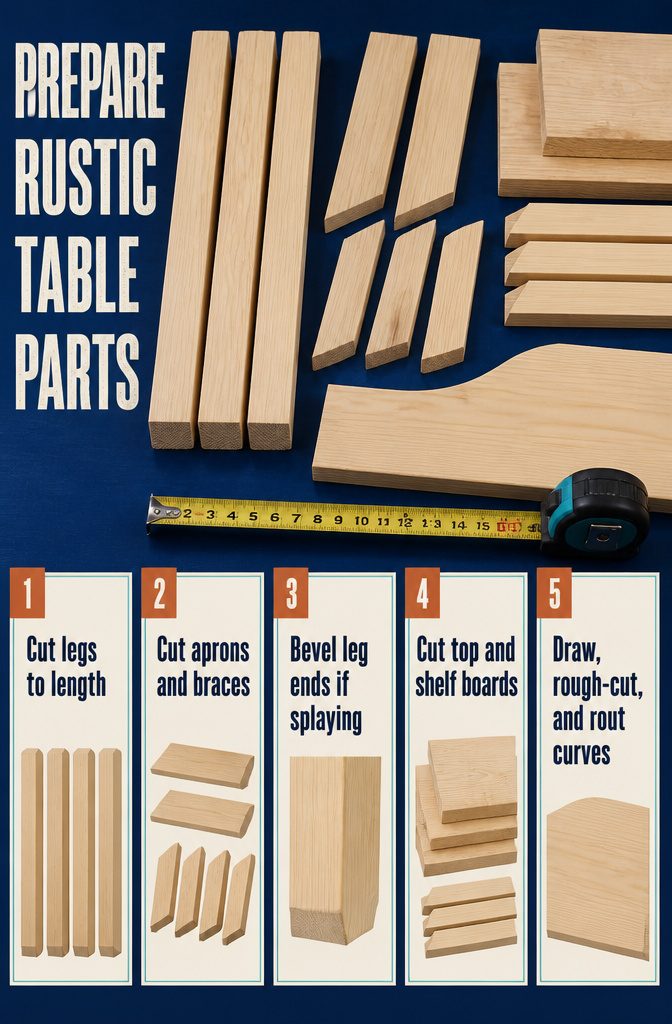
- Cut the legs to length. Start with the 2×4 stock: eight pieces at 22½ inches if you’re following the angled-apron plan, or four 20-inch legs for the simpler strapping version. All leg cuts are straight 90-degree crosscuts.
- Cut aprons and braces to angle. The compound angles take the most care. Two long aprons run 26½ inches from long point to short point, ends parallel, cut at 50 degrees off square. Four short braces measure 13¼ inches on the longest edge, one end at 50 degrees, the other at 10 degrees. If you’re new to compound miters, trace and cut these in place after the legs are up.
- Miter leg ends if splaying the base. Some plans bevel the bottom of each leg at 10 degrees so the table sits wider at the floor. Skip this if you want straight, flush legs.
- Cut top and shelf boards. For a planked top, cut five 2×6s at 27 inches or six 1×4s at 22 inches. Shelf boards run 16 inches.
- Shape curves with a tape-measure arc. Find the center of the top board, drive a nail, hook the tape measure around it, and swing a pencil at the far end to draw a smooth arc. Rough-cut outside the line with a jigsaw, then rout to final shape using the first piece as a template for the shelf.
3. Drill Joinery and Assemble the Base
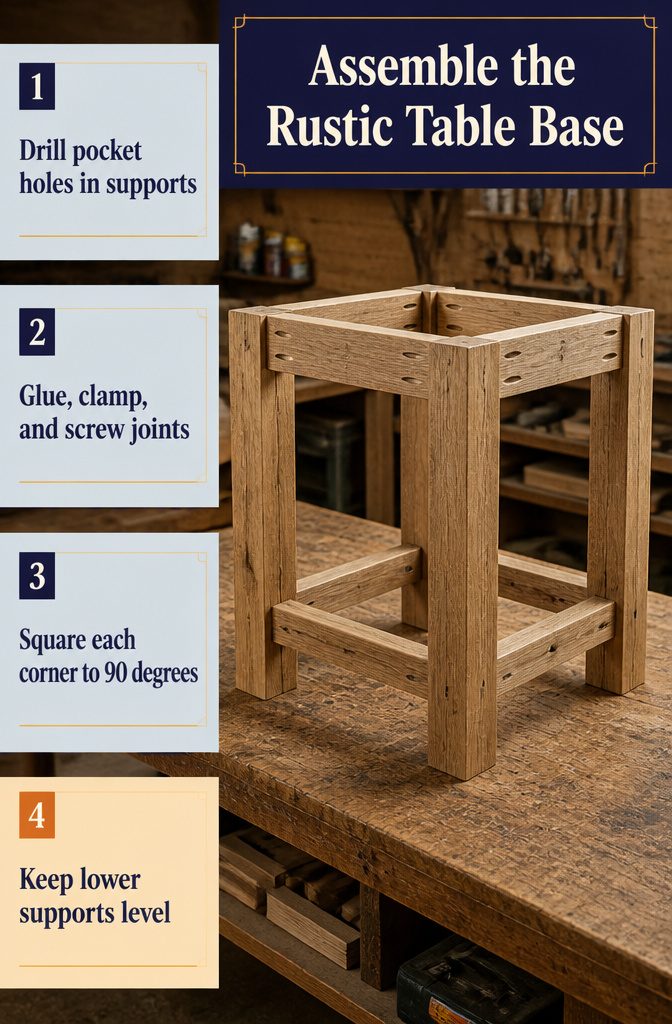
- Drill pocket holes at the ends of your support boards using a jig set for the thickness of your stock. If you’re working with 2×2s, drill just one pocket hole per joint rather than two. Two holes in narrow stock can split the wood, so rely on glue to back up that single screw.
- Position the top supports flush with the tops of the legs, then place the lower supports about 7 inches from the bottom. Clamp each joint, apply wood glue to the mating surfaces, then drive 2½-inch pocket-hole screws to lock everything together. A right-angle drill attachment gets into tight corners where a standard drill won’t fit.
- Work through the frame one joint at a time: glue, clamp, screw. Keep a square handy to check that corners stay at 90 degrees as you tighten.
- Let the tabletop overhang the frame by about ½ inch on all sides once you attach it later. For now, just make sure the apron boards sit flush with the leg tops and that all four lower supports land at exactly the same height.
- If pocket holes don’t suit your look, drill angled pilot holes from the inside face of each support into the leg, or use ⅜-inch dowels set into matching ⅜-inch holes drilled half an inch deep on both pieces. Dowels need precision but hide completely. Screws driven from the outside work too if you countersink them and fill the divots, or leave the hardware visible if it suits the rustic style you’re after.
4. Build and Attach the Top, Shelves, or Slats
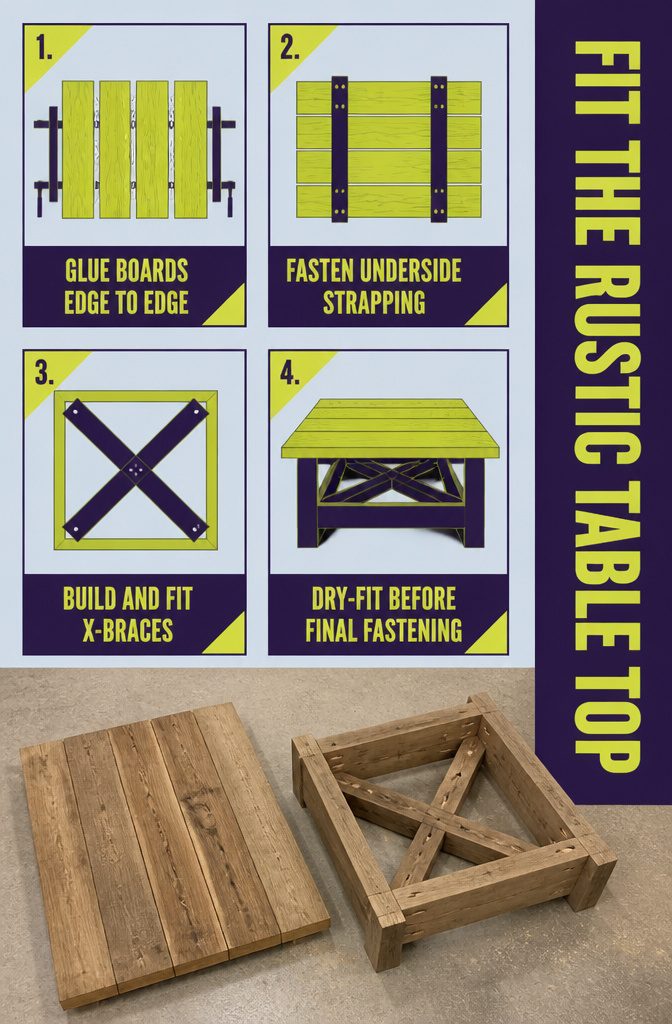
Build and Attach the Top, Shelves, or Slats
- Arrange your boards and glue them edge to edge. Lay out pieces for the top or shelves with the knots and character marks you like best, then apply wood glue to the long edges, clamp them tight and let the glue cure overnight. If you skipped edge trimming, sand those joints smooth before gluing so the panels hold.
- Cut strapping or spacer blocks and attach them to the underside. For a panel top, cut 8-inch lengths of 1×2 strapping and fasten them across the underside in a staggered screw pattern after drilling pilot holes. For a slat design, glue 1×2 spacer blocks along the inside of a 2×4 frame.
- Build any X-braces separately, then fit them. Mark angles by holding each brace in place, cut at 50 degrees off square, then glue and nail or screw the completed X together before dropping it into the frame.
- Dry-fit everything before final fastening. Line up the top on the base with a couple of inches of overhang on all sides, clamp it down, then drive screws up through counterbored holes in the aprons or top rails.
5. Sand, Fill, Stain, Paint, or Seal
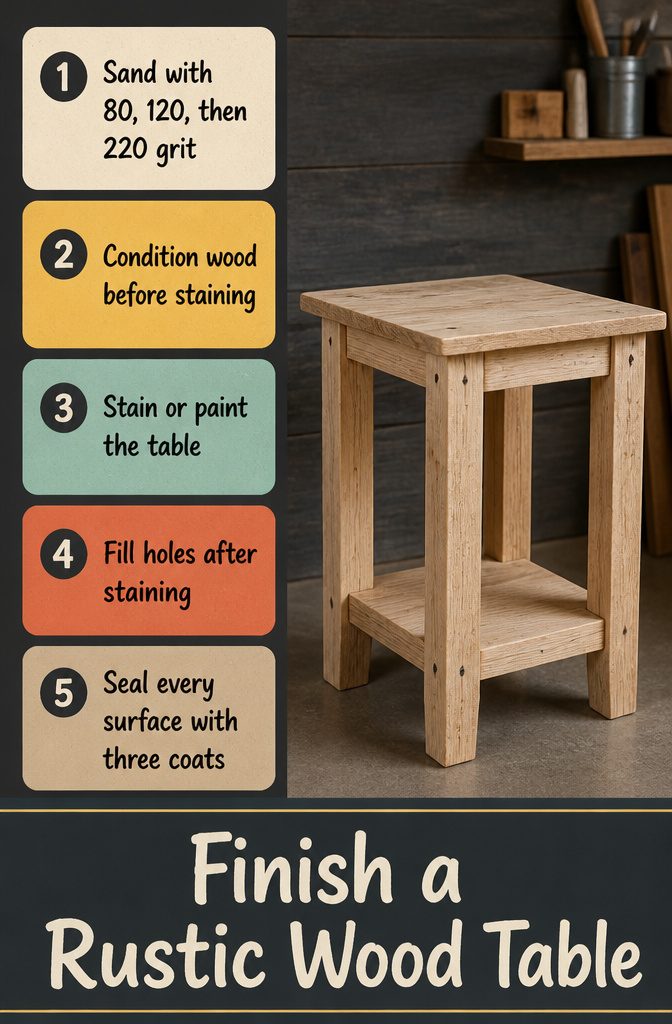
Sand, Fill, Stain, Paint, or Seal
- Sand the bare wood starting with 80-grit sandpaper and work up through 120 to 220-grit, always moving with the grain. Remove dust with a vacuum and a damp lint-free cloth, then let the wood dry completely.
- Apply wood conditioner if you plan to stain. Wipe it on evenly and remove excess within 1–5 minutes for water-based conditioner or 5–15 minutes for oil-based. This prevents blotching, especially on softer pine or reclaimed lumber.
- Stain or paint the table. For stain, apply with a foam brush or rag in the direction of the grain and wipe off excess after five minutes for lighter color or up to fifteen for darker. I like mixing 1 ounce Golden Oak with 1 ml Special Walnut for a warm rustic tone. For a deep black that shows grain, use two coats of India ink with no wait between coats. If you’re painting instead, fill nail holes and defects with wood filler before you sand, let it dry, then prime and paint in two or three coats with light 220-grit sanding between layers.
- Fill holes after staining if you want them hidden. Wood filler takes stain differently, so waiting until after gives you better color matching.
- Seal all surfaces with Polycrylic or polyurethane. Apply thin coats, sand lightly with 220-grit between each, and plan on three coats for tabletops. For outdoor tables, use an exterior-rated finish on every surface including end grain.
6. Complete Final Fittings and Check the Build
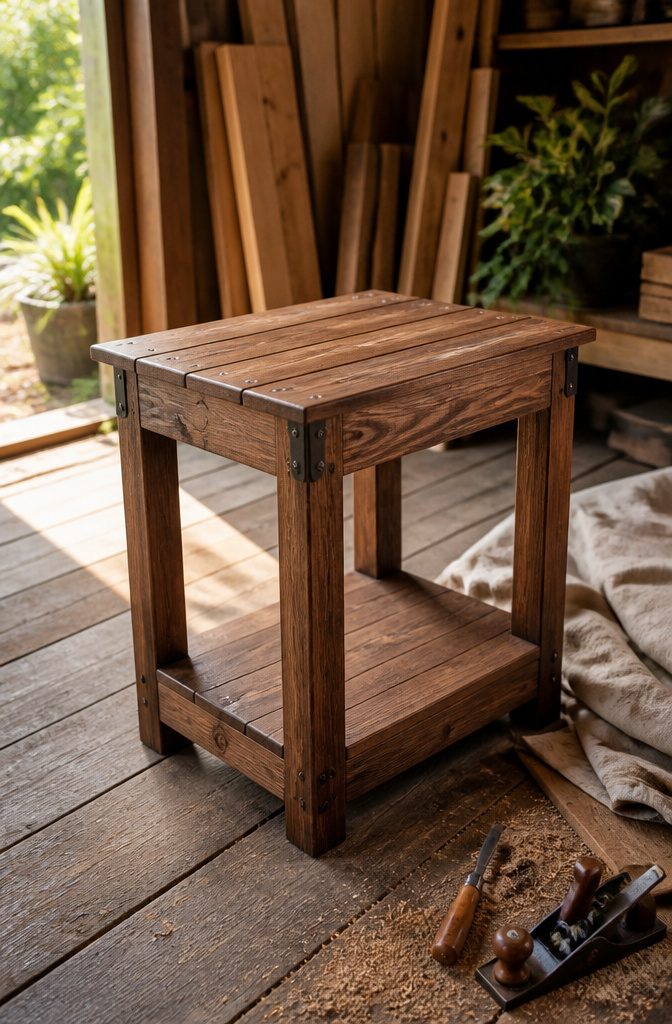
Once the stain or sealer has cured, plug any visible pocket holes before the table goes into service. Pocket hole plugs trim flush with a flush-cut saw, and when they match the wood species they disappear into the grain.
If you used countersunk screws on the top, those heads sit below the surface and stay put—no plugs needed.
Decorative hardware goes on last if your design calls for corner brackets or stretcher details.
Countersunk screws keep the hardware tight to the frame without proud heads catching on fabric or skin. I like the look of visible hardware on outdoor pieces; it reads honest rather than fussy.
If you built a slatted top, brad nails hold the slats without splitting the wood the way screws often do on narrow stock.
A bead of exterior wood glue along the spacer blocks does most of the work, and a few brads keep everything aligned while the glue sets.
Screws are an option if you predrill, but on 1×6 slats the risk of a crack at the end grain is real. Once the slats are down and the glue has cured, the table is ready to move.
Choosing and Preparing Reclaimed Lumber
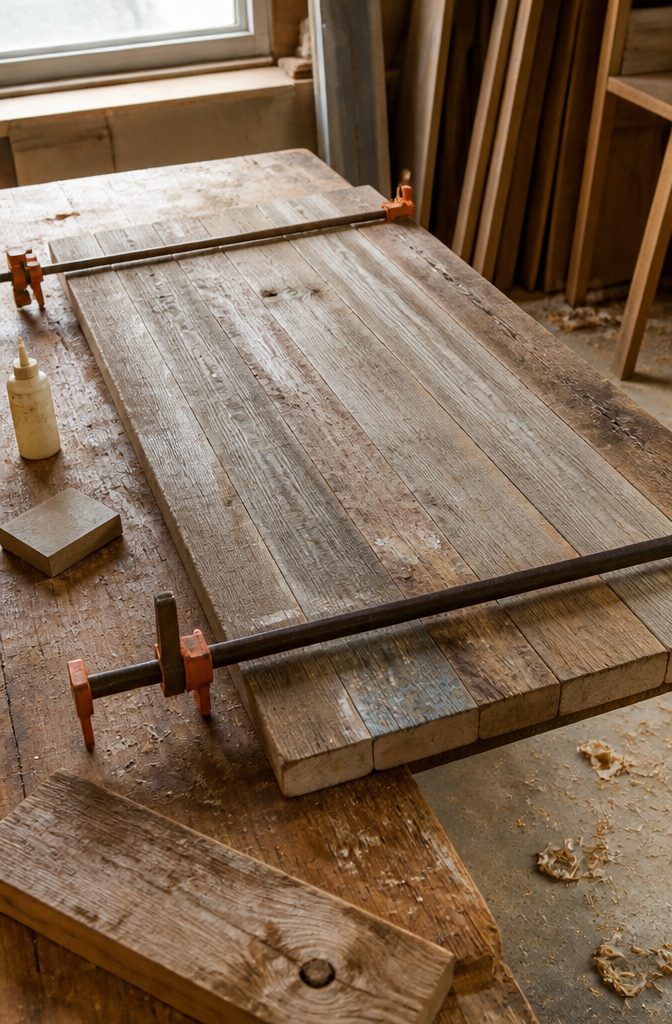
I saved the boards with the most weathering and left the ones with structural damage on the scrap pile.
Knots, old nail holes, and paint splatters all count as character. Deep splits that run clear through the thickness or mangled ends do not.
Reclaimed 2x4s that sat outside for months carry exactly the grain and patina a rustic end table needs, and sorting them took less time than staining new stock to look old.
Once I settled on an arrangement, I trimmed the mating edges on the boards that would sit in the middle of each panel.
Rounded factory edges leave a gap when you clamp them together, and glue needs flat contact to hold.
I kept the rounded corners on the outside pieces and chose boards with the deepest texture for the visible edges. If you do not have a table saw, sand those rounded edges smooth before gluing so the joint closes tight.
Outdoor Wood and Weather Protection
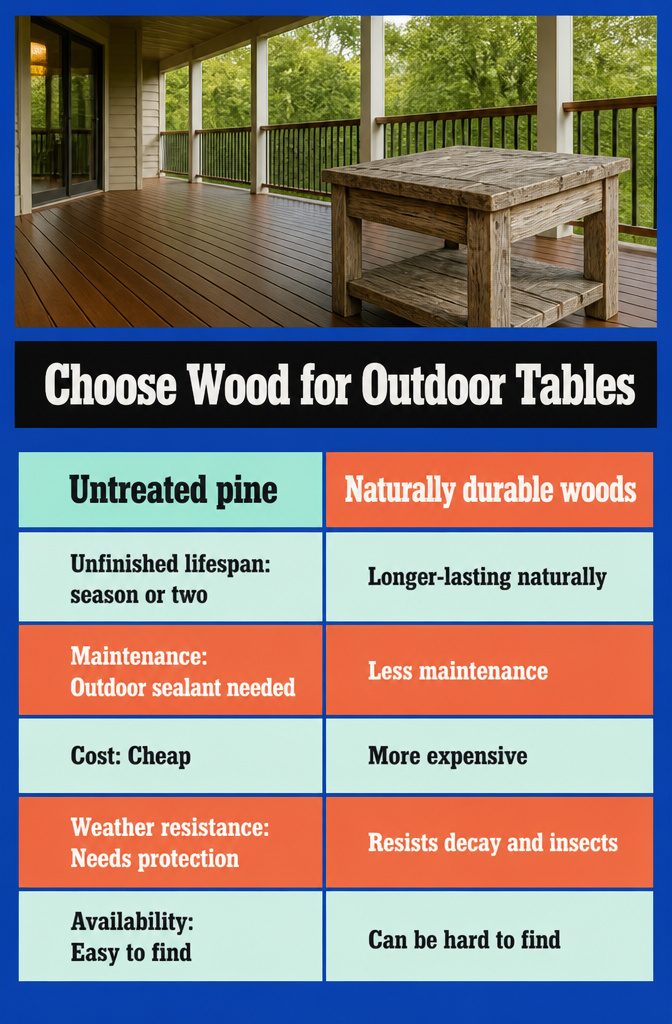
If you’re building this table for a covered porch or open deck, the wood you choose decides whether it lasts five years or just one.
Untreated pine is cheap and easy to find, but left unfinished it may only last a season or two.
A proper outdoor sealant or paint can stretch that to several years if the table sits under cover and the weather is mild.
Pressure-treated wood resists rot longer but it’s heavy to work with and not always the nicest to look at.
Cedar, redwood, and teak resist decay and insects naturally, need less maintenance, and age better, but they cost more and can be hard to find depending on where you live.
Whatever species you pick, use outdoor-rated screws and apply finish to all surfaces, especially end grain. End grain soaks up water faster than face grain, and any exposed edge becomes the first place rot starts.
I prefer a transparent or semi-transparent outdoor stain and sealant because you still see the wood grain underneath. When water stops beading on the surface, it’s time for another coat.
Frequently Asked Questions
What type of wood should you build an outdoor side table with?
Cedar, redwood, and teak resist decay and insects naturally and age well, but they cost more and can be hard to find. Pressure-treated wood resists rot longer and costs less, though it’s heavy and not always nice to look at.
Untreated pine is cheap and easy to find but may only last a season or 2 unfinished, or several years if you seal it properly and keep it under cover.
What wood should I use for an end table?
For indoor tables, reclaimed 2x4s, dimensional lumber, cedar fence pickets, and maple plywood all work well.
Reclaimed boards bring weathering and character like knots and old nail holes without needing stain. For outdoor tables, choose cedar, redwood, or teak for natural rot resistance, or use pressure-treated wood or sealed pine if you’re on a budget.
How do you make a table look rustic?
Use reclaimed lumber with knots, old nail holes, and paint splatters for built-in texture.
Stain with a warm mix like 1 ounce Golden Oak and 1 ml Special Walnut, or apply 2 coats of India ink for deep black that shows grain. Leave visible hardware like corner brackets and countersunk screws rather than hiding every fastener.
Is there a difference between a side table and an end table?
The terms overlap and most plans use them interchangeably.
Both sit beside seating or at the end of a sofa and hold lamps or books, typically standing around 21 inches tall with a footprint of 13 by 19 inches or larger depending on the space.






