
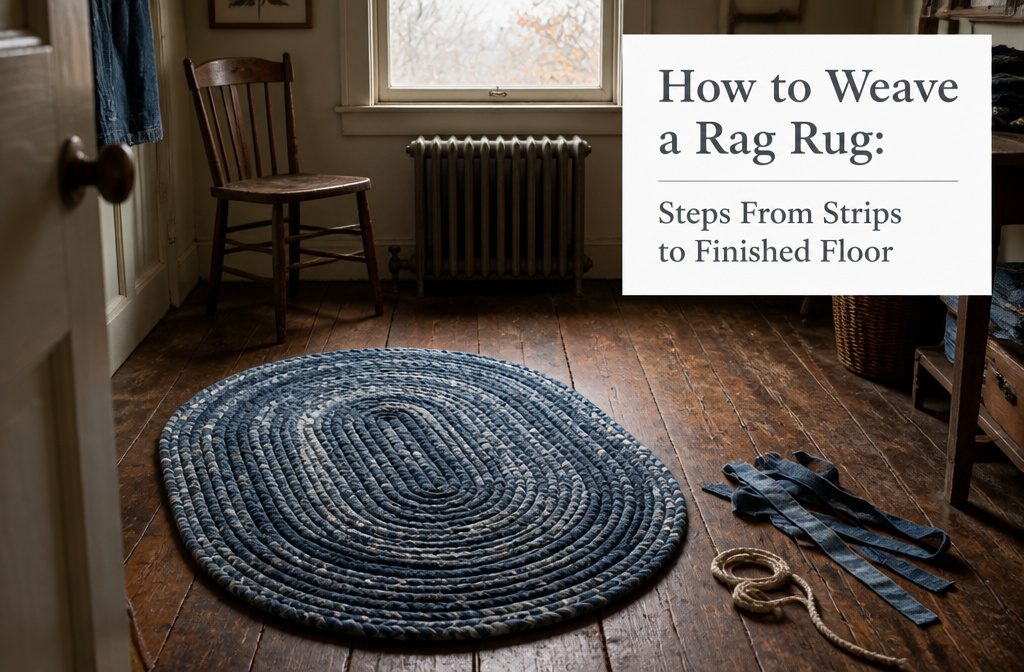
A rope-weave rag rug takes 20 meters of rope, about 8 legs of denim, and an afternoon to finish.
A hooking method on hessian takes longer but needs no loom. Most people space the rags too far apart and end up walking on knots instead of fabric.
Denim yarn strips need to stay under 2 meters or they tangle halfway through the center hole as you coil, and stretch denim frays less than the stiff kind.
1. Cut the Fabric Into Strips
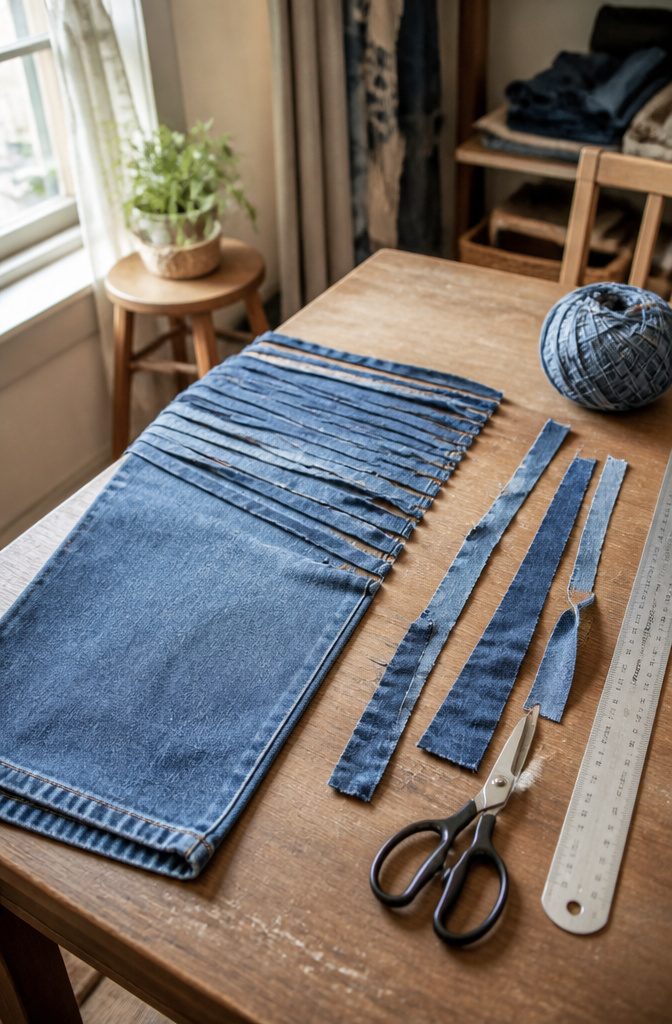
The method you pick decides the cut.
For hooking, cut strips roughly 50 mm long and 20 mm wide, adjusting as you go. Thin stretchy fabric curls up and disappears if you cut it too narrow, so give those pieces extra width.
Stiff fabric won’t curl into the loop unless you cut it thinner. Some fabrics fray heavily when you first cut them but settle down once they’re hooked in; others shed continuously and aren’t worth the mess.
For rope weaving, the approach is different. Cut denim yarn strips about 3 cm wide, stopping 3 cm from the top, then cut diagonally between strips to turn the whole piece into one continuous length.
Flared and boot-cut jeans give you more yarn than skinny jeans, and soft-worn denim wraps more easily than thick, stiff fabric.
One leg produces a large ball of yarn. Stretch denim frays less than non-stretch, though both types will shed some threads as you work with them.
2. Wrap the Starting End of the Rope
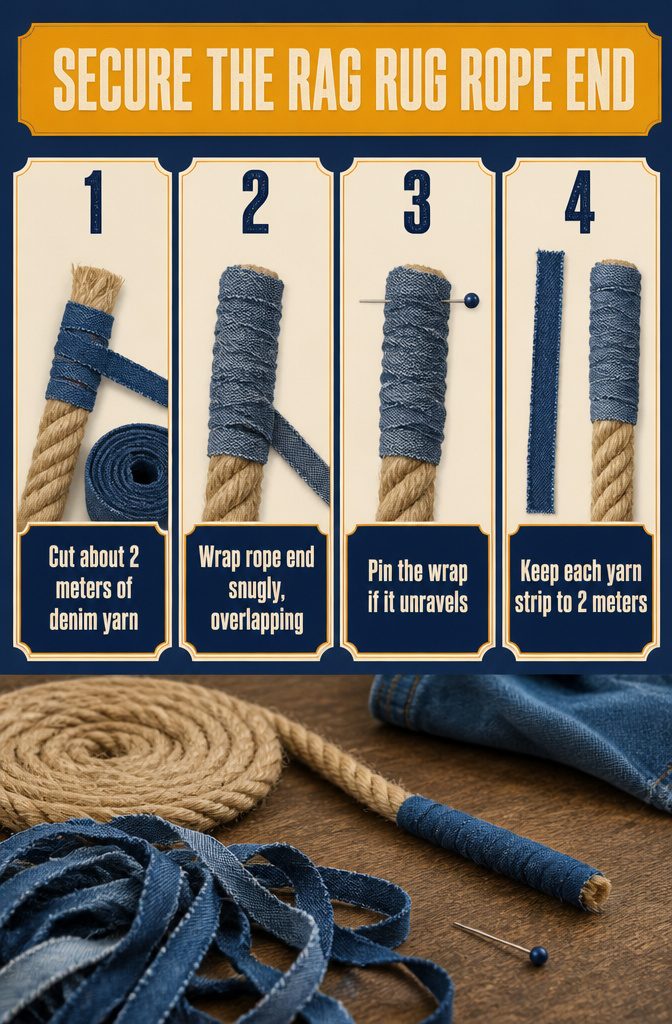
- Cut about 2 meters of denim yarn and wrap it tightly around the end of the rope, overlapping as you go. The wrapping needs to be snug enough that the rope end stays covered and secure.
- Pin the wrapped end temporarily if it tries to unravel. A single pin holds it while you move to the next step.
- Keep your yarn strips to 2 meters. Shorter lengths matter because you’ll be threading the fabric through a small hole in the center of the coil, and anything longer tangles into knots halfway through. I’d rather join a new strip every few minutes than fight a snarl for ten.
3. Start and Secure the Coil
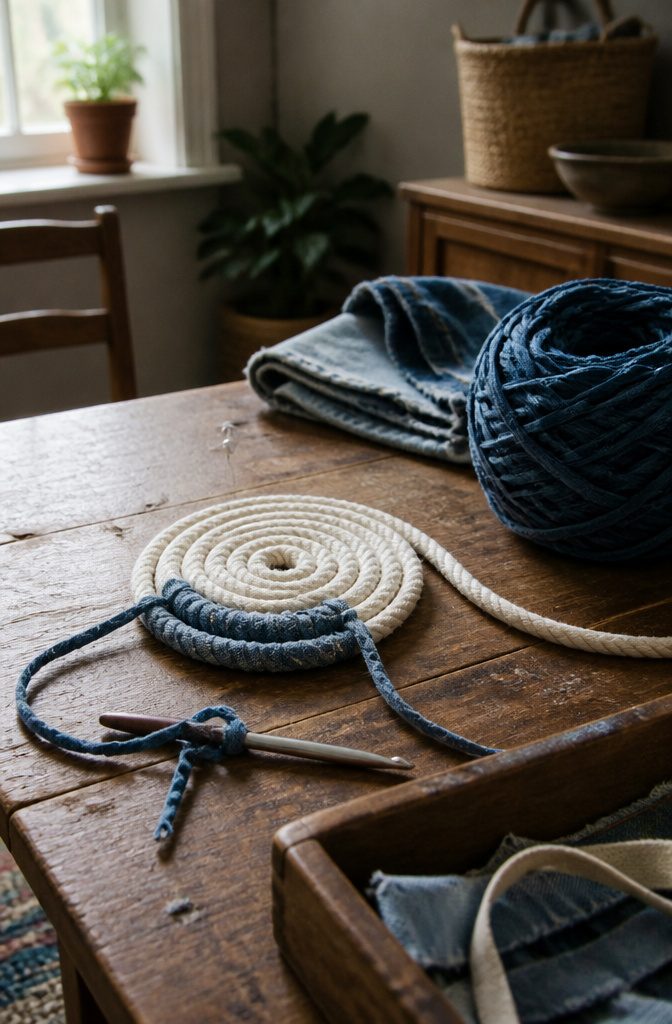
Coil 15–20 cm of rope tightly after you have wrapped the end.
You might want to pin it in place to keep it from springing loose while you work. Thread the end of your denim yarn through the center of that coil using a crochet hook to guide it through.
Pull the yarn all the way out the back, then bring it up between the top two rows of rope and wrap it around both rows together.
Repeat that motion, threading through the center and wrapping around the first two rows, to lock the coil together.
This is the trickiest part of the whole rug. The coil wants to shift, the yarn does not always slide cleanly through, and it takes a few passes before the center feels stable.
Once you have secured those first few rounds, though, the rug builds momentum and the wrapping rhythm becomes much easier to hold.
4. Continue Wrapping and Weaving the Rope
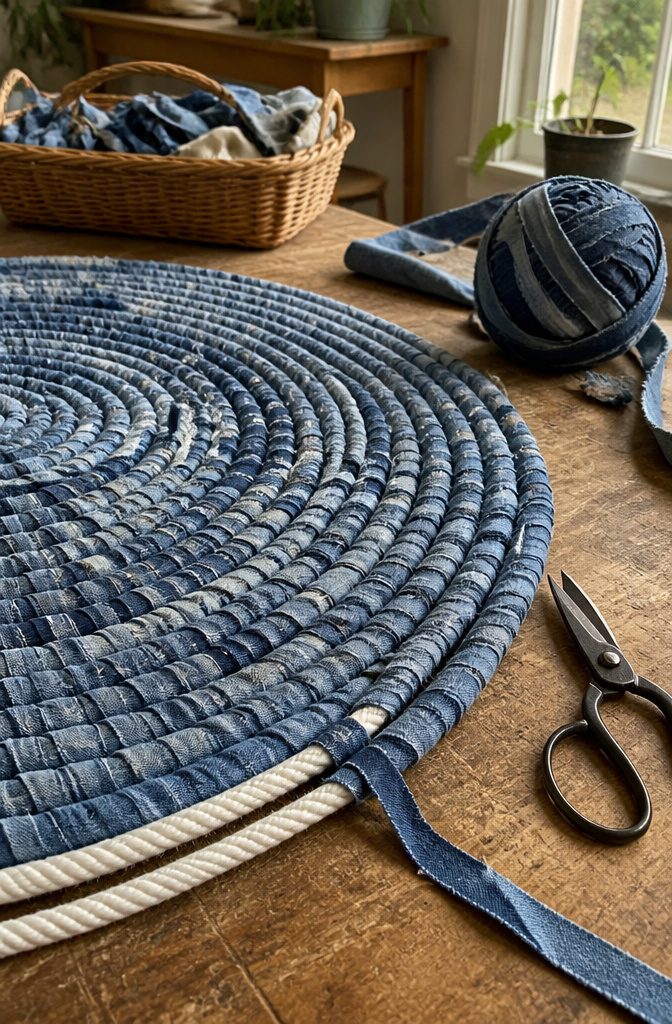
The wrapping pattern itself becomes second nature after the first few inches. Wrap the yarn around a single rope strand three times, pass it through the strand below, then wrap around two strands.
The rhythm matters more than perfection on any single wrap. I find that wrapping three to four times before pulling the fabric through keeps tension even without creating bulky spots where the denim bunches.
When a yarn strip runs out, overlap a new strip over the old end as you continue wrapping.
The next few wraps hold both layers in place, and once the denim is secured you can trim the tail on the underside if it shows.
The overlap vanishes under the coil, so there’s no need for a knot or any stitching to join strips.
5. Loop Rags Through Hessian With a Latch Hook
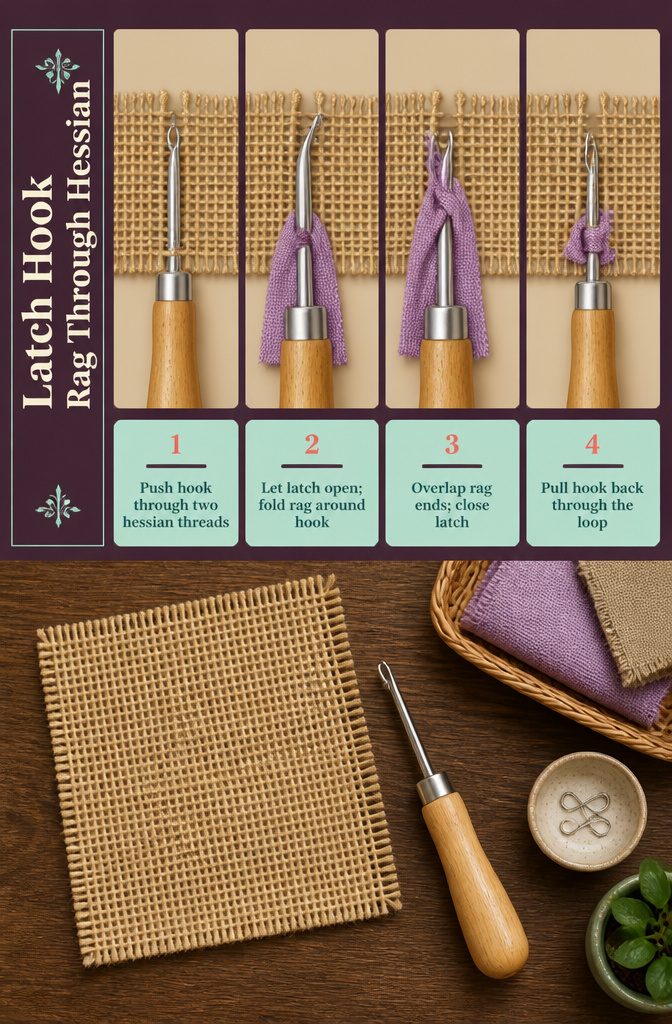
Loop Rags Through Hessian With a Latch Hook
- Push the latch hook through two threads of hessian at a time to guard against snapped threads. The latch should pass completely through to the other side.
- Let the latch fall open once it clears the hessian. Fold your rag strip roughly in half around the curved outer edge of the hook on the handle side of the hessian loop.
- Fold the two ends of the rag over each other inside the hook, then flick the latch closed on top of them so they’re caught securely.
- Pull the hook tool back through the hessian loop and open the latch. The rag should now sit anchored in place, with both ends on the surface side of your base.
6. Space the Rags for Density and Comfort
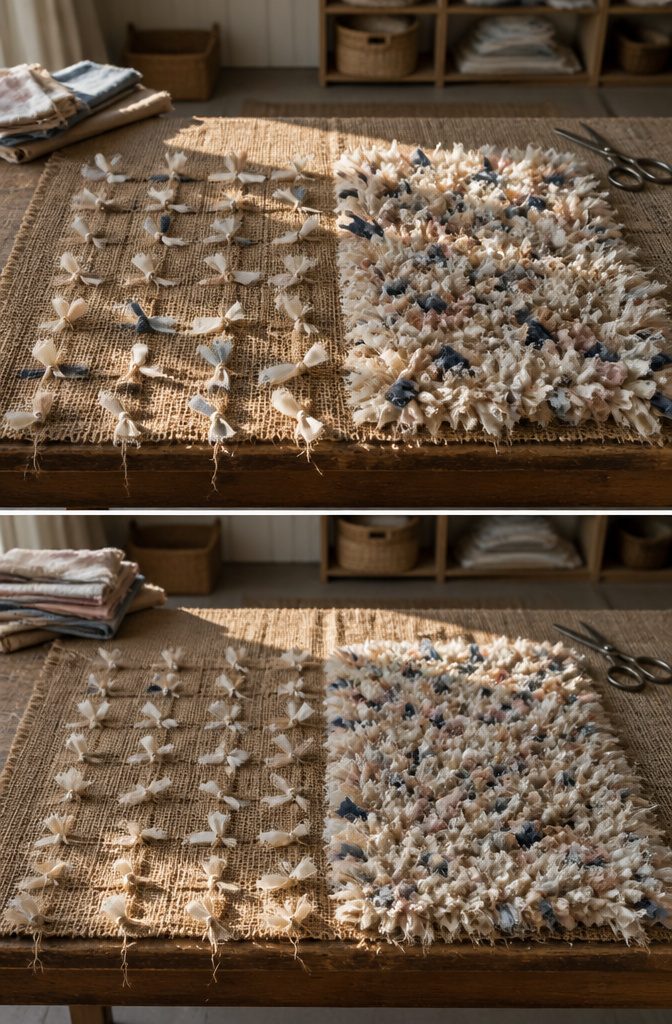
Spacing decides whether the finished rug feels soft underfoot or whether you walk on knots.
When rags sit too far apart, the hessian stays visible from the underside and you feel the knots through the loose ends rather than walking on fabric alone.
A trial section spaced 4 or 5 threads apart looked fine from above but felt noticeably harder than a denser section spaced only 2 threads apart, because the loose rag ends no longer buried the knots.
The tighter spacing takes longer to fill a given area, and going back to fill gaps afterward takes more time than starting dense. A rug made purely for display can tolerate sparser spacing, but anything walked on needs density.
How close you can pack the rags depends on the tightness of your hessian weave, the size you want, and how much time you have. Loose hessian frays and pulls when rags sit too close together.
7. Turn at the Row’s End
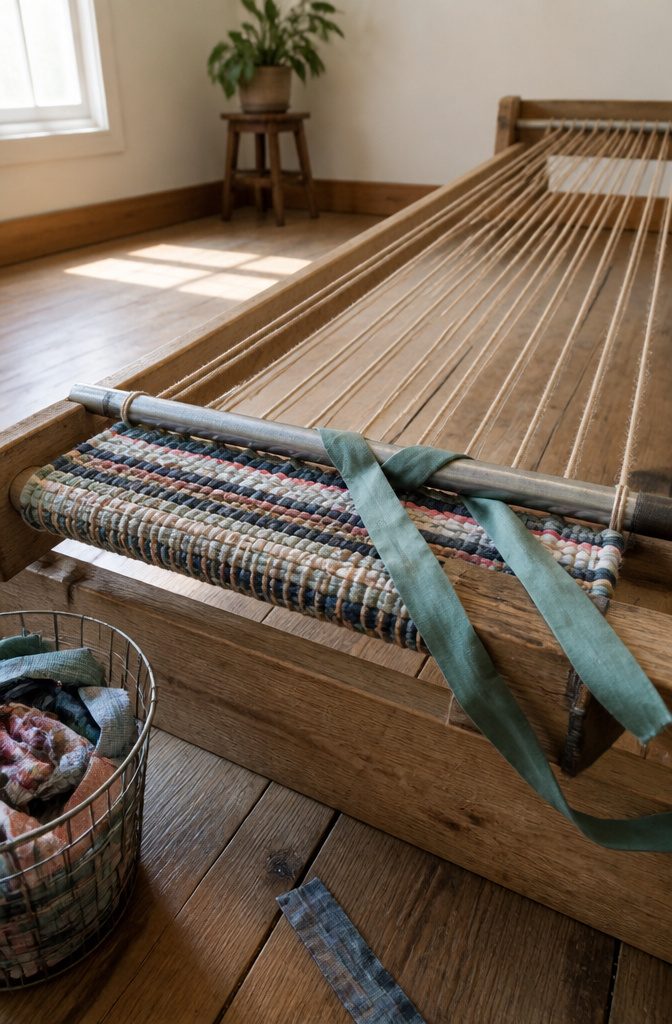
When you reach the right edge, the last warp thread and the metal rod count as one unit.
Take your left strip over the right, slide it under the last warp and rod together, then hold that strip out straight so the crossing stays visible.
Now take the strip that’s on the left, bring it over, around, and back through the gap between the rod strip and the second warp thread. Pull it snug.
You’re facing left now. Take the strip sticking out to the side—that’s your right strip—over the left one, then under and up between the second and third warp threads.
Keep weaving left until you hit the rod on that side. The same moves apply in reverse: right strip over left this time, wrapping around the rod and threading back through before you turn and head right again.
I still have to think through the sequence every time, but once the rhythm settles, the turns come faster.
8. Seal the Hessian Edges
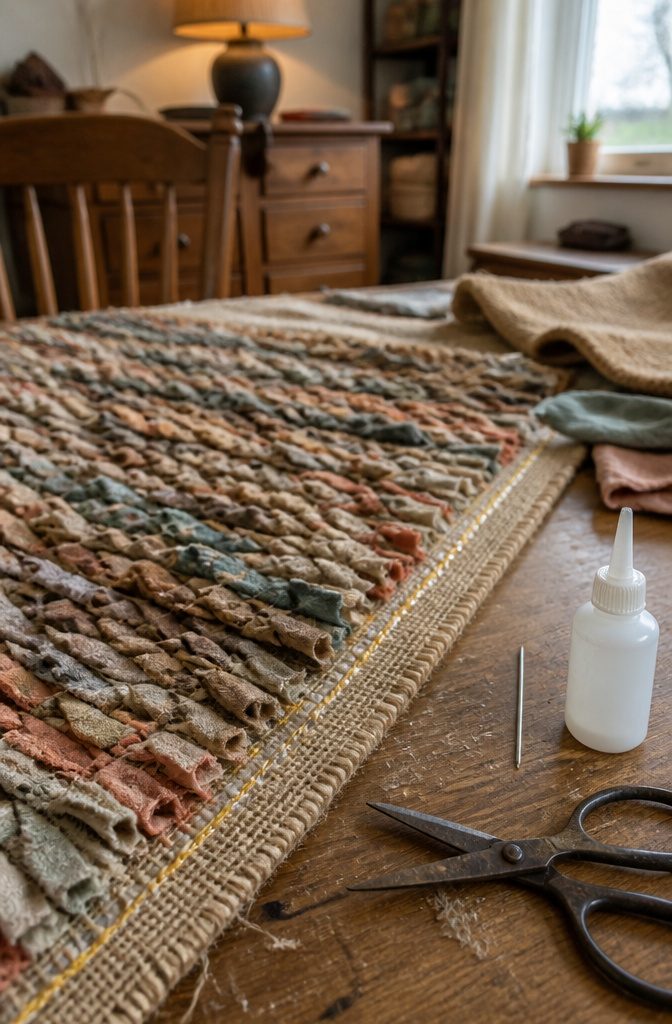
Once the hooking is finished, the raw hessian edge needs locking down or it will fray and pull away from the ragged pile.
Thick gold thread stitched close to the ragging holds the edge in place, and I add a line of super glue right alongside the stitching for double security.
The glue soaks into the weave and stops any thread from working loose over time.
This combination came after trying stitching alone, which held well enough at first but loosened after a few weeks of foot traffic near the edge. The glue makes the difference.
Run the bead thin so it doesn’t stiffen a wide strip of hessian, just enough to anchor the thread and seal the cut edge. Let it dry completely before trimming any excess base material.
9. Trim Away Excess Base Material
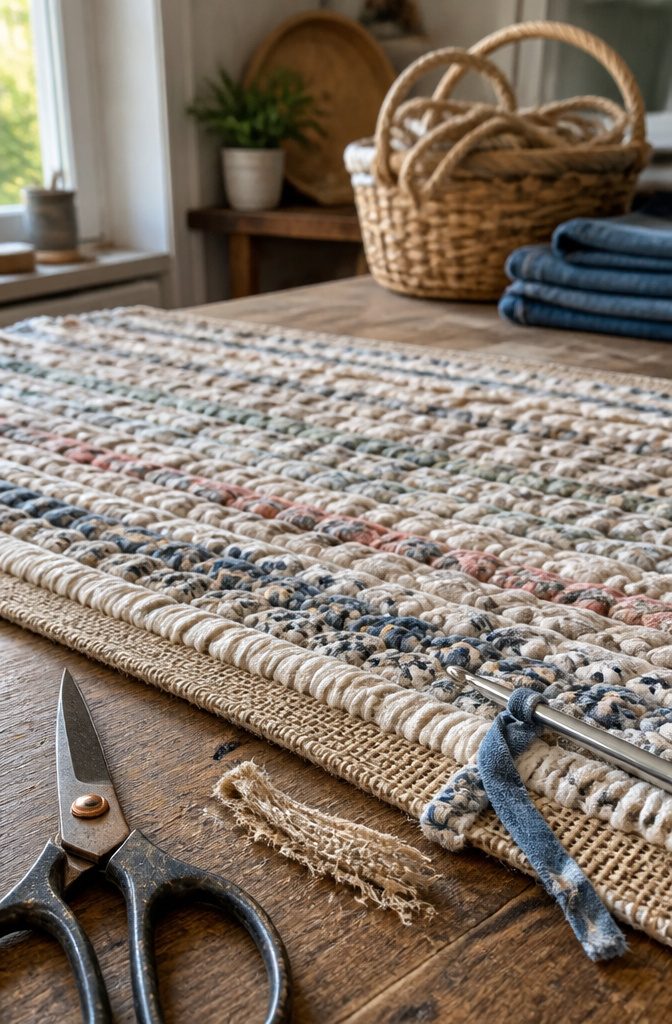
Once the rope coils stop or the rug hits the size you wanted, weave the fabric-yarn end back into the rug to lock it in place.
Thread the last strip through a few wraps on the edge using the crochet hook, pulling it snug so nothing unravels. Trim any tail that sticks out beyond the weave.
For hessian-base rugs, trim away surplus hessian after you have secured its edges. Cut close to the binding or whipstitch line, leaving just enough margin that the edge treatment holds.
A quarter inch is usually plenty. The trimmed base sits flat and keeps the rug from curling at the corners.
If the rope runs out before the rug is finished, join another coil with duct tape. The fabric wrapping hides the join completely.
You can also add another coil anytime you decide the rug needs to grow. Just tape the new rope to the last coil and keep wrapping and weaving outward.
10. Finish the Back and Add Optional Fringe
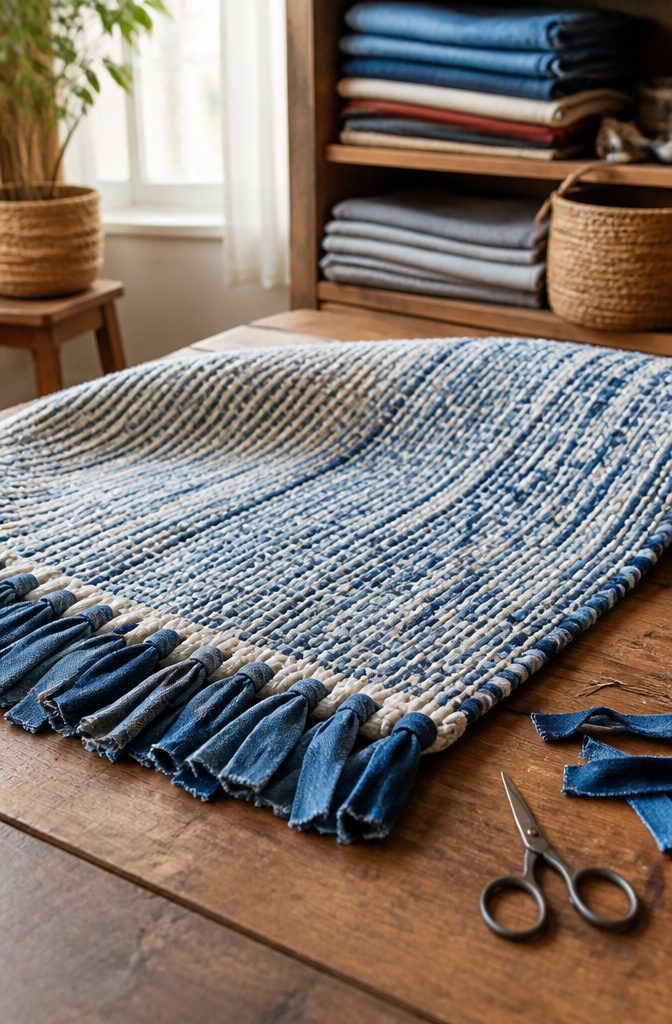
Once the rug comes off the loom, you have tails and exposed warp loops to deal with.
Weave the ends through a couple of back loops rather than knotting them. Knots create bumps, especially with denim, and those bumps telegraph through to the front.
If an end looks like it might work itself loose, tack it with a needle and thread. Then cut the tails flush.
For fringe, the warp loops at the rug’s ends do most of the work.
Cut fabric strips 1 inch by 17 inches. Pass a strip through each loop from the front, pull both ends of the strip through its own loop, and tighten.
Continue across both ends of the rug. The fringe stays put without stitching because the strip locks onto itself through the warp loop.
Which Fabrics Work Best
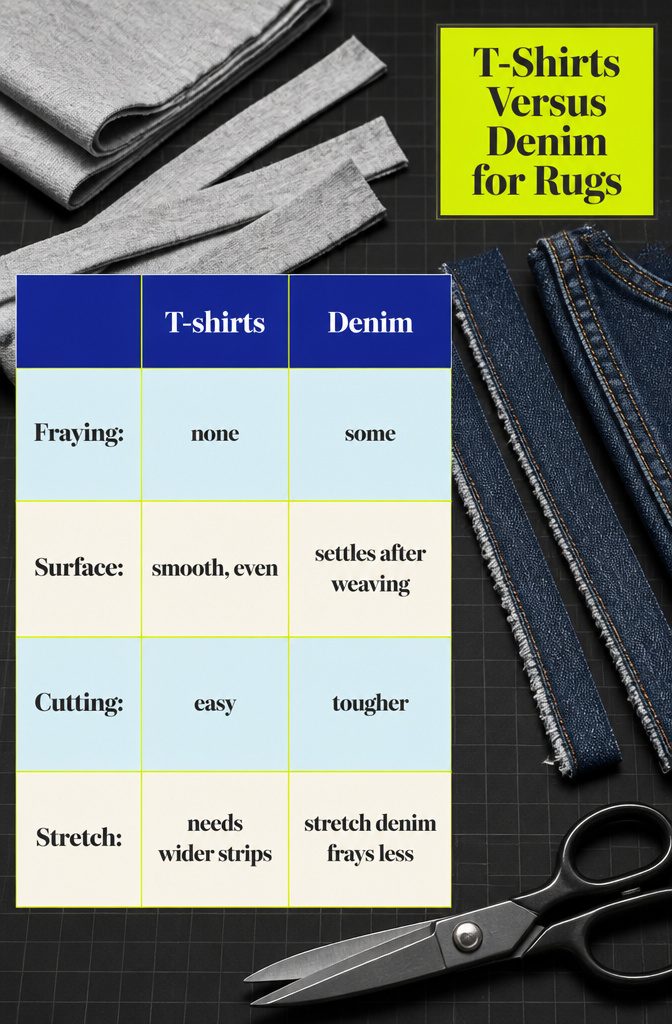
Fabric choice decides how much effort you’ll spend cutting and how cleanly the rug will hold together once you start wrapping.
T-shirts are the easiest option: they don’t fray at all and produce a smooth, even surface without loose threads working their way out as you handle the strips. Old bed sheets, sweaters, cotton, and polyester all work just as well.
Denim is tougher but usable.
Stretch denim frays less than the non-stretch kind, so if you’re working from old jeans, reach for those first. Both types will shed some threads when you cut them, but the fraying settles once the strips are woven in.
One leg of jeans produces a large ball of fabric yarn, and flared or boot-cut styles give you more material than skinny cuts.
Very heavy or stiff fabric fights you when you try to wrap it around rope, so stick with softer, more pliable materials.
Stretchy t-shirts curl up when cut too thin and disappear into the rug, so those need wider strips—closer to 50mm rather than 20mm.
Tools and Materials You Need
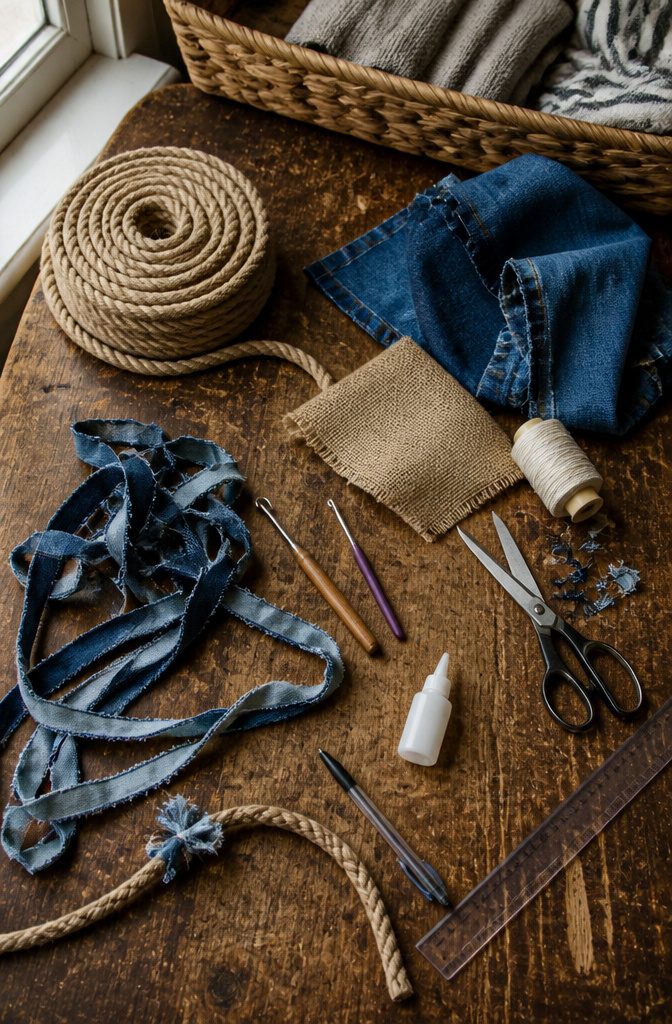
The tools change with the method, but most of what you need is already in the house.
For rope weaving:
- 20 meters of rope 14 mm thick (or 8–14 mm; thinner rope requires more length to reach the same rug size)
- About eight legs from four pairs of straight-legged adult jeans
- Scissors, ruler, and pen
- A crochet hook or large bobby pin to help pull fabric strips through loops
For hooking:
- Hessian base
- Latch hook
- Thick thread
- Super glue
Nylon or natural rope both work. I find the thicker end of the range easier to handle when you’re first learning the pattern, and it lets you finish faster since each wrap covers more ground.
Frequently Asked Questions
What type of denim works best for a rag rug?
Any style of jeans works, but flared and boot-cut styles give you more fabric yarn than skinny cuts.
Soft-worn denim wraps more easily around rope than thick, stiff fabric, and stretch denim frays less than non-stretch though both shed some threads when you cut them.
Why cut the yarn into 2-meter strips?
Shorter strips thread through the small center hole of the coil without tangling into knots halfway through. Anything longer fights you every few minutes, so joining a new strip beats wrestling a snarl.
Can I use other fabrics besides denim?
T-shirts, bed sheets, sweaters, cotton, and polyester all work well. T-shirts are the easiest because they don’t fray, while very heavy or stiff fabric fights you when you try to wrap it around rope.
What kind of rope should I use?
Nylon or natural rope between 8 mm and 14 mm thick works best. Thicker rope is easier to handle when you’re learning the pattern and lets you finish faster since each wrap covers more ground.






