
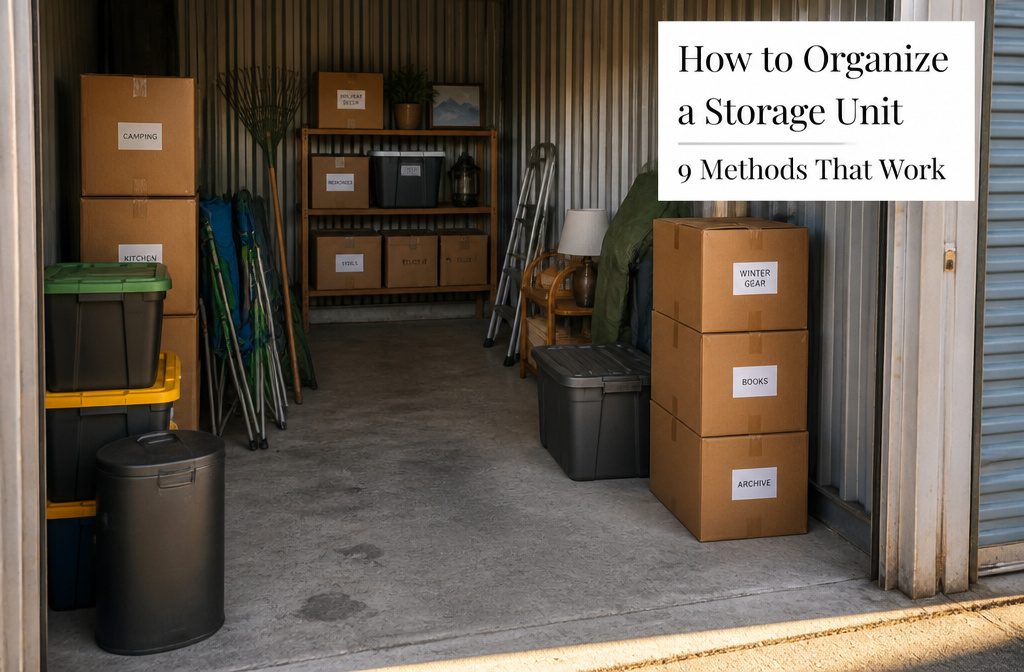
A 10-by-15-foot storage unit organized by zone, with a center walkway and frequently needed items near the door, keeps everything accessible without unloading half the space to find one box.
Most people pack well but plan the layout too late, once boxes are already stacked and the clearest path is gone.
Drawing the unit to scale before you load it—half an inch per foot on paper—gives you a map to follow so holiday decorations, long-term archive boxes, and seasonal gear each get their own section instead of ending up wherever they fit at the moment.
1. Plan the Layout and Group Belongings by Use
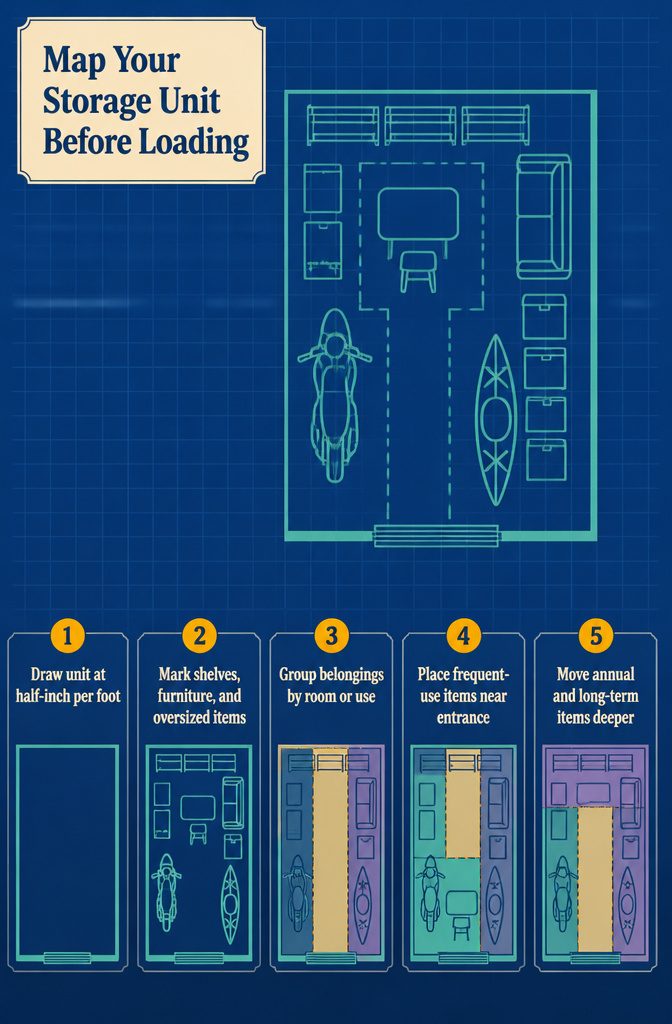
Start by drawing the unit to scale on paper, using the method Storage Solutions recommends: half an inch represents one foot.
A 10-by-15-foot unit becomes a 5-by-7.5-inch rectangle, small enough to sketch in a few minutes but accurate enough to fit real furniture and boxes on the page.
Mark any shelving units you plan to bring in, a table or chair if the unit is large enough to work inside, and anything oversized like a motorcycle or kayak.
If you want an aisle down the center, draw that too.
Once the footprint is clear, divide the unit into zones based on how often you need each category.
Group belongings by room or use: kitchen boxes together, tools together, seasonal decorations in their own section. What you need regularly goes near the entrance.
Holiday items and things you might pull out once a year sit in the middle. Belongings heading to long-term storage belong at the back, tucked against the wall where they will not block anything else.
Sketch those zones on your layout so you have a map to follow when loading day arrives, not a guessing game in a half-empty unit.
2. Make an Inventory Before Packing
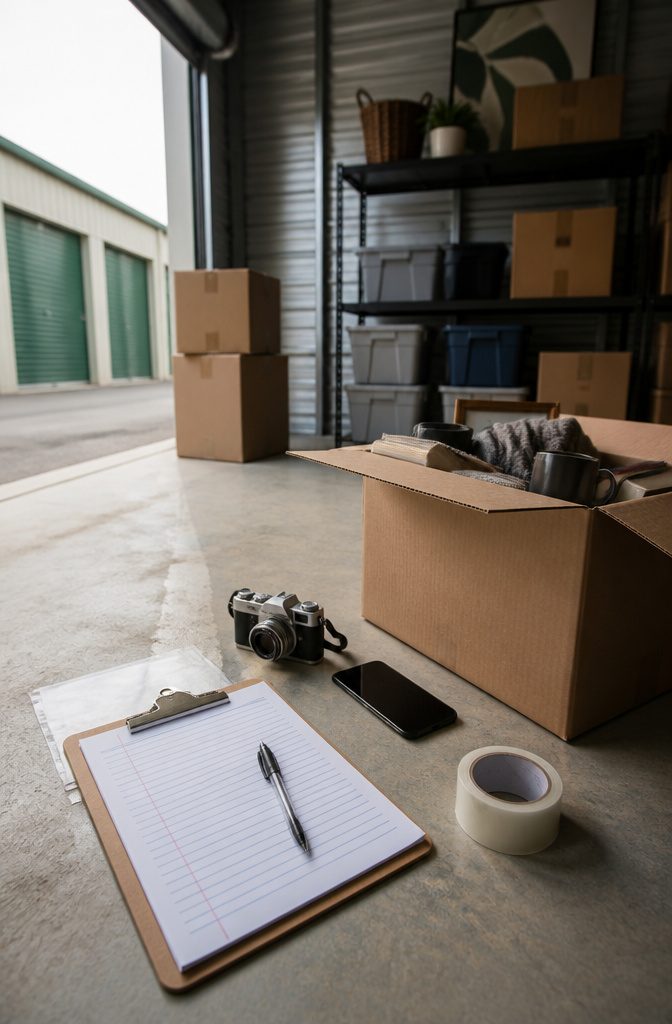
Before anything lands in a box, make a master list of what you’re storing. I keep a digital copy on my phone and a printed version inside the unit itself in case one goes missing.
The list travels with you, and you can update it anytime something leaves or arrives without digging through plastic bins to remember what you packed six months ago.
Two ways to structure the inventory work well. Write the full contents on each box as you pack it, or number each box and record what’s inside next to that number on your list.
The numbered approach saves time at packing and keeps your workspace cleaner, though it does mean consulting the list later when you need something specific.
Either system beats opening unsealed boxes in the aisle because you forgot which one holds the winter coats.
Photos help more than most people expect. Take a picture of each box after you pack it but before you seal the top.
You’ll see exactly what’s inside when you’re standing in the unit trying to decide which carton to pull, and the images double as proof for an insurance claim if you ever need to file one.
3. Label Boxes and Containers on Multiple Sides
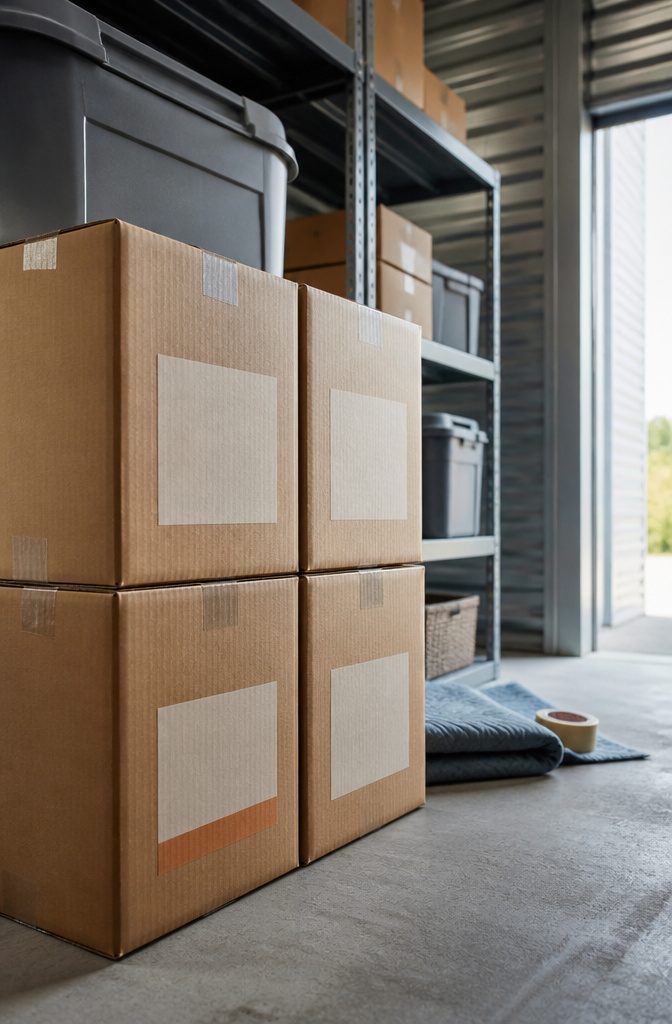
I label boxes as I finish packing each one, which is when I still know exactly what went inside.
Waiting until everything is packed means guessing or opening them again, and that defeats the point. The label itself goes on multiple sides of the box so I can read it without moving anything.
If a box ends up stacked three deep or wedged into a corner, I still see what it holds from whichever side faces out.
Two systems work equally well. The first writes the full contents on the top and at least two sides of each box, which gives me the answer at a glance.
The second assigns each box a number and keeps a master list that matches the number to what is inside.
The numbered approach saves time on the box itself and keeps the unit tidier if I stack boxes in order, since I can scan the list instead of reading every label.
Either way, the front of the box or the side I can see from the walkway carries the information I need.
Color coding by room or category helps if I am storing for multiple people or plan to move belongings in phases, but it only works if the label still tells me what the color means without checking a separate key.
4. Pack in Sturdy, Uniform Containers
Pack in Sturdy, Uniform Containers
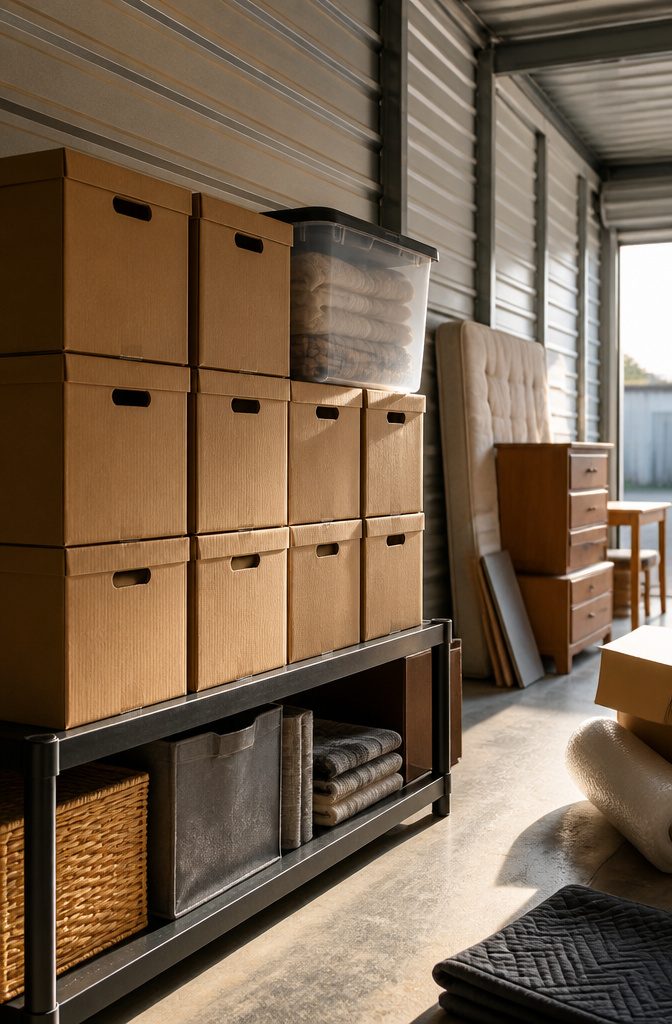
The fastest way to stabilize a stack and fit more into your unit is to pick one box size and stick with it.
Medium boxes around 3 cubic feet or lidded plastic bins of the same footprint work best. They fit neatly on shelving, stay light enough to lift when full, and lock together in columns without wobbling or wasting air between rows.
Clear plastic bins cost more than cardboard, but they let you see what’s inside without unpacking.
They also block moisture and bugs, which matters if anything sits for months. Cardboard is fine if the unit stays dry and you label well.
Some people favor containers matched to what goes in them, like smaller bins for holiday decorations or wardrobe boxes for hanging clothes.
That approach works if you have the storage to keep the empties between uses. For most renters packing a unit once or twice, uniform medium boxes win on simplicity and space.
5. Protect Belongings While Packing
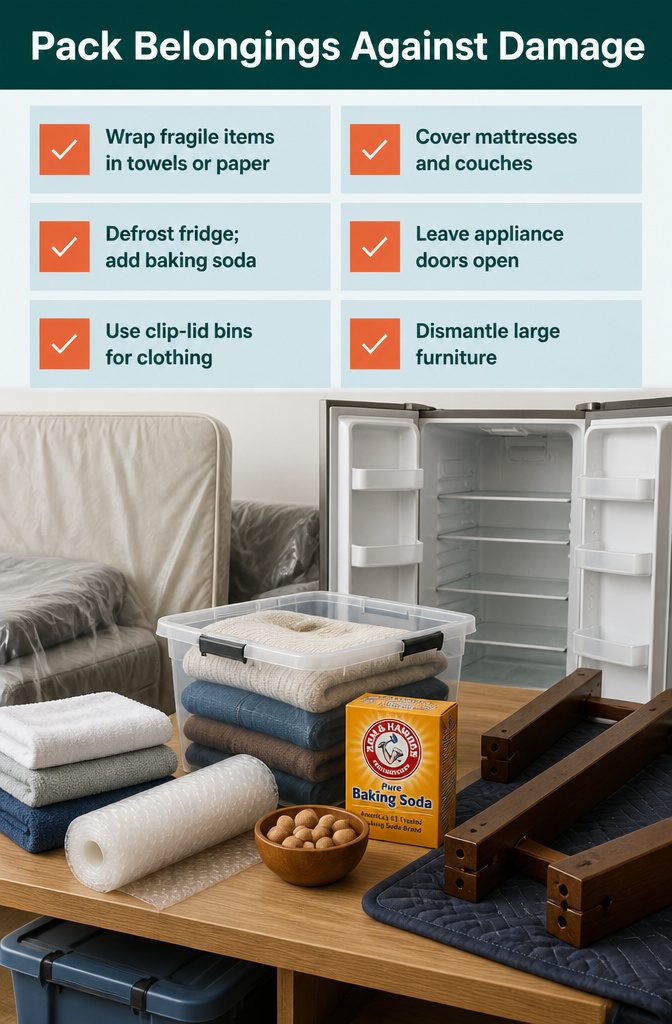
Packing protects as much as padding does. Before you load the unit, wrap fragile items, prep furniture and appliances, and shield everything from dust and damage.
- Wrap fragile items in bubble wrap, packing paper, or towels to prevent breakage. Rolling utensils in cloth napkins or wrapping dishes in seasonal towels does double duty.
- Cover mattresses and couches with protective covers to block dust, mold, and pests.
- Defrost refrigerators before storing them. Place Arm & Hammer baking soda inside to absorb odors and moisture, which also reduces mold and mildew. Keep appliance doors open while stored.
- Store clothing in containers with clip-on lids rather than cardboard boxes. Add cedar balls to ward off moths and odors. Use wardrobe boxes for delicate items that need to keep their shape.
- Dismantle large furniture like bed frames and tables to save space and reduce the chance of damage during handling.
6. Use Shelving and Vertical Space
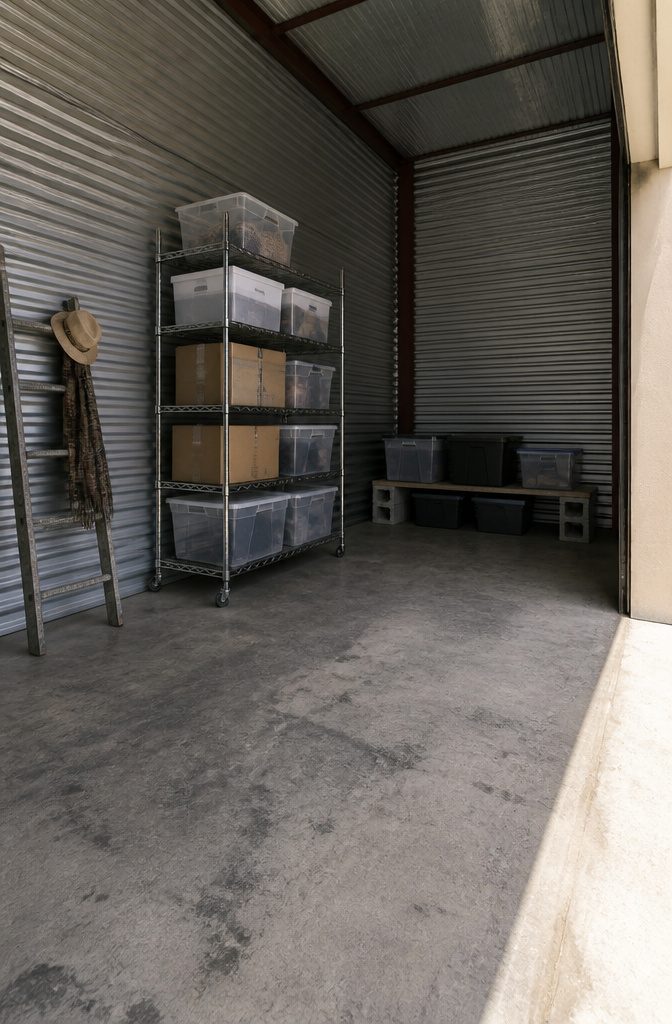
The floor takes weight, but freestanding shelving holds more without the gamble of stacking boxes ten high.
Wire shelving with adjustable shelves is what I reach for first: you can shift a shelf height as what you store changes, and models with wheels let you slide the unit out to reach anything wedged behind it.
Wall-mounted shelves sound cleaner, but most facilities ban screws or brackets that pierce the walls, so skip them entirely.
Using shelves eliminates the issues associated with stacking – if you inadvertently place a heavier bin on one containing fragile items such as glassware, they’d be damaged.
— RentCafe
Shelving means you can pull the middle box without unstacking four others, and fragile items sit on their own level instead of under something twice their weight.
Budget options work just as well.
Cinder blocks and wood planks give you DIY shelves for a fraction of what store-bought units cost, and an old ladder propped against the wall holds scarves, hats, or anything else you can drape or hook.
Bungees and hooks let you hang items from the walls or ceiling, turning every vertical inch into storage rather than leaving it empty above waist height.
7. Stack Heavy Belongings Lower, Light Ones Higher
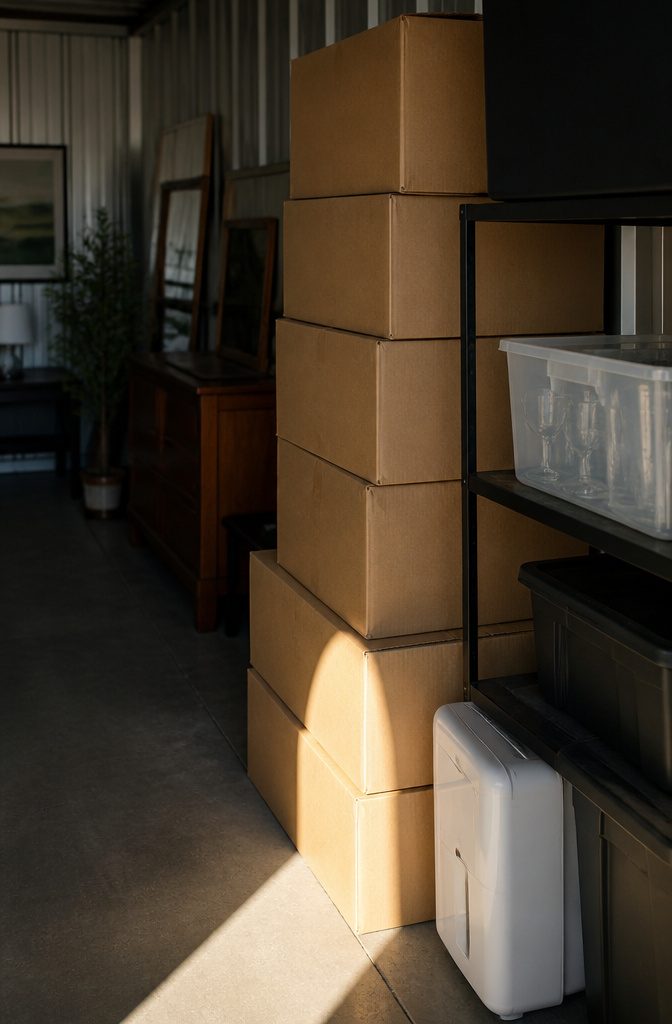
The heaviest boxes and containers go at the bottom of every stack, with lighter ones layered up from there.
That keeps weight pressing down instead of crushing what sits below, and it keeps stacks from tipping. Books, appliances, glassware and heavy furniture all belong on the floor or the lowest shelf tier.
Uniform box sizes make stacking safer and more stable. Medium-sized boxes around 3 cubic feet fit well on shelving, stack cleanly, and stay manageable to lift.
When every container shares roughly the same footprint, you build straight columns instead of wobbling towers. Mismatched box sizes leave gaps, waste vertical space, and put pressure on corners that were never meant to carry the load above them.
Stack only as high as the column feels solid. A tower that sways when you nudge it will collapse the first time you pull something from the row behind it.
8. Leave a Walkway Through the Unit
Leave a Walkway Through the Unit
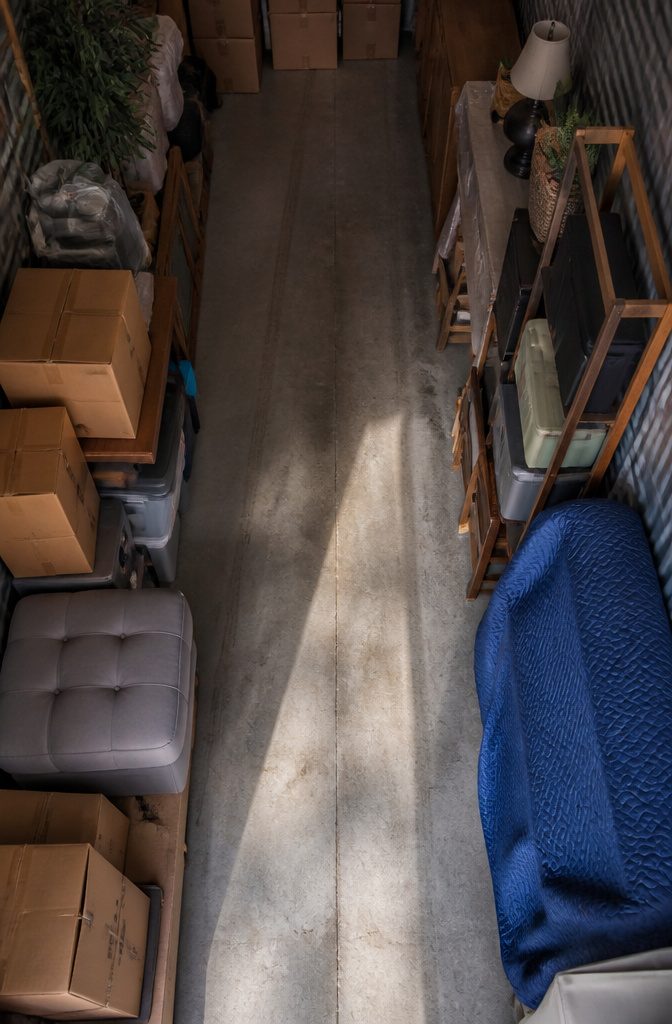
A storage unit packed wall to wall becomes a locked vault the moment you need something from the back. Keep a center walkway open so you can reach anything without unloading the front half of the space first.
I treat the layout like a mini warehouse.
The path runs down the middle, and boxes stack in rows on either side. That single strip of open floor makes the difference between a five-minute retrieval and an hour of shifting furniture.
A couple of feet between each row gives enough clearance to turn, crouch, and pull boxes out without knocking others over.
The gap doesn’t need to be wide, just consistent. Narrow aisles feel cramped fast, and items wedged too close together end up damaged when you try to slide something free.
The walkway also keeps air moving through the unit, which helps if humidity builds. Static air against cardboard invites mildew over time, especially in units without climate control.
9. Put Frequently Needed Belongings Near the Entrance
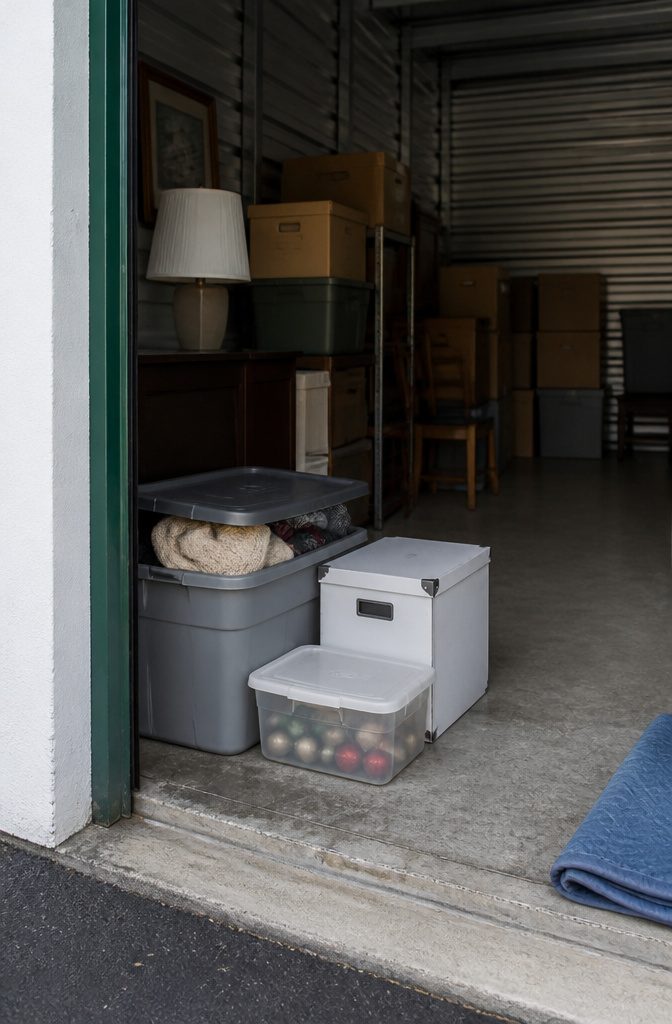
The belongings you reach for most often belong within arm’s reach of the door.
Business documents that need regular review, clothing you swap seasonally, and holiday decorations all fit the profile. Anything you expect to need in the next few months goes in front, where you can grab it without stepping past the threshold.
Farther back is where I put the belongings I know I won’t touch for a year or more.
The middle of the unit holds the occasional-use layer: decorations that cycle through once a year, camping gear that sees a few weekends, archived files that might need a single reference check.
The back holds archive boxes, long-term storage, and furniture waiting for a future move.
This placement saves time every visit. Walking straight to what you need means you avoid pulling boxes aside, re-stacking crates, or disturbing a carefully packed column just to find one file folder.
The rest of the unit stays intact, and the front row stays accessible without rearranging the whole space.
10. Choose a Unit Size and Features That Match What You Store
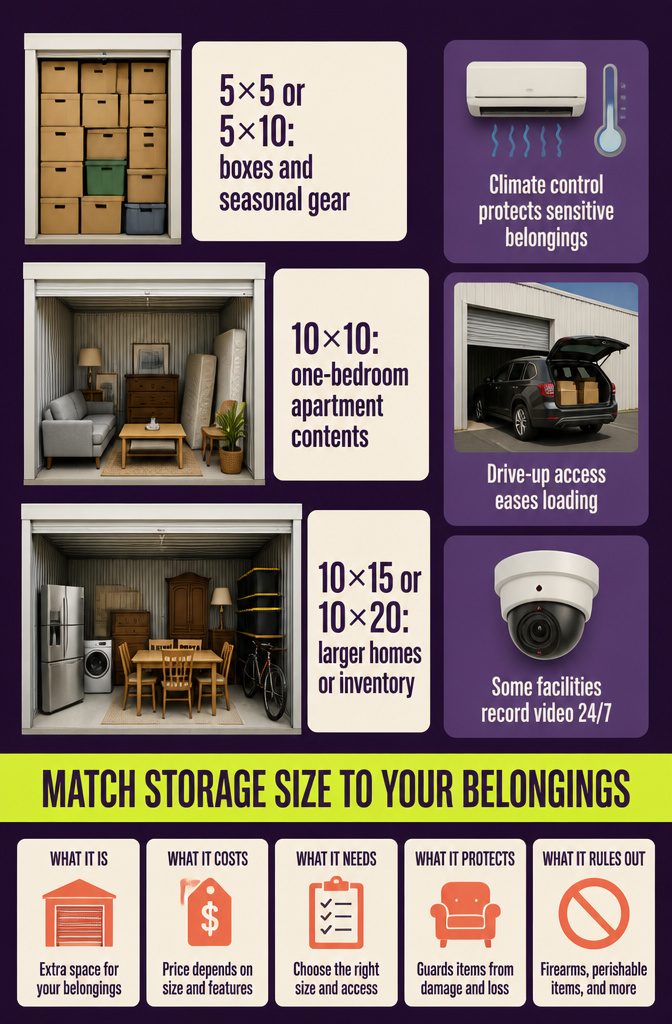
The size you pick decides whether belongings stay accessible or end up buried. A 5-by-5-foot or 5-by-10-foot unit works for boxes, seasonal gear, or a few pieces of furniture.
A 10-by-10-foot unit holds the contents of a one-bedroom apartment. A 10-by-15-foot or 10-by-20-foot unit fits larger homes, RVs, or business inventory.
I treat the smallest size carefully. A 5-by-5 that is packed wall to wall turns into a puzzle you cannot solve without unloading half of it onto the pavement.
Features matter as much as square footage.
Climate control protects wooden furniture, antiques, electronics, and paperwork from heat and humidity swings. Drive-up access makes loading easier.
Some facilities offer 24/7 video recording. Match the unit to what you are storing rather than trying to make sensitive belongings survive in a metal box that hits 110 degrees in July.
11. Clean, Inspect, and Maintain the Unit Over Time
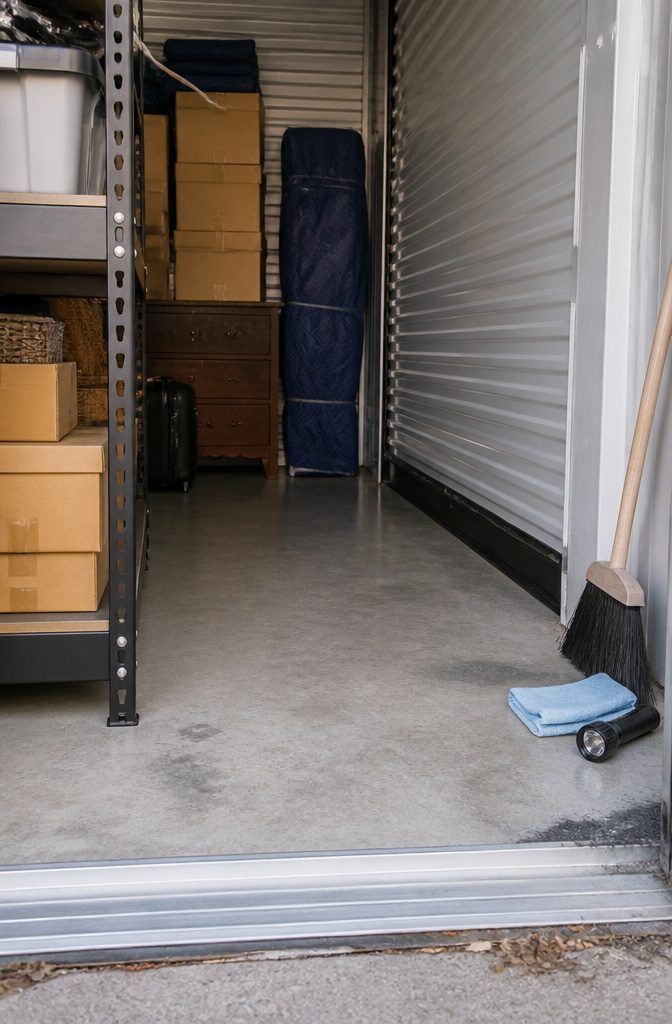
I clean the unit before I move anything in, and I keep up with it the way I would a closet at home.
Dust and debris build up even in an indoor unit, and anything I ignore at the beginning only gets harder to see once boxes are stacked.
A quick sweep of the floor and a wipe of any shelves means I am not packing clean belongings into a grimy space.
Once everything is in place, I check the unit every quarter to catch problems before they spread. I look for signs of moisture on boxes near the floor, pests behind stacked furniture, and damage to anything stored along the walls.
I also confirm that the unit itself is still in good condition: the door seals properly, the lock works, and there is no sign of a roof leak or shifted shelving.
Timing the visit matters. Weekends are the busiest time at most facilities, especially the first and last weekends of the month when people are moving in or out.
I go midweek if I can, or I arrive early on a Sunday to avoid waiting for an elevator or maneuvering around other tenants in narrow hallways.
Clearing Out a Unit and Deciding What to Keep
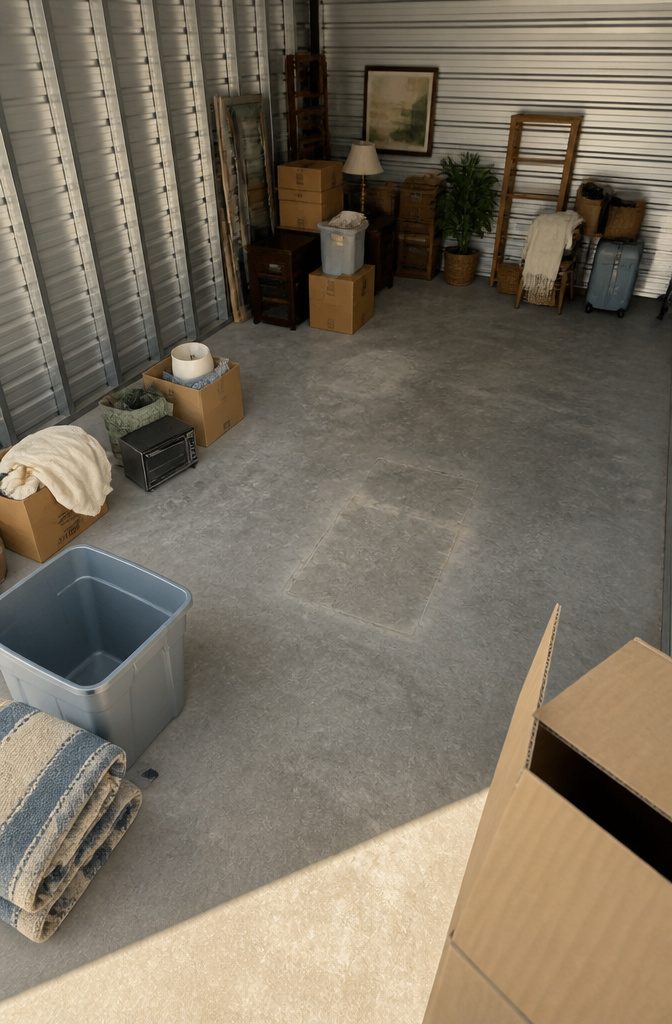
The surest way to know whether a storage unit is still worth paying for is to empty it completely and decide what to keep. A 10 × 10 unit costs around $110 to $150 a month, which means emptying the unit saves $1,300 to $1,800 a year.
That number changes the question fast: not whether you might use something eventually, but whether it is worth more than the cost of keeping it there.
Set aside more time than the job sounds like it needs. A 10 × 10 takes a full day or a long weekend, not a Saturday morning, and the first and last weekends of the month bring the most traffic at the facility.
Start by discarding anything broken or unusable, then separate donations and drop them off on your way out.
If something is worth selling, photograph it at the unit and price it to move. Set a deadline for listed items.
Anything unsold by that date gets donated. Sentimental belongings are harder to judge alone, so ask someone you trust to help decide what stays.
Preventing Moisture, Pests, and Climate Damage
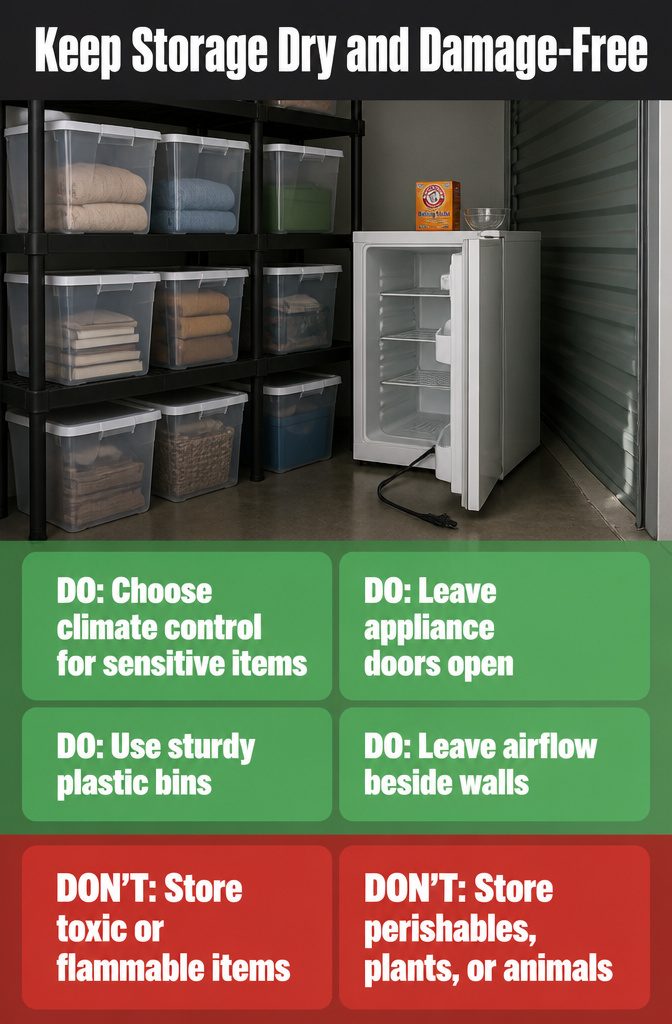
A few steps keep belongings dry and intact for the months they sit.
- Choose climate-controlled storage if you’re keeping wooden furniture, antiques, artwork, electronics, or paperwork. These units stay within a consistent temperature range year-round and protect against both extreme heat and Florida-style humidity that warps wood and corrodes metal.
- Keep appliances unplugged. Remove any liquid, glass shelves, and fragile parts before storage. Leave doors open and place baking soda inside to absorb odors and moisture that lead to mold.
- Use sturdy plastic bins rather than cardboard if moisture is a concern. Cardboard wicks water and collapses.
- Leave space between boxes and the walls for airflow. Stacking items too tightly against exterior walls traps condensation.
- Check your facility’s prohibited list before you load the truck. Toxic and flammable substances, perishables, plants, and live animals typically cannot be stored. Rules vary by location, so ask.
Using Belongings as Packing or Storage Aids
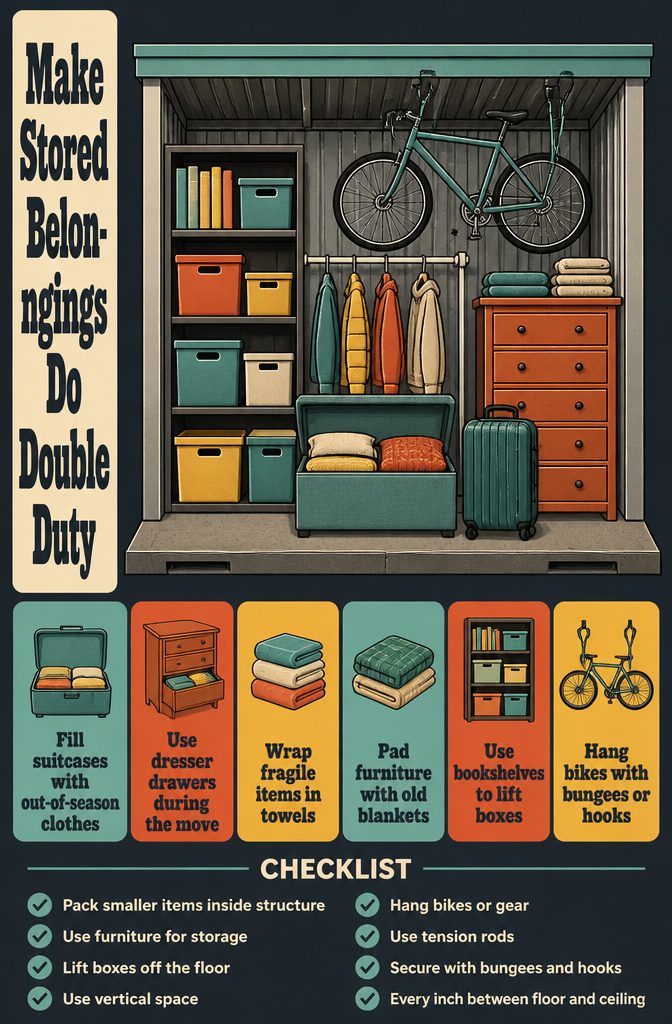
Your belongings can do double duty: packing material on the way in, storage aids once you’re there.
Pack smaller items inside what already has structure. Suitcases hold out-of-season clothes, jacket pockets take gloves or socks, drawers stay full when you move a dresser.
Fragile objects wrap in seasonal towels or roll up in cloth napkins instead of bubble wrap. Old blankets pad furniture edges or line gaps between stacks.
Use furniture and DIY materials to create storage where the unit gives you none:
- Bookshelves hold boxes and keep them off the floor
- Storage ottomans contain blankets and pillows
- Tension rods hang clothes or partition sections
- Bungees and hooks attach to walls or ceiling beams to suspend bikes, tools, or bags
Every inch between floor and ceiling is yours. I’d rather hang a bike from a bungee than eat up floor space with it flat, and tension rods cost less than a standalone garment rack.
Frequently Asked Questions
Where do I start when organizing a storage unit?
Start by drawing the unit to scale on paper (half an inch per foot) and creating a master list of everything you plan to store.
Divide the space into zones based on how often you need each category, placing frequently used items near the entrance and long-term storage at the back.
Pack in uniform boxes, label them on multiple sides, and follow your layout plan when loading.
How should I place my belongings in my storage unit?
Put frequently needed items near the entrance, occasional-use belongings in the middle, and long-term storage at the back.
Heavy boxes and furniture go on the floor or lowest shelf, with lighter items stacked higher. Leave a center walkway open so you can reach anything without unloading the front half of the space.
How much space do I need for a storage unit?
A 5×5 or 5×10 unit works for boxes, seasonal gear, or a few pieces of furniture.
A 10×10 unit holds the contents of a 1-bedroom apartment, while a 10×15 or 10×20 unit fits larger homes, RVs, or business inventory. Inventory your belongings first to determine the right size, and avoid units packed wall to wall since they become inaccessible.
How do you organize storage bins?
Pack in uniform medium-sized boxes or lidded plastic bins that share the same footprint so they stack cleanly and fit neatly on shelving.
Label each container on the top and at least 2 sides with either the full contents or a number that matches a master list.
Group bins by category or room, and store the heaviest ones at the bottom with lighter ones layered above.
What are the four D’s of self storage?
Instead, it focuses on practical organization methods: planning your layout, packing in uniform containers, using shelving and vertical space, and maintaining a clear walkway through the unit.






