
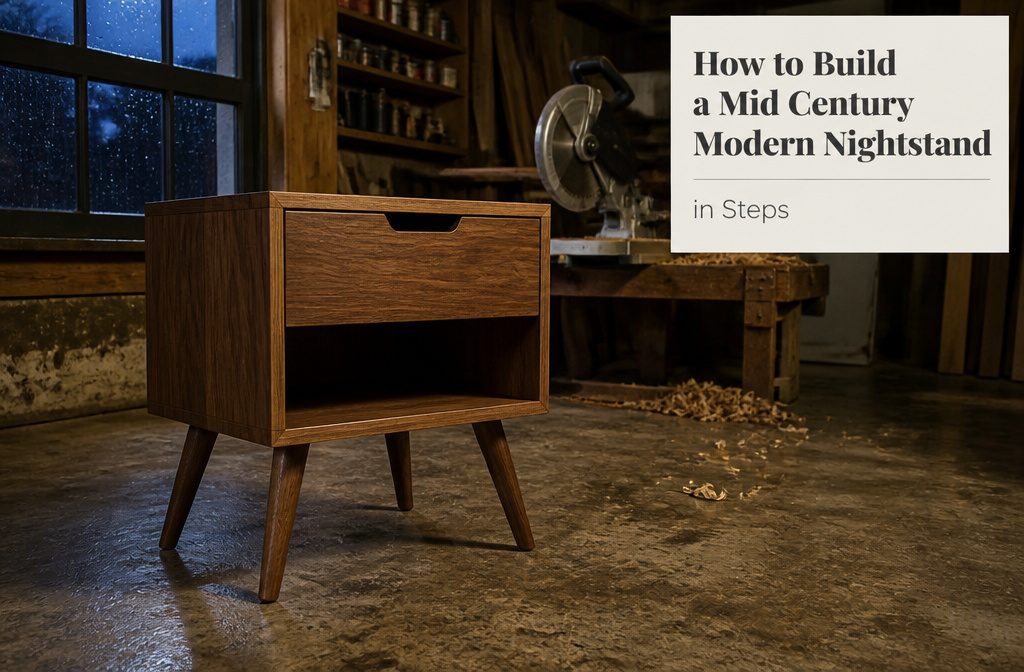
A mid-century nightstand built from plywood or solid boards costs $25 to $100 in materials and takes a weekend if you have a table saw and a pocket-hole jig.
Most builders get the leg angle wrong or skip it entirely, which is why the finished piece looks square rather than mid-century. The characteristic rake comes from cutting each leg end at 15 degrees on a mitre saw before assembly.
1. Plan the Design and Choose Your Materials
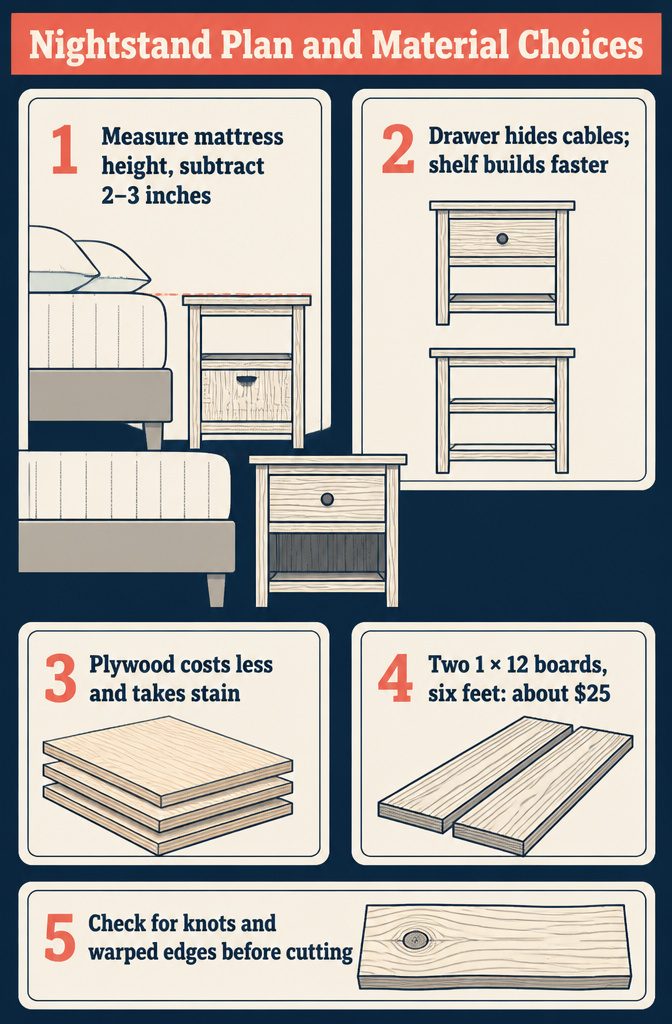
The first move is sketching the nightstand against your bed height. Measure from the floor to the top of your mattress, then subtract two or three inches so the finished surface sits just below it.
That height becomes the spine of your design. Add a drawer if you need a closed compartment for charging cables or a book, or plan an open shelf when you want the look clean and the build faster.
Material choice splits two ways. Plywood keeps the cost down and takes stain well.
One builder used three sheets of 1/2-inch birch plywood but recommended 3/4 inch next time for better screw hold and less flex. Solid boards cost more but give you visible grain on every face.
Walnut runs higher, while two 1 × 12 boards at six feet can land around $25. Check each board before you buy.
Knots near a corner or a warp along the edge will show in the finished piece, and most lumberyards will not take them back once cut. Mark the worst face so you can hide it inside or underneath during assembly.
2. Cut the Case Components
Cut the Case Components
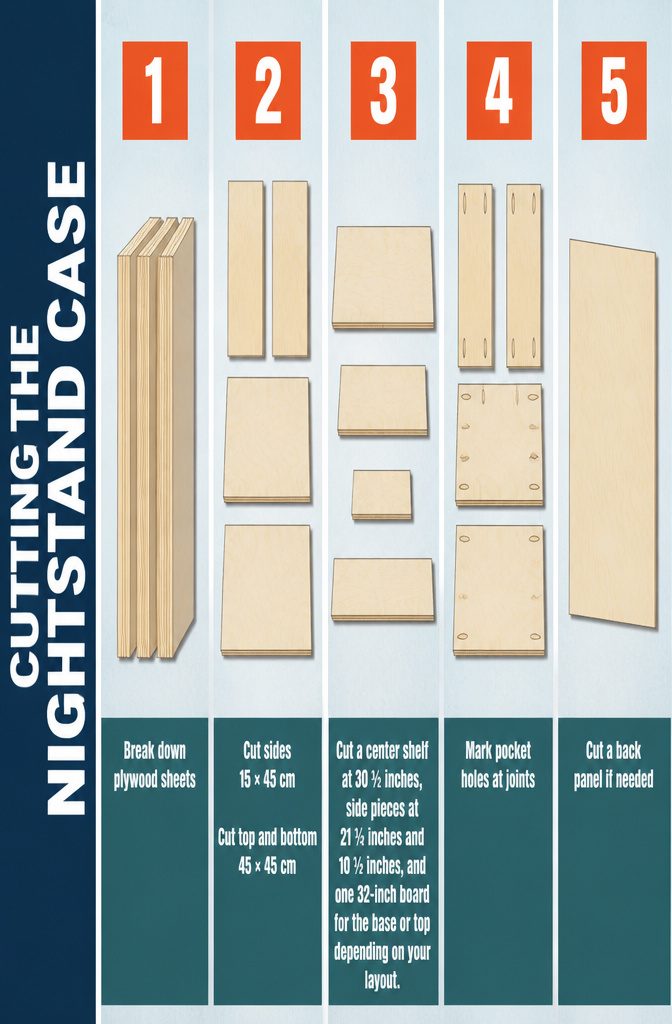
- Break down your plywood into the main case panels. If you ordered full sheets, have the store make the rough cuts to your planned dimensions. You’ll clean up the edges at home, but getting the big breakdown done on their saw saves twenty minutes of setup.
- Cut two side panels at 15 × 45 cm and a top and bottom at 45 × 45 cm. Most mid-century nightstand plans stick close to these proportions: a square footprint with sides tall enough to clear a typical mattress height.
- Cut a center shelf at 30 ½ inches, side pieces at 21 ¾ inches and 10 ½ inches, and one 32-inch board for the base or top depending on your layout.
- Mark pocket hole locations on each connection point before you drill. I space them roughly a third apart; three holes per joint for the top and bottom connections, two for the sides.
- Cut your back panel if the design calls for one. Some builders skip it and leave the back open; others use birch underlayment or matching plywood trimmed to fit just inside the case.
3. Assemble the Case
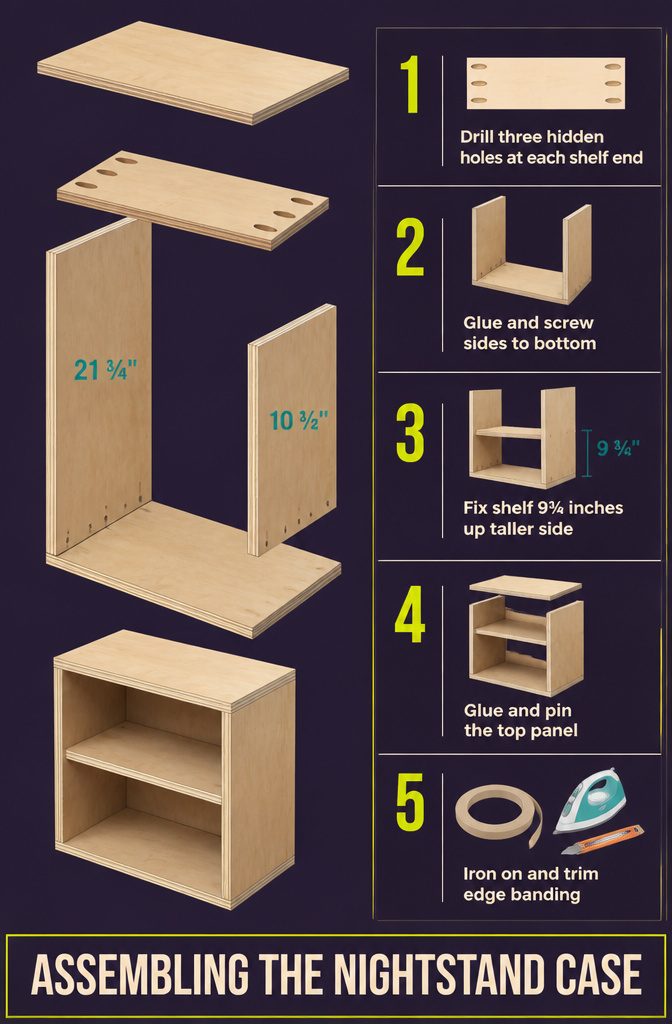
- Mark and drill pocket holes in the center shelf piece (the 30 ½" board). Space 3 pocket holes in both ends, roughly one-third apart. The underside placement keeps them hidden once the shelf is installed.
- Attach the side panels to the bottom. Apply wood glue where the panels meet, then secure with 1 ¼" wood screws driven up from the bottom. The taller side is 21 ¾" and the shorter side is 10 ½". Use assembly squares to hold everything at right angles while you work.
- Install the center shelf. Drive 1 ¼" pocket hole screws through the holes you drilled, joining the shelf to the top of the shorter side and 9 ¾" up on the taller side. Check for square before locking it in.
- Glue and pin the top panel. Run wood glue along the top edges of the side panels, set the top in place, then either nail it with finishing nails or let the glue cure overnight. If you use screws here instead, keep them shorter than the wood is deep or they’ll poke through the face.
- Apply edge banding to any visible plywood edges. Iron it on, trim flush with a block plane, then smooth with sandpaper. Skip the fancy hardwood if you’re working fast; edge banding from a roll does the job and takes a hot iron and a utility knife.
4. Build and Attach the Legs
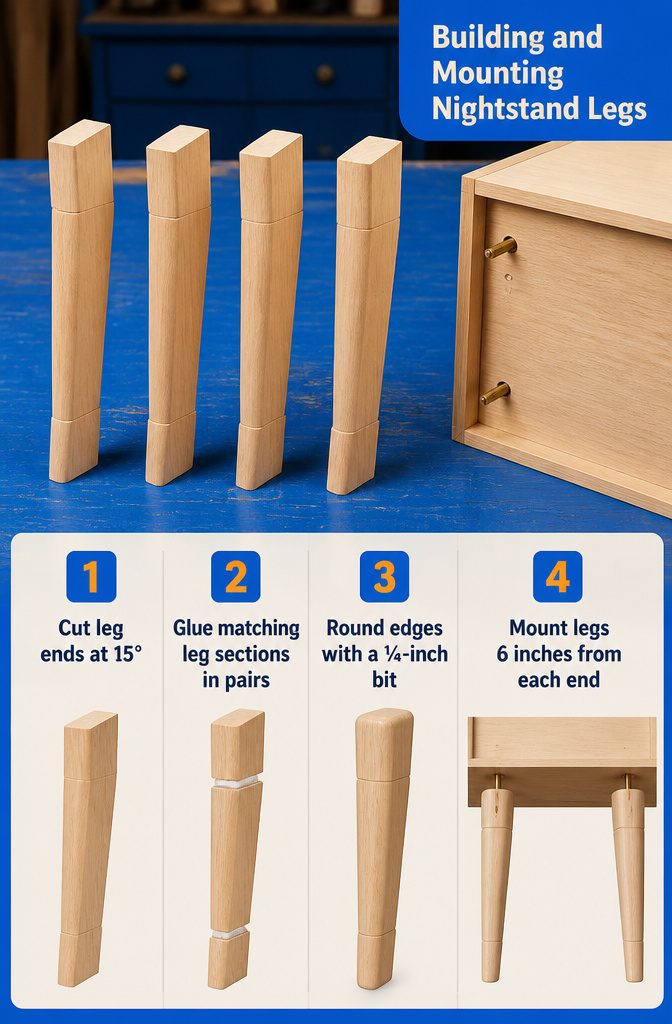
- Cut the leg pieces at a 15° angle on each end. For a finished height of 26 inches, start with four pieces cut to 3½ inches long, then measure down 2¾ inches and cut a parallel 15° angle on the opposite end.
- Taper the leg blanks on a table saw using a tapering jig, or freehand the cut on a band saw and smooth with a hand plane. Each leg has three components: the top, the main leg, and the bottom.
- Glue the leg sections together in matching pairs and reinforce with finishing nails. Clamp until dry.
- Shape the assembled legs with a ¼-inch roundover bit to soften the edges and give them that characteristic mid-century profile.
- Sand the legs smooth with 120-grit, then 220-grit sandpaper before finishing.
- Apply your finish to the legs separately so you can control coverage on all sides.
- Mount the legs 6 inches in from either end of the case bottom using wood glue and finishing nails. For a cleaner look, drill ½-inch-deep holes and insert ¼-inch brass rods, positioning the legs 1 inch down from the top edge. Hairpin legs at 18 inches are the fastest route if you’re buying rather than building.
5. Make and Install Drawers or Shelves
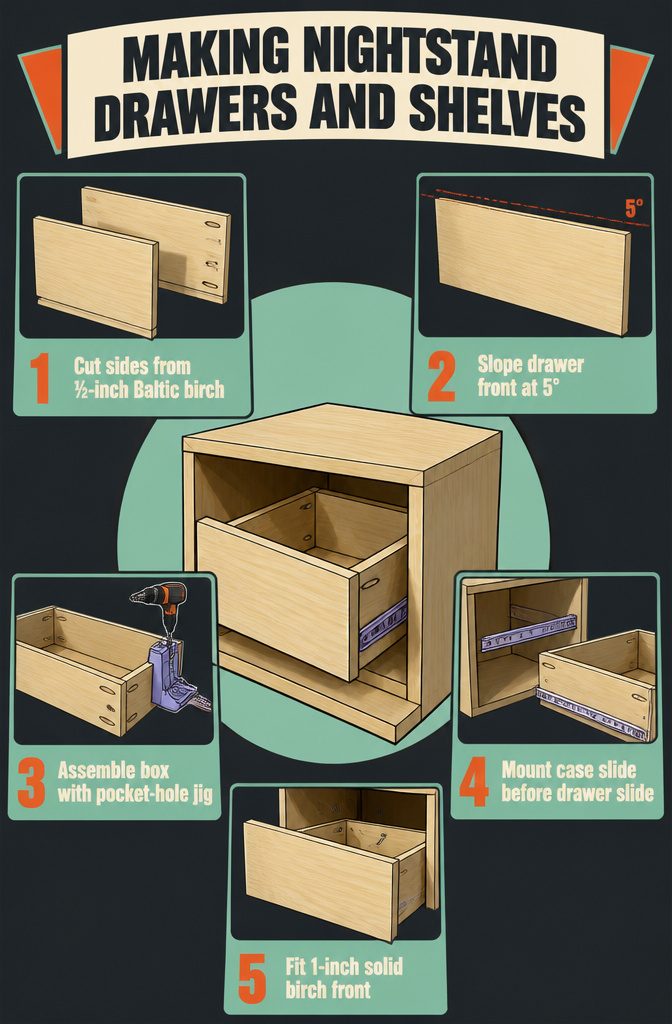
- Cut the drawer sides from 1/2-inch Baltic birch plywood, leaving 1/2 inch of clearance on each side of the case opening for drawer slides. Cut a groove 1/2 inch from the lower edge of each piece to hold the drawer bottom.
- Cut a 5-degree slope on the front side of each drawer case. The front groove needs a small adjustment on the table saw so the bottom plywood slides in without binding.
- Assemble the drawer box using a pocket-hole jig. Drill the holes on the outside of the front and back pieces where they stay hidden once the drawer closes.
From the start, I wanted the drawers to be free from hardware, having a sloped front that invited you to grab it from the underside.
The handleless design keeps the front clean and gives you something to grip from below, which feels right on a mid-century piece.
- Mount drawer slides to the case using a drawer slide jig or straight scrap clamped level as a guide. Install the case half first, then extend the slide and rest the drawer on the jig to line up and attach the drawer half.
- Cut a 1-inch-thick solid birch drawer front and trim the top edge to the same 5-degree slope. Use double-sided tape to position it against the installed drawer, then secure it permanently with two countersunk screws driven from inside the drawer box.
- Add a center divider if your design calls for shelf sections. Position an 11 1/4-inch board 14 1/2 inches in from the tall side, and attach it with wood glue and 1 1/4-inch wood screws driven up from the underside of the shelf below.
6. Sand and Finish
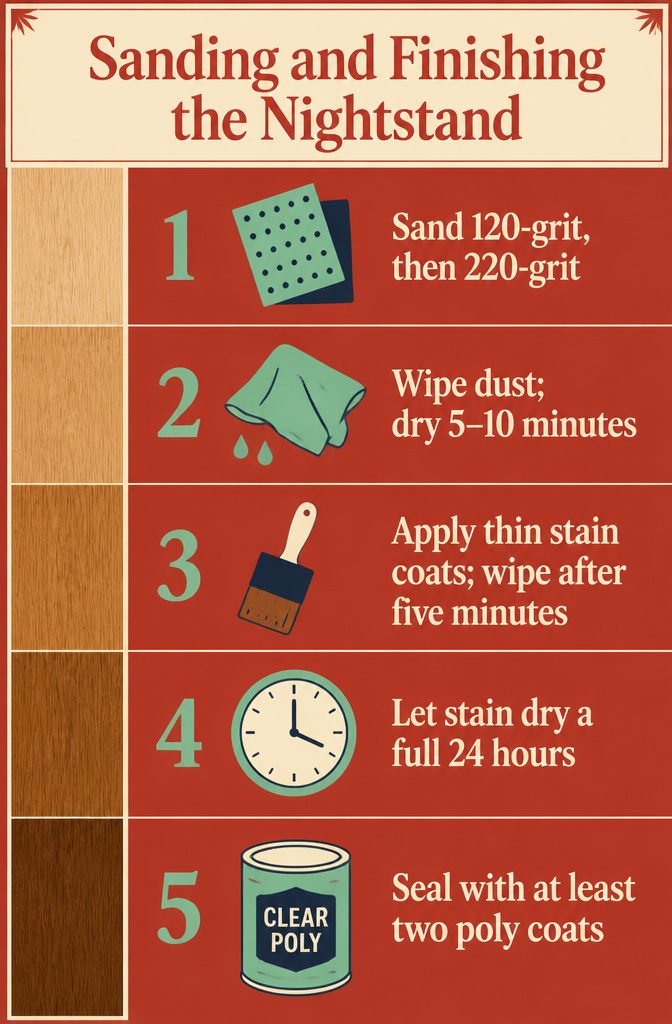
- Sand with 120-grit paper first, working along the grain on all exterior surfaces and any interior edges the user will touch. Follow with 220-grit for a smooth base that takes stain evenly.
- Wipe down every surface with a damp rag to lift sawdust, then wait 5 to 10 minutes for the wood to dry completely before you open the stain.
- Apply stain in thin coats using a foam brush or lint-free cloth. Golden Oak and fruitwood are both period-appropriate choices. I like three coats for depth, letting each one sit about five minutes before wiping off the excess.
- Let the stain dry a full 24 hours before handling the piece or adding topcoat.
- Seal with oil-based polyurethane or clear poly in at least two coats, sanding lightly with 220-grit between layers. This protects the wood from rings and scratches without changing the color.
- If the stain dries darker than you want, sand it back lightly before sealing. The worn look reads authentic on mid-century pieces.
- Attach legs and drawer pulls after the finish cures.
7. Level and Check the Finished Piece
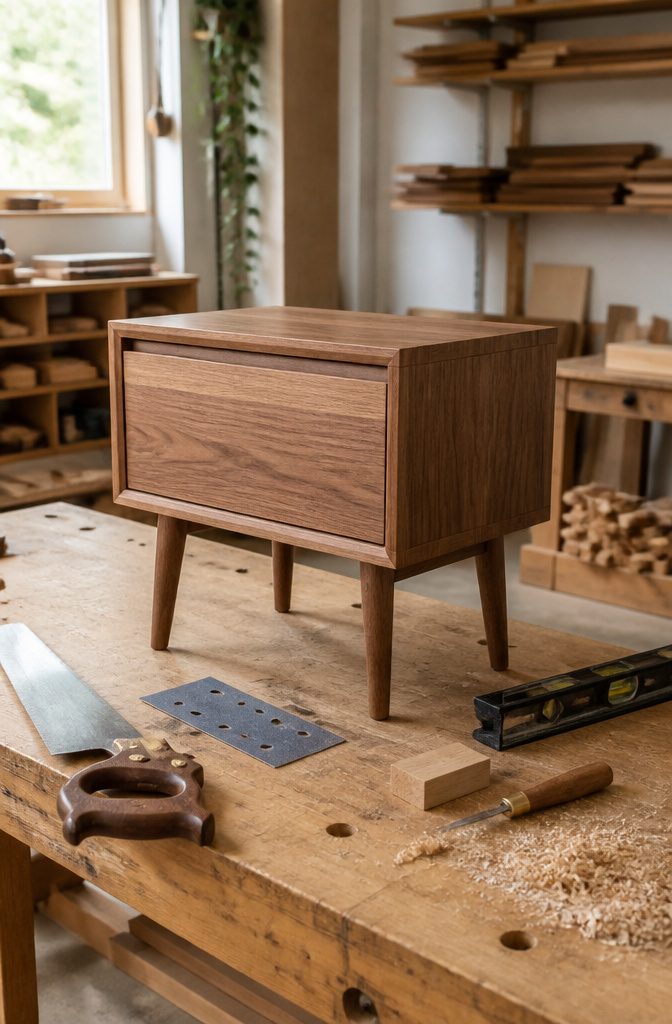
Most builds skip a final leveling step, but if you notice the nightstand rocking on uneven legs or the drawer front looks skewed, trim the feet to bring it level.
Set the piece on a known-level surface, shim under each foot until a bubble level reads true front-to-back and side-to-side, then mark a trim line on each leg with a marking knife and a spacer block.
Cut to the mark with a handsaw and smooth the foot with adhesive-backed sandpaper on a flat surface.
One stability issue to watch: the design tends to be front-heavy and may tip forward when the drawer is fully extended.
Changing the main leg angle slightly would solve that, but if you’ve already built it, just avoid leaving the drawer open when the nightstand holds anything with weight.
Mid-Century Design Elements That Define the Look
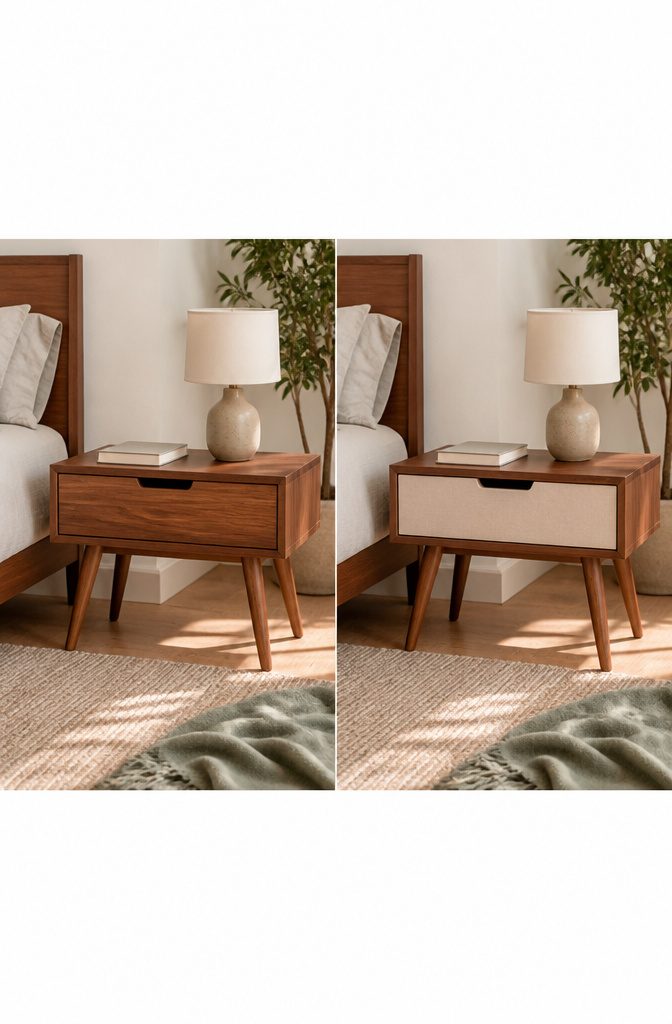
The look turns on clean geometric shapes paired with tapered legs that barely touch the floor. That lean silhouette gives the piece visual lift without sacrificing the storage a nightstand needs.
Mid-century pieces share a few hallmarks worth carrying into the build:
- Straight lines and minimal curves. The case runs square or rectangular; edges round slightly at the corners if at all.
- Low profile. Mid-century nightstands sit closer to the ground than traditional pieces, usually 20–24 inches tall.
- Angled legs. Legs splay outward a few degrees and taper toward the floor, usually turned or cut from solid stock.
- Recessed handles or finger pulls. Hardware stays flush or invisible. Drawers often use routed finger grooves instead of knobs.
- Warm wood tone or two-tone finish. Walnut, teak, and oak dominate, sometimes with a painted case body and natural legs.
The result reads as functional rather than fussy. Storage does its job, the frame does not compete for attention, and the whole piece feels lighter than its actual weight.
Plywood, Solid Boards, and Joinery Choices
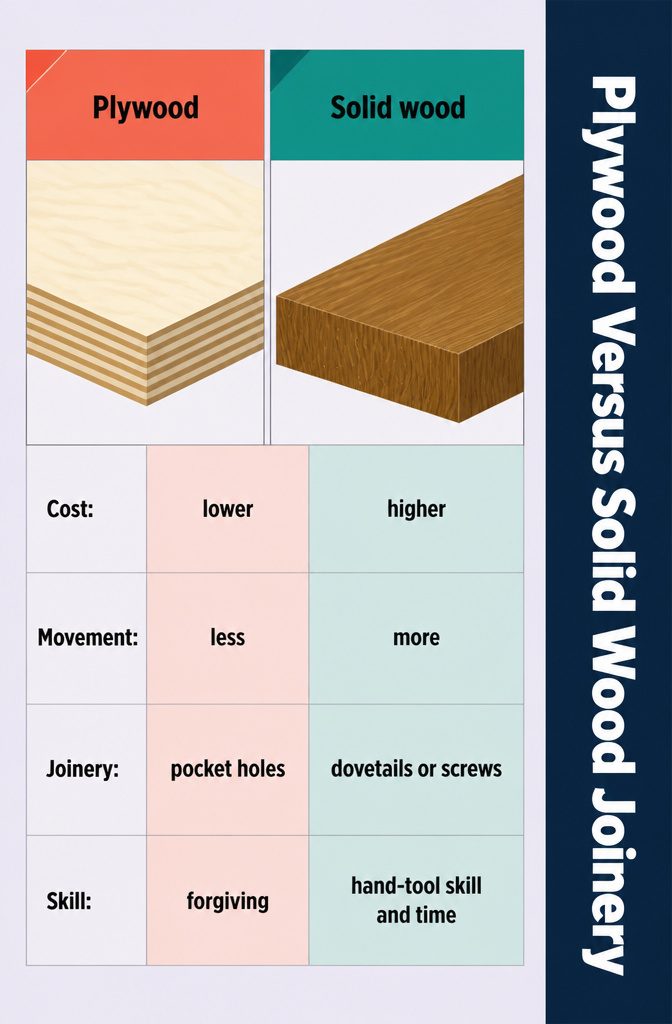
The build approaches split pretty clearly between plywood and solid wood, and that choice sets the difficulty level and the joinery that makes sense.
Plywood keeps the cost low and the assembly forgiving. One builder used 1/2-inch birch plywood for the case and birch underlayment for the drawer, joining everything with pocket holes and 3/4-inch wood screws.
Another went with Baltic birch plywood and lap joints, which adds a step but looks cleaner where end grain shows.
Solid wood raises the stakes. A walnut build with full-blind mitered dovetails for the carcass and half-blind dovetails for the drawer faces takes hand-tool skill and time, but the waterfall grain and the joinery itself become the design.
A simpler solid-board version relies on glue, screws, and finishing nails.
I lean toward plywood for a first build. The joinery is more direct, the material moves less, and pocket holes disappear once the piece is assembled.
Tools You Will Need
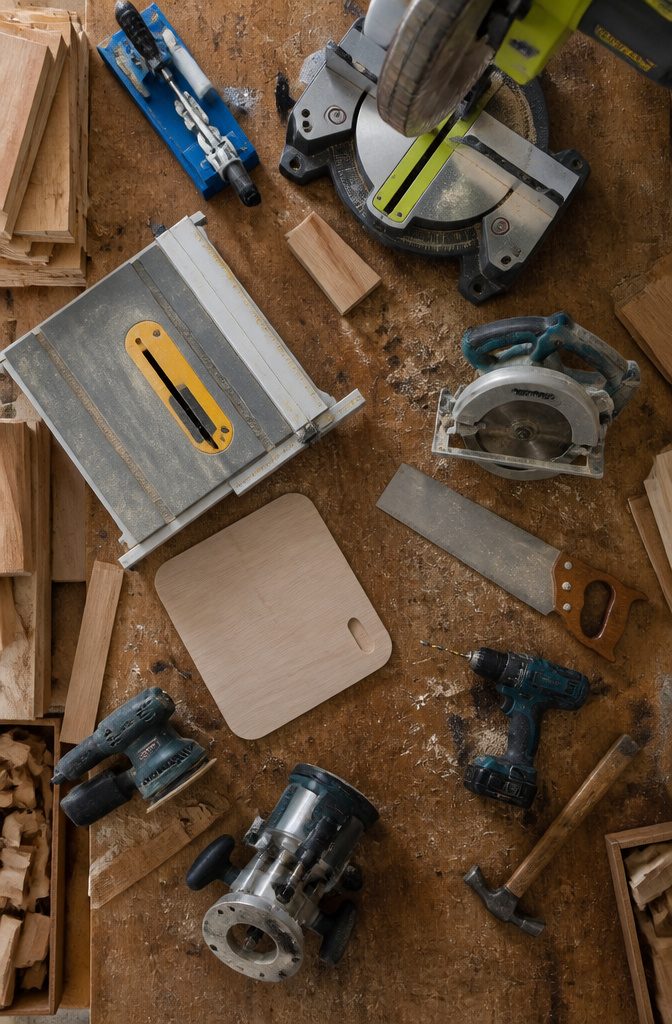
You need a handful of standard tools and two items worth calling out if you want clean joinery and the angled legs that give a mid-century piece its look.
- Kreg Jig for pocket-hole joinery. This lets you join case panels without visible fasteners on the outside.
- Saw. A table saw if you have one, otherwise a circular saw or hand saw will get the cuts done.
- Mitre saw for cutting the 15° angles on the leg ends. That angled foot is what makes the piece look mid-century rather than just square.
- Power drill and a 1/4-inch drill bit.
- Router with a 1/4-inch roundover bit if you want eased edges on the top or drawer fronts.
- Electric sander. You can hand-sand, but an electric sander saves time when you are smoothing plywood edges and prepping for finish.
- Hammer for finishing nails.
The Kreg Jig and mitre saw do the heavy lifting here.
The jig hides screws, the mitre saw cuts the legs to stand at that characteristic rake. Everything else is shop standard.
Frequently Asked Questions
How thick should the plywood be for a mid century modern nightstand?
Use 3/4-inch plywood for better screw hold and less flex in the finished piece.
One builder started with 1/2-inch birch plywood but recommended the thicker material after completing the build. The extra 1/4 inch makes the case more stable and gives fasteners a solid grip.
Where can I buy hairpin legs for a nightstand?
Hairpin legs are available from specialty suppliers like hairpinlegs.com, where you can choose the length that fits your design. For a standard nightstand, 18-inch legs work well and mount quickly with just wood glue and finishing nails.






