
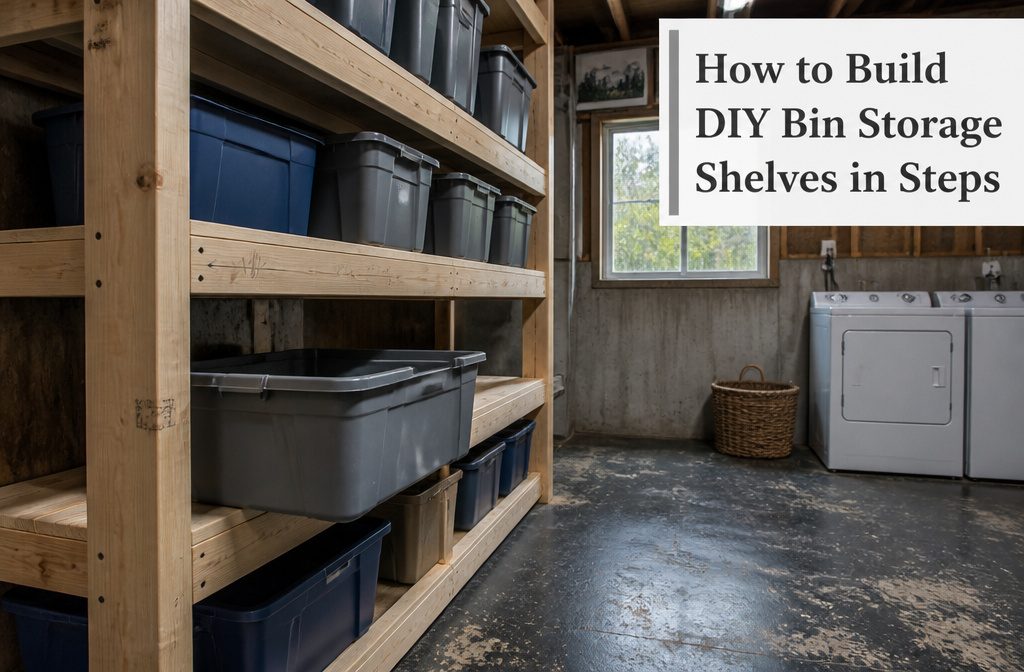
A DIY bin storage rack built from 2×4s and 4×4s costs about $85 for one 8-foot unit and takes under a day to finish, but most builders space the shelves too tight and end up wrestling bins in and out every time they need what sits at the back.
Clearance needs to match bin height plus 1½ to 2 inches so containers slide without catching the rim on the shelf above.
1. Measure the Space and Bins First
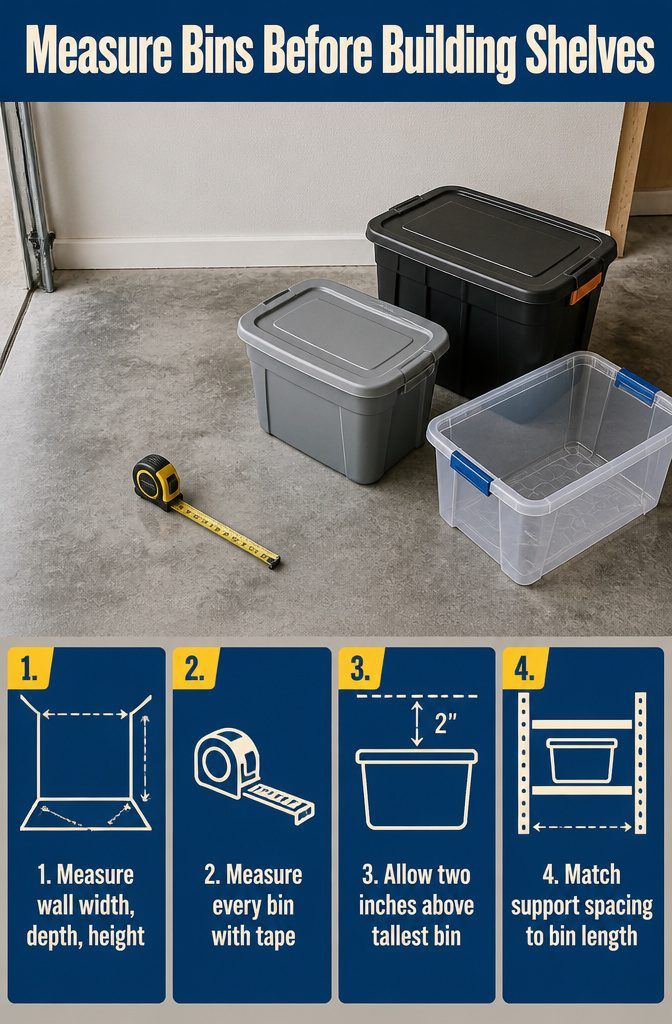
Before you cut a single board, measure the storage area and every bin that will sit on the shelves.
I start with the wall or closet width, depth, and height, then lay out the containers themselves on the floor and check their actual dimensions with a tape.
A 27-gallon HDX tote stands taller than an 18-gallon Sterilite tub, and a 66-quart clear-view bin is deeper front to back than either. Those differences decide shelf spacing.
Shelf height needs to match the tallest bin in each row, with about two inches of clearance so you can lift containers in and out without catching the rim.
If you plan to stack identical totes, measure one and add that clearance for each shelf. The width between vertical supports depends on bin length plus enough margin that you can slide them forward without binding against the frame.
2. Cut the Vertical and Horizontal Pieces
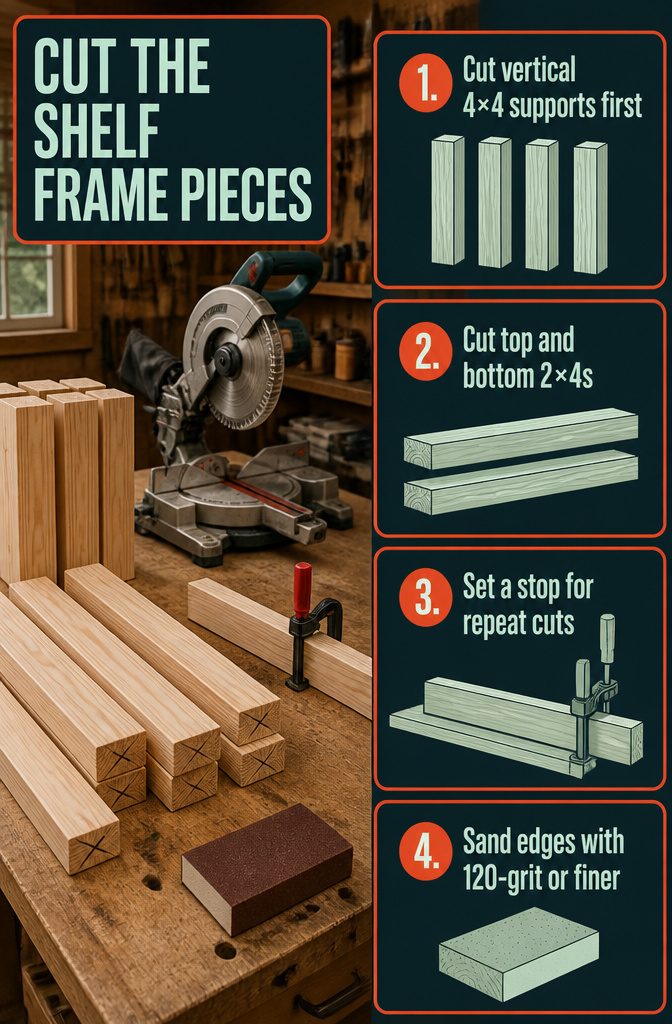
- Cut the vertical 4×4 supports first, then move to the horizontal 2×4 top and bottom pieces. Save the horizontal 2×4 shelf supports for last. One typical unit frame takes two 8-foot 2×4s and two 24-inch end pieces, though your bin count changes that fast.
- Set up a stop on your miter saw before cutting the horizontal rails. If your saw has no built-in stop, clamp a spare piece of wood to your workbench so you’re not measuring the same cut six times over. The stop pays off by the third cut.
- Sand all edges lightly after cutting. A quick pass knocks down splinters and keeps the wood from catching when you slide bins in later. I skip anything finer than 120-grit at this stage.
3. Join the Frame Together
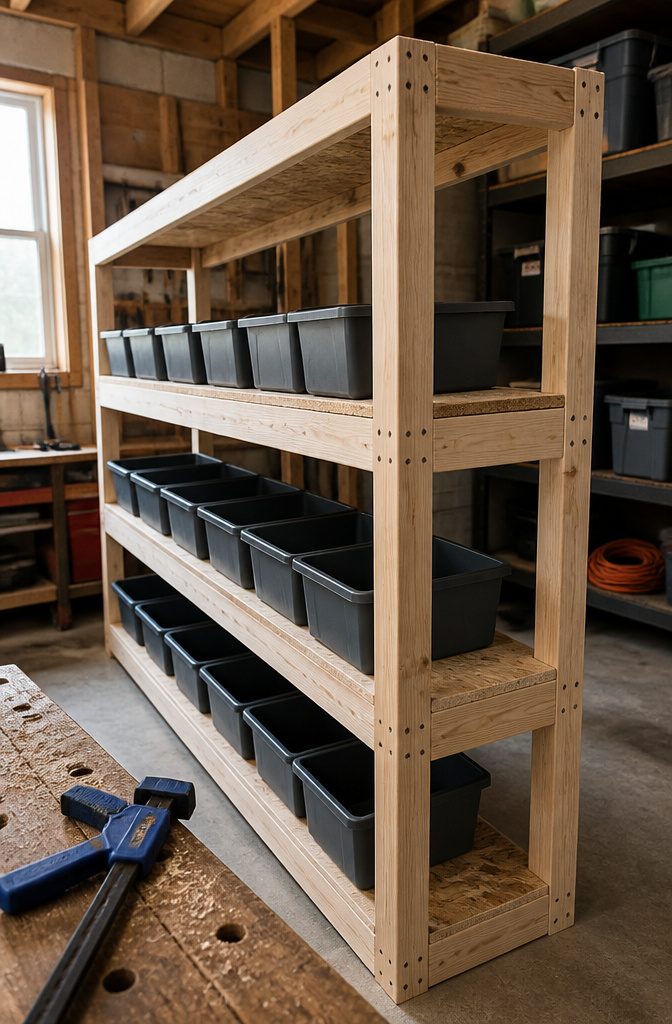
The frame goes together faster than you think. I start by securing the 4×4 vertical pieces to the horizontal 2×4s with 2-1/2-inch or 3-1/2-inch construction screws, forming the outer skeleton of the front and back frames.
Once those corners are locked, I space the vertical 2×4 pieces evenly across to fill out each frame. Screws win over nails here because you can rework the whole thing later without wrecking the wood.
For a simpler build, join two long 2×4s to a pair of 24-inch short pieces, forming a single rectangular frame.
Attach 1/2-inch OSB to that frame with 3-inch Torx-head self-tapping deck screws, and you have one shelf tier. Repeat for as many levels as your bins need.
The torx heads bite without slipping, and the self-tapping threads pull tight against OSB without predrilling. Build three or four frames, then stand them with vertical 2×4s at each corner to complete the unit.
4. Space the Shelf Supports to Match Bin Height
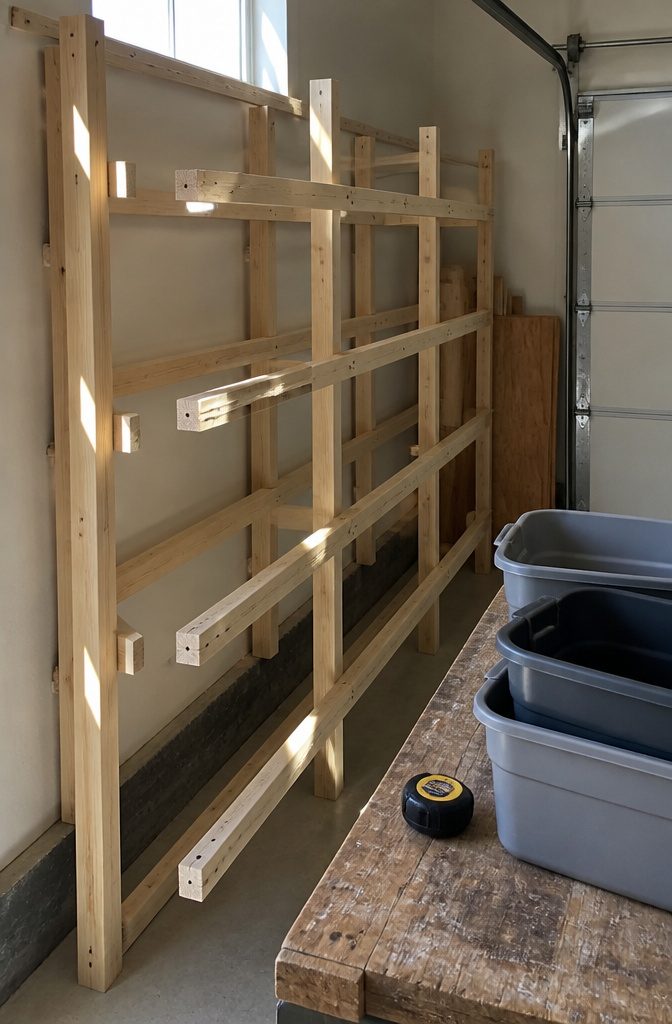
Stand the two vertical frames upright and position them at the correct distance apart. The first horizontal slide goes in at the top of your first row; clamp it to both vertical posts before driving screws.
Stagger the screw positions along the length of each board to keep the wood from splitting when you drive several fasteners close together.
After the first set of slides is in, cut a scrap piece of wood to match the height you need between rows and use it as a spacer.
Clamp the spacer against the installed slide, position the next horizontal piece below it, then screw that one in. Repeat down the entire frame.
The spacing should equal the bin height plus 1½ to 2 inches of clearance so the totes slide in and out without binding. One frame might need 18½ inches between slides while another needs 17½, depending on which bins go where.
5. Anchor the Upper Corners Before Loading
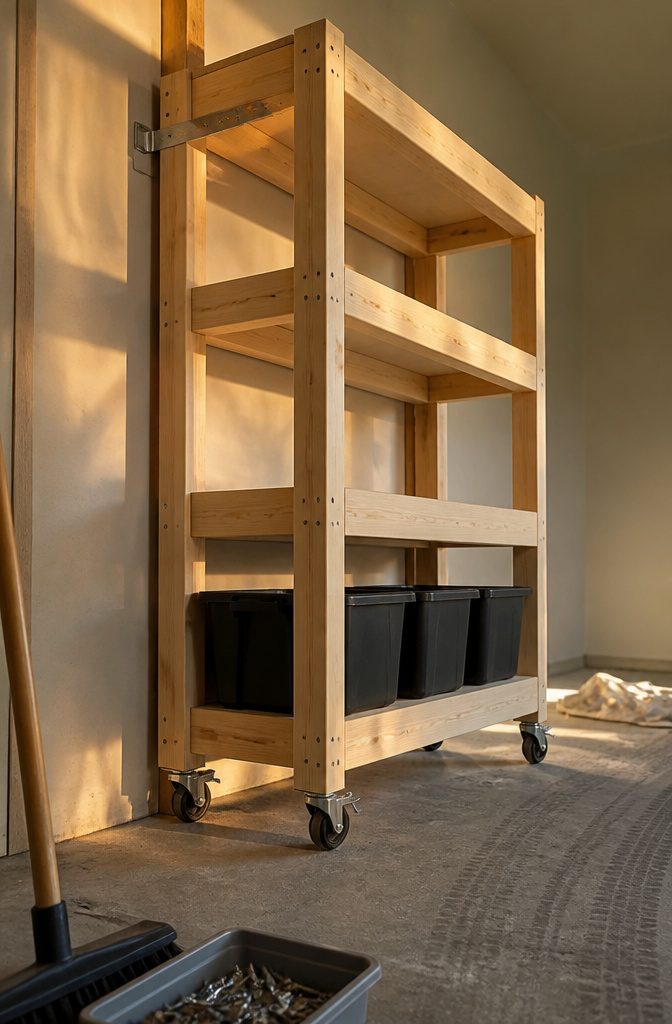
Tall loaded shelves can tip forward, especially once the top bins fill with off-season gear or hand tools. Anchor the upper corners to wall studs with two metal L brackets before you slide anything in.
The brackets catch the frame right where weight wants to lever it away from the wall, and the stud gives you solid wood to drive into rather than drywall that crushes under load.
Not every setup needs it.
If you mount locking casters instead of building against the wall, you get a mobile rack you can roll out to clean behind or pull into the middle of the garage when you need three sides of access.
The 2-inch rubber locking casters hold the frame in place once you flip the lock, and you build enough clearance so bins slide in and out without catching the shelf above.
That clearance matters more than the anchors do. A bin that jams halfway out because you cut the spacing too tight turns a storage upgrade into a wrestling match every time you need what sits at the back.
6. Load and Label the Containers
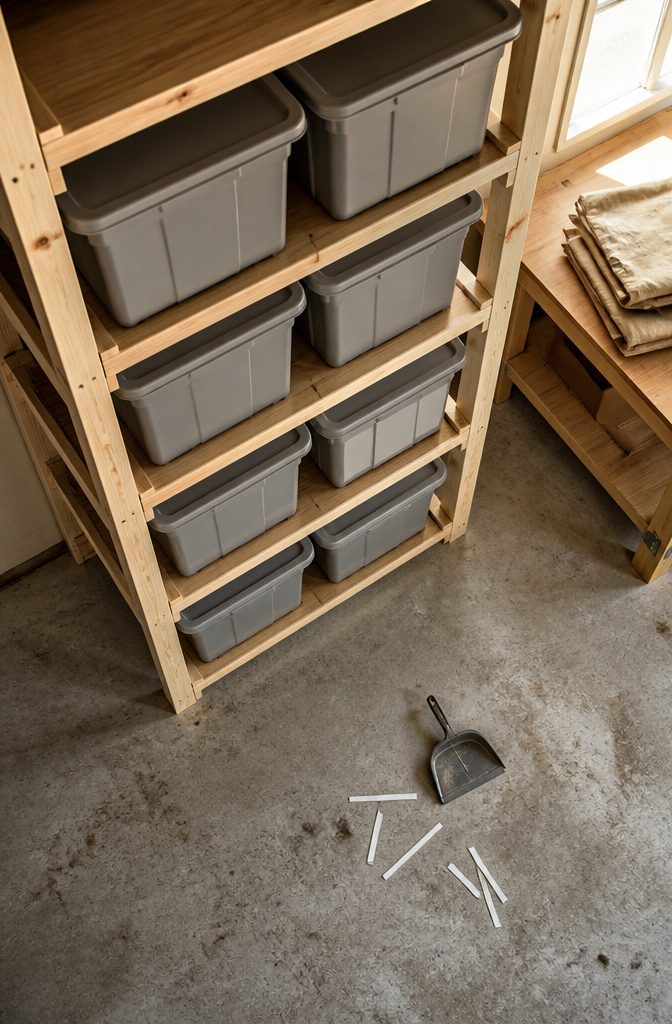
Once the rack is standing, slide the bins onto their supports and avoid overfilling them.
Totes loaded past the top lip can bend or distort under their own weight, especially when the frame supports them by that rim rather than from underneath.
I leave an inch or two of clearance below each lid so nothing bows when the bin slides out.
For labels, a Cricut Joy with Cricut Smart Vinyl and weeding tools gives clean, durable text that holds up to handling.
Print the category on the front and sides so you can read it no matter which way the bin faces, and add a second label to the top if the rack sits high enough that you see down into it.
Some builders prefer a QR-code system that links to a full inventory list, useful when you need to check from another room or while you are still at the store.
Owners on Reddit mention pairing both methods so the front label narrows the search and the code gives the exact contents when precision matters.
Tools and Materials You Will Need
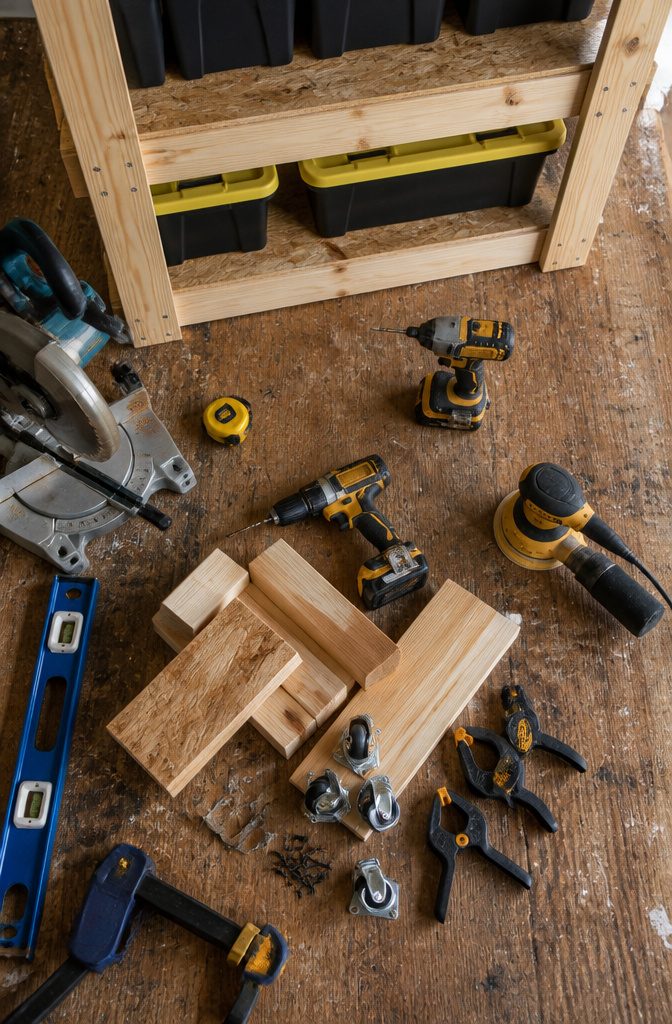
You need a few hand tools, some standard dimensional lumber, and fasteners that match the load.
Pine 2×4s form the horizontal shelves and the verticals that tie them together.
4×4s anchor the corners and carry the weight down to the floor. Half-inch OSB backs the assembly if you plan to mount it to studs or need a solid rear panel.
Construction screws in two lengths handle most of the joinery: 2-1/2-inch screws for joining 2×4s face-to-face, 3-1/2-inch screws where you’re driving through a 2×4 into a 4×4.
Torx-head deck screws (3-inch) bite cleanly without pilot holes and hold better under shear if you skip the OSB and fasten directly to wall studs.
Two metal L brackets brace the upper corners to the wall. If you want the whole unit to roll, add four 2-inch rubber locking casters to the base.
For tools, I’d start with:
- Measuring tape
- Miter saw or circular saw
- Impact driver and drill
- Orbital sander
- Clamps
- Level
The clamps hold assemblies square while you drive screws, and the level keeps shelves flat so bins don’t slide forward. Sand any rough edges after cutting; splinters on a shelf you reach into daily get old fast.
What This Build Costs
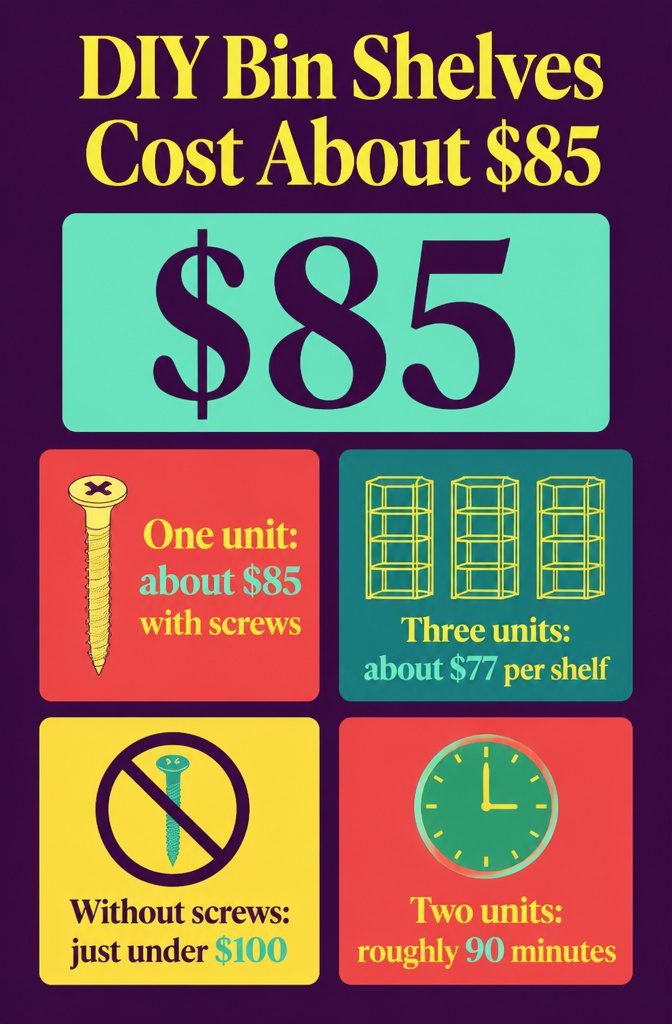
Building one 8-foot shelving unit ran about $85 in materials when screws were already on hand, pushing just under $100 when they were not.
A reader in Houston built three units for $230 total, splitting the cost of full plywood sheets and longer lumber across the project.
Another finished two units in roughly an hour and a half, and the time stays under a day even for a first build.
The per-unit cost drops when you build more than one.
Plywood comes in 4×8 sheets, and most builds use 2×4s sold in 8-foot or longer lengths. Buying for three units means fewer offcuts and less waste, which is why the Houston build worked out to around $77 per shelf rather than $100.
If you are outfitting a garage or basement and need more than one rack, buy for all of them at once.
Build Versus Buy for Bin Storage
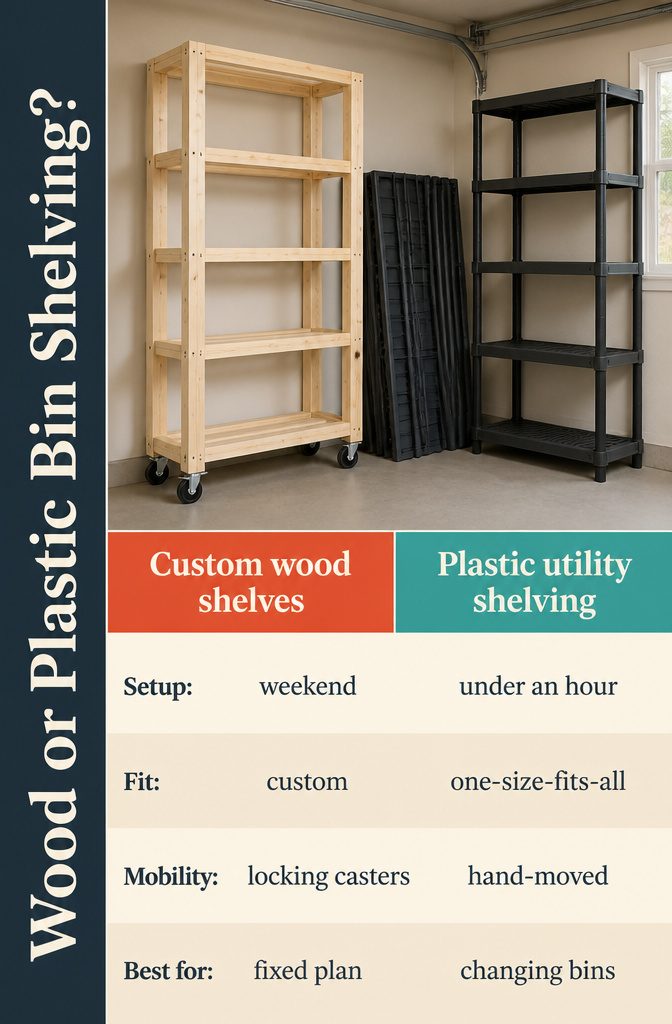
Custom wood shelves on locking casters give you a system built to your exact bin size and ceiling height.
If you go that route, 2×4 pine and 2-inch rubber locking wheels let you roll the whole unit wherever you’re working or push it aside to sweep.
Clearance is sized so the bins slide without dragging. The flexibility costs you time and a skill floor: cutting, joining, and squaring a frame takes a weekend and a comfort level with a saw.
Heavy-duty plastic utility shelving made to fit bins is faster.
The units arrive flat, snap together in under an hour, and weigh little enough to move by hand. They hold more weight than their looks suggest and keep bins separated instead of stacked.
The trade is one-size-fits-all: you adapt your bins to the shelf rather than building the shelf around what you already own. For renters or anyone whose bin collection will change, plastic wins on speed and budget.
For a fixed storage plan in a garage or basement you control, wood on casters gives you a system that fits the space exactly and moves when you need it to.
Frequently Asked Questions
How far apart should DIY bin storage shelves be spaced?
Space shelves to match your bin height plus 1.5 to 2 inches of clearance.
One example uses 18.5 inches between supports on the left side and 17.5 inches on the right, depending on which bins go where. The extra clearance lets you lift containers in and out without the rim catching on the shelf above.
How much weight can DIY bin storage shelves hold?
The weight capacity depends on your frame design and the spacing between vertical supports.
For really heavy loads, add 2 center supports along the length of each shelf to prevent sagging. The horizontal 2×4 shelf supports carry the bin weight, so closer vertical posts handle more weight per shelf.
Where should you store bins if space is limited?
Use under-bed storage, closet space, or areas under sofas when room is tight.
Garages and attics work well for seasonal items you don’t need year-round. Vertical wall shelves free up floor space and let you organize by category with labeled containers.






