
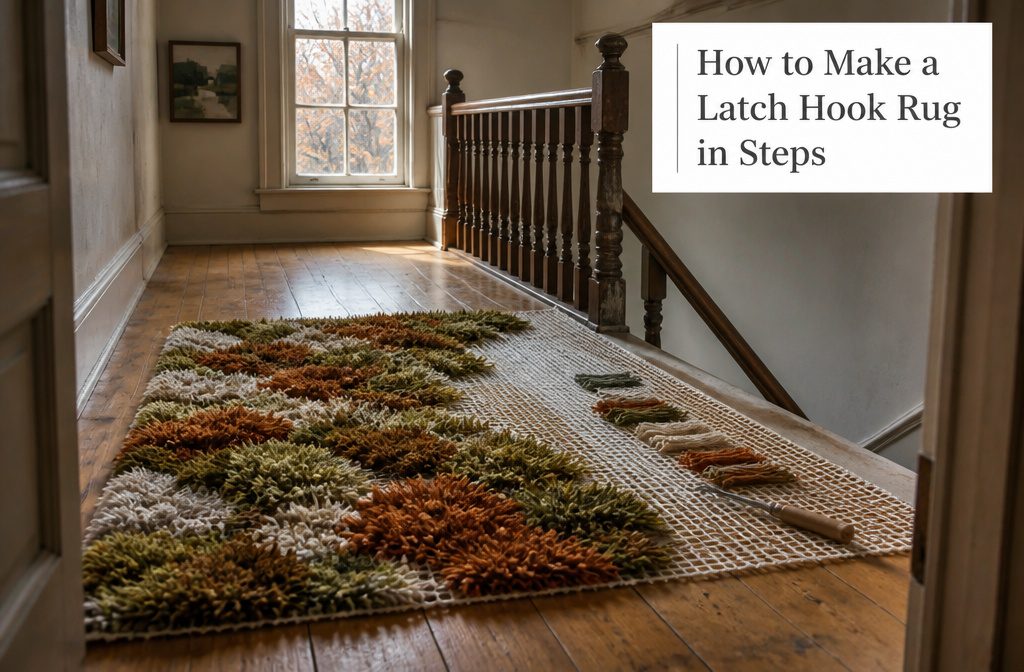
A latch hook rug takes a few hours for a 12×12-inch piece or weeks for a full floor rug, depending on size and how much time you give it each session.
The technique is simple, but most people cut yarn to the wrong length and end up with uneven pile height across the finished surface.
You want strands cut to twice the pile height you’re after: 2-inch yarn becomes roughly 1-inch pile once the latch-hook knot halves the strand and takes up a small fraction more.
1. Choose Your Canvas, Hook, and Yarn
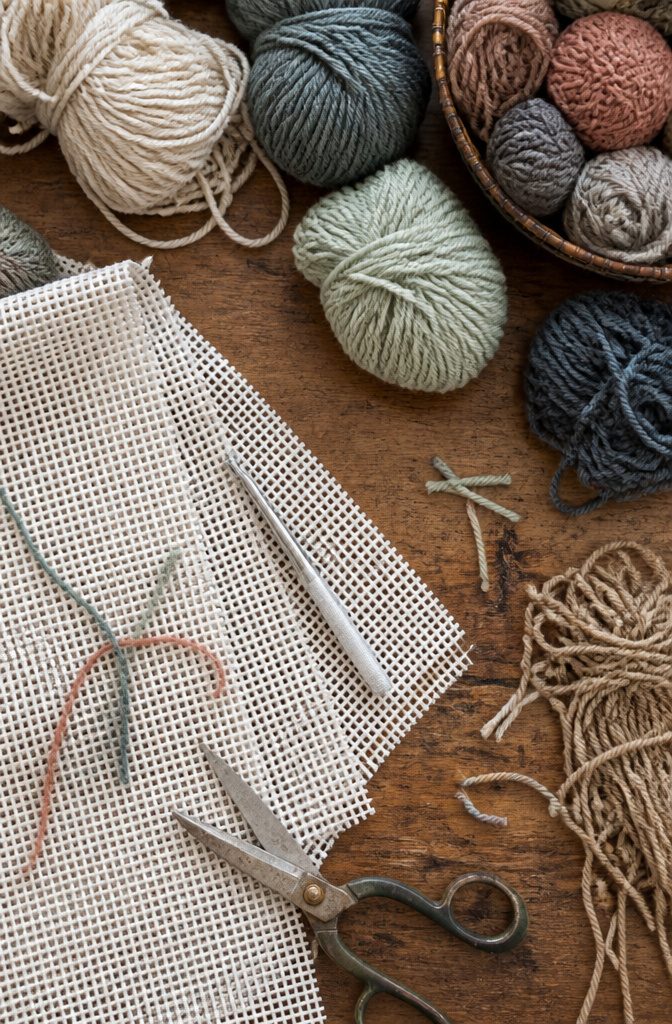
The rug canvas you want is 100% cotton mesh, stiff enough to hold its shape under heavy use.
Look for a grid that runs around 13 squares per 10 centimeters. That density works with standard latch hooks and keeps the finished rug tight without fighting you on every knot.
You can latch hook on other meshes if you size the hook to match: produce bags and plastic canvas both work, but cotton rug canvas holds up better long term.
The latch hook itself is straightforward.
The standard size sold in craft stores and online kits fits rug canvas without adjustment. If you want to experiment on smaller grids, size down to a smaller hook.
Yarn choice is wide open. Cotton and wool are both solid picks for durability.
Bulky blanket yarn works if you size up the canvas to match its thickness. Stash yarn is fair game, which makes this a good way to clear out leftovers.
Just keep the yarn thick enough to fill the squares without gaps. Larger projects eat yarn fast and may stretch across months, so plan the yardage before you start cutting.
2. Plan the Design or Pattern
Plan the Design or Pattern
Before you start hooking, you need a roadmap.
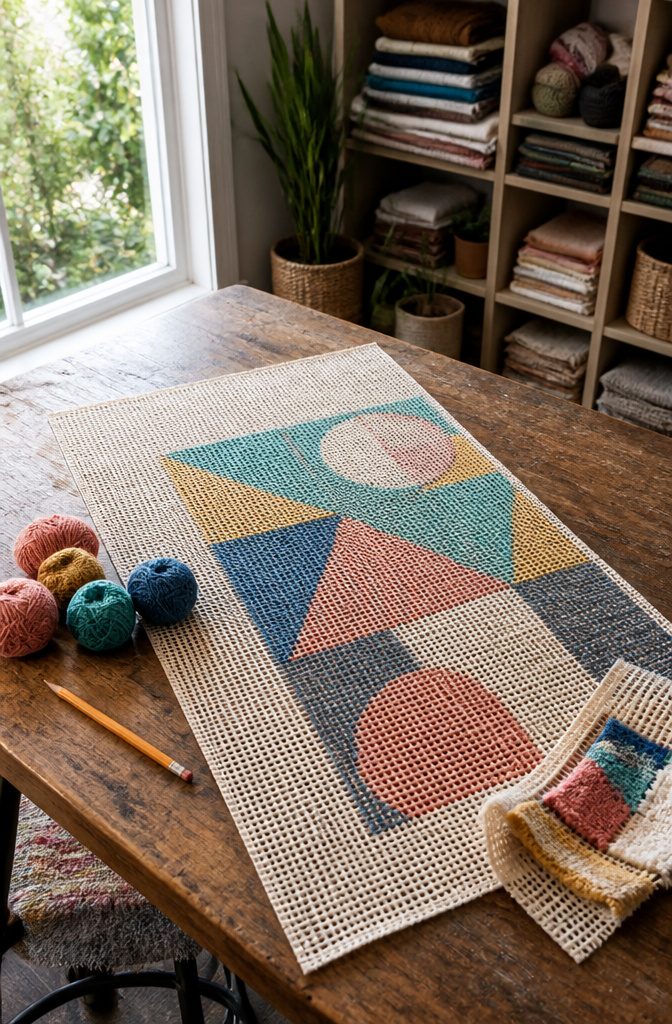
The simplest approach is to sketch your design directly onto the canvas backing with a permanent marker or fabric pen. Trace a shape you like, block out areas for each color, or map a simple geometric pattern.
If drawing freehand feels uncertain, you can trace a printed pattern by taping it behind the canvas and working near a bright window or light box.
Some makers buy pre-printed canvases with the design already stamped on, which removes the guesswork entirely but limits you to existing patterns.
Deciding how to fill the canvas matters as much as the design itself. Working in color blocks keeps the process organized when your design has distinct areas, while row-by-row filling suits allover patterns or solid fields.
Section work splits a large rug into manageable chunks, which helps if you want to check progress or take breaks without losing your place.
Starting with a small first project, something around twelve by twelve inches, lets you figure out your pace and catch mistakes before you commit to a larger piece.
3. Cut the Yarn to Length
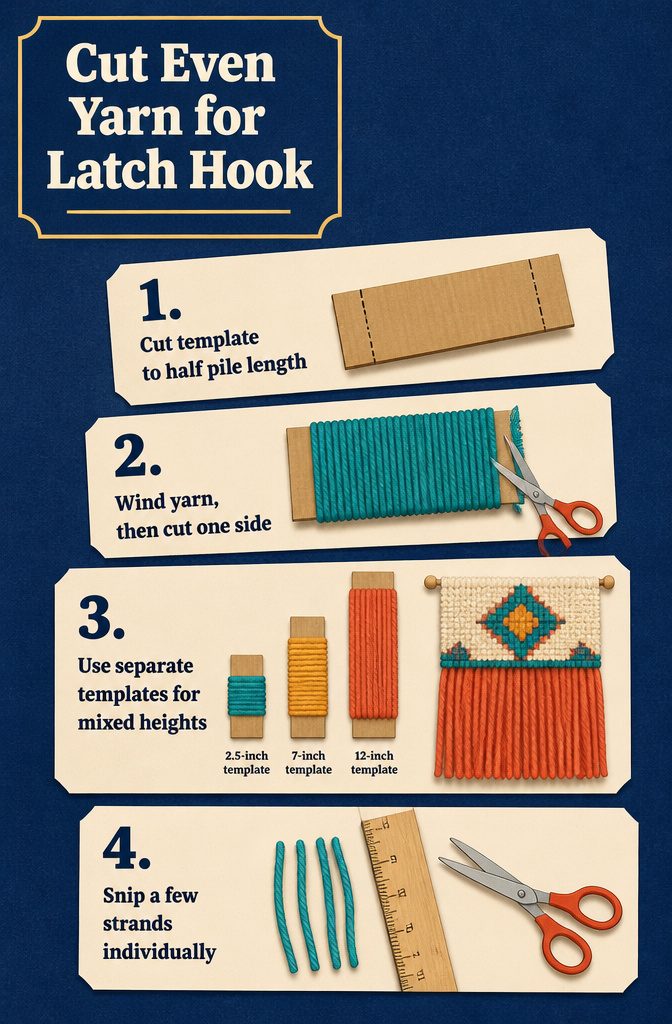
- Cut a cardboard template to half the length you want the finished pile to be. For 2-inch yarn (which becomes roughly 1-inch pile after knotting), cut the template 1 inch wide. For 4-inch yarn, cut it 2 inches wide. The latch-hook knot halves the strand length and takes up a small fraction more.
- Wind the yarn around the template as many times as it takes to fill your canvas, then cut straight across one side. You end up with a stack of strands all exactly the same length, no measuring each one.
- For projects that mix pile heights, cut multiple batches with different templates. One wall hanging I saw used 14- to 24-inch strands at the bottom (templates cut to 7 and 12 inches) and switched to 5-inch strands (2.5-inch template) for the rest. The long fringe at the base gave it weight; the shorter pile kept the upper design tight.
- If you need only a few strands of a given color, skip the template and cut them individually with scissors. Measure against a ruler or fold to the right length and snip.
4. Cut and Prepare the Canvas
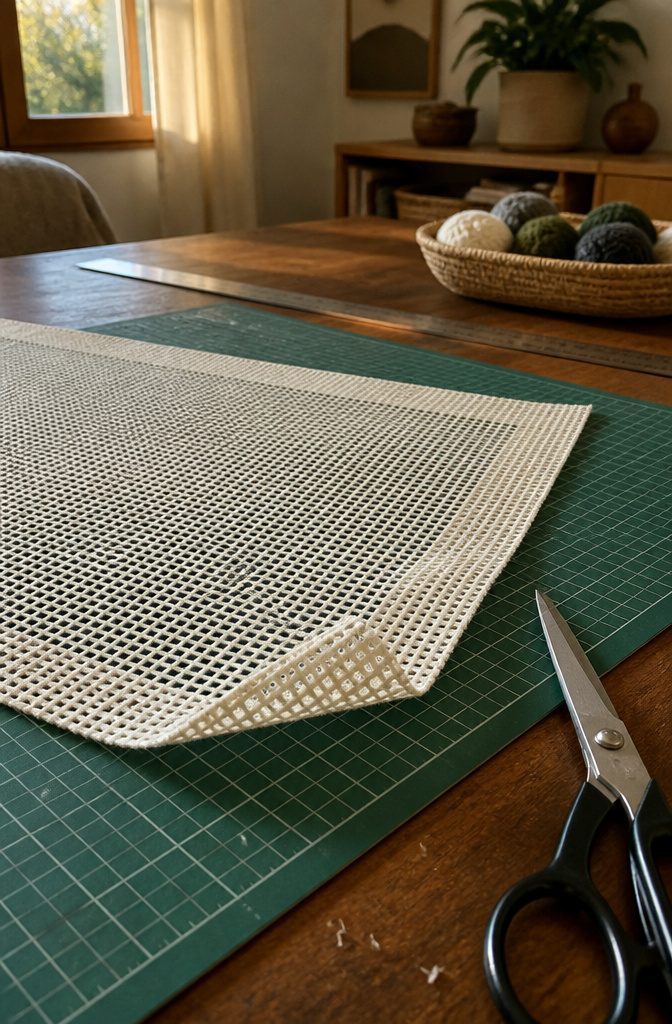
Start by cutting the canvas ¼ to ½ inch wider on all sides than the finished rug you want. That buffer gives you room to fold and hem the raw edges without crowding the last row of knots.
A sharp pair of fabric scissors makes the cleanest cuts, and a rotary cutter paired with a self-healing mat will give you straight edges if you have one on hand.
For a wall hanging, you need more canvas at the top.
Leave about 2 inches there so you can fold it over and stitch a sleeve for a dowel or rod. The sides can stay closer to the finished edge, around ½ inch when you plan to fold them inward.
If you are planning to bind the edges, fold them now to see how much space you actually need before you trim too close.
Cutting tight is harder to fix than cutting generous. Keep a little extra canvas in reserve, and you will not regret it when you are hemming.
5. Form the Latch-Hook Knot
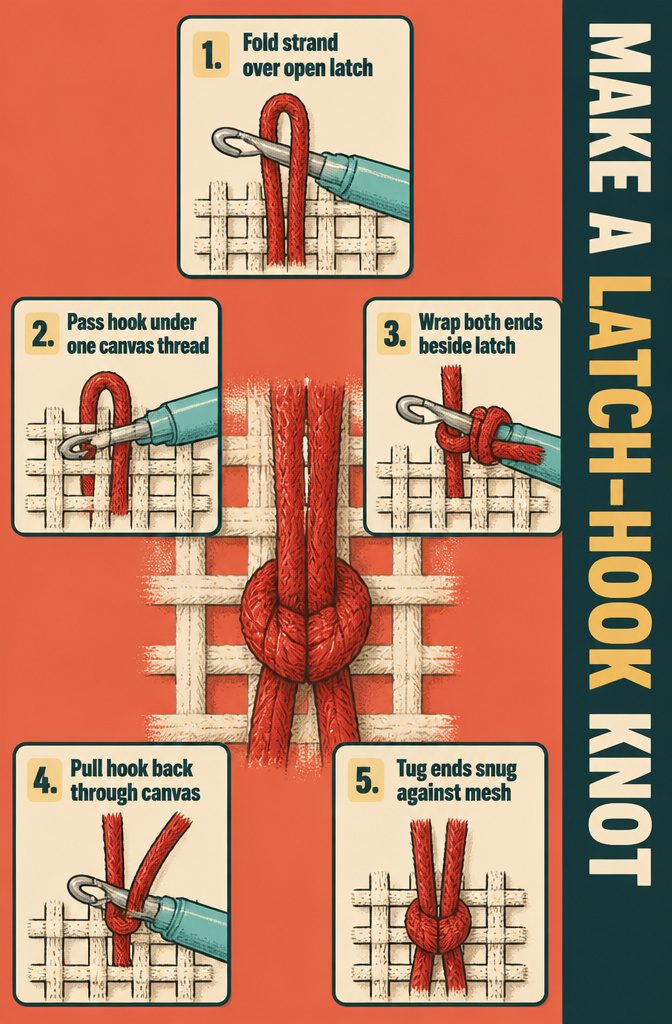
- Fold one strand of yarn in half and drape the looped end over the hook, past the latch.
- Push the hook tip under a single horizontal or vertical thread of the canvas mesh, keeping the latch open as you pass through. Watch that the latch does not snag the canvas weave.
- Bring both cut ends of the yarn up and around to one side of the latch, then wrap them across so they sit between the hook and the latch mechanism.
- Pull the hook back toward you through the canvas. The latch will close as it moves through, catching the yarn ends and drawing them through the loop you created in step one.
- Tug the two ends to snug the knot against the canvas. What forms is a lark’s-head knot, symmetrical and tight to the mesh if the tension held through the pull.
6. Fill the Canvas Following Your Pattern
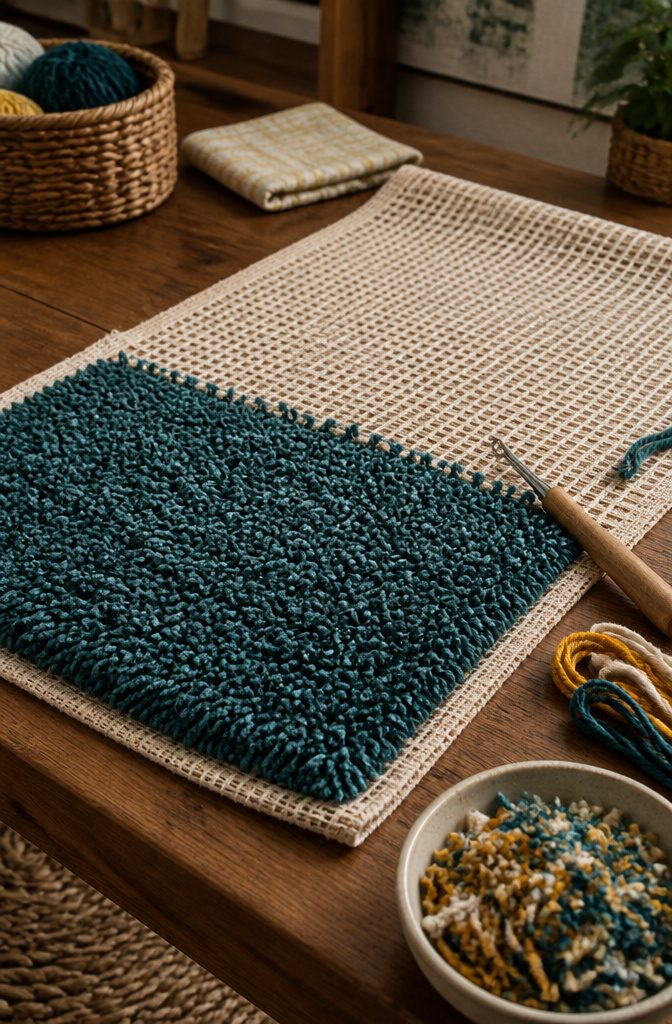
Once you have your pattern marked and the knot down, the rhythm takes over. You can work bottom to top if you want gravity on your side, letting the growing pile hang naturally as you move upward.
Top down works just as well, particularly if your pattern has a strong horizontal element you want to keep level as you check progress.
Some people prefer filling one color block at a time, which keeps you from switching yarn constantly and lets you see a shape emerge fast.
Others go row by row across the width, which makes it easier to keep the canvas square and catch mistakes before they travel too far up the piece.
The knots should all face the same direction. A left-handed knotter and a right-handed one will naturally tilt opposite ways, and mixing them in the same rug leaves a visible grain shift.
Keep your yarn lengths consistent, too. A strand that is half an inch longer than its neighbors will stand proud of the surface, and you will see it.
If a few ends do stray, trim them once the hooking is finished and the whole surface is in front of you.
7. Finish the Edges
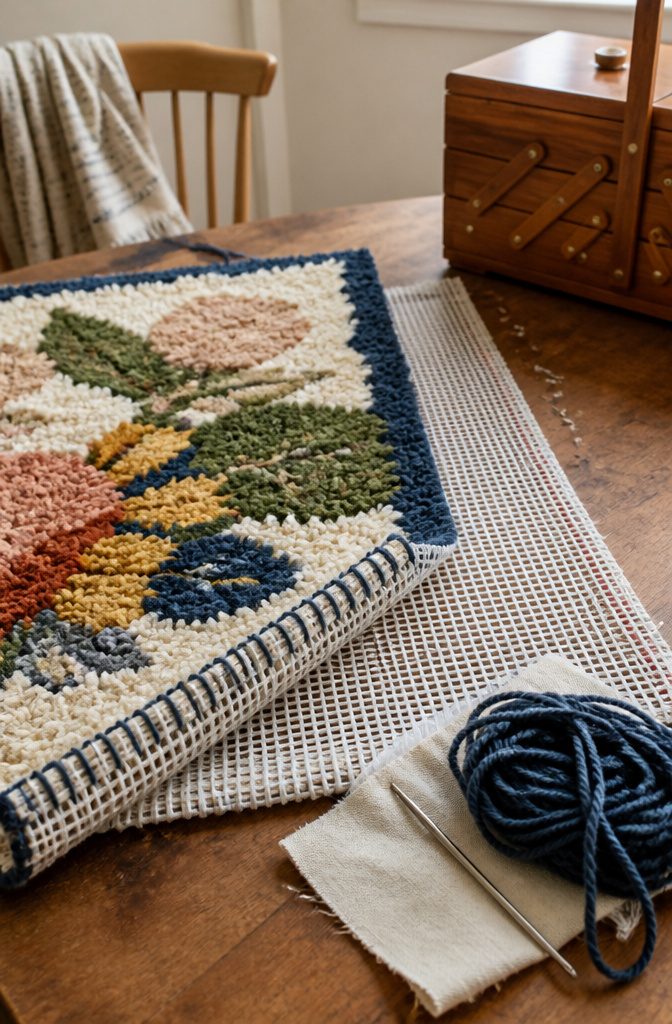
Once the hooking is done, the raw canvas edges need securing or they’ll fray and pull the yarn loose over time.
The most straightforward method is folding and hemming: fold one raw edge over so that one row of canvas lines up with another, thread a tapestry needle with thick thread or embroidery floss, and catch just the horizontal strands of canvas with your stitches.
Work around all four sides the same way. A whipstitch does the same job and holds just as well if you’re joining two pieces or prefer that stitch.
If sewing isn’t your thing, iron-on fold-over binding made for rug canvas gives a clean finish without thread.
Fabric glue or iron-on hemming tape work too, though they’re better for wall hangings or pillows than rugs that see regular foot traffic.
Bias tape adds durability and a finished look if you want something that reads more polished than a simple fold.
8. Add Backing, Hanging Hardware, or a Rug Pad
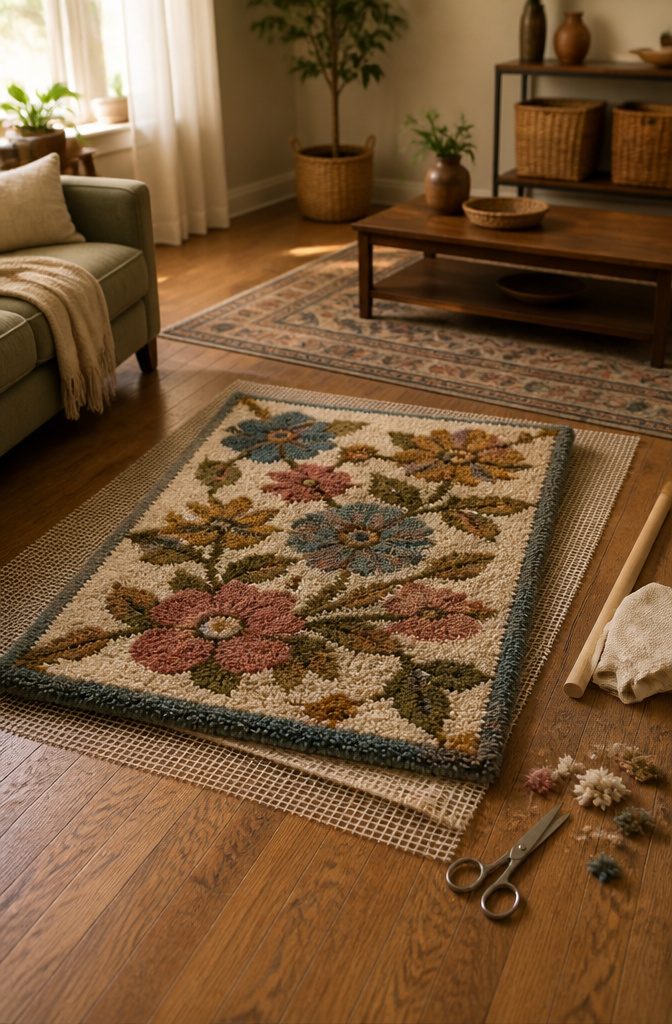
Once the hooking is done, the rug needs protection on the back if it goes on the floor, or a way to hang if it goes on the wall.
For a floor rug, add a backing to protect the knots and keep it from sliding:
- Cut felt, non-slip rug backing, or sturdy fabric to match the finished size, leaving a small margin so it doesn’t show past the edges.
- Attach it with fabric glue, stitching, or both. Apply glue evenly and press firmly to avoid bubbles.
- Add a rug pad underneath for extra grip.
For a wall hanging, skip the backing and make a hanging sleeve instead:
- Fold a strip of fabric along the top edge on the back and sew it down to form a sleeve.
- Slide a dowel or copper pipe through the sleeve to hang the piece.
Finish the surface by trimming any uneven yarn strands with scissors, then brush or fluff the pile to even out the texture. This step makes the difference between a project that looks homemade and one that looks finished.
What You Can Make
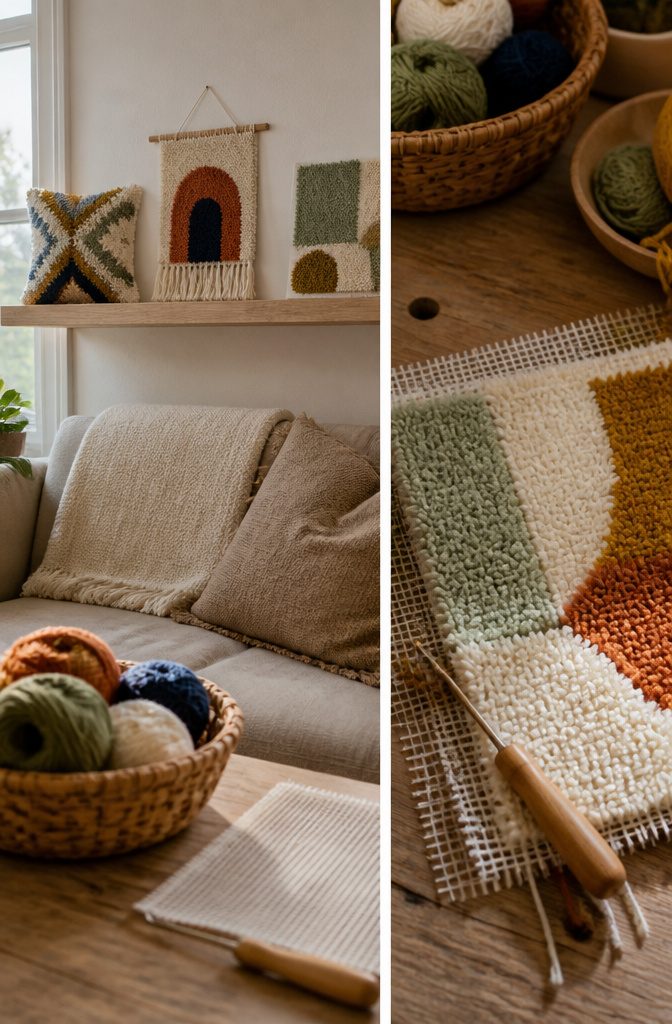
Latch hook isn’t locked into floor rugs. The technique works just as well for throw pillows, wall hangings, and smaller decorative objects that take the same canvas and yarn.
A pillow cover finishes faster than a full rug because the canvas size stays manageable, and wall art lets you frame or hang the piece without worrying about durability underfoot. The same knotting process applies to all of them.
Designs can be drawn freehand on the canvas, traced from a printed pattern, worked from a pre-printed kit, or improvised as you go.
Kits come with the pattern already stamped on the canvas and yarn counted out by color, which removes most of the planning.
A custom design means you pick the canvas size, sketch or transfer the image, and calculate how much yarn each color needs before you start cutting.
Planning that up front keeps you from running short halfway through a project or ending up with a pile of unused yarn.
Working in Sections, Rows, or Color Blocks
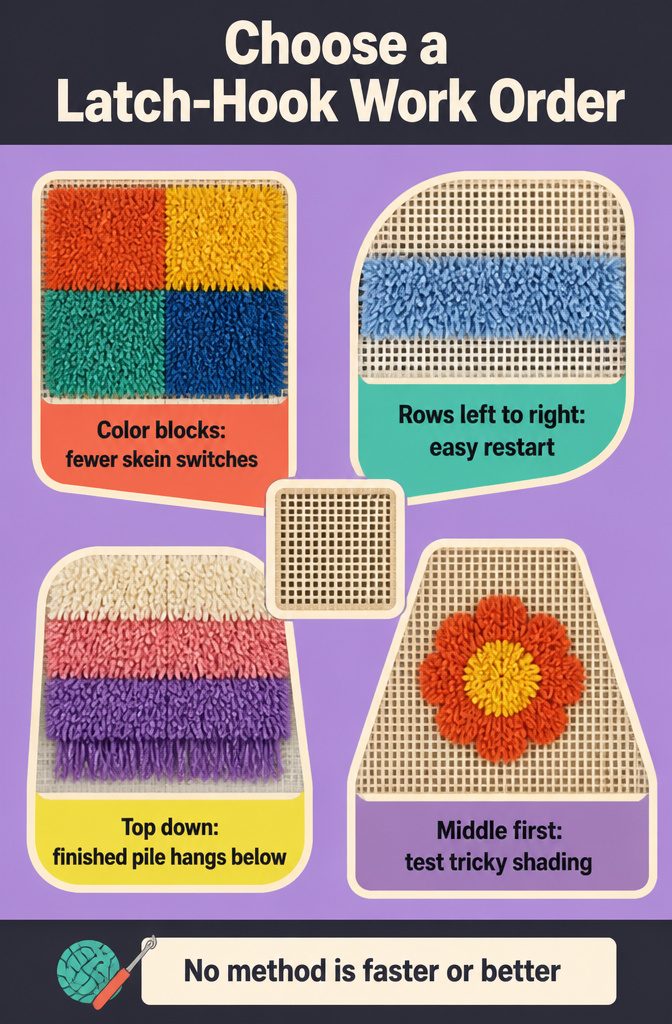
The canvas grid divides naturally, so you can work in whatever sequence feels right for your pattern and pace.
- Work by color block if the design has large areas of the same shade. Finish all the red yarn before switching to blue, which means fewer ends to manage and less switching between skeins.
- Work row by row, left to right the way you read. This keeps the rhythm simple and makes it easy to pick up where you left off without hunting for the last knot.
- Work from top to bottom in horizontal sections to keep finished rows out of the way while your hands are working lower down. The weight of completed yarn hangs below instead of bunching in your lap.
- Start in the middle with a small practice section if the pattern has tricky shading or a central motif you want to nail before committing to the edges.
None of these methods is faster or better.
The choice comes down to whether your design has strong color zones, whether you like finishing one area completely before moving on, or whether a predictable left-to-right sweep suits the way you work.
Using Bulky Yarn or Fabric Strips
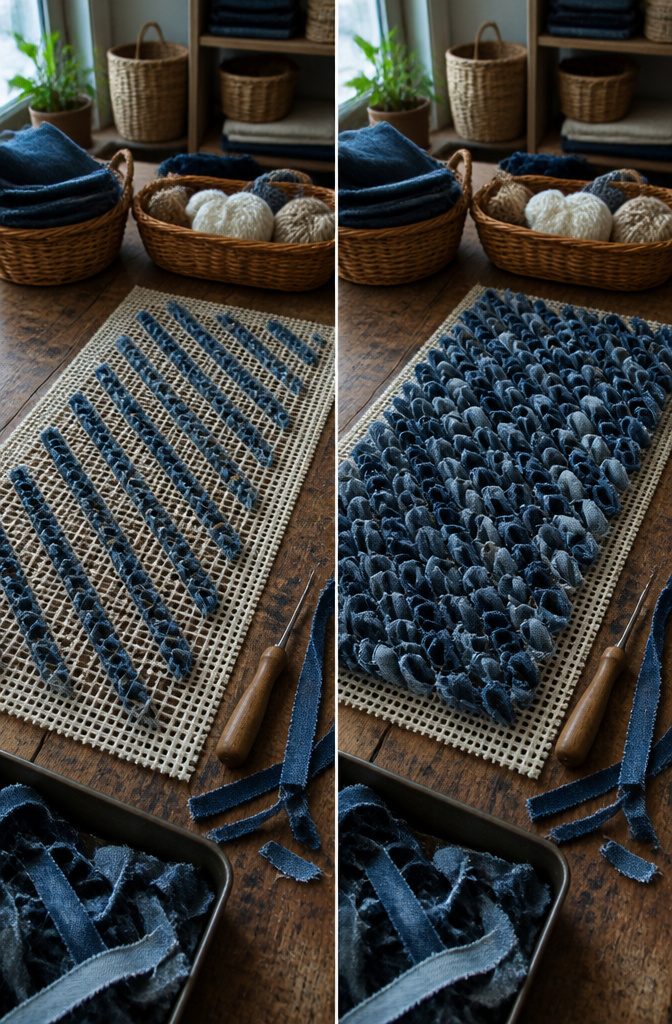
Bulky rag strips don’t always cooperate with the standard latch hook the way ordinary yarn does. Denim strips cut to 5 × ½ inches or knit scraps trimmed to 5 inches can be too thick to pull cleanly through the tool’s latch.
When that happens, I fold the strip in half and place it in the hook, use the latch to pull up the looped end, then push the two ends through the loop by hand.
It takes slightly longer than the usual motion, but it works.
Another option when the strips are bulky: skip every other slot on the canvas and hook diagonally. That gives each strip more room and still delivers good coverage without forcing the material through a space it won’t fit.
The canvas itself can vary.
Produce bags or plastic canvas both work, as long as the hook size matches the mesh. A smaller mesh needs a smaller hook; a larger one tolerates bulkier strips without the manual workaround.
Keeping the Canvas Flat and Cleaning the Finished Rug
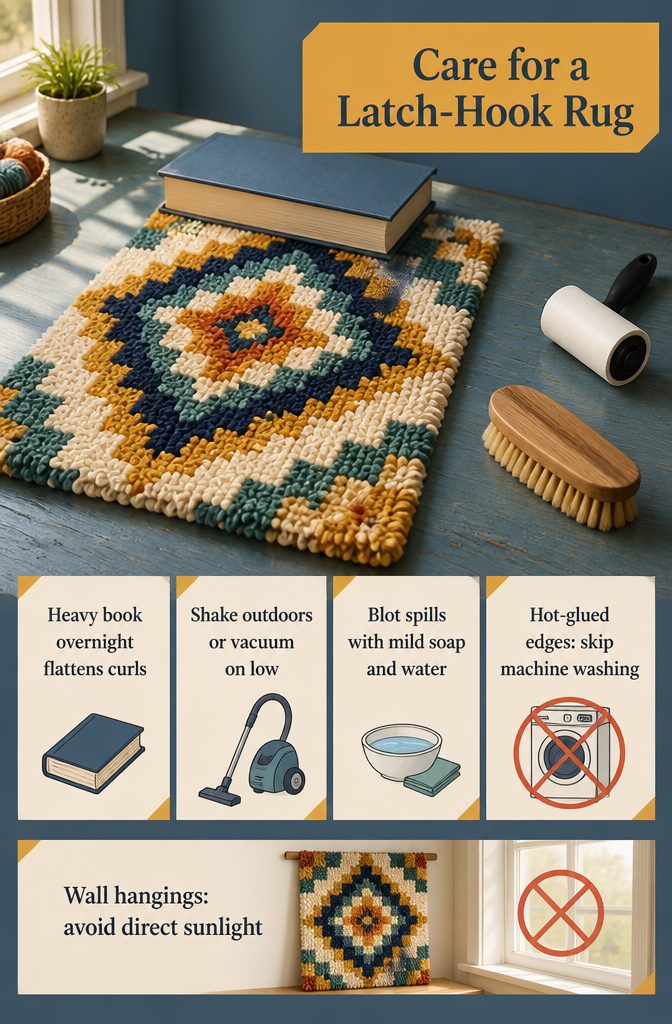
Once the rug is finished, a few simple steps keep it looking good without much effort.
Press down any curling edges with a heavy book overnight to flatten them. The canvas tends to curl after weeks of handling, and weight is usually enough to coax it back into shape.
For regular cleaning:
- Shake the rug outdoors or vacuum it lightly to remove dust. Use the vacuum’s lowest suction setting so the pile doesn’t get pulled.
- Spot clean spills right away with mild soap and water, blotting instead of rubbing.
- Skip the washing machine if you sealed the edges with hot glue. The adhesive breaks down under that kind of stress, and the edges can fray or come apart completely.
Wall hangings need even less. A lint roller or soft brush keeps the surface clean between vacuuming, and keeping the piece out of direct sunlight prevents the yarn from fading over time.
Frequently Asked Questions
Is latch hook easier than cross stitch?
Latch hook is generally easier to learn than cross stitch because the knot is the same every time and you don’t need to count threads or follow complex stitch patterns.
The repetitive motion becomes automatic quickly, making it approachable for beginners. Cross stitch requires more precision in placing each X and tracking your position on the fabric.
Is tufting the same as latch hooking?
No, tufting uses an electric or pneumatic gun that punches loops or cut pile through fabric backing at high speed, while latch hooking ties individual knots by hand through rigid canvas mesh.
Tufting is faster and suited to large projects like custom rugs, but latch hooking requires no special equipment beyond a small hand tool and gives you complete control over every strand.
How do you clean latch hook rugs?
Shake the rug outdoors or vacuum it on the lowest suction setting to remove dust, and spot clean spills immediately with mild soap and water by blotting rather than rubbing.
Avoid the washing machine if you used hot glue to seal the edges, as the adhesive breaks down and the canvas can fray. Wall hangings stay clean with a lint roller or soft brush between vacuuming.
What size mesh should I use for latch hook?
Use 100% cotton rug canvas with a grid of around 13 squares per 10 centimeters, which works with standard latch hooks and keeps the finished rug tight without fighting you on every knot.
If you’re working with bulkier yarn or fabric strips, size up to a larger mesh so the material pulls through cleanly. Smaller grids require a smaller hook to match.
How much yarn do I need for a latch hook rug?
Calculate yardage by counting the total squares in your canvas and multiplying by the length of each strand you plan to cut.
Larger projects consume yarn quickly and may stretch across months, so plan before you start cutting to avoid running short. Keep extra yarn in reserve for each color, especially if you’re working from stash rather than a pre-counted kit.
What can you make with latch hook besides rugs?
Latch hook works for throw pillows, wall hangings, and smaller decorative objects using the same canvas and knotting technique.
Pillow covers finish faster because the canvas size stays manageable, and wall art lets you frame or hang the piece without worrying about durability underfoot. The same process applies to all of them.
How do you soften latch hook canvas?
Switch to cotton canvas instead of the stiff rug canvas typically sold in kits, or wash and dry the canvas before you start hooking to relax the fibers.
Some makers use cotton fishnet fabric for a softer base. Keep in mind that canvas stiffness helps it hold its shape while you work, so softening it may make the project harder to handle.






