
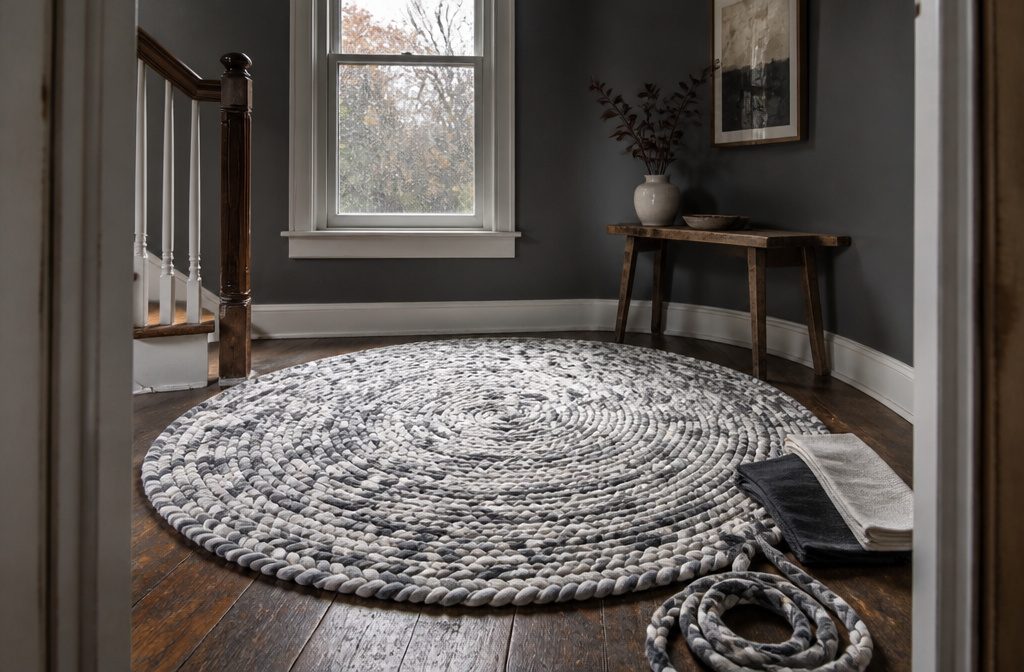
A no-sew braided rug made from old T-shirts or bed sheets takes about 16 hours over a weekend if everything goes right the first time, or closer to 22 hours once you account for buckling and re-work.
The mistake that causes most of the re-work is pulling the braid too tight while attaching it, which makes the rug wrinkle or bowl instead of lying flat.
1. Choose and Prepare Your Fabric
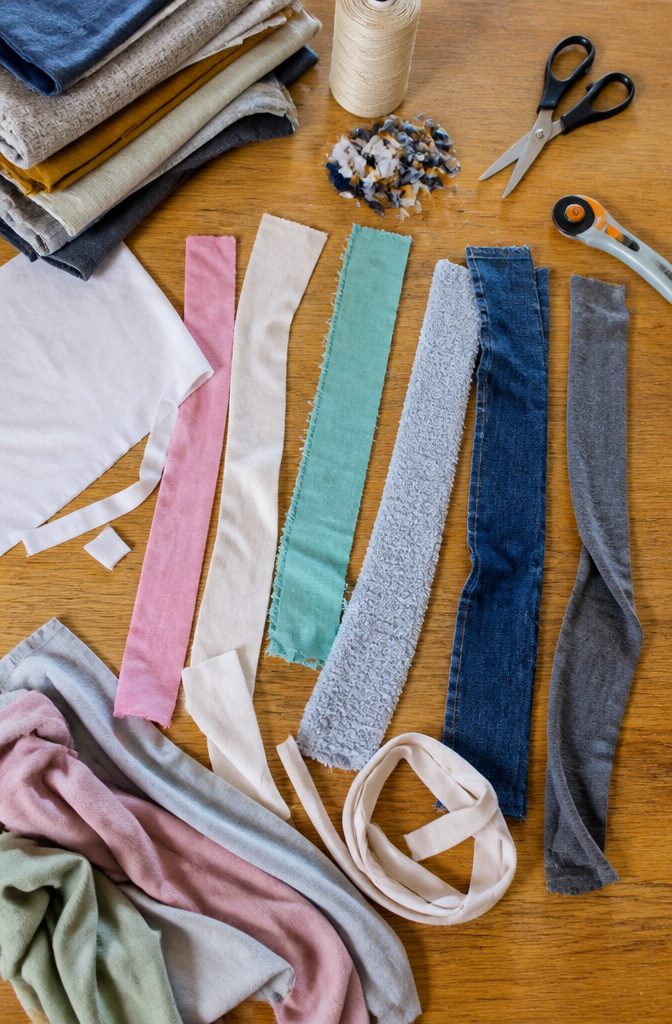
Old T-shirts, bed sheets, towels, jeans, and blankets all work for this. T-shirts braid easily, but they stretch under tension and the finished rug can spring back instead of lying flat.
Sheets tear cleanly along the grain once you start them with a small cut, and my kids loved the sound different fabrics made when ripping. Heavier material like denim or fleece gives you a thicker braid and more bulk underfoot.
Strip width decides how tight the braid reads. Cut T-shirts 1.5 inches wide for a tighter weave, or go 2 to 3 inches if you want something chunkier and faster to work.
Sheets can handle 2 inches without getting unwieldy. You can measure and cut with scissors, use a rotary cutter for speed, or make one snip and tear the rest.
Make sure these are of different lengths, and keep the lengths varied as you sew strips onto those that are braided in. Three stitched connections, if too close together, will produce a weak spot in the rug.
Stagger your strip lengths so joins don’t pile up in one spot.
Remove any seams before you start. For methods that fold raw edges in, tuck them toward the center as you braid so they don’t show on the finished surface.
2. Join Your Strips
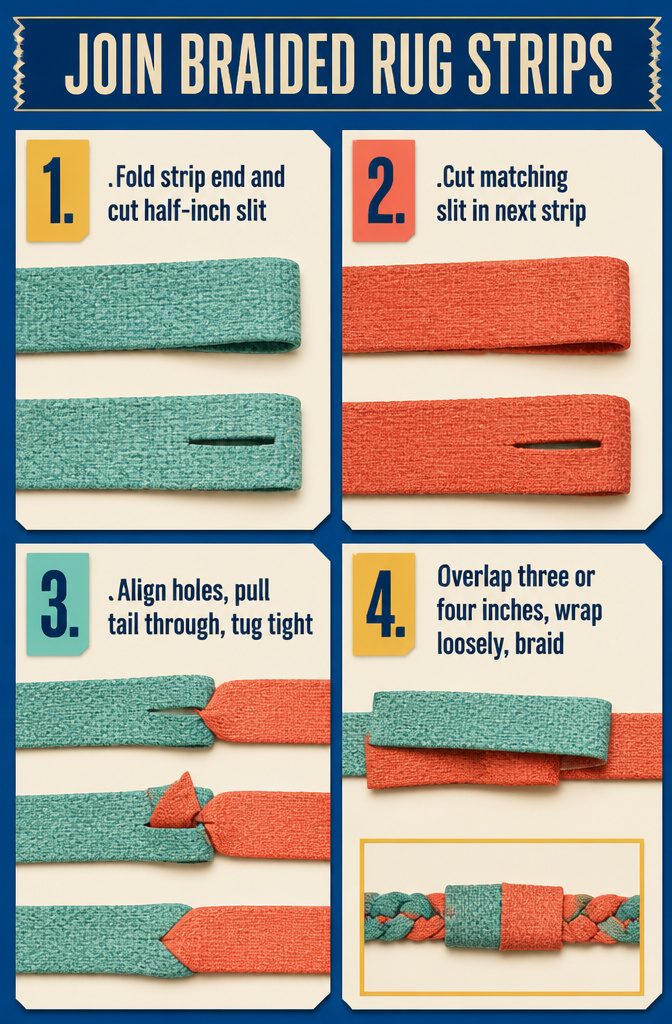
When one strip runs short, fold the end over and cut a half-inch slit, then do the same with the next strip you want to join.
Line up the two slits, pull the tail of the new strip through both holes, and tug tight. The fabric locks on itself without a knot or any thread.
This slit-and-loop technique works best on thinner or stretchy fabrics that compress into the opening. A tight weave or thick cotton will bunch at the join, and the doubled fabric shows more.
The other fast option is a plain overlap: lay three or four inches of the new strip on top of the old one, wrap one around the other loosely, and keep braiding.
The braid holds them in place. This adds bulk but no hard lump, and it suits heavier fabrics that won’t loop easily.
If all three strands are about to run out at once, stagger the overlaps by cutting one or two shorter so the rug does not thicken in one spot.
3. Start the Braid
Most three-strand braids begin by knotting or looping the strips together.
Cut a slit near the top of each of three strips, overlap two of them, then thread the third strip through both slits and pull its tail back through its own slit to lock all three in place.
If you prefer, a few hand stitches or a quick pass on the machine will hold the start together just as well.
The woven method uses two strips instead of three to begin, but the traditional braid is easier to start and easier to keep even.
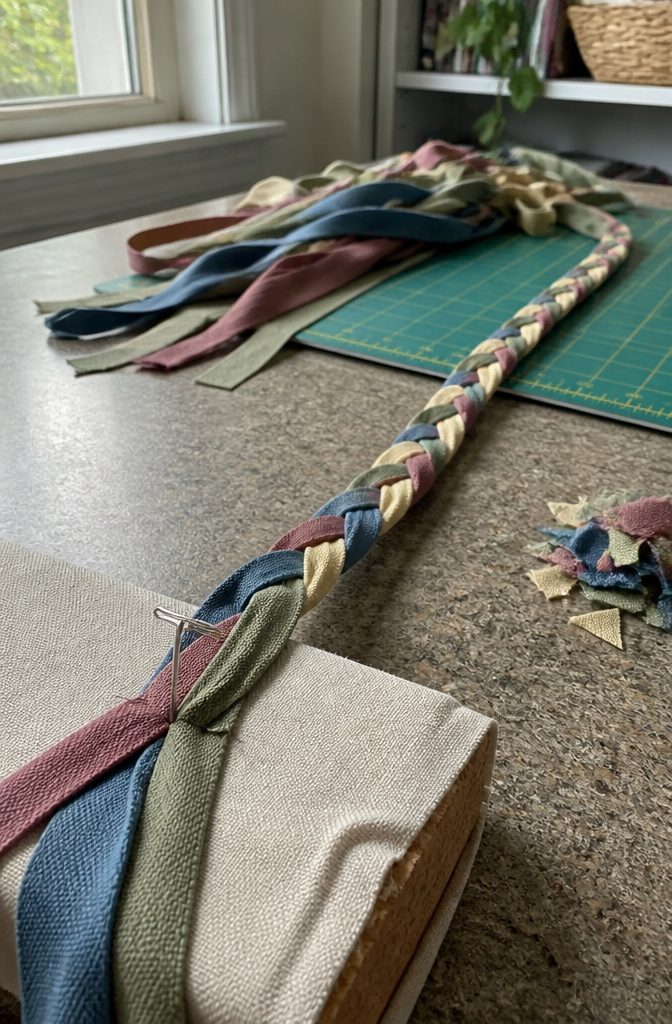
Anchor the work while you braid or it will slide and twist. Tape fixes the start to a countertop, though it wears out fast.
A fabric-wrapped brick gives enough weight to pin the braid to without shifting, and adding a thick piece of cork inside the fabric lets a T-pin stick without the pin pulling free every few stitches.
A styrofoam cake dummy takes the pin easily but weighs too little to let you pull the braid tight, and a tight braid resists warping later.
Any heavy object works if it keeps the start secure while you build tension into the braid.
4. Braid and Attach as You Build the Rug
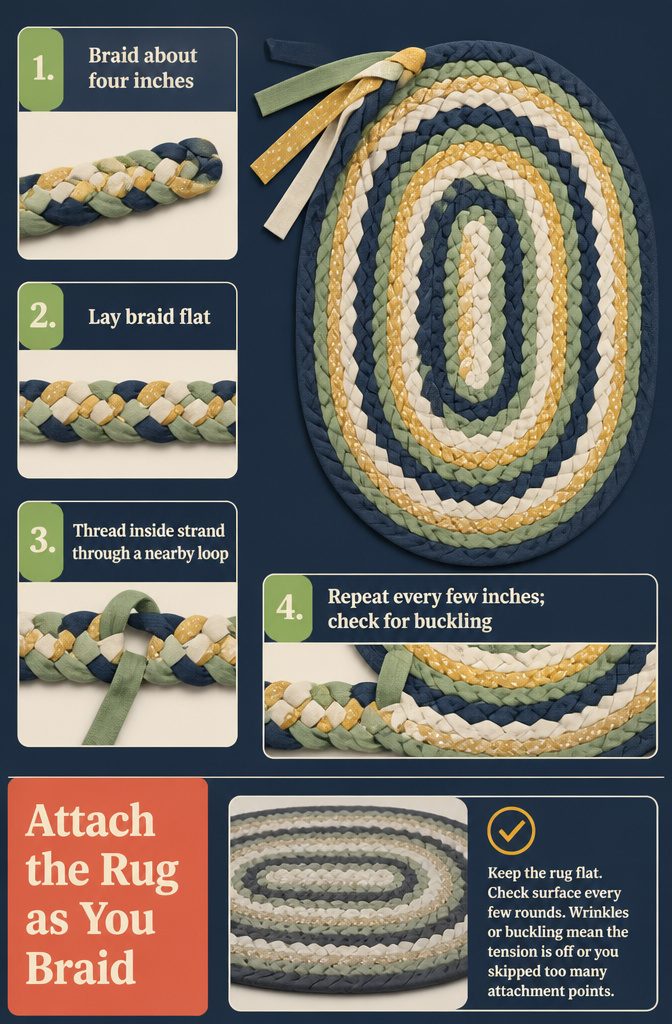
The coil-as-you-go method keeps the rug manageable from the start. Braid about four inches, lay it flat, and loop the inside strand through an existing braid loop to attach each new section as you work.
That inside strand becomes your connector: every few inches, as it comes around to the inner edge again, thread it through one of the loops in the row beside it and keep braiding.
If the braid is tight or the fabric less stretchy, a large needle on the end of that strip makes the threading easier.
The rug stays flat only if you attach consistently and avoid pulling too hard. Check the surface every few rounds; wrinkles or buckling mean the tension is off or you skipped too many attachment points.
Some builders braid the entire length first and coil it later with string threaded through the loops. That works better with non-stretchy fabric like flannel, but you lose the simplicity of finishing as you go.
A third option skips threading entirely: under-over weaving, the same interlocking principle as cotton loop potholders, though it changes the look and the structure.
5. Shape the Rug and Control Tension
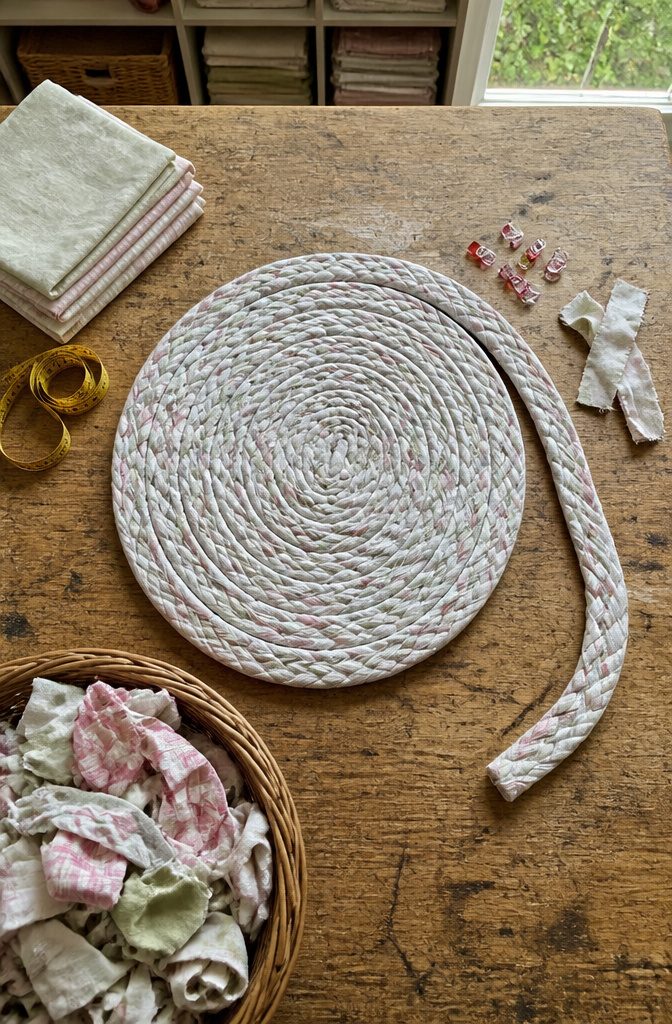
The simplest shape is a coil, and most no-sew braided rugs follow that path. You start with a few inches of braid, curve it into a loose spiral, and keep feeding new braid along the outside edge as you work.
The tighter you pull the braid while attaching it, the more likely the rug is to bowl or wrinkle.
Fabric that stretches under tension will keep trying to spring back, and t-shirt fabric in particular fights to stay flat. Flannel sheets behave better because they hold their shape once braided.
A four-strand interlocking method changes the rhythm slightly.
The outer strand weaves over, under, and over the other three, then through loops in the center braid. The result is denser and a little stiffer than a three-strand coil.
For a rectangular runner or bath mat, fold the braid back and forth instead of coiling it. The edges stay parallel, and the length grows with each pass.
6. Finish the Edge
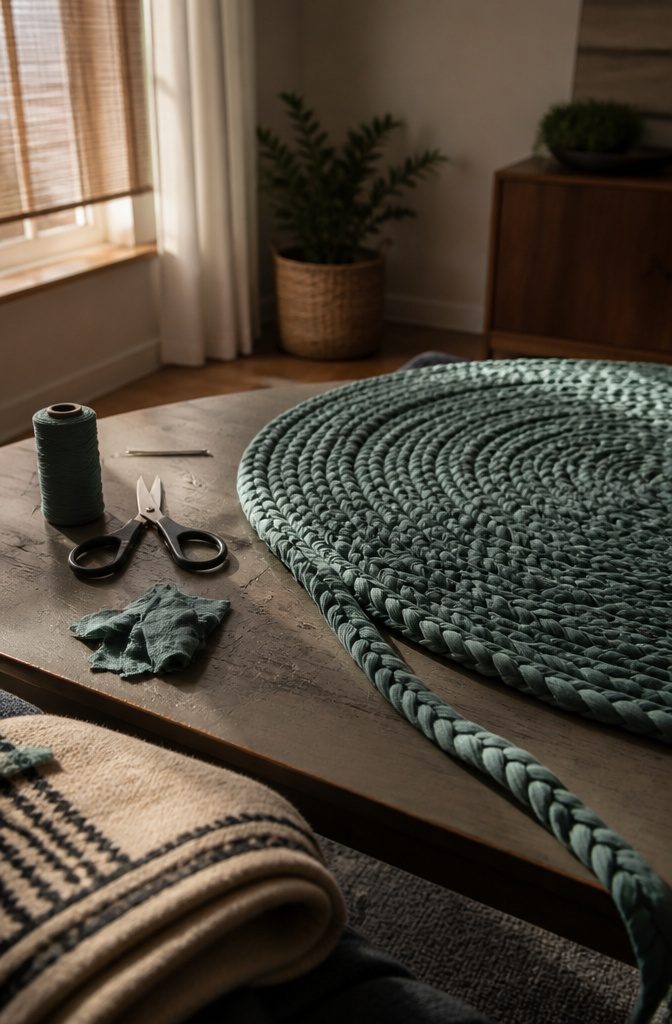
Finish the Edge
The way you close the braid depends on how you built it.
If you braided loose strips and coiled them flat, taper the final six to eight inches of each strip so the braid thins gradually, then stitch the tapered end flat against the outer edge of the rug where it disappears into the coil.
If you braided and attached continuously as you spiraled, stop braiding about four inches from where the end will land, trim each strip on the diagonal, tuck the raw edges under, and hand-stitch them down so no frayed ends show.
Both methods hide the finish, but the taper works better when the braid stays thick all the way to the edge, and the tuck-and-stitch finish suits thinner or more flexible fabrics that fold cleanly.
I prefer the taper for cotton T-shirt strips because they bulk up when braided and a blunt end would stand proud of the surface.
Fabric Quantities for Different Rug Sizes
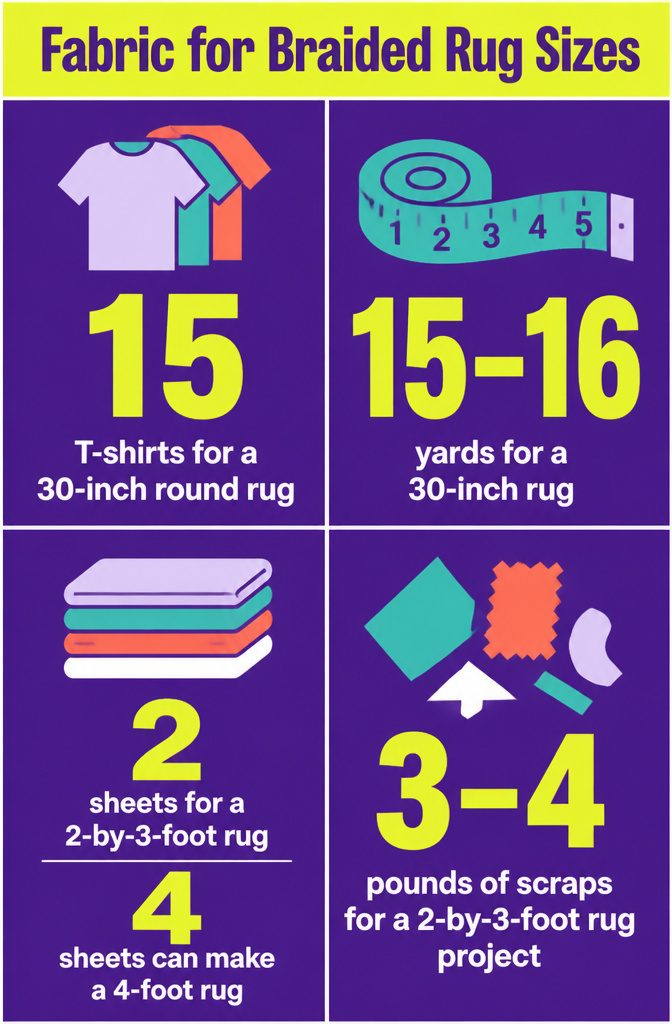
Estimates shift depending on fabric weight and how tightly you braid, but the numbers below give you a starting point.
- 15 T-shirts for a 30-inch round rug, or around 10 shirts if you want something smaller.
- 15–16 yards of fabric (roughly 3 queen sheets or 4 twin sheets) for the same 30-inch size.
- 2 full or queen sheets for approximately 2 by 3 feet; add a third or fourth sheet if you want a 4-foot rug.
- 3–4 pounds of fabric scraps for your first 2-by-3-foot project.
I lean on the sheet estimates when planning, since yardage is easier to picture than T-shirt count.
If your shirts run small or you cut narrow strips, expect to need more. Braiding tight makes the rug denser and shrinks the final diameter, so save a few extra strips and keep adding until the size looks right.
Time the Project Will Take
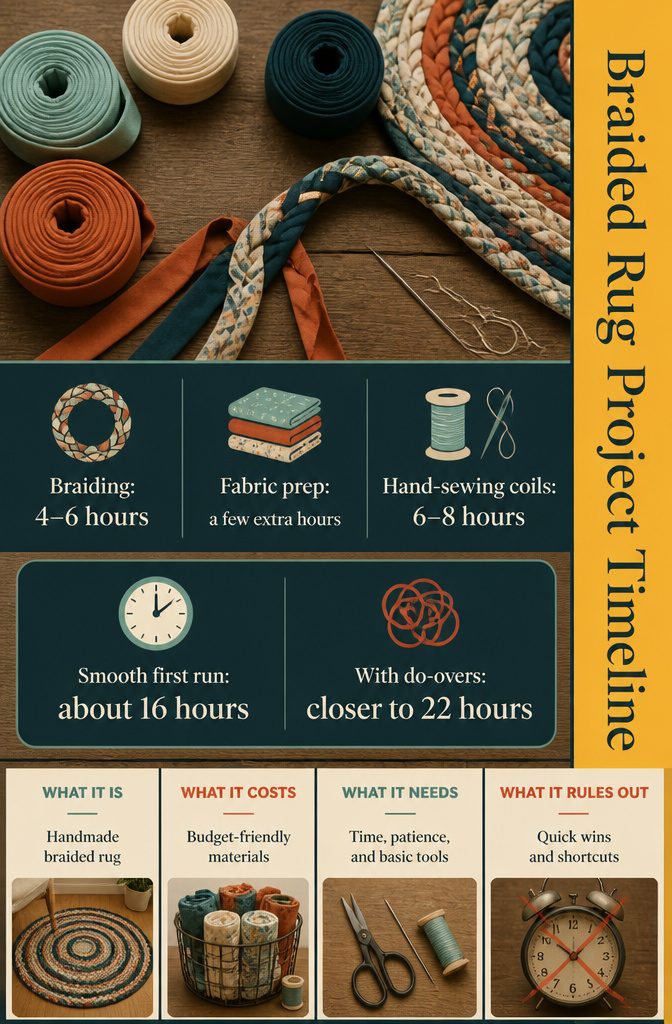
The braiding itself ate anywhere from four to six hours over a couple of days, and the fabric prep added a few more hours up front.
Hand-sewing the coils together once the braid was complete took another six to eight hours, though that figure jumped higher when the rug buckled and needed unpicking.
Total time came to roughly 16 hours if everything went smoothly the first time, or closer to 22 hours once mistakes and do-overs were factored in.
A first rug is a multiple-day project. The videos make it look faster than it plays out in real time, and getting quicker happens with practice, not on the first attempt.
If you block out a weekend and expect an evening left over, you’re giving it the right scope.
Adding Backing or Grip
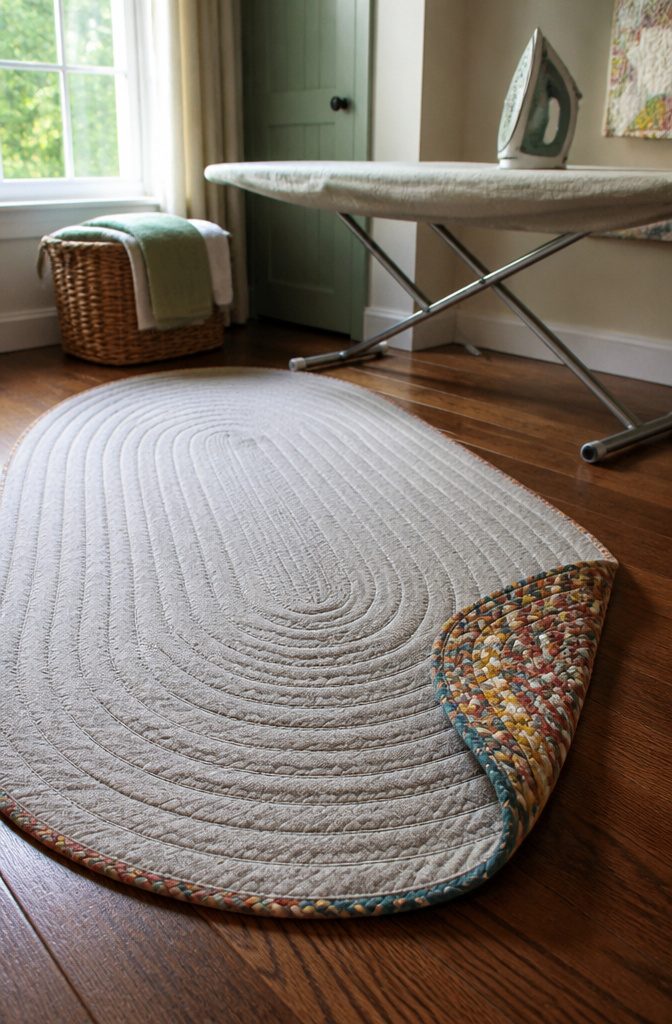
Backing is optional, but if the rug tends to slide on hardwood or tile, fusible interfacing ironed to the reverse side anchors it without sewing or spray adhesive.
The interfacing bonds when heat activates it, and the process takes about as long as pressing a shirt. Starch or Polycrylic spray work as alternatives if you want a lighter hand or already have them around.
Both add a bit of stiffness to the back and can keep the fabric from shifting, though neither grips quite as firmly as fusible interfacing.
I skip backing on rugs that live in low-traffic corners or sit on carpet, where sliding is not an issue.
The trade is stability against the extra step and the slight stiffening effect. If you know the rug will stay put, backing is more work than it pays back.
Tools and Materials You Will Need
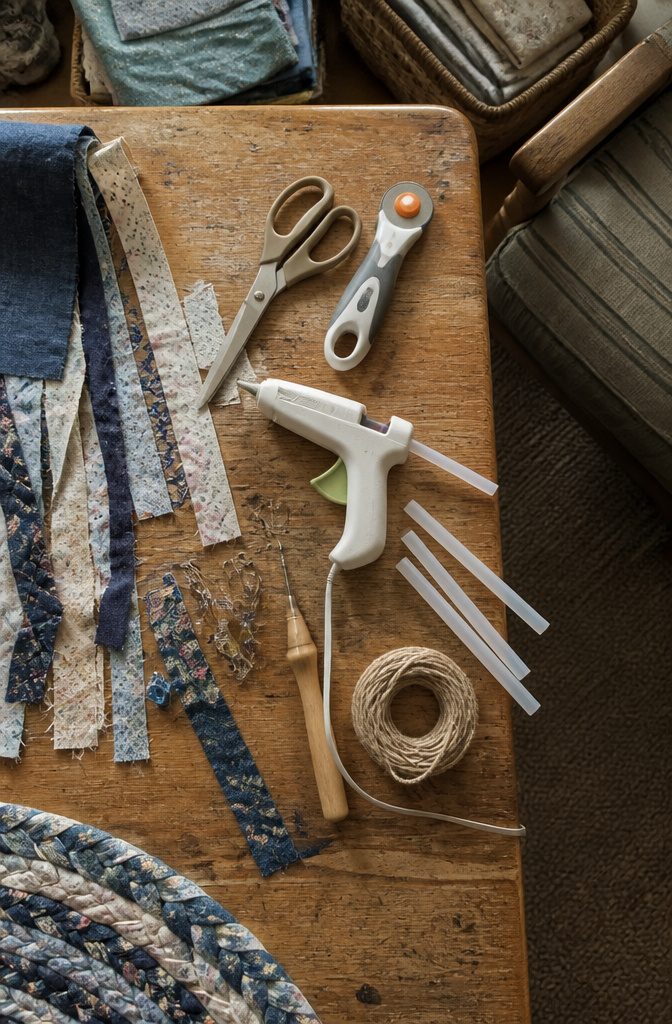
You’ll need fewer tools than you think. Most are things you probably already have, and the method you choose decides which ones actually come into play.
- Scissors or a rotary cutter for cutting fabric strips. The rotary cutter gives you cleaner, more consistent strips if you have one; scissors work fine if you don’t.
- Hot glue gun and large glue sticks if you’re using the glue method to attach the braid as you build. This takes a lot of glue, so stock up on the big sticks.
- Wooden rug needle or large needle for the sewing method. The wooden needle handles the thick fabric strips better.
- Safety pins as an alternative to a needle if you’re piecing strips together by hand.
- Clips to hold fabric strips as you work.
- String or warp string for lacing the braid together, depending on the technique.
The glue gun is the fast route. The needle takes longer but gives you more control over tension and flatness as you go.
Frequently Asked Questions
What can you make a braided rug out of?
Old T-shirts, bed sheets, towels, jeans, blankets, and fabric scraps all work for braided rugs. T-shirts braid easily but stretch under tension, while sheets tear cleanly and heavier materials like denim or fleece create thicker braids with more bulk underfoot.
Do you need a sewing machine to make a braided rug?
No sewing machine is required for a no-sew braided rug. You can join strips using a slit-and-loop technique or by overlapping them, then attach the braid as you coil by threading the inner strand through existing loops.
How much fabric do I need for a braided rug?
A 30-inch round rug takes 15 T-shirts or about 15–16 yards of fabric, roughly 3 queen sheets or 4 twin sheets. For a 2-by-3-foot rug, plan on 2 full or queen sheets, or 3–4 pounds of fabric scraps.
How many shirts do you need for a braided rug?
15 T-shirts will give you a rug about 30 inches across. If you want something smaller, 10 shirts will work, and you’ll need more if your shirts run small or you cut narrow strips.
How long does it take to make a braided rug?
Expect 16 hours if everything goes smoothly the first time, or closer to 22 hours once mistakes and do-overs are factored in. The braiding takes 4–6 hours, fabric prep adds a few more hours, and hand-sewing the coils together takes another 6–8 hours.






