
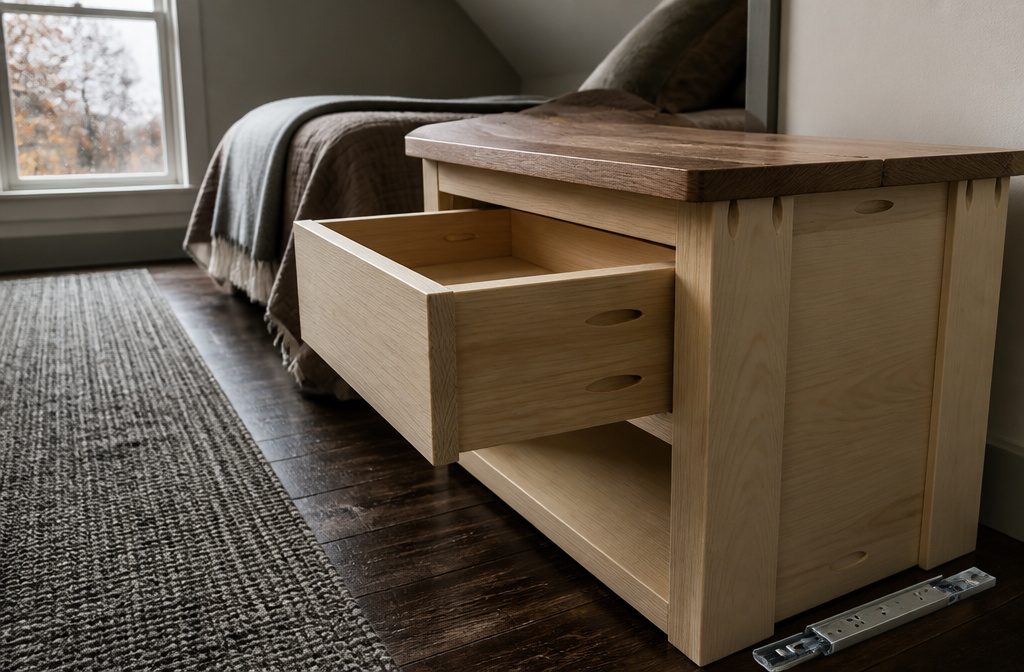
A nightstand built from dimensional lumber and pocket-hole joinery costs $60 to $150 in materials and takes a weekend to finish.
Most builders run into trouble at the drawer stage, where short push-to-open slides limit how shallow the box can go. The shortest reliable slides measure 10 inches front to back, so account for that depth before you cut the cabinet sides.
1. Plan Your Nightstand and Cut the Parts
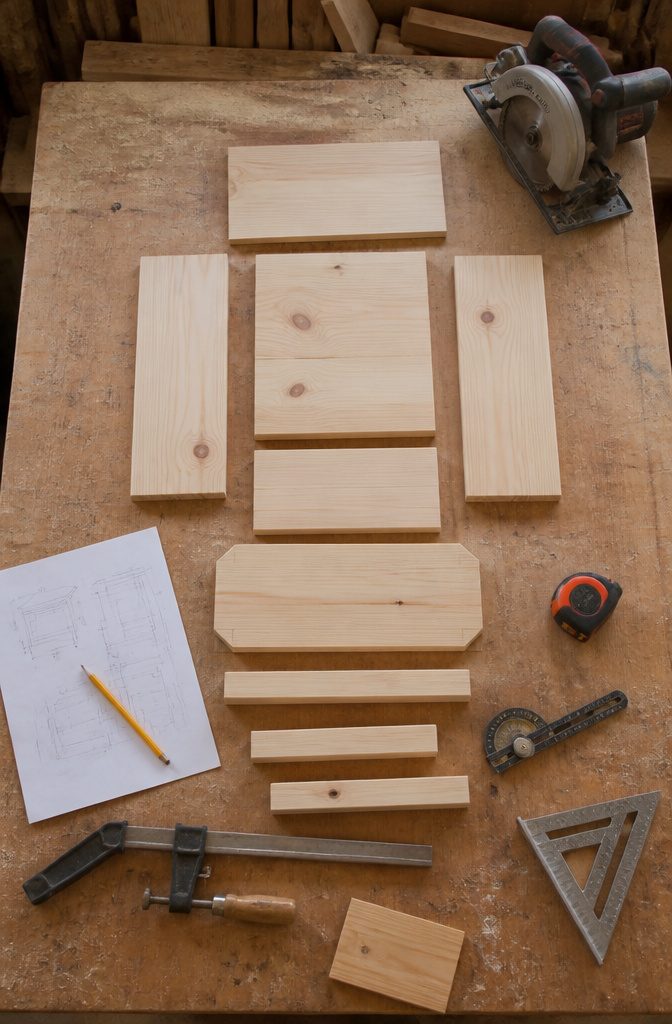
Start by sketching your nightstand with measurements that fit the height of your mattress and the space beside your bed.
Account for drawer slide clearance inside the box, outlet access if the nightstand sits against a wall, and room for a French cleat if you plan to mount it floating.
The shortest push-to-open slides available run about 10 inches, so measure twice before committing to a shallow build.
Cut all your pieces to length following your plan. If you’re joining pine boards for the top and bottom instead of cutting a single piece from plywood, measure the assembled bottom piece before cutting the sides.
Lumber can vary by a sixteenth of an inch, and that gap compounds fast.
Check every cut with an angle finder or speed square. Miters close to 45 degrees glue up cleanly; anything off square shows as a hairline gap at the corner.
2. Build the Side Panels or Box Frame
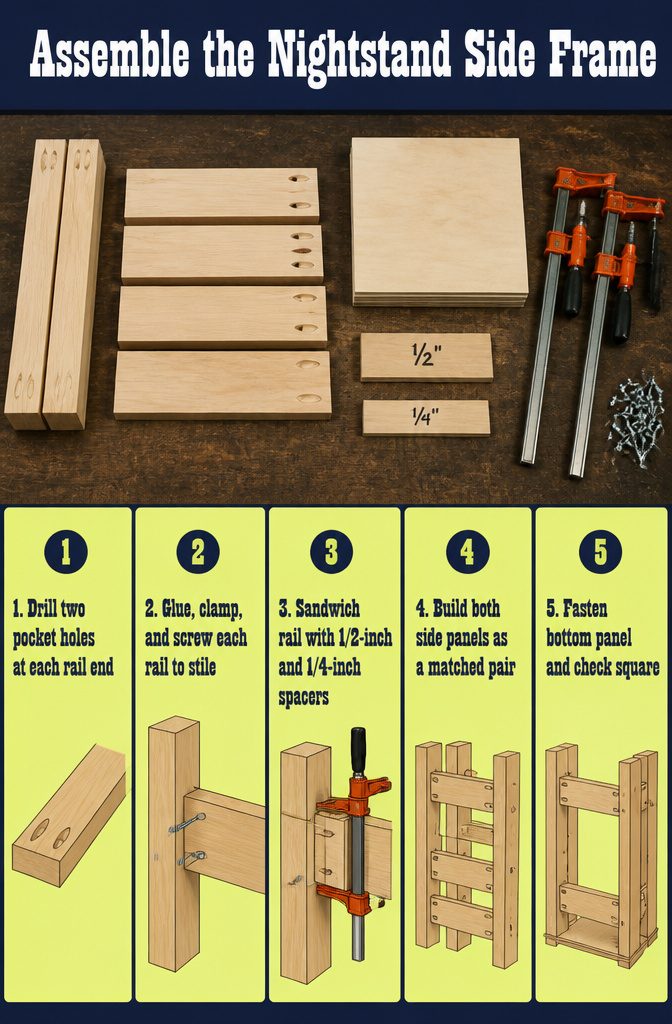
Build the Side Panels or Box Frame
- Drill pocket holes in the rails. Set your pocket hole jig for 3/4″ material and drill two holes into both ends of each rail piece. These accept 1-1/4″ pocket hole screws when you join rails to the stiles.
- Assemble the frame on a flat surface. Apply wood glue to the joint, clamp the rail to the stile, and drive 1-1/4″ pocket hole screws through the drilled holes. Wipe excess glue immediately before it sets.
- Use spacers to hold boards flush. Cut a 1/2″ spacer from scrap plywood and a 1/4″ spacer for the outward edge. Sandwich the rail between them when you clamp the rail to the post so everything lines up square without measuring every time.
- Build both side panels first. Repeat the same pocket hole and glue process for the second side before moving on. Working in matched pairs keeps dimensions consistent.
- Attach the bottom panel. Drill pocket holes into the edges of the plywood bottom, apply glue, and fasten it to the side panels with 1-1/4″ pocket hole screws. Stand the assembly upright to check that corners meet square before the glue cures.
3. Add the Back Panel and Structural Supports
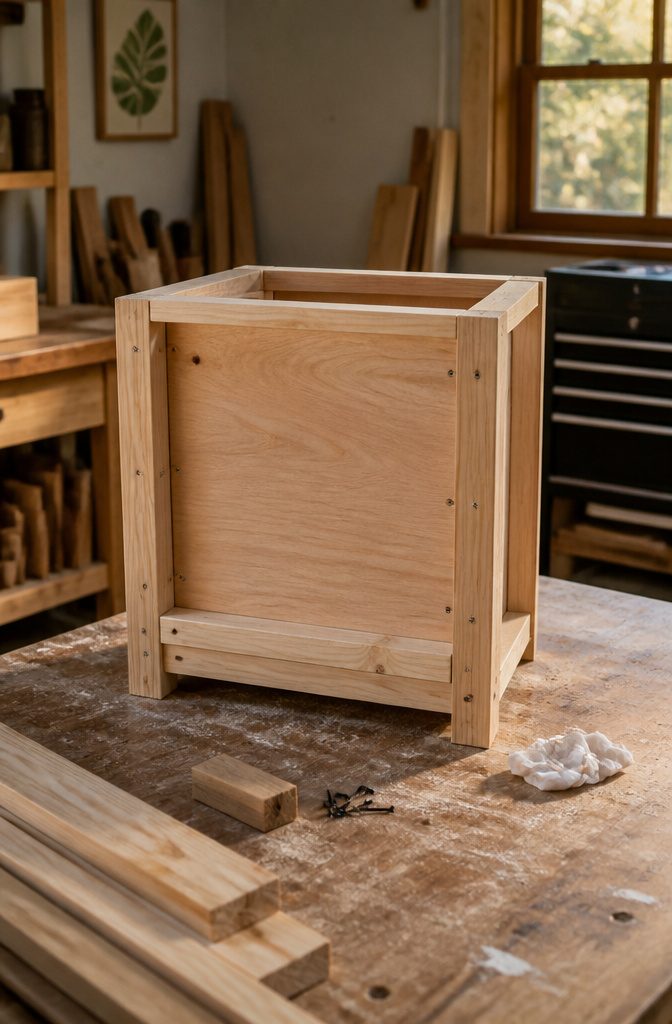
The back panel closes the frame and keeps the structure square. Most builders use ½-inch plywood cut to 12.5 inches by 23.25 inches, glued and screwed to the back edges of the side panels with nine ¾-inch countersunk wood screws.
Wipe excess glue immediately; it won’t take stain if it dries on the surface.
Front and back supports tie the corner posts together and leave clearance for the panel.
Drill two pocket holes in both ends of the 1x2x20-inch boards, then glue and screw them to the 2×2 posts with 1¼-inch pocket hole screws.
A ¼-inch spacer block held against the outward face keeps the 1×2 positioned correctly and leaves the ½-inch recess the back panel needs.
Trim and inside cleats come next if the design calls for them. The cleats are short 1×2 pieces, typically 4 inches long, that support the shelf from below or provide a ledge for drawer slides.
Trim rails run horizontally at 27 inches, stiles vertically at 18 inches, depending on the plan. One design adds a long back piece before attaching the top, though most fix the panel early and move straight to the shelf.
4. Build and Install the Lower Shelf
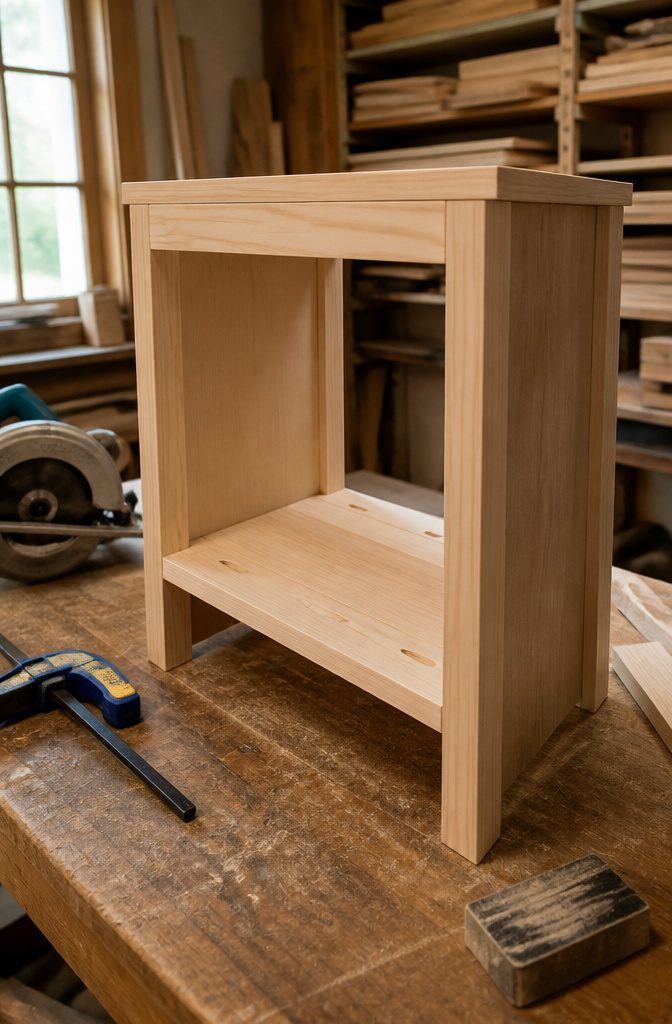
The lower shelf gets pocket holes, glue, and screws.
Drill three pocket holes in three of the four 1×4×20" boards, then attach them one at a time with clamps holding the assembly flat at each joint. If you have a scrap 1×3 on hand, swap it in for the last board.
Otherwise, assemble all four 1×4s and trim 1" off the back edge with your circular saw. The trim step avoids buying a whole 1×3 just for the final piece.
Once trimmed, set the shelf where it belongs. Attach it to 1×2 cleats if your frame uses them, or secure it directly to the side panels with brad nails.
Wipe any glue squeeze-out before it dries. Bare wood takes stain; dried glue does not.
5. Join Boards for the Top and Attach It
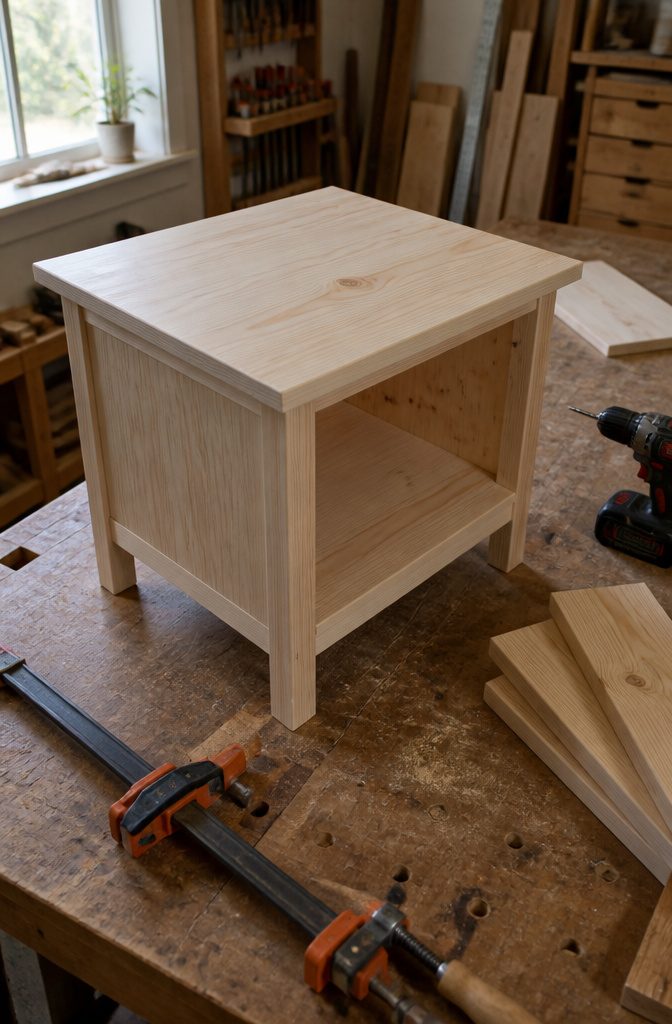
The top needs pocket holes drilled into each board before you glue and screw them together. For a top around 30 by 18 inches, plan on three pocket holes per board, drilled along the edge that will meet the next piece.
Spread glue on the mating edges, clamp near the hole so the joint stays tight, and fasten with 1¼-inch pocket screws.
The boards should sit flush with each other; any high edge will telegraph through finish later. Wipe off squeezed-out glue right away while it’s still wet.
Once the planked top dries, attach it to the box with more pocket holes drilled on the inside face of each side panel.
I leave a ½-inch overhang on all four edges from the corner posts, which gives the top visual weight and covers any small gaps at the joint.
Glue and screw the top down with the same 1¼-inch screws, and again, clean up any glue squeeze-out before it sets.
6. Build the Drawer Box and Install Slides
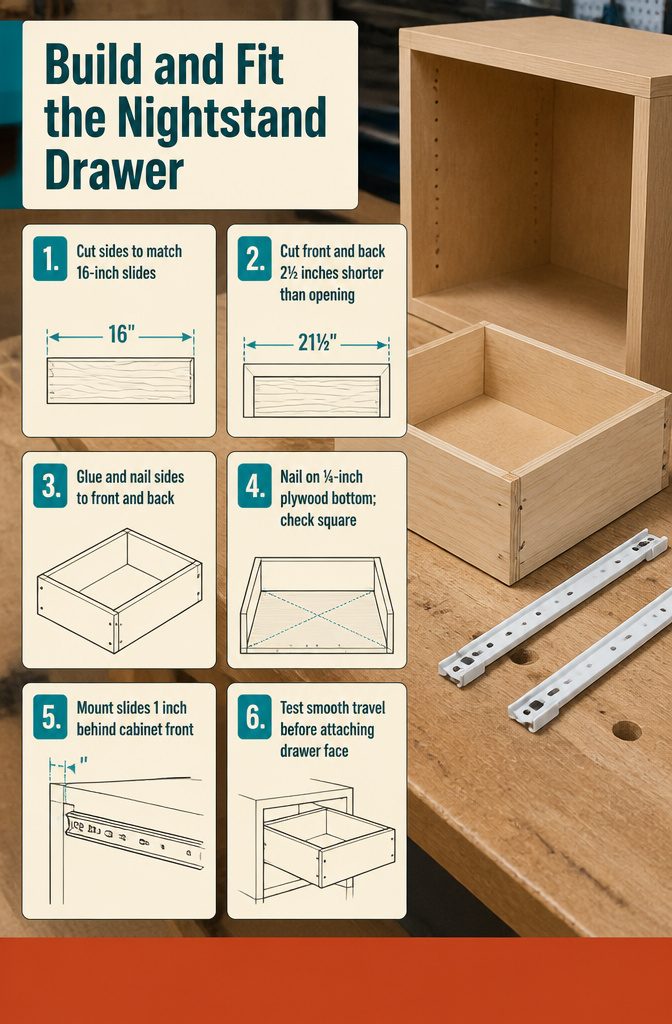
Build the Drawer Box and Install Slides
- Cut the drawer sides to match the length of your slides. The box in the plywood build uses 16-inch drawer sides paired with 16-inch white euro slides.
- Cut the drawer front and back 2½ inches shorter than the cabinet opening, assuming half-inch clearance for the slides on each side. One plan calls for 21½-inch front and back pieces to fit a 24-inch opening.
- Attach the sides to the front and back with 1¼-inch brad nails. I add glue to the joints and wipe the squeeze-out before it dries.
- Nail the ¼-inch plywood bottom in place with 5/8-inch brads, checking that all corners are square before you drive them home.
- Mount the drawer slides 1 inch back from the front edge of the cabinet. Some plans use push-to-open slides; others rely on homemade wood rails if you want to skip the hardware cost.
- Test the fit before you attach the drawer face. The box should slide smoothly with no binding at the back.
7. Sand, Stain, and Finish the Wood
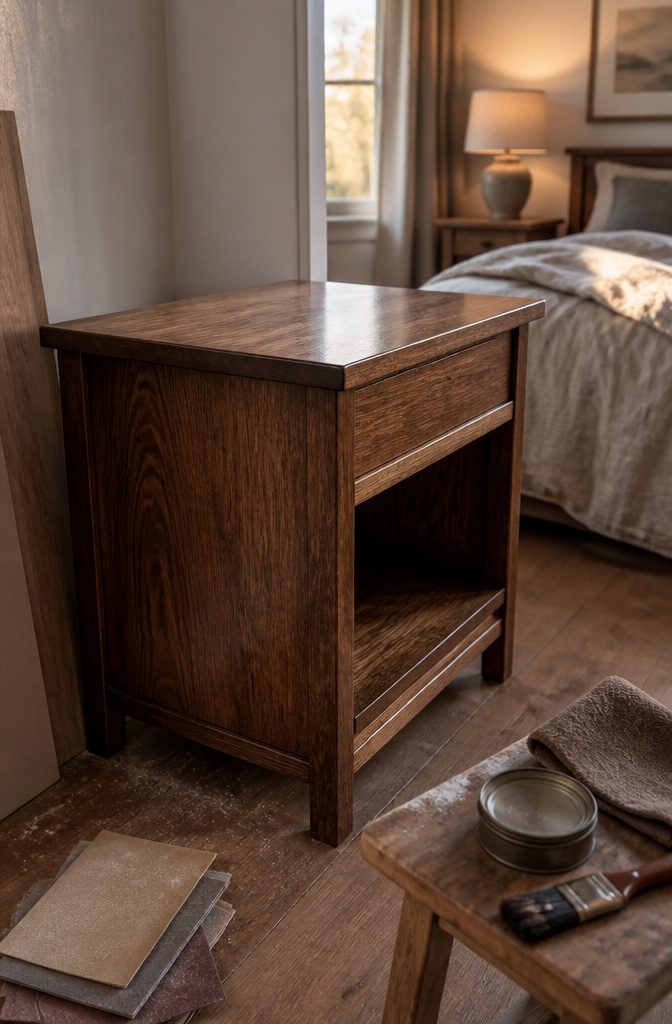
Sand the wood first with 120-grit paper, then 180-grit to smooth all surfaces before you choose a finish path.
Most builders I see online take one of three routes from here: stain with a protective clear coat, paint it white or another solid colour, or leave the bare wood sealed for an outdoor piece.
For stain, combinations like Minwax Special Walnut mixed with Weathered Oak or Rustoleum Weathered Gray deliver depth that single coats miss.
Varathane Ash stain is another option if you prefer cooler grey tones. Seal stained nightstands with shellac or polyurethane; Varathane Triple Thick Polyurethane dries in under an hour, which helps if you need the piece finished in a weekend.
Some builders layer four coats of Zinsser Bulls Eye Shellac on the body and finish drawer fronts with Minwax Paste Finishing Wax instead.
Painted finishes start with wood filler in any gaps or nail holes; let that dry a full day before sanding again.
One coat of Zinsser primer goes down first, followed by two coats of trim paint like Behr white enamel. The enamel holds up better than flat wall paint when you set drinks or lamps on top.
Materials and Tools for Each Plan
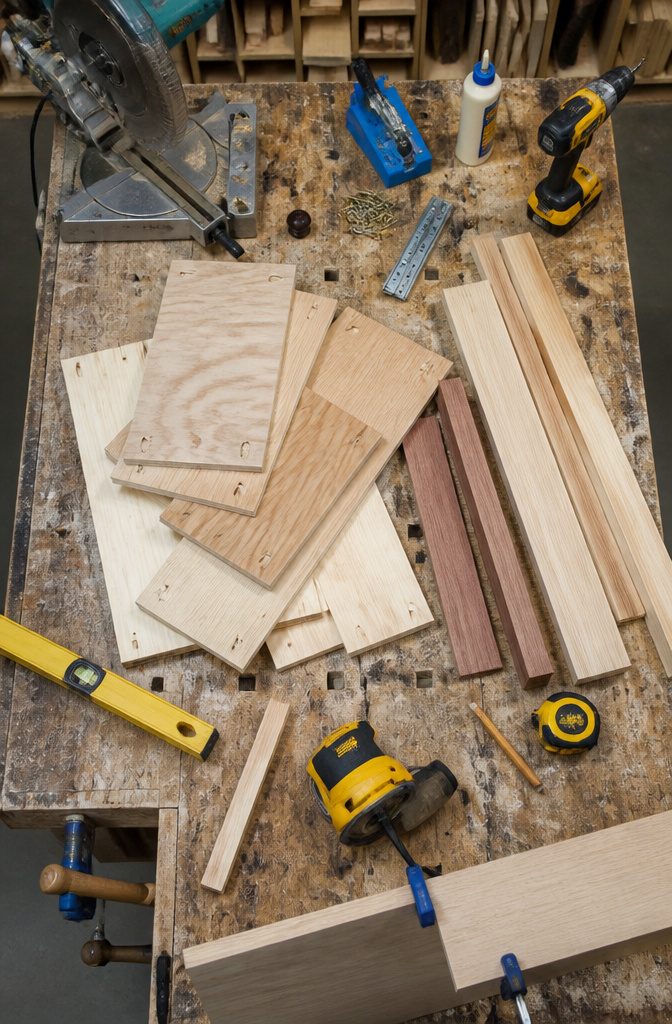
Each plan draws from a different lumber list, so there’s no single cart to copy.
The parts you need depend on whether the design uses a plywood box, solid boards mitered at the corners, or dimensional lumber joined with pocket holes.
Common builds call for:
- 3/4-inch plywood for side panels, top, and shelf, with 1×2 trim strips to cover raw edges and add detail around the face
- Knotty pine in 1×8, 1×10, and 1×12 widths for piecing together tops and sides, paired with a Kreg Jig pocket hole system and 1¼-inch Kreg screws
- Red oak boards at 1x12x6 for a stain-grade floating box ($69.42 for the frame, $14.96 for a 1x8x2 drawer front), cut with mitered corners
- Dimensional lumber in 2×2, 1×4, and 1×6 for frame-and-panel construction, with ¼-inch or ½-inch plywood for drawer bottoms and back panels
- PureBond Birch plywood at 3/4-inch if you want a cleaner veneer for staining or clear coat
- Wood glue, 1¼-inch finishing nails, and 3/4-inch wood screws across nearly every plan
- Drawer slides (10-inch push-to-open pairs run around $10), a drawer pull if the design isn’t handleless, and wood filler for nail holes
Tools repeat across sources: miter saw or circular saw, drill, Kreg Jig for pocket holes, electric sander, measuring tape, level, and a carpenter’s pencil.
Assembly Methods: Pocket Holes, Brad Nails, and Fasteners
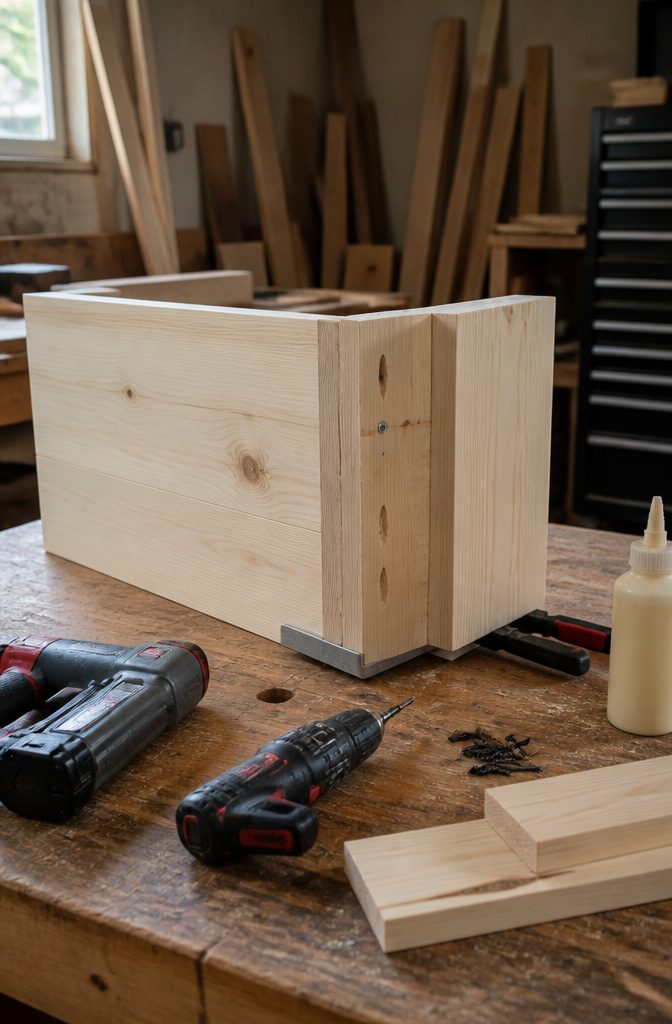
Wood glue and pocket-hole screws hold most DIY nightstand joints together. The typical setup uses 3/4-inch pocket holes with 1-1/4-inch pocket-hole screws, and that pairing appears in nearly every plan that calls for a pocket-hole jig.
Glue goes on first, the joint gets clamped or held square, then screws pull it tight. A right-angle clamp substitutes for a second set of hands when you’re working alone.
Brad nails work where pocket holes don’t make sense or you want to avoid them entirely.
One plan skips the pocket-hole jig and instead uses a brad nailer with 1-1/4-inch brad nails to attach planked side panels and the back.
Another relies on 2-inch finish nails for wooden drawer slides and 3/4-inch staples to secure thin plywood drawer bottoms, since nails tend to shoot straight through quarter-inch material.
Nails give you speed, pocket holes give you clamping force without waiting on glue to set. Both work, and the choice comes down to whether you already own a jig or a nailer.
Design Choices: Open Shelves, Drawers, or Floating Mount
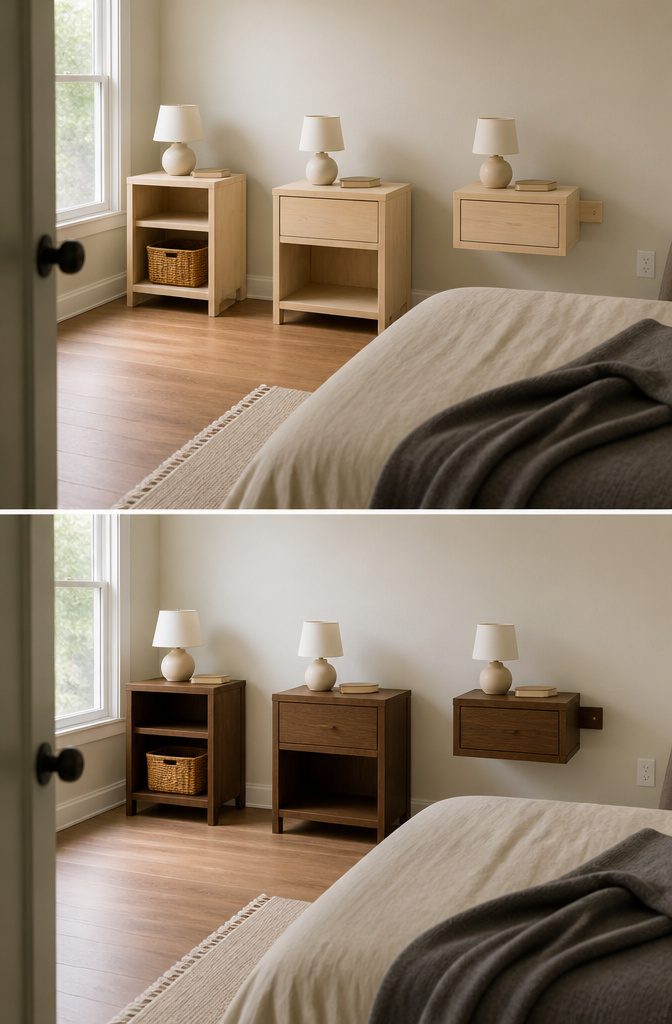
The plan you pick dictates what the nightstand holds and how it meets the wall. A few features define the functional split:
- Open shelves or a single lower shelf give you a wide landing for books and a lamp without fussing with hardware. Most simple builds use an open top compartment and one fixed shelf near the floor.
- Drawers need slides, clearance for the drawer box depth, and a recessed or flush front. Push-to-open slides shorter than 10 inches are hard to find, so drawer plans tend to run deeper front to back than open-shelf versions.
- Floating installation calls for either a nailing strip glued to the back or a French cleat. A French cleat should span two studs for secure mounting. Account for outlet or wire clearance when you lay out the height and position, especially if the wall behind the bed has low receptacles.
- Baskets or bins fit under open lower shelves when the shelf sits high enough off the floor. Drawer plans skip the lower shelf entirely and use the height for the drawer box instead.
Most beginner plans lean on open shelves because they skip drawer slides and the tight tolerances that come with them.
Wood Choice: Red Oak, Pine, or Plywood
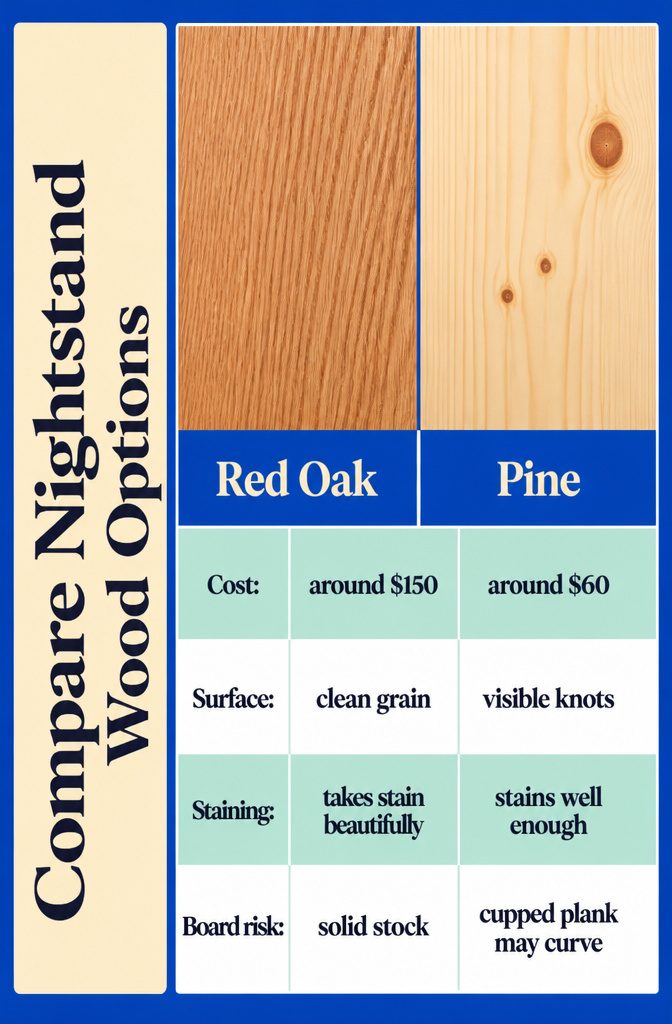
The decision starts with what you already have and what you can live with visually.
Most builders work in solid red oak, pine, or plywood, and the price spread is real. Red oak costs around $150 in lumber for one nightstand, pine drops that to $60, and plywood falls somewhere in between depending on grade.
Red oak takes stain beautifully and gives you clean mitered corners if you cut solid boards for the box. Pine is softer and shows knots, but it stains well enough and costs a third as much.
One builder tried common pine board and ended up with a curved edge from a cupped plank, so if you go pine, spend the time at the rack finding flat stock without splits.
Plywood skips the step of edge-gluing narrow boards into a wide panel for the top and bottom. You lose the grain continuity of solid wood, but you also lose the risk of a glue joint opening up later.
If you plan to paint the finished piece, plywood makes more sense than paying hardwood prices for grain nobody will see.
Fixing Drawer Fit and Protruding Brads
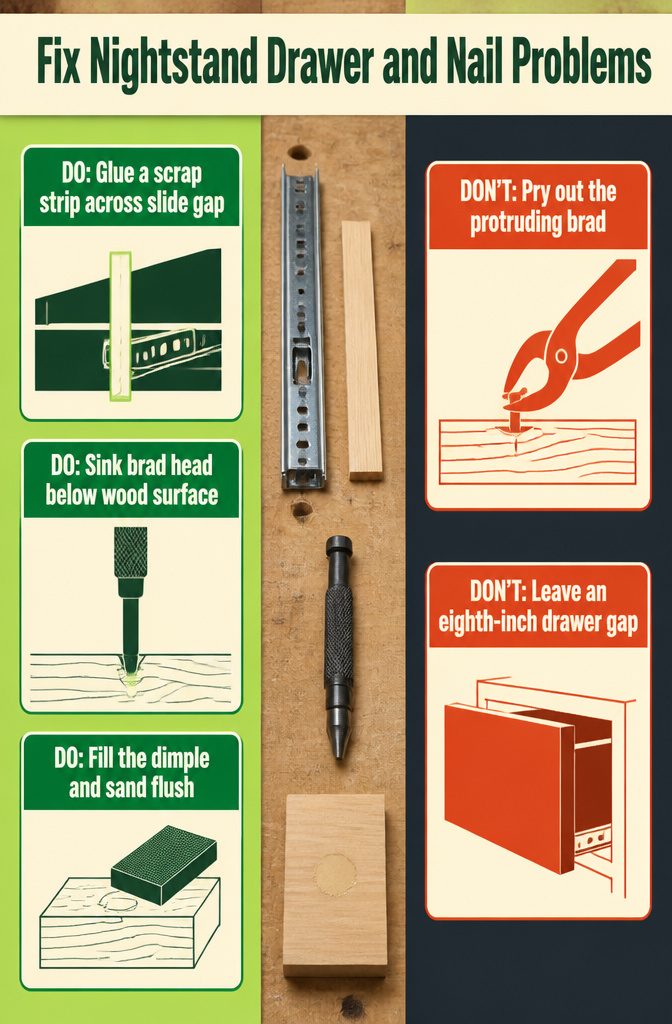
Two common problems show up late in the build, and both have quick fixes.
- Drawer box too narrow for the slide? Cut a scrap strip to match the gap depth and glue it along the side where the slide screws in. The strip bridges the space between the metal slide and the box wall so the drawer tracks smoothly. Even an eighth-inch gap is enough to throw off the fit, and this trick corrects it without rebuilding the whole box.
- Brad nail head sticking out? Use a nail setter or place a screwdriver tip against the head and tap with a hammer to sink it just below the surface. Don’t pry the nail out, that leaves a worse dent. Once the head is recessed, fill the dimple with wood filler and sand flush.
Getting the Stain and Finish Right
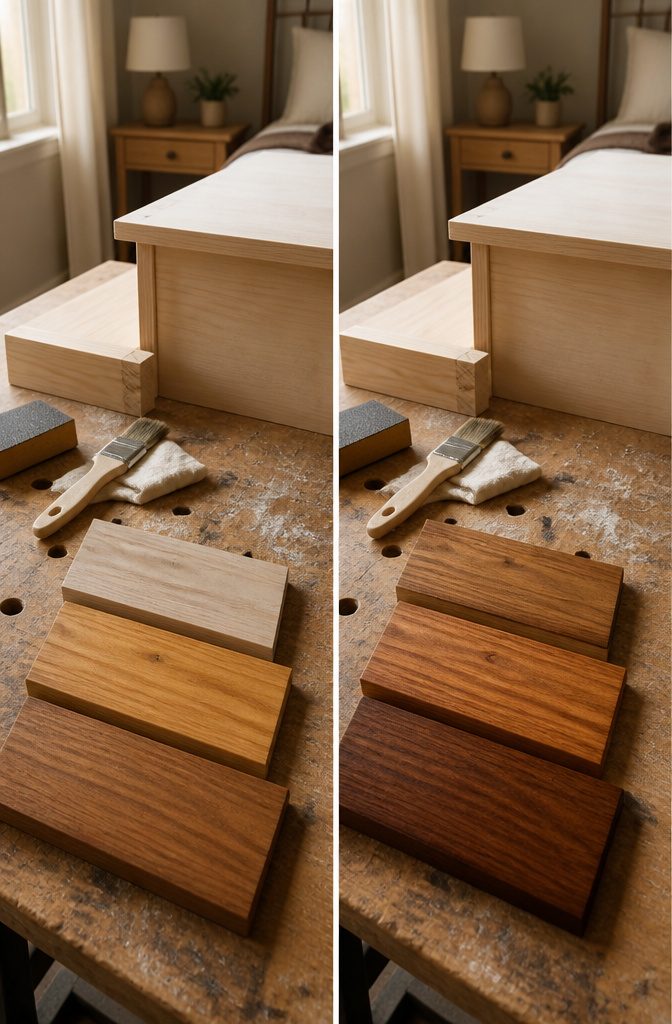
Wood varies more than the plan accounts for. Red oak will never look exactly like white oak, and even two boards of the same species pick up stain differently depending on grain and color.
Testing stain and finish on scrap from your actual lumber is the only way to know what you’ll get before you commit the top and sides to a color you can’t undo.
The test options I’ve seen work well include tan wash (acrylic paint thinned to a translucent layer that tones down red undertones) and furniture butter (an oil finish that deepens the amber and brings out grain without hiding it).
General Finishes gel stains in American Oak or White also show up in tests, along with Minwax oil-based English Oak.
Apply each to a piece of scrap, let it dry fully, and compare under the light where the nightstand will sit.
Imperfect miter joints are hard to avoid without a saw that delivers precise bevels.
Clamp the joints tightly during glue-up, place the worst cuts at the back or bottom where they won’t be seen, and fill any gaps with wood filler before sanding flush.
The filler blends in completely once it’s sanded smooth and stained.
Frequently Asked Questions
What material is the best to build a simple nightstand?
Red oak takes stain beautifully and gives you clean mitered corners, but it costs around $150 per nightstand. Pine drops the price to $60 and stains well enough despite showing knots, though you’ll need to pick through the rack for flat boards.
Plywood falls between the two in cost and skips the step of edge-gluing narrow boards into wide panels, making it the better choice if you plan to paint the finished piece.
How much does it cost to build this nightstand?
A nightstand built from red oak costs about $150 in materials, while pine brings that down to $60. If you have leftover plywood and fasteners already on hand, out-of-pocket expense can drop below $100.
Can you make waterfall edge furniture with just a circular saw?
Yes, but the 45-degree bevel cuts are error-prone and tedious even with careful setup.
Miter joints cut this way tend to have uneven gaps that need wood filler and sanding to hide. Straight-edge boards with butt joints are easier and look just as good.
How do I fix a brad nail sticking out?
Place a nail setter or screwdriver tip against the nail head and tap it with a hammer until it sinks just below the wood surface. Fill the dimple with wood filler, let it dry, then sand flush.
How do I fix imperfect miter joints?
Clamp the joints tightly during glue-up, place the worst cuts at the back or bottom where they won’t be seen, and fill any gaps with wood filler before sanding flush.
The filler blends in completely once it’s sanded smooth and stained.
How do I get the perfect natural wood tone?
Test stain and finish on scrap from your actual lumber before you commit the top and sides to a color you can’t undo.
Wood varies by species and even between boards of the same type, so what works on red oak won’t match white oak, and grain picks up stain differently depending on color and figure.
What do I do with a drawer box that’s too narrow for the slide?
Cut a scrap strip to match the gap depth and glue it along the side where the slide screws in.
The strip bridges the space between the metal slide and the box wall so the drawer tracks smoothly, even if the gap is only an eighth of an inch.






