
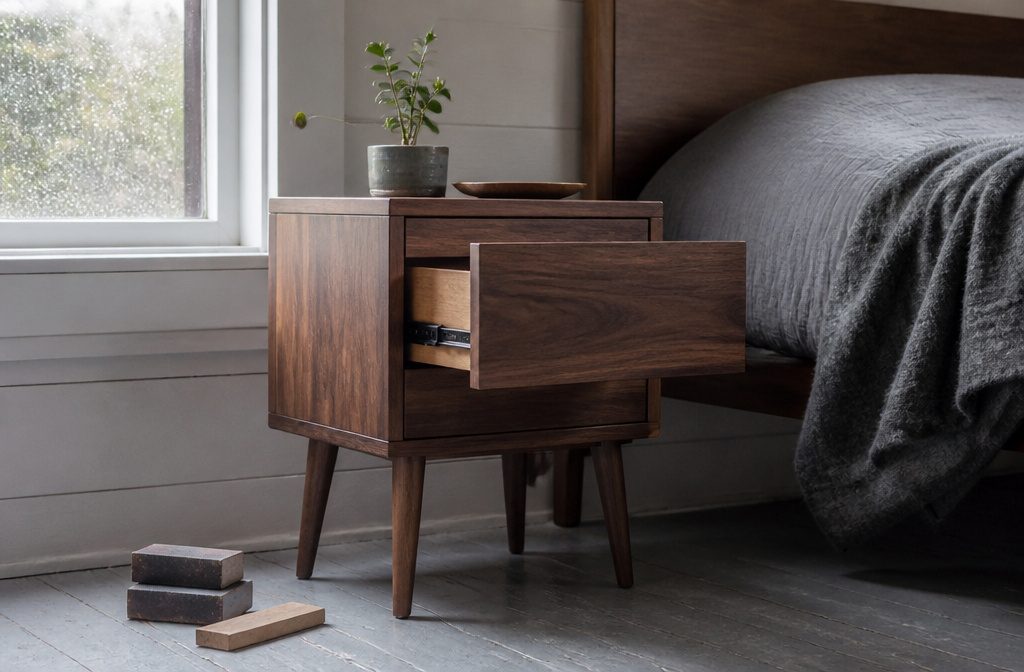
A nightstand with a single drawer and tapered legs takes about four to six hours to build and costs anywhere from $50 for a simple box with butt joints to $120 when the plan calls for beveled edges, wide boards and soft-close slides.
Most builders underestimate the drawer-front attachment stage, where uneven reveals make one drawer look like it was installed by two different people.
Setting the front with 1/8-inch spacers on all four sides before driving screws from inside the box keeps the gaps consistent.
1. Plan Your Nightstand Size and Gather Materials
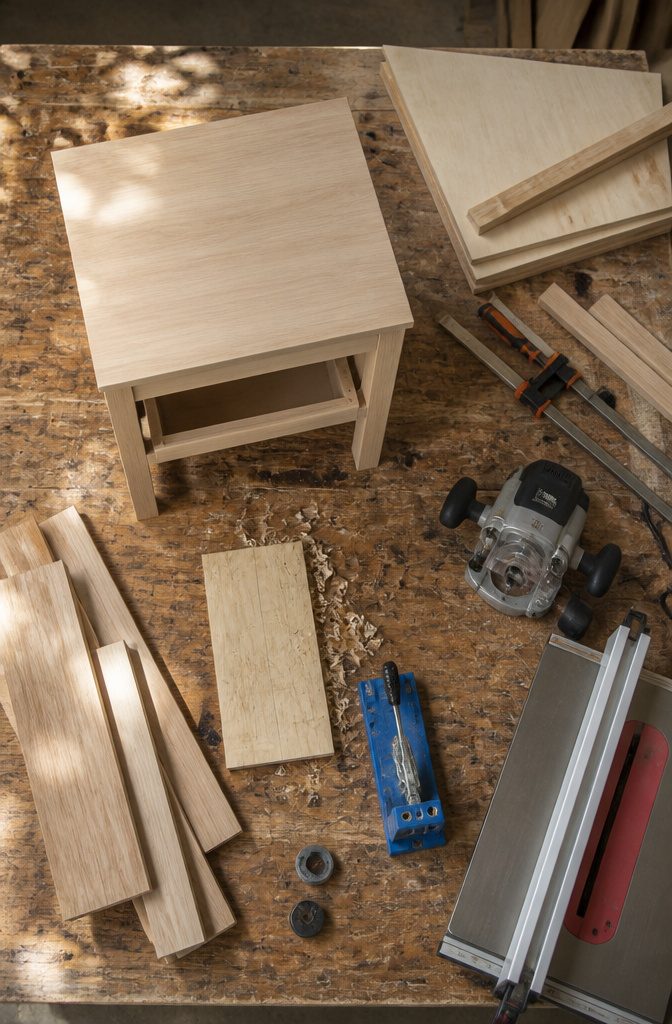
I build most bedroom pieces to sit between 24 and 28 inches tall, which keeps the surface just above mattress height for easy reach.
Width runs 20 to 22 inches for a standard nightstand, though wider builds at 28 inches give you room for a lamp and a few books without crowding.
Depth can go as shallow as 14 inches if floor space is tight or stretch to 18 inches when you need drawer capacity.
The exact box you end up with depends on how much drawer opening you want and whether you plane your own lumber or work with what the home center stocks.
For a 20-inch-wide by 18-inch-deep by 26¾-inch-high stand, you need ¾-inch plywood for the drawer box sides, front, back, and bottom, plus dimensional lumber for the legs and any face trim. Drawer slides come in 12-inch lengths for shallow builds.
Glue up narrower boards when you want a single wide panel for the top or sides rather than edge-joining plywood, clamping them tight and letting them cure overnight before cutting to final size.
A table saw handles the dimensional cuts, a router with a rabbeting bit cleans up the joinery, and a pocket hole jig keeps the frame tight without visible fasteners.
2. Cut and Prepare Shaped Parts
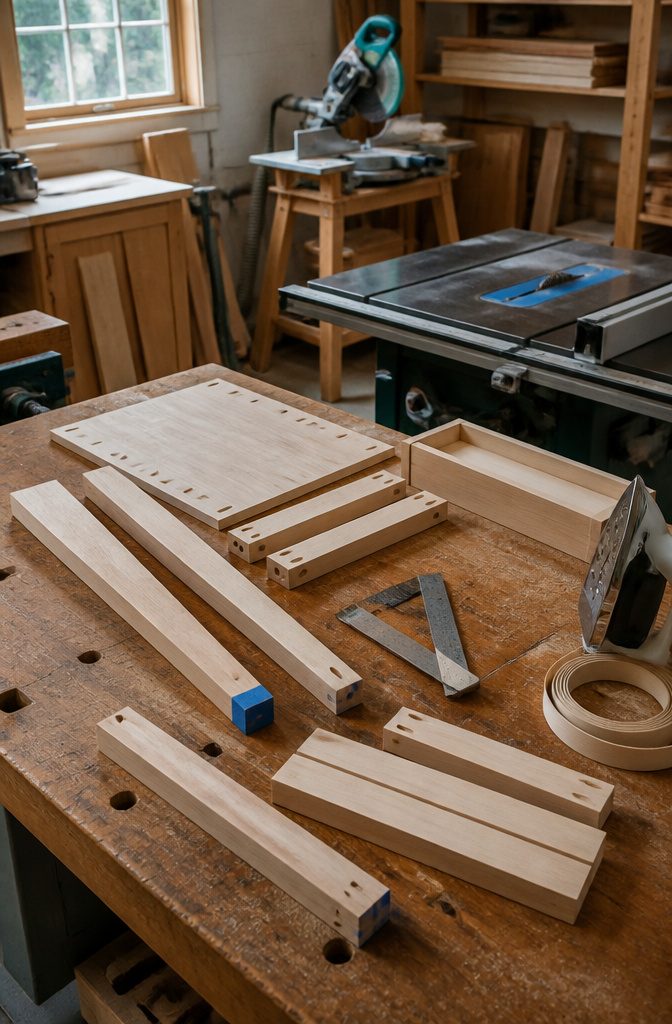
All the shaped details happen now, before assembly starts. Tapered legs give the build a lighter look without changing the joinery, and cutting them takes just a few passes.
Set a miter saw to 5 degrees, mark about 6½ inches up from the bottom, and taper two adjacent sides of each leg. I mark the untapered corner with painter’s tape so I know which face goes where during assembly.
Beveled edges soften the front of the case. Tilt the table saw blade to 45 degrees and run the front edge of the top and side boards through before cutting them to final length.
Pocket holes go on the inside top of the side pieces, set for the thickness of your material.
Dowel holes join the top to the sides, so mark and drill those carefully. Sand all cut edges smooth before moving on.
Edge banding hides plywood edges on drawer fronts if you’re painting.
Iron it around the perimeter, then trim the overhang. For a decorative touch, rout a shallow groove down the center of the top drawer front to make one drawer read as two.
One pass with the saw is enough. If the groove looks pale, darken it with stain so it mimics a gap.
3. Assemble the Legs and Frame
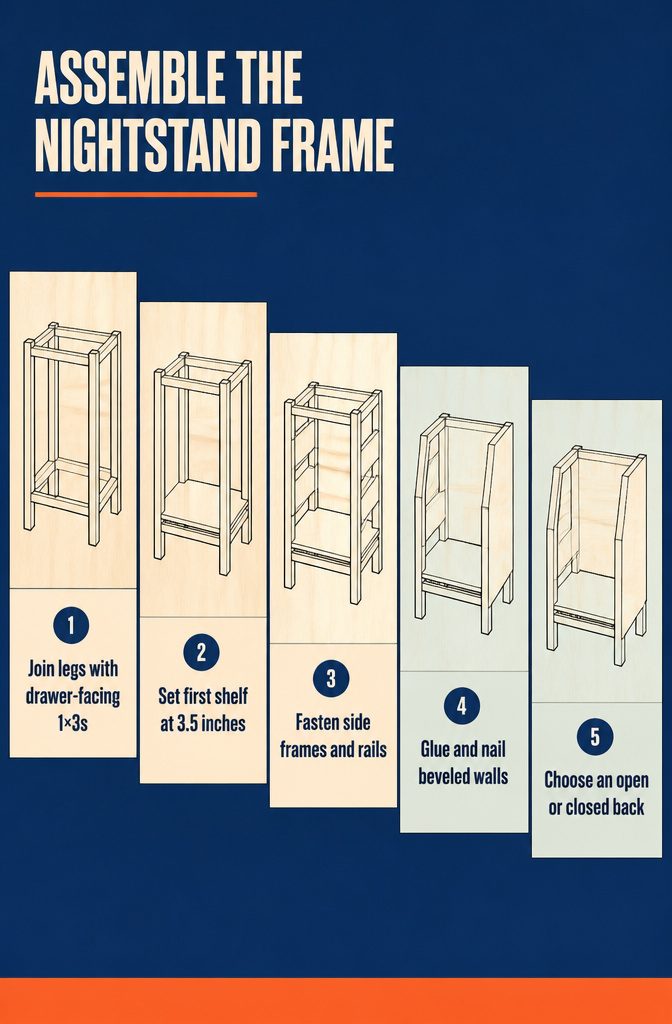
- Join the leg pieces with the 1×3 facing front and back and the 1×2 on the sides. The 1×3 placement matters because that is where the drawer travels. Mark each leg 3.5 inches up from the bottom.
- Attach the first shelf flush to those marks so the nightstand sits 3.5 inches off the floor. This gives you the base structure and clearance underneath.
- Build any side frames or rails using pocket screws, wood glue, and clamps. Drill 1.5-inch pocket holes at frame tops and 0.75-inch holes at rail ends, then fasten with 2.5-inch or 1.25-inch pocket hole screws depending on material thickness.
- If your design uses beveled walls, apply glue to the adjoining edges, clamp firmly, and shoot 1.25-inch finish nails through both sides of each joint.
- Attach a 0.25-inch plywood back with glue and 0.625-inch finish nails if you want a closed rear. The back is optional and not needed for structure. I prefer leaving it open so nothing gets wedged behind the drawer.
4. Install Shelves, Bottom, Back, and Trim
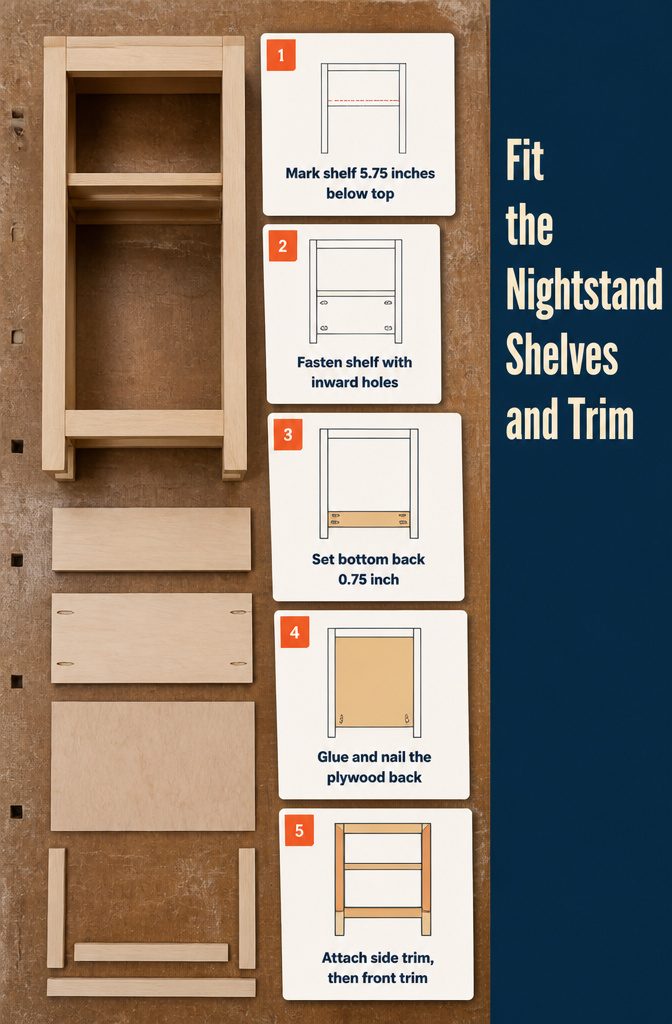
- Position the shelf 5.75 inches from the top of the nightstand frame and mark the location on both side panels. Some builders rabbet the sides 7 inches down and 5/16 inch deep to recess the shelf, but pocket holes and screws work just as well if you skipped the rabbet during cutting.
- Attach the shelf with wood glue and 1.25-inch pocket hole screws, driving through the shelf into the side panels. Keep the pocket holes facing inward where they won’t show.
- Slide the bottom panel between the sides so it sits flush with the bottom edges of the frame. Set the front edge back 0.75 inch from the front of the legs to leave room for the front trim piece. Secure with glue and screws.
- Cut a piece of 1/4-inch plywood for the back panel and apply glue to the back edges of the frame. Nail through the plywood into the frame with 5/8-inch finish nails to square up the assembly.
- Attach side trim pieces to the lower shelf and the sides of the drawer opening with 1-inch pin nails and glue, then add the front trim. If your nightstand has legs, set the front trim back 1/4 inch from the front edge of each leg for a recessed look.
5. Build the Drawer Box
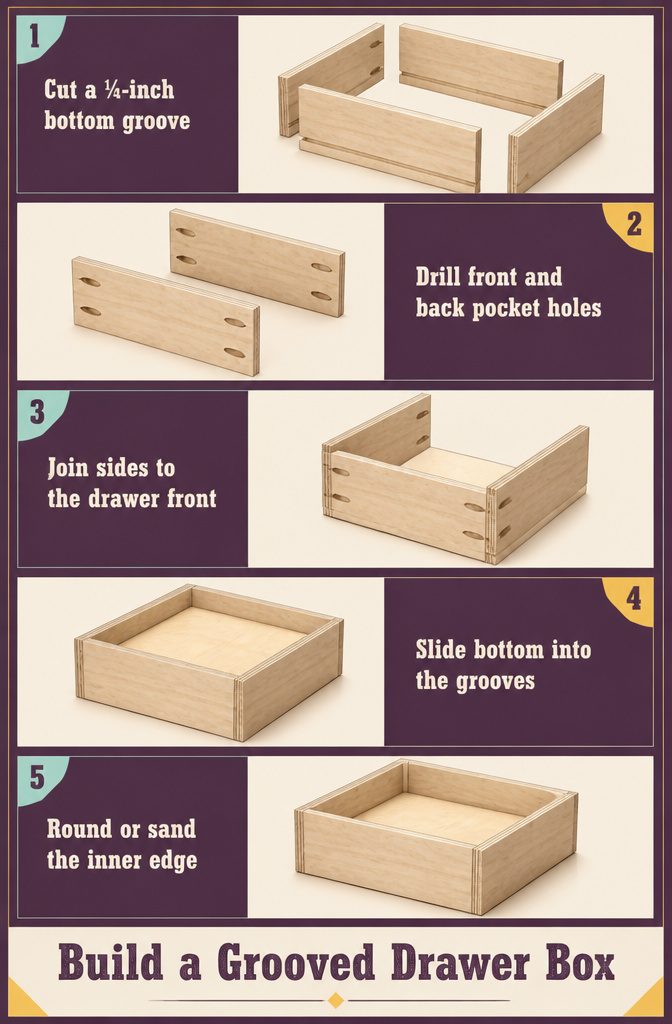
- Cut a 1/4-inch-wide groove 1/4 inch up from the bottom edge on the inside face of each drawer side, front, and back piece. I make multiple passes on the table saw to get a clean 1/4-inch-deep channel for the plywood bottom to slide into.
- Drill pocket holes in the drawer front and back pieces if you’re using screws instead of nails. Set the jig for 1/2-inch material and place two holes on each end of the front and back.
- Attach the side pieces to the front piece with wood glue and 1-inch brad nails or pocket-hole screws. Keep the top edges flush so the drawer box sits level in the frame.
- Slide the 1/4-inch plywood bottom into the grooves on the assembled front and sides, then attach the back piece the same way to trap it in place. The groove holds the bottom without needing fasteners along the sides.
- Round over the inside top edge of the drawer box with a trim router and round-over bit, or sand the sharp plywood edge smooth by hand. This takes thirty seconds per box and leaves a cleaner feel when you reach into the drawer.
6. Install Drawer Slides and Fit the Drawer Front
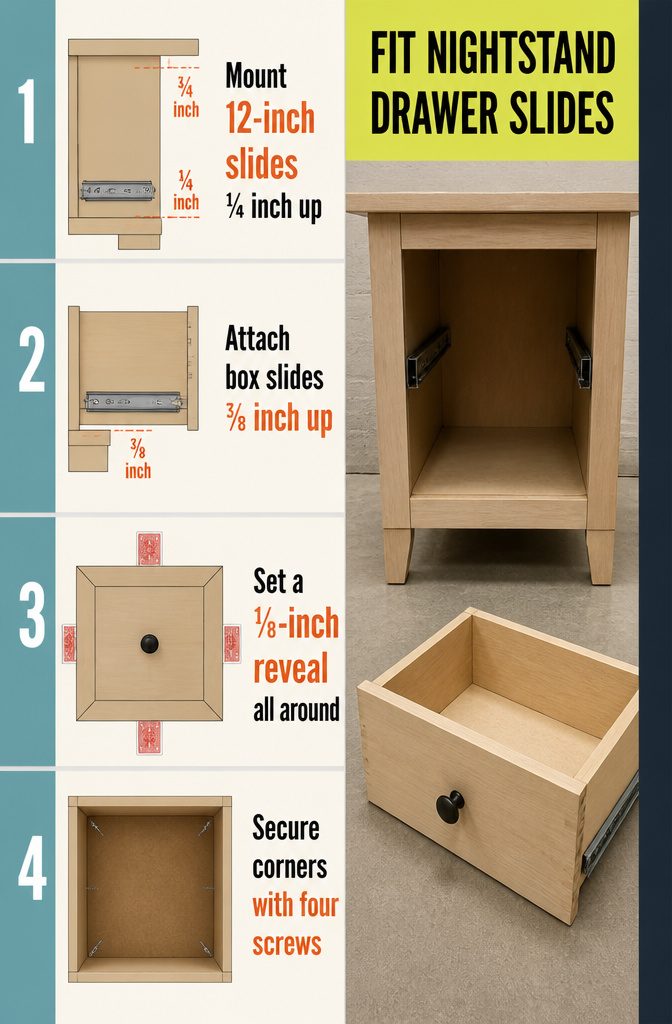
- Mount the drawer slides 12 inches long to the cabinet sides first, setting them ¼ inch up from the bottom of the drawer opening. This leaves ¾ inch clearance at the top. I clamp a ¾-inch scrap of plywood on top of the front frame and level it at the back, then rest the slides on it while I drive the screws. The drawer boxes sit ¾ inch back from the front trim pieces, 1 inch back from the legs.
- Attach the smaller part of each slide to the drawer box sides, spacing them ⅞ inch up from the bottom of the box. Slide the drawer into the cabinet to check the fit before moving to the front.
- Position the drawer front so it sits flush with the frame and has a 1/8-inch reveal all the way around. I use playing cards or ⅛-inch spacers to get the gaps even on all four sides, then hold the front in place with a couple of brad nails shot from inside the drawer box.
- Secure the drawer front permanently with 1-inch wood screws driven from inside the drawer, one screw in each corner of the box front. Four screws per drawer locks it in without any visible fasteners on the face.
7. Attach the Top
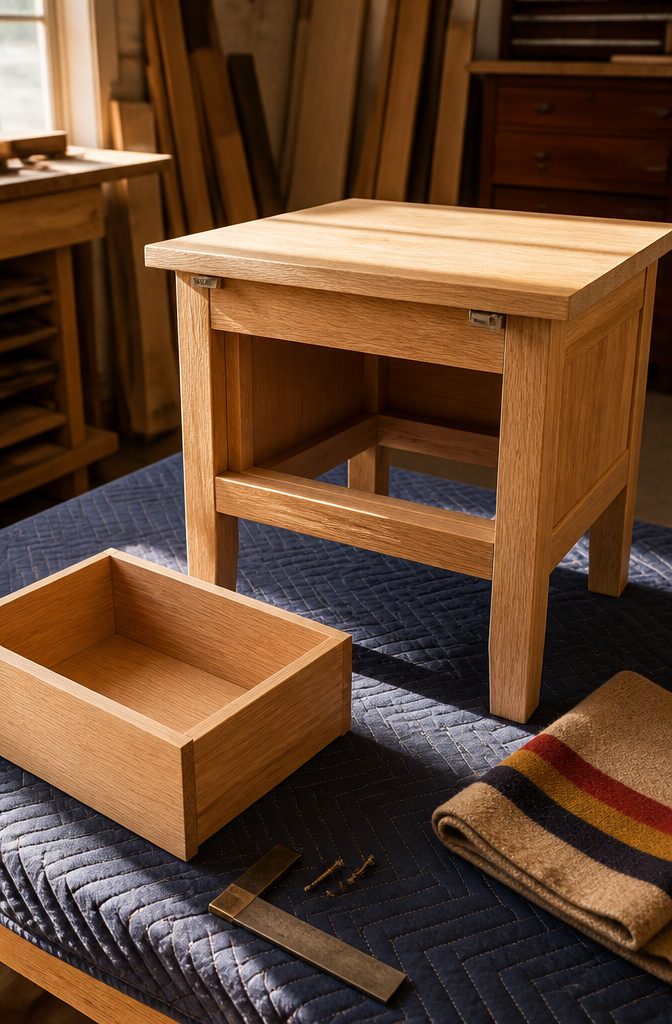
Position the top so it overhangs the frame by 1 inch on the sides and front, flush with the back edge.
I find it easier to flip the assembled frame upside down onto the top panel rather than balancing the top on the frame right-side-up. Mark the overhang before you flip if you want exact placement on the first try.
If you attached the top before painting, nail it directly into the sides, back, and legs. If you painted first, right-angle brackets keep finish intact.
Drill countersunk pilot holes through the top of the frame, three along the front rail and three along the back. Use 1-inch screws at the front and 2-inch screws at the back to pull the top down tight.
Before you attach anything permanently, remove the drawer and label its position on the back of the box. Access to the drawer cavity matters more than you think once the top is locked down.
8. Sand, Finish, and Add Hardware
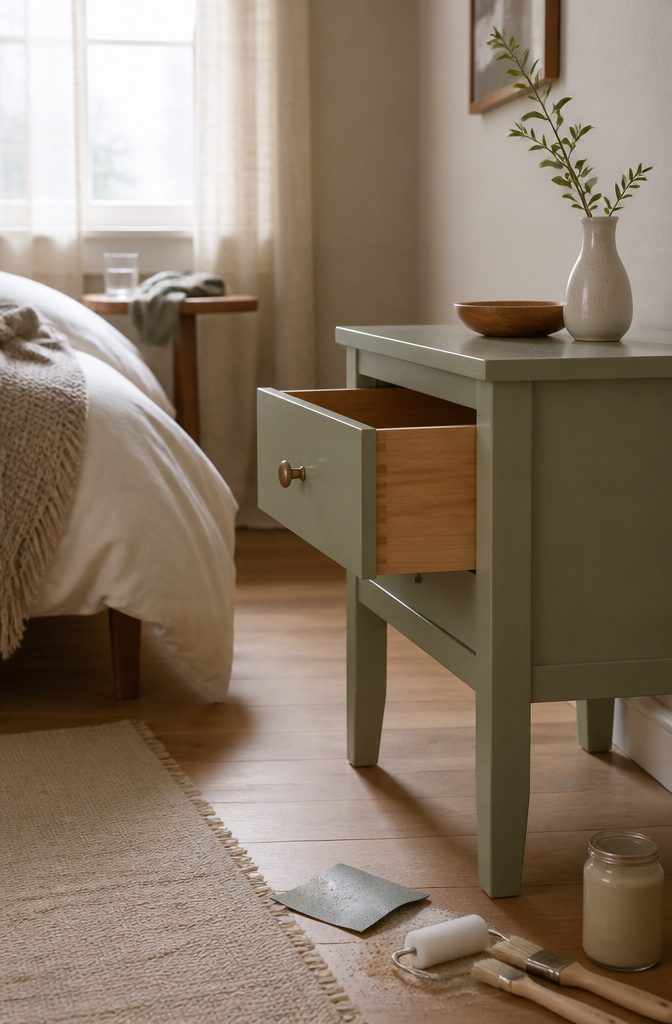
Once the nightstand is assembled, sand the entire piece starting with 120-grit sandpaper and working through 180-grit to 220-grit.
Sand in the direction of the wood grain, remove all dust with a vacuum and damp cloth, then let the wood dry completely before finishing.
For a painted finish, fill any exposed screw holes with wood filler, let it dry, then sand smooth. Apply primer first or use paint with primer included.
I prefer a synthetic-bristle brush or foam roller for even coverage. Let the first coat dry, then lightly sand with fine-grit paper before adding more coats until the color looks consistent.
Stainmaster in Dappled Glass satin works, but it does not self-level so every brush stroke stays visible. Sherwin Williams Emerald Urethane Trim Enamel levels better on furniture.
For a natural look, apply interior wood stain with a foam applicator, then seal with clear polyurethane.
If the nightstand will see moisture or direct sun, switch to an exterior deck or fence product: opaque or solid-color stain for a painted effect, semi-transparent for visible grain.
Follow the product instructions exactly for coat count, drying time, and curing.
Once the finish has cured, install the drawer pull. Measure and mark the center of the drawer front, drill pilot holes, then attach a 1-inch knob or 3-inch pull from the inside with the included screws.
Choosing One, Two, or Three Drawers
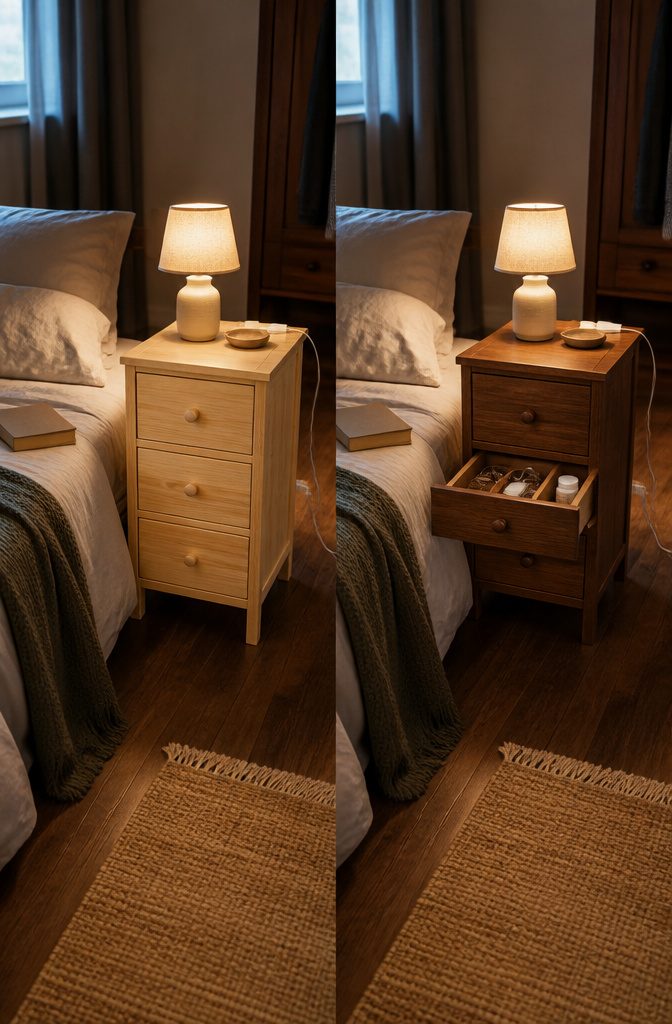
The number of drawers you build changes how the piece looks, how much you can fit inside, and how much time you spend cutting dados or mounting slides.
Three drawers give you the most sorting space if you want medications separate from phone chargers separate from reading glasses, but each drawer gets shallow unless you push the nightstand past 26 inches tall.
Two drawers split the height more generously and suit a midcentury profile that sits lower to the ground.
A single large drawer keeps the build faster and gives you room for a tablet or hardcover book laid flat, though you lose the ability to group small items by type.
If you want open storage for a lamp cord or a water bottle, subtract a drawer and leave that bay as a shelf. The frame stays the same; you just skip the slides and the drawer box for that opening.
Decorative Options That Change the Look
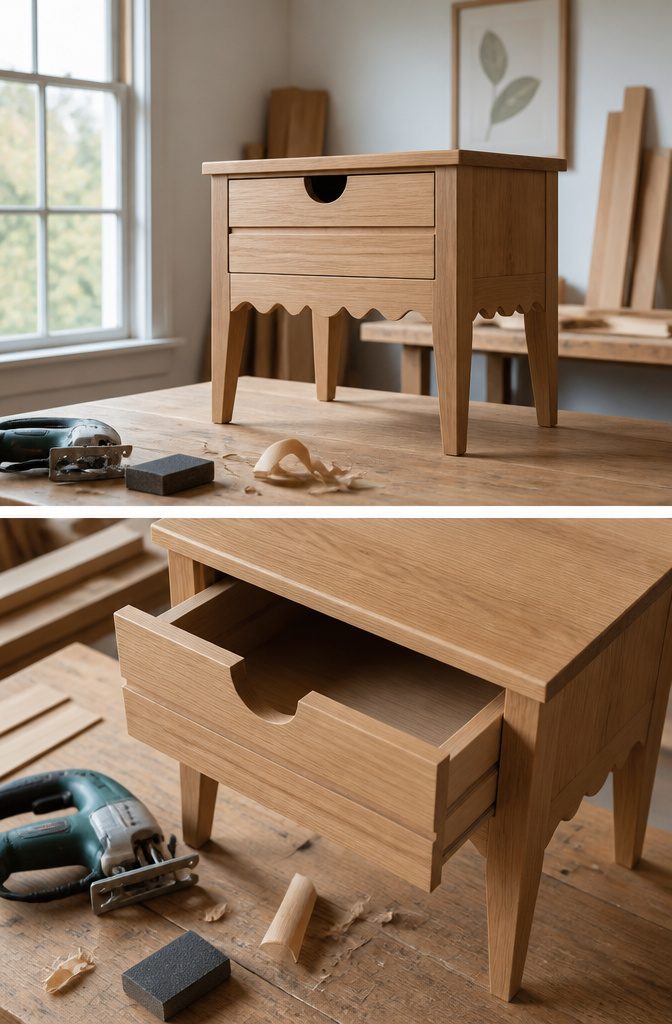
A few details shift the whole character of the piece without adding time to the build.
- A half-circle cutout centered on the drawer front (around 3 inches across) works in place of a pull. You drill a starting hole, cut the curve with a jigsaw, and sand the edge smooth. It reads more modern than hardware and costs nothing.
- A shallow groove routed across the drawer front, about 1/8 inch deep, makes a single drawer look like two stacked drawers. The line fakes division and suits taller builds where one deep drawer would look blank.
- Wavy trim along the bottom edge, scalloped apron cuts, or tapered legs change the profile. All three take longer to lay out and cut than straight lines, but the shaping is visible from across the room.
- Continuing the design around the back matters only when the nightstand floats in the room rather than sitting against a wall. That means matching trim on all four sides and finishing the back panel.
Using This Design as a Side Table
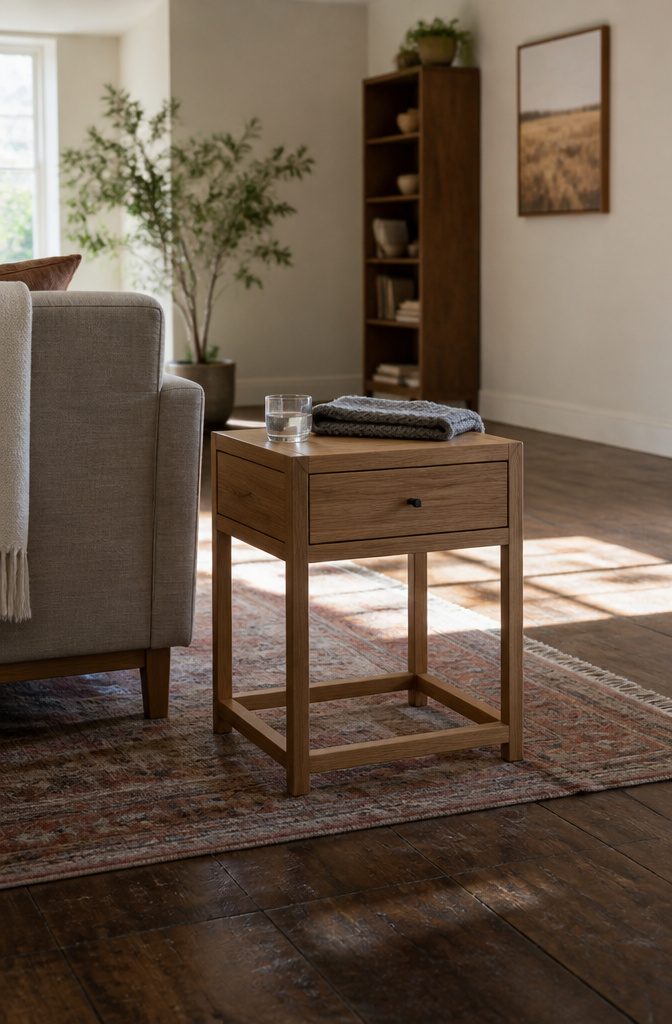
The nightstand you just built works just as well in a living room, and the design holds up when someone walks around it.
If the back of the piece will be visible, cut one extra 1×2 and one 1×3, both to 15 inches, so the decorative trim and top frame continue around all four sides instead of stopping at three.
That keeps the squiggle detail consistent from any angle.
An open back also means things won’t get stuck behind the drawer when it slides all the way in. I prefer leaving it open for that reason alone, even when the piece sits against a wall.
The missing panel gives you one more place to catch something before it disappears into the gap between furniture and baseboard, and it keeps the drawer mechanism easier to reach if a slide ever needs adjustment.
What This Build Costs and How Long It Takes
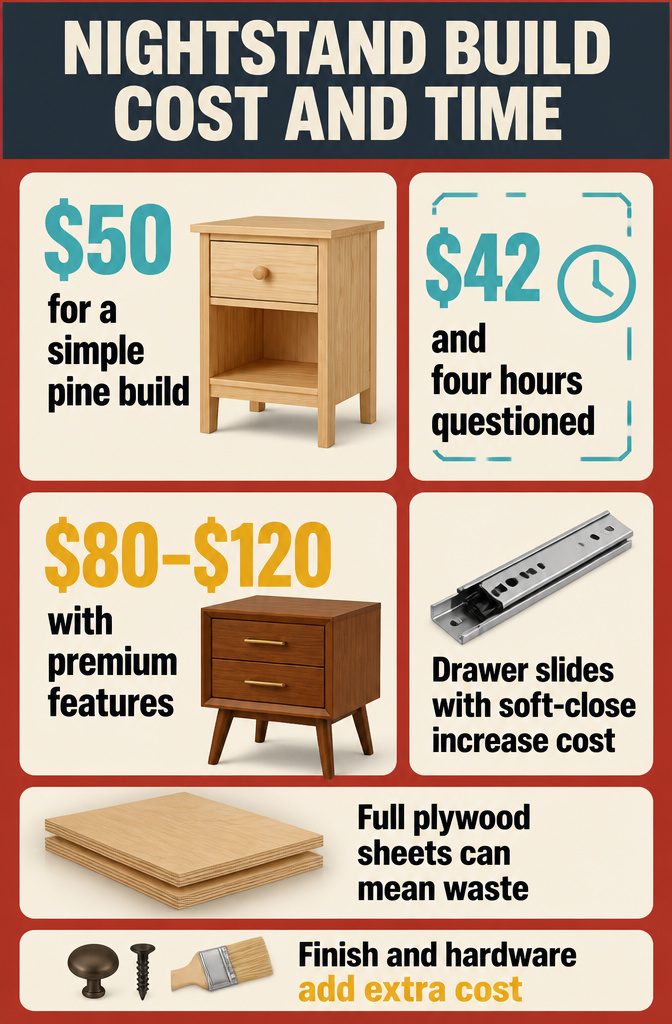
The $42 estimate and 4-hour timeline that appear in one widely shared plan draw skepticism in the comments section, where readers point out that the tapered legs alone can run over $30 and question whether a single 8-foot 1×3 board truly yields all the listed drawer cuts without coming up short by several inches.
The figure looks attractive at the top of the page, but the math underneath it wobbles.
Cost swings wide depending on which nightstand design you follow. A simple box with butt joints and straight pine legs can land near $50 if you shop carefully and already own pocket screws and glue.
Designs calling for tapered midcentury legs, beveled edges on wide boards, or drawer slides with soft-close mechanisms push the total toward $80 to $120 before finish and hardware.
Plywood drawer bottoms stay cheap, but any plan requiring a full sheet when you only need a few square feet means buying more material than the project uses or paying a premium for small project panels.
Frequently Asked Questions
How tall should a nightstand be?
Most bedroom nightstands sit between 24 and 28 inches tall, which places the top surface just above mattress height for comfortable reach.
The exact height depends on your bed frame and mattress thickness, but staying in that range keeps items within easy access while you’re lying down.
How much does it cost to build a nightstand?
A simple nightstand with straight legs and butt joints can cost around $50 if you shop carefully, while designs with tapered legs, beveled edges, or soft-close drawer slides push the total toward $80 to $120 before finish and hardware.
The $42 figure in some plans draws skepticism because tapered legs alone often run over $30, and the lumber counts don’t always add up.
How long does it take to build a nightstand?
The widely cited 4-hour estimate appears in some plans but proves optimistic once you account for tapering legs, cutting dados, fitting drawer slides, and waiting for glue to cure.
A realistic build with proper joinery and finishing typically takes longer, especially if you’re working through the steps for the first time.
What wood is best for a nightstand?
Three-quarter-inch plywood works well for drawer boxes and side panels, while dimensional lumber handles legs and face trim.
If you want a solid-wood top or wide panels, glue up narrower boards and clamp them overnight before cutting to final size rather than edge-joining plywood.
How many drawers should a nightstand have?
Three drawers give you the most sorting space for small items but require a taller nightstand to keep each drawer from getting too shallow.
Two drawers split the height more generously, while a single large drawer keeps the build faster and gives you room to lay a tablet or book flat.
What size drawer slides do I need for a nightstand?
Twelve-inch drawer slides suit most nightstands with 14 to 18 inches of depth, leaving enough clearance for the drawer box and front trim.
Mount them a quarter inch up from the bottom of the drawer opening on the cabinet side and seven-eighths inch up on the drawer box itself.






