

Installing LVP next to hardwood means joining two floors that behave in opposite ways. The hardwood expands and contracts with moisture; the vinyl blocks it entirely, so the transition zone becomes a stress point where one material fights the other.
A quarter-inch expansion gap at every wall prevents the LVP from buckling when summer humidity hits, but only if the hardwood underneath is nailed or glued solid.
Floating hardwood has to come out first, or the two layers shift against each other and the joint at the doorway gaps within months.
Assess the Hardwood You Have
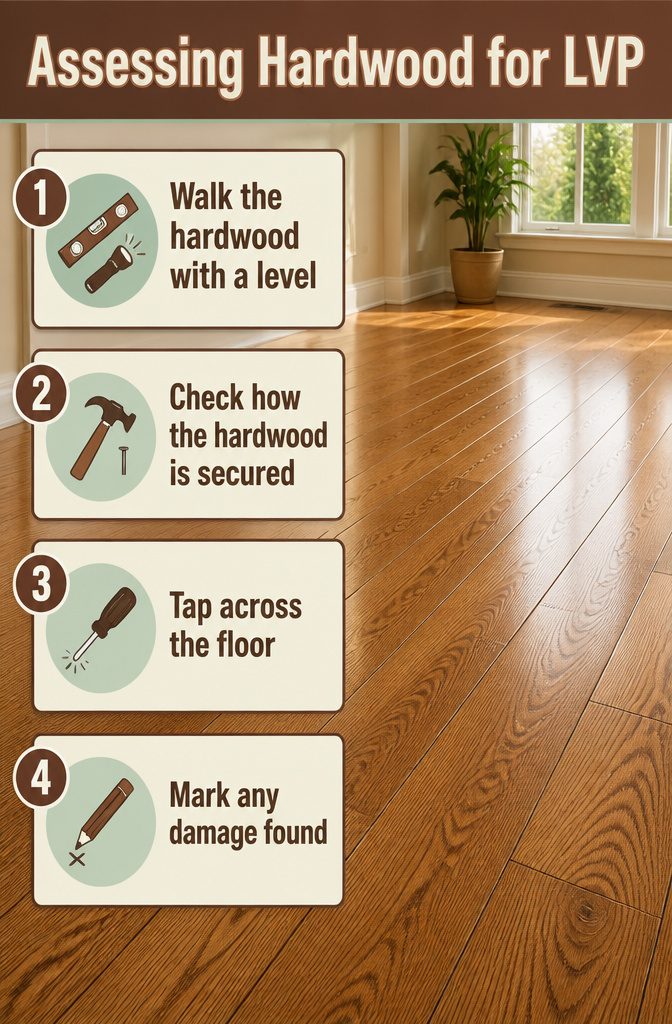
- Walk the hardwood with a level and a flashlight. Any board more than 1/8 inch out of plane will telegraph through LVP and eventually crack the locking joints. I run the level perpendicular to the boards first, then diagonally; the diagonal pass catches the humps a straight run misses.
- Check how the hardwood is held down. Nailed-down or glued-down hardwood can stay put and serve as your subfloor. Floating hardwood has to come out before LVP goes in; the two layers of floating material will fight each other and you’ll get movement, noise, and gaps where the transition strip meets the door frame.
- Tap across the floor with a screwdriver handle. Loose boards, hollow spots under glued sections, or the rattle of a missed nail all mean the hardwood isn’t stable enough yet. Fix it now or the LVP will shift with every step.
- Mark damage as you find it: water stains that cupped the boards, cracks wider than a dime, spots where the finish wore through to bare wood. Minor unevenness gets leveled with underlayment. Major warping or rot means that section of hardwood comes up and you patch the subfloor underneath before the LVP goes down.

ONE SET FITS MOST FLOORS: These floor spacers fit laminate, LVP, vinyl plank, engineered hardwood, tile, bamboo and floating floors, so one kit covers the floor types you actually lay—no need to match a different spacer to each floor

1/4 INCH & 1/2 INCH DESIGN: The flooring spacers include 1/4 inch and 1/2 inch gaps from the wall, can provide an appropriate expansion gap between the floor and the wall, to avoid damage.

PACK OF 40 FOR LARGER AREA FLOORING-Save your time to find perfect gaps of 1/2 or 1/4, making flooring installation high efficiently, used for 1400-1600 square feet of flooring. For larger areas and the pursuit of higher efficiency, suggested purchasing multiple sets
Decide Whether to Cover or Remove
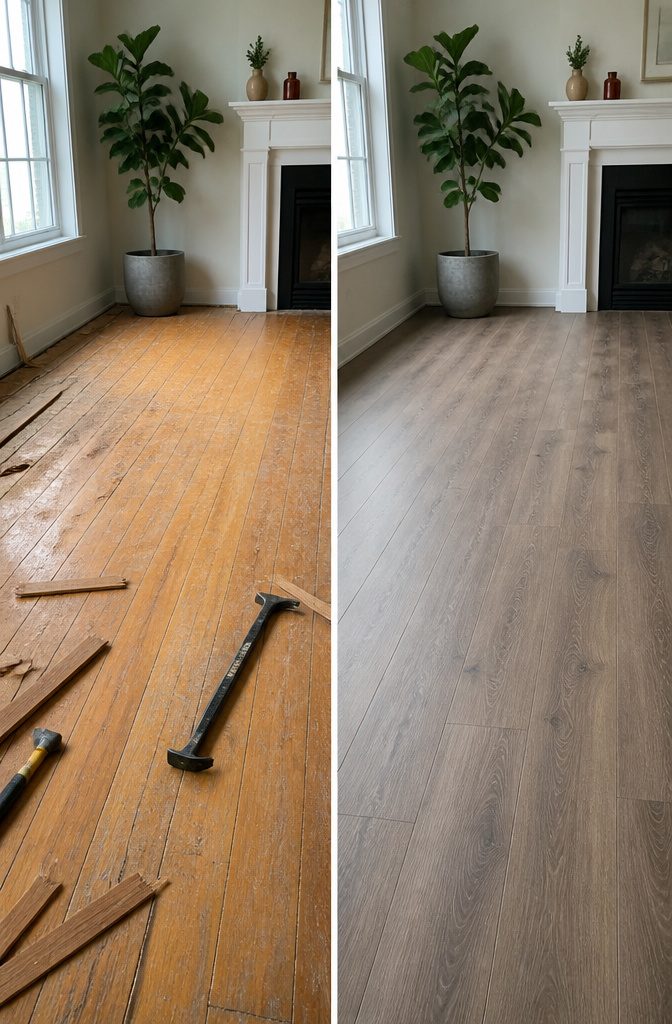
Installing LVP over existing hardwood looks like a shortcut on paper. The wood underneath is already flat and level, which saves hours of prep work.
But that same flat surface hides a problem: hardwood needs to exchange moisture with the air to stay stable, and LVP is designed to block moisture entirely.
Seal one material against the other and you trap humidity between them with nowhere to go.
The hardwood underneath starts to rot. As it decays, it warps and pushes upward against the rigid LVP above.
That pressure travels straight to the click-lock joints, which are built to tolerate slight movement, not a subfloor that is actively buckling. Joint failure follows, usually starting at the perimeter and working inward.
"The LVP is waterproof and will suffocate the hardwood floors, causing them to rot and ultimately cracking the LVP joint."
For a weekend project with a real budget, removing the hardwood first is the safer play.
The extra day of demolition buys you a stable foundation and eliminates the risk of tearing up two floors instead of one twelve months later.

SEAMLESS TRANSITIONS - Effortlessly bridge the gap between different flooring types with our advanced adhesive technology. No more tripping hazards or unsightly gaps. Achieve a professional finish.

SEAMLESS TRANSITIONS WITH MAXIROC - Effortlessly bridge the gap between different flooring types with our advanced adhesive technology. No more tripping hazards or unsightly gaps. Achieve a professional finish.

Premium PVC Material - Lightweight, durable, and water-resistant. Not wood, ensuring long-lasting quality and performance.
Prep the Subfloor for LVP

- Sweep or vacuum every trace of dust and grit from the hardwood surface; even a small pebble left under LVP will telegraph through and wear the locking joint.
- Check the floor for loose boards, popped nails, or cracked planks, and secure or replace them. The hardwood must be structurally sound because any movement underneath will eventually gap the LVP above.
- Run a level across the surface in several directions. Minor unevenness can be corrected with underlayment; major dips or humps mean the hardwood itself needs attention first.
- Underlayment is worth adding when the manufacturer calls for it or when the old floor has slight imperfections that would otherwise stress the click-lock system. Not every LVP requires it, but skipping it on a questionable subfloor risks joint failure down the line.
- Verify moisture conditions before you proceed. Trapped humidity between hardwood and LVP leads to cupping, rot, and mold; if the wood feels damp or the room runs humid, address ventilation or a vapor barrier before laying anything on top.

✔ Self sealing adhesive tape for ease of installation
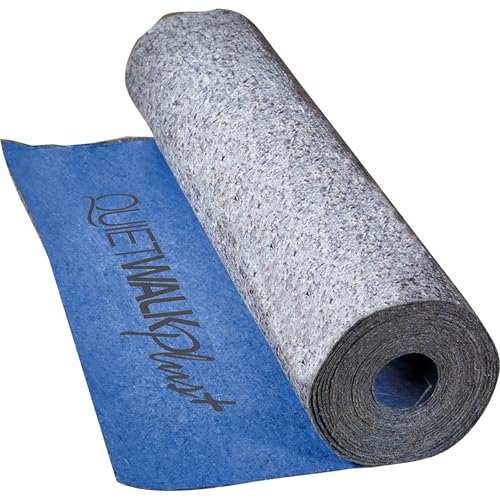
Covers 360 sq ft of laminate, hardwood, and engineered wood flooring

DUAL SURFACE: Perfect for use on both hard and soft surfaces. Simply place the natural rubber backing side down for hard surfaces and place the felt side down for soft surfaces, such as carpet.
Lay the LVP Planks
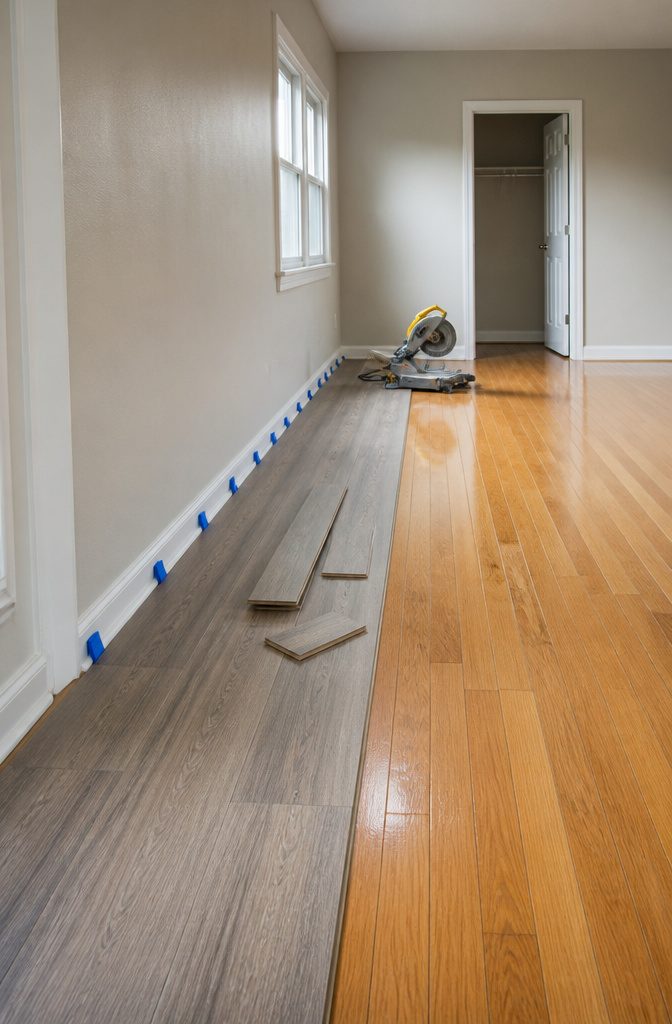
- Start the first row along your longest straight wall, working left to right with the tongue side facing the room. The planks click together dry, so the hardwood underneath stays untouched.
- Keep a quarter-inch gap at every vertical surface for expansion. I use the plastic spacers that came with the flooring, wedged every foot or so. Without them, the LVP will buckle when summer humidity hits.
- Stagger end joints by at least six inches between rows. The random pattern hides the seams and gives the floor the plank look you’re after. A cheap chop saw makes the crosscuts fast; the LVP’s scratch resistance means you can slide pieces around on the hardwood without babying them.
- Tap stubborn seams with a scrap block, never the mallet directly. The dent resistance helps here, too. A plank that doesn’t seat flat usually has debris under it; lift and check rather than forcing it.
- Save the tricky cuts for last: door jambs, vents, the transition zone where LVP meets hardwood. The moisture resistance matters most in these spots, since the subfloor can shift or dampness can collect at thresholds.

【RESTORE SEPARATED FLOOR PLANKS WITHOUT REMOVING THE FLOOR】Bring laminate, vinyl plank and engineered wood floors back together in minutes with this floor gap fixer tool. Simply position the suction cup, lock the handle and tap the strike block to pull planks tightly back into place. No adhesives, no floor disassembly and no expensive contractor required—an easy solution for routine floating floor maintenance and DIY repairs.

【Check before use of purchase】 Please double confirm if your floor is floating floor before make a order or using the tool. Since our Floor Gap Fixer Tool is only specifically designed for floating floors and perfect works on them, can not be used to floor which is nailed or glued down.

Quick Floor Gap Repair Tool:This floor gap fixer tool helps move separated floating floor planks back into place without replacing boards. Ideal for small gaps in laminate, vinyl plank, LVP, engineered wood, and hardwood floating floors.
Add Transition Strips
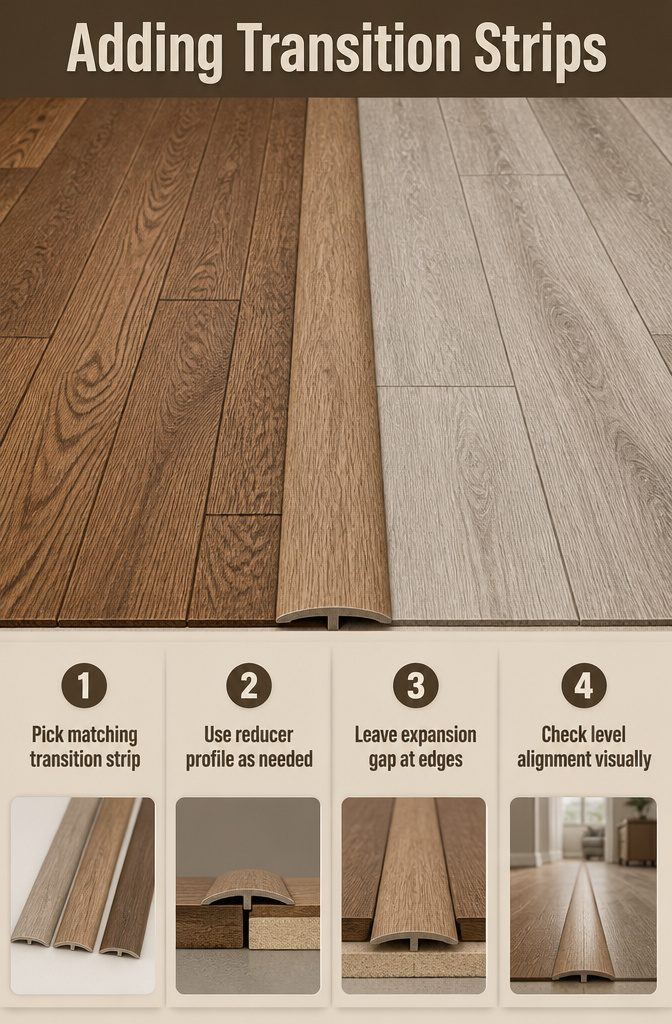
- Pick a transition strip that matches the LVP or the hardwood, whichever has the warmer tone, and lay it down the middle of any doorway or open junction where the two floors meet. The strip itself does the visual work, so the planks on either side can stop cleanly without fussy miter cuts.
- The reducer profile works when the LVP sits higher or lower than the hardwood; it angles the edge so you do not catch a sock or a vacuum head on a step between them. My first attempt ran straight into a quarter-inch lip because I grabbed flat T-molding out of habit. Measure the height difference first.
- Leave the recommended expansion gap at both edges, usually covered by the strip’s molding wings, so seasonal swell in the hardwood does not buckle the joint. The strip floats or fastens to the subfloor between the floors, never to either floor directly.
- Where the two floors sit dead level on either side of a long opening, a flush T-strip reads almost like a intentional design line. I lay it out dry before committing and sight down it from both directions; light rakes across the seam and a strip even a hair off plumb jumps out.


COVERS LARGE AREAS – Each roll of this flooring underlayment covers 200 sq ft and is 3 mm thick, providing a thick underlayment layer with an integrated moisture barrier for enhanced floor protection.

COVERS LARGE AREAS – Each roll of this flooring underlayment covers 200 sq ft and is 3 mm thick, providing a thick underlayment layer with an integrated moisture barrier for enhanced floor protection.
Inspect the Finished Floor

- Press down on every plank edge with your palm or a knee to feel for movement. Any give means the LVP hasn’t locked fully, or the hardwood beneath it is shifting.
- Slide a business card into every seam between LVP and hardwood at the transition. If it slips in deeper than its own thickness, the strip sits too high or the plank ends are crowned.
- Sight across the joint from a low angle, using daylight or a phone flashlight. Gaps show up as bright lines; even hairline ones will collect grit and telegraph through in a year.
- Walk the whole run heel-to-toe, listening for clicks or pops. A floating hardwood subfloor, which the sources flag as the riskiest base, will announce itself this way within the first dozen passes.
- Mark anything that shifts with blue tape and pull it up now. The LVP itself is thin; the real failure point is whatever moves underneath it.

【UPGRADED DESIGN】 Providing a 1/4 inch & 1/2 inch gap of the floor from the wall. Only one set of tools can meet different gap requirements. The special triangle design is stable and doesn’t need to be taped to the wall during your installation, also assures less damages on Floors because it provides the proper expansion spacing for most wood flooring.

Yesland's 2-in-1 wood flooring spacers for 1/2" & 1/4" gaps meet different gap requirements. Provide appropriate expansion gaps between floor and wall to avoid damage.

1/4 INCH & 1/2 INCH DESIGN: The flooring spacers include 1/4 inch and 1/2 inch gaps from the wall, can provide an appropriate expansion gap between the floor and the wall, to avoid damage.
Why LVP Over Hardwoods Makes Sense

Refinishing hardwood runs into the thousands and traps you out of the house for days while the floors cure.
LVP goes down in a weekend, costs a fraction of that, and the room stays usable the whole time. The planks click together dry, so there’s no sanding dust migrating through the HVAC or stain fumes lingering in the upholstery.
The durability difference matters more once you live with it.
Hardwood dents under a dropped cast iron pan and scratches when the dog scrambles for the doorbell. LVP shrugs off both, and spilled water sits on the surface instead of warping the boards underneath.
For a kitchen, a mudroom, or the main hallway that takes the daily beating, that resistance buys you years of not thinking about the floor.
Style options have expanded past the obvious vinyl look. The planks now come in widths and textures that read as wood from a few feet away, including matte finishes that avoid the plastic sheen older vinyl carried.
You can run a weathered gray plank next to original oak and have the LVP side look intentional rather than apologetic.
You get to choose where each material lives instead of committing the whole house to one era or one budget tier.

High Quality Materials: The threshold strip is made of premium PVC, designed to be scratch-resistant and wear-resistant, ensuring long-term use with minimal maintenance.

High Quality: Our Threshold transition strip is made of high-quality PVC materials for durability and longevity. The surface of the rubber threshold strip is scratch-resistant, abrasion-resistant, dirt-resistant, which means it’s easy to clean and not stain.

SEAMLESS TRANSITIONS WITH MAXIROC - Effortlessly bridge the gap between different flooring types with our advanced adhesive technology. No more tripping hazards or unsightly gaps. Achieve a professional finish.
What Can Go Wrong With LVP Over Hardwood
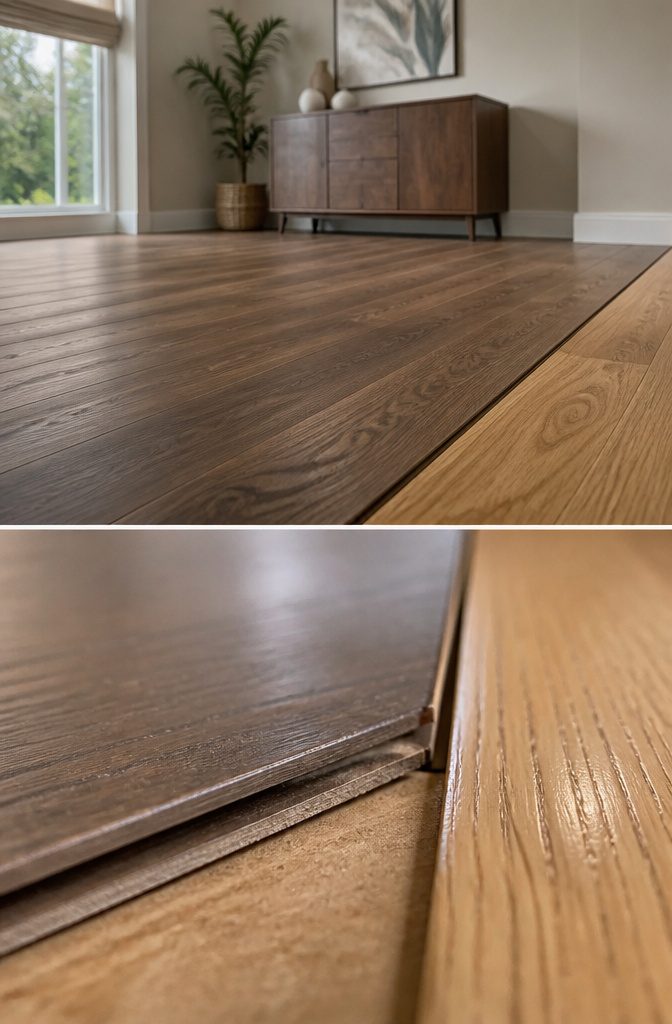
Moisture has nowhere to go once you seal hardwood under vinyl. The wood beneath still breathes, still pulls humidity from the air and releases it back, but now that cycle hits a waterproof barrier instead of open air.
Over months, the trapped dampness softens the grain. Subfloor rot sets in where you cannot see it, and by the time the smell reaches you, the damage spreads past the spot where you first laid plank.
The click-lock joints on LVP take the punishment next. Hardwood swells and cups against that trapped moisture, pressing upward in waves that stress every connection.
Locks designed to stay tight under stable pressure instead crack or gap as the surface beneath them moves. One failed joint pulls load onto its neighbors, and the failure runs.
Pulling up the vinyl later to check the wood beneath is the only way to catch this early, which means treating the install as permanent risks the structure underneath.
Some conditions make the risk worse: large spills that seep through plank seams, or existing moisture already in the wood before you cover it.
The floor beneath needs to read dry before anything goes over it, and even then the combination remains a gamble I would not take in a house I planned to keep.

Superior Impact Sound Reduction: Enjoy quieter spaces with exceptional soundproofing
DUAL SURFACE: Perfect for use on both hard and soft surfaces. Simply place the natural rubber backing side down for hard surfaces and place the felt side down for soft surfaces, such as carpet.
DUAL SURFACE: Perfect for use on both hard and soft surfaces. Simply place the natural rubber backing side down for hard surfaces and place the felt side down for soft surfaces, such as carpet.
Blend the Two Floor Types Well

Matching the tones between hardwood and LVP takes patience, but the time at the store is worth it.
I laid samples from three different LVP lines directly on my oak living room floor and walked away for ten minutes. Coming back with fresh eyes showed me which ones were pretending to match and which ones actually did.
The LVP that worked best was not the closest color match, it was the one whose grain pattern moved the same direction and whose plank width sat within a quarter inch of the hardwood boards.
Placement matters as much as color.
Hardwood belongs where you want warmth underfoot and where water is not the daily threat, living rooms, dining rooms, bedrooms. LVP earns its keep in kitchens, bathrooms, basements, and the mudroom where boots land.
The visual trick is putting the break between them where a door frame or a hallway already interrupts the sight line, so your eye never travels across both materials in a single glance.
For the transition itself, a T-mold or reducer strip in a tone that picks up both floors works better than trying to match one side exactly and missing the other.
I have seen transitions fail when the strip sits too high and catches a sock, or too low and leaves a gap that collects grit.
The strip should sit flush to the taller floor and slope to meet the lower one with no lip you can feel with a fingertip.

Fast Floor Gap Fixing: This floor gap fixer tool repair kit helps close visible gaps between laminate, vinyl plank, LVP and floating wood floor planks, making small flooring repairs easier without glue, filler or complex tools

【Compatibility Test Required】Before using the tool, confirm your floor is a floating floor (not nailed or glued down). This tool is specifically designed for floating floors and works best on them.
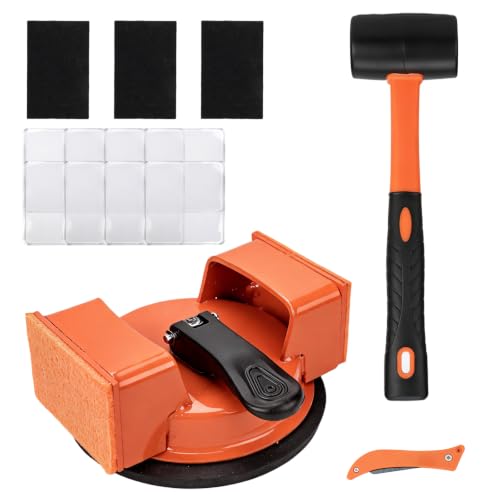
COMPLETE REPAIR KIT: Includes 1 double suction cup floor gap fixer tool, 10 clear sticky pads, 3 black buffer pads, 1 slot cutter, and 1 hammer. A practical set for everyday floor gap repair and floating floor maintenance.
Pick the Right LVP Type

The thickness and rigidity of your LVP matters more than the color when it sits next to hardwood. Rigid core planks carry their own structure and can bridge small gaps in an older subfloor without telegraphing every imperfection upward.
Click-lock systems snap together into a floating floor that expands and contracts as one sheet, which is forgiving if the hardwood side of the room still breathes seasonally.
Adhesive-backed planks stick directly down and work best when the existing surface is truly flat; any warp in the hardwood below will eventually show through as a soft spot or a seam that pops.
| Feature | Rigid Core | Click-Lock | Adhesive-Backed |
|---|---|---|---|
| Best for | Uneven subfloors over hardwood | Floating install, seasonal movement | Dead-flat, stable surfaces |
| Prep needed | Moderate | Minimal | Extensive sanding or leveling |
| Reversibility | Fair | Excellent | Poor |
| Speed for a weekend | Fast | Fastest | Slowest |
For a first project, click-lock usually wins because you can lift it back up if the transition to hardwood looks wrong. Adhesive-backed saves height at a doorway but commits you completely; one misaligned row and you are scraping, not adjusting.


Installation Methods Compared
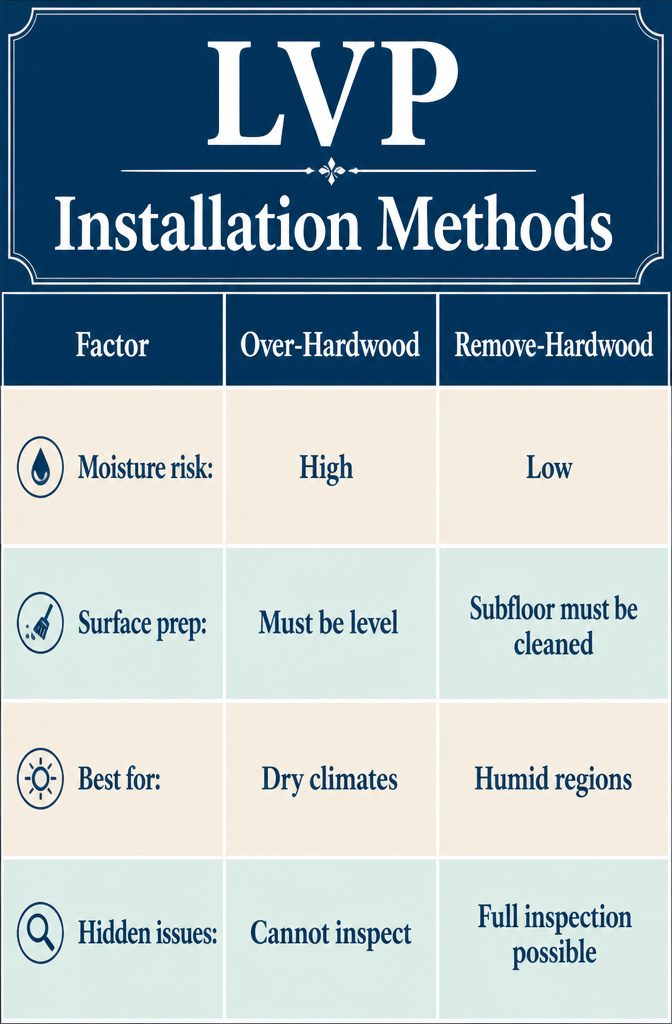
Installing LVP over hardwood traps moisture between two incompatible materials. The hardwood needs to exchange moisture with the air to stay stable; the vinyl acts as a waterproof barrier that stops this completely.
In humid climates especially, the wood underneath can rot, cup upward, and push against the click-lock joints until they crack or gap.
Removing the hardwood first costs more time and disposal effort, but it eliminates the breathability problem entirely and lets you inspect the subfloor directly.
| Factor | Over-Hardwood Install | Remove-Hardwood Install |
|---|---|---|
| Moisture risk | High; wood suffocates underneath | Low; direct subfloor access |
| Surface prep | Must be level, stable, with no loose boards | Subfloor must be leveled and cleaned |
| Best for | Dry climates, intact nailed-down floors, short-term solution | Humid regions, glued-down hardwood, long-term installs |
| Hidden issues | Cannot inspect subfloor; trapped damage worsens | Full subfloor inspection possible |
If your hardwood is already cupping or you live anywhere with seasonal humidity swings, remove it. The weekend you save by going over top gets spent later tearing out both floors.
Floor Types and How They Behave
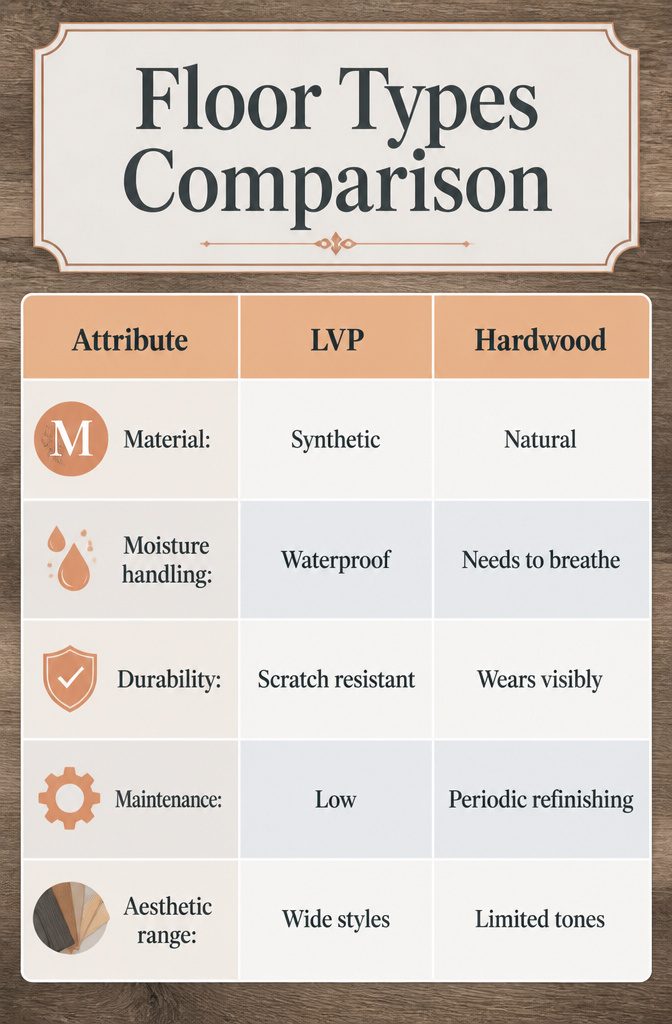
Luxury vinyl plank is a non-porous synthetic, which means moisture has nowhere to escape once it sits on top of hardwood.
Hardwood, being organic, expands and contracts as it exchanges moisture with the air. Trapping that cycle under a waterproof barrier leads to cupping, warping, and eventually rot in the wood layer beneath.
| Attribute | LVP | Hardwood |
|---|---|---|
| Material | Synthetic, non-porous | Natural, organic |
| Moisture handling | Waterproof barrier | Needs to "breathe" |
| Durability | Scratch and dent resistant | Can be refinished but wears visibly |
| Maintenance | Low | Periodic refinishing needed |
| Aesthetic range | Wide variety of styles and colors | Limited to natural wood tones |
The click-lock system in LVP depends on a stable surface underneath. Once the trapped hardwood starts to push upward, that locking mechanism takes the stress and gaps or cracks form.
In humid climates this happens faster, but the mismatch in behavior exists anywhere. The two materials simply respond to the same room conditions in opposite ways.
Frequently Asked Questions
Can I install LVP over hardwood?
Yes, but removing the hardwood first is usually the safer choice.
Nailed-down or glued-down hardwood can stay in place as a subfloor if it is fully stable and level within 1/8 inch, yet covering it traps moisture against the wood and risks rot that eventually cracks the LVP joints.
Floating hardwood must come out; two floating layers will fight each other and create movement, noise, and gaps.
How can I blend LVP and hardwood flooring?
Match the grain direction and keep plank widths within a quarter inch rather than chasing exact color. Place hardwood in dry, low-traffic rooms where warmth matters, and LVP in kitchens, bathrooms, and mudrooms where water and wear hit hardest.
Break between the two at door frames or hallways so your eye never crosses both materials in one glance, and use a T-mold or reducer strip that picks up tones from both floors.
How do I transition between hardwood and LVP?
Use a reducer when the floors sit at different heights; it angles the edge so socks and vacuum heads do not catch.
Choose a flush T-strip when they are level, and sight down it from both directions before fastening to check it reads straight.
The strip fastens to the subfloor between the floors, never to either floor directly, with expansion gaps at both edges covered by the molding wings.
What are common mistakes people make when installing vinyl plank flooring?
Skipping the quarter-inch expansion gap at walls is a frequent error that causes summer buckling.
Another is forcing a stubborn seam with a mallet instead of lifting the plank to check for debris underneath. Failing to stagger end joints by at least six inches weakens the floor visually and structurally.
Running the first row crooked throws off every row that follows, and tapping the plank directly instead of using a scrap block dents the edge.
Do high end homes use vinyl plank flooring?
They do, particularly in rooms where durability and water resistance matter more than prestige.
Modern LVP comes in widths, textures, and matte finishes that read as wood from a few feet away, including weathered and gray tones that pair well with original hardwood.
You get to choose where each material lives instead of committing the entire house to one budget tier or one era of flooring.






